SDA SRS 1.2TL Custom Wood Panels

DarqueKnight
Posts: 6,765
Introduction
Reader's Discretion Advisory: This is a true wood **** story. If you don't like viewing wood ****, then you should exit this thread now.
If you have been reading me for a while, you may know of my dislike for the look of oak. I have wanted to replace the oak veneer end caps and side strips for a long time, but it took a while to decide what I wanted. Many options were considered such as anodized aluminum, clear-coated etched aluminum in various colors, various colors of glossy automotive paint and various solid wood and veneered exotic wood finishes. Once I decided to go with wood, these were the top candidates:
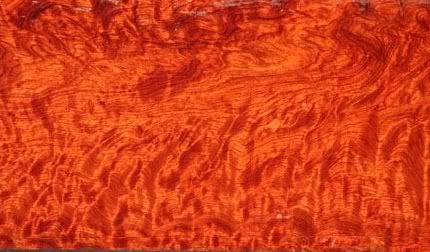
Figure 1. Bubinga.
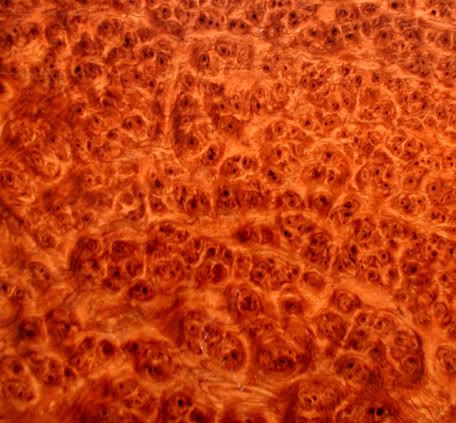
Figure 2. Amboyna Burl.
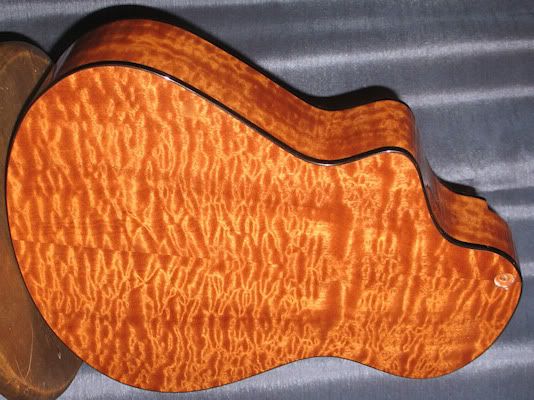
Figure 3. Pomelle Sapele.
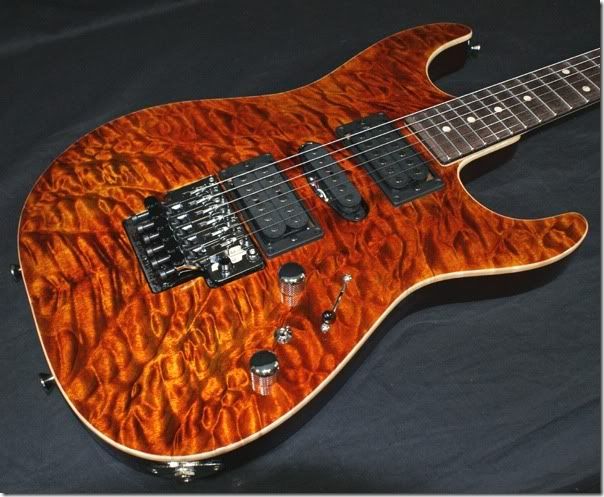
Figure 4. Highly-figured Quilted Maple.
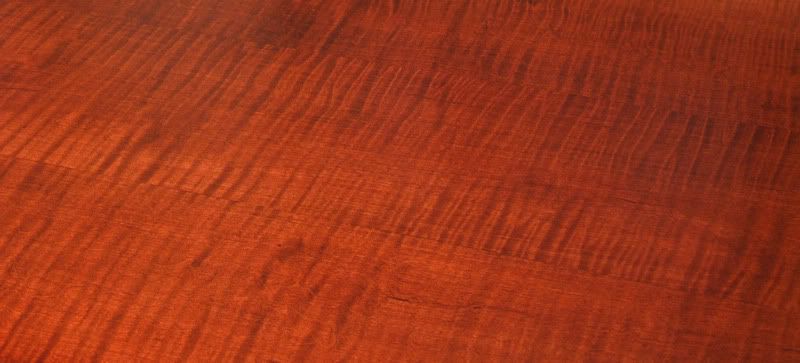
Figure 5. Highly-figured Tiger Maple.
The expense of the first four options was difficult to justify considering that most of the wood would be out of sight most of the time (end cap tops and bottoms and side strips). Also for the first four, there was the consideration of acquiring the quantities required in a reasonable length of time. Tiger maple met my criteria for cost, aesthetics and ease of acquisition.
Excellent Craftsmanship
Those of you who have sought to have this kind of work done know that it can be difficult to find a wood craftsman willing to do it. I found an outstanding custom furniture builder, Mike Delnero, in New York state (DelneroFurniture.com). Mike was a pleasure to work with and kept in frequent contact, even sending pictures as my project progressed.
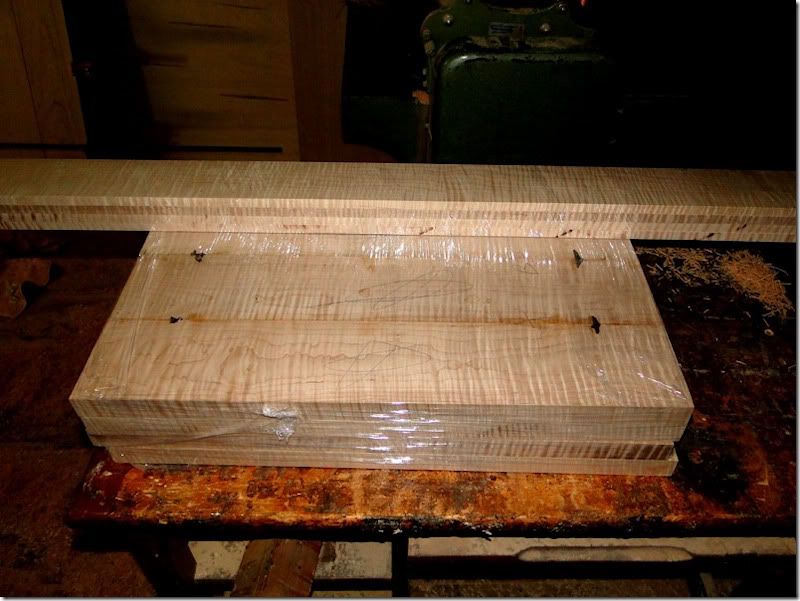
Figure 6. Rough cuts of solid tiger maple end caps and side strips.
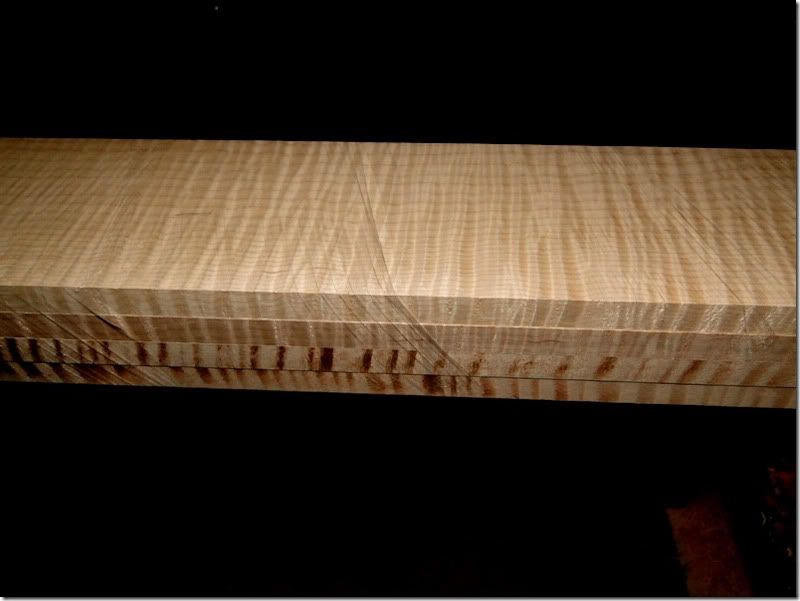
Figure 7. Insane figuring: rough cut side strips. If the figure is this pronounced
after rough cutting, you can imagine how outrageous it will look after finishing.
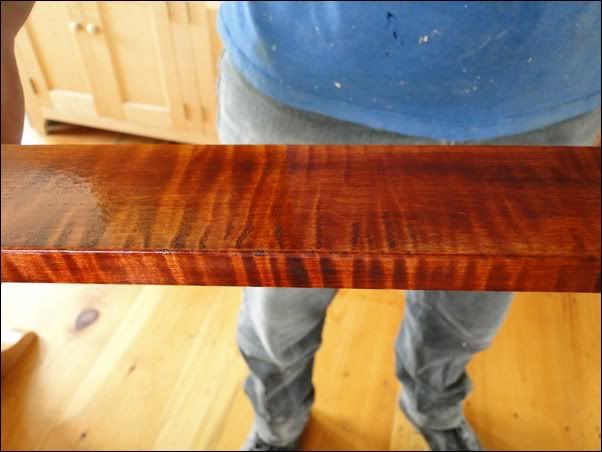
Figure 8. Color sample submitted for approval.
I specified highly-figured tiger maple with an aniline dyed color and oil finish. Color samples were to be sent prior to applying final color. To avoid delays, in lieu of having actual samples sent, I decided to accept color pictures. The color shown above was what I originally specified. However, I decided to go redder and darker.
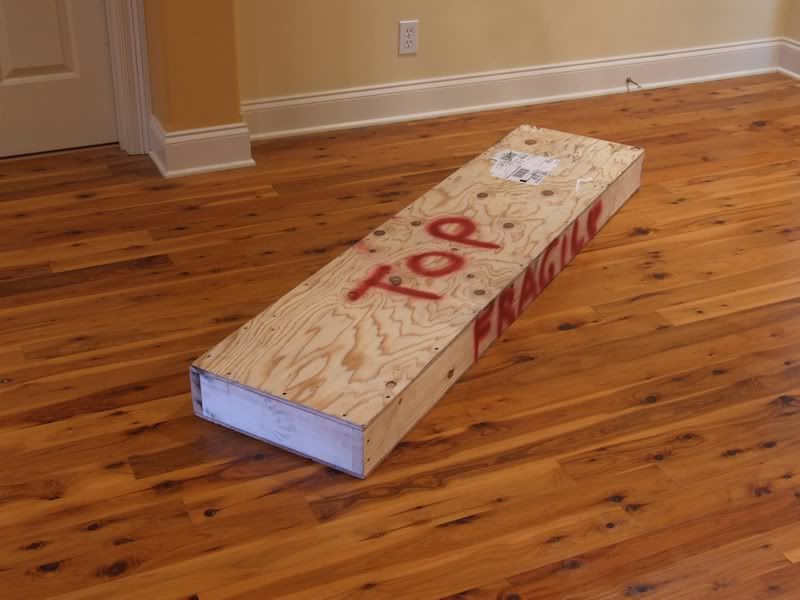
Figure 9. My order arrived in a custom built padded wood crate.
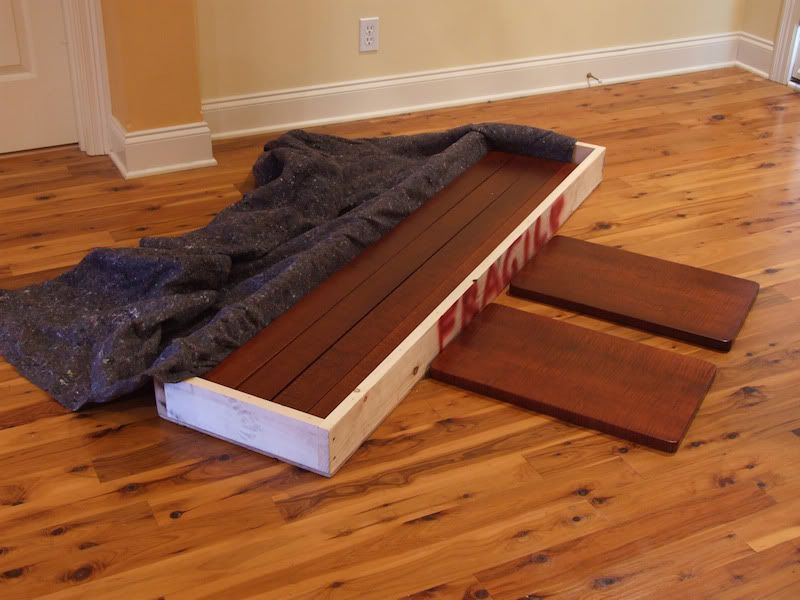
Figure 10. This is a picture of me getting wood.
I was nervous when I saw the large "FRAGILE" notice. UPS sometimes takes such notices as a "challenge" to test the customer's packing skills.
The picture in figure 10 was taken with a lot of natural light coming into the room. This picture is closest to the true color of the caps and strips. In the following pictures, the wood will take on more of a red, brown or orange color due to the interior lighting and viewing angle.
Goodbye Golden Oak
I don't know why I loathe oak so much. I like looking at stately old oak trees, I just don't like looking at finished oak wood. It is a relief not to have to look at it in my home anymore.
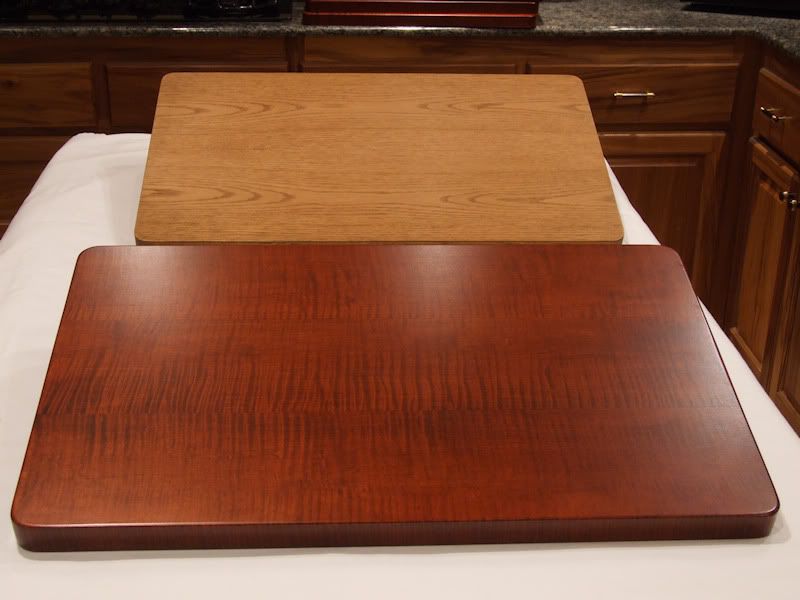
Figure 11. Tiger maple and oak end cap.
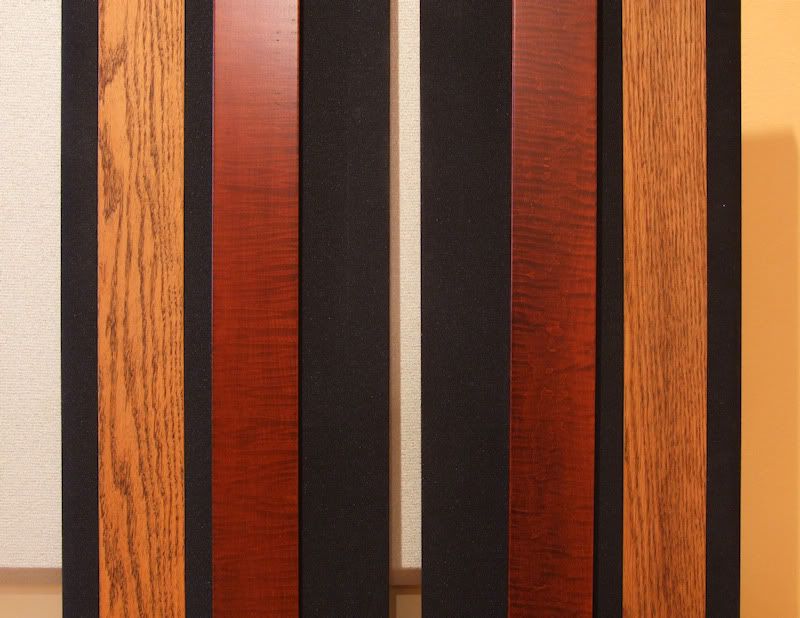
Figure 12. Tiger maple and oak side strips.
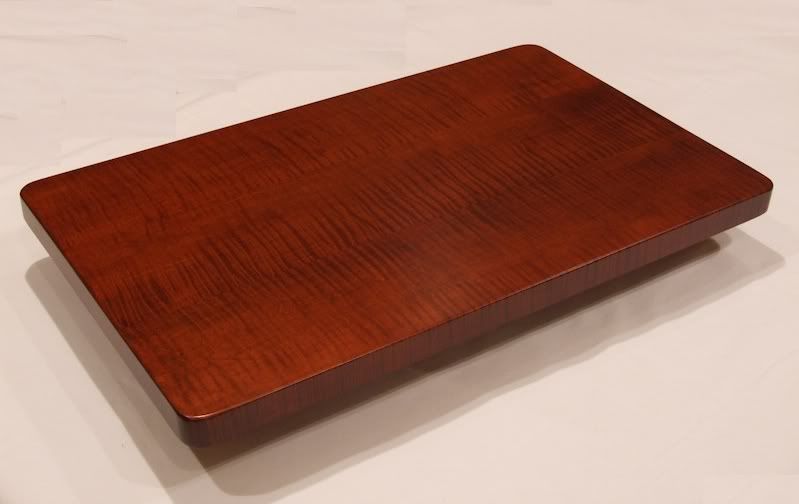
Figure 13. Tiger maple top cap angle view.
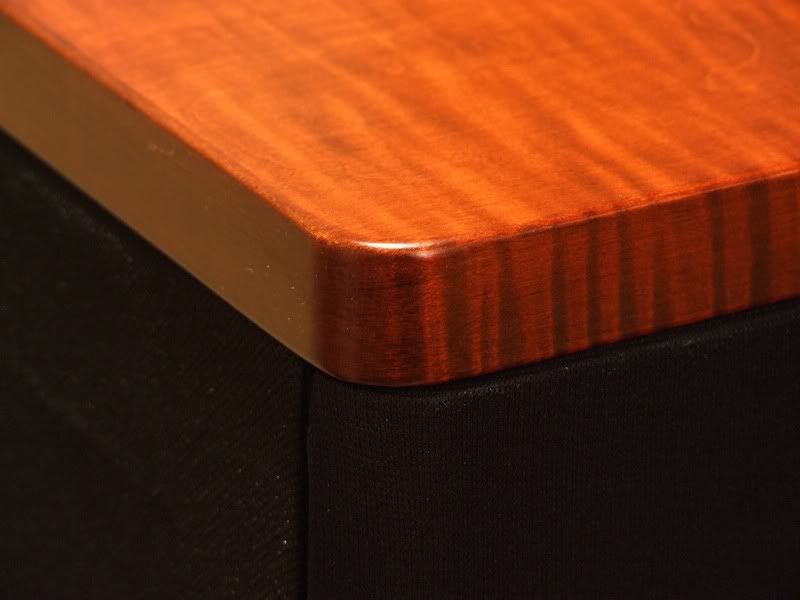
Figure 14. Rounded top and bottom edges.
I requested the corners of the maple end caps to have the same 5/8" radius as the original oak caps. I was pleasantly surprised to find that the upper and lower edges of the caps, as well as the two visible edges of the strips, were rounded. I was also pleasantly surprised that all pieces were sanded to a glassy-smooth finish.
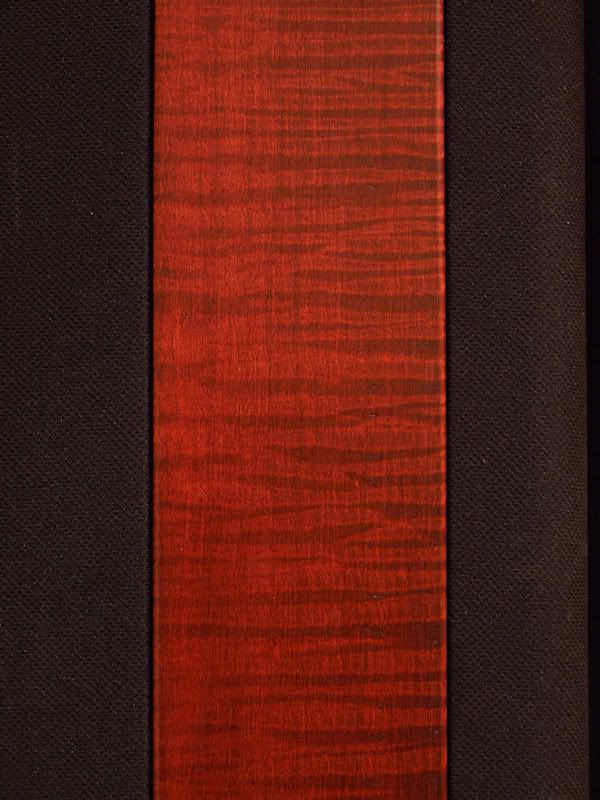
Figure 15. Finished side strip figure closeup.
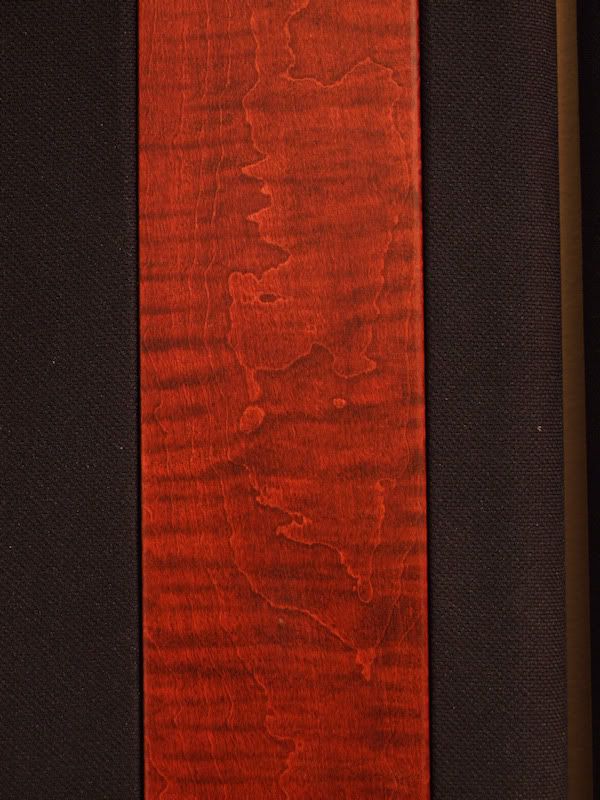
Figure 16. Finished side strip with striping and "burl" pattern.
Two of the side strips had the typical tiger striping pattern and two strips had a nice combination pattern of striping plus a "burl-like" pattern underneath the stripes. I put the stripe and burl strips on the inside sides of the speakers since I would see these the most when I am at the stereo equipment cabinet.
Unfortunately, these casual photographs cannot capture and convey the thrilling iridescent, three-dimensional "strike" (chatoyancy) of this wood.
Assembly Notes
Including time spent buying assembly hardware and cleanup, assembly took a tedious 20 hours. Care must be exercised when measuring the placement of drill holes for the feet and hanger bolts. The drill must be held steady and level. For the top cap's hangar bolt holes, I used a band of colored tape as a stop marker for the hole depth. If I would have accidentally drilled all the way through one of these caps, people in Siberia would have wondered who was screaming.
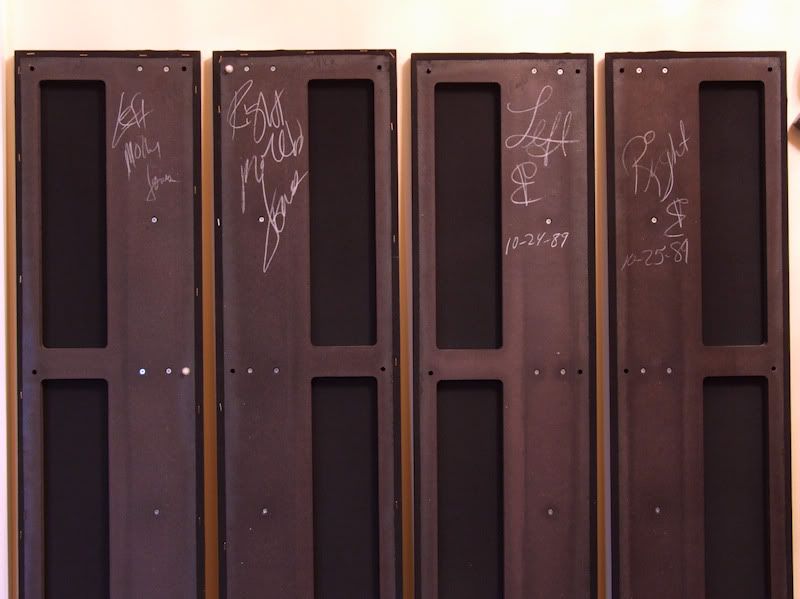
Figure 17. Backs of my SDA SRS 1.2TL side panels.
Figure 17 shows the backs of my SDA SRS 1.2TL side panels. The two panels at the left, which were assembled by Ms. Molly Jones, had an abundance of glue securing the oak veneered particle board strips to the side panel cloth. When the cloth was pulled off the back of side strip, clumps of particle board came off with it. These clumps of glue and particle board had to be cut off or else the new strips would not have fit flush. The two panels at the right were dated and initialed by "V. E." V. E. used a much smaller amount of glue. Therefore, only tiny bits of particle board peeled off with the cloth on his panels.
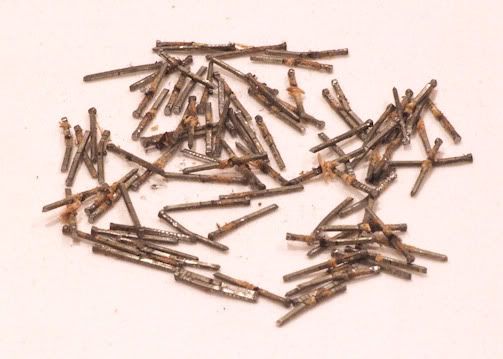
Figure 18. Each oak strip was secured to the side panel with 6,855 5/8" finishing nails.
The side strips had to be carefully pried loose from the side panels. This was not easy due to the glue and the 6,855 finishing nails holding the strips. There were already 11 pre-drilled countersunk holes behind the strip slots in the side panels. Rather than use nails, I secured the new strips to the side panels with 5/8" long, #8 wood screws.
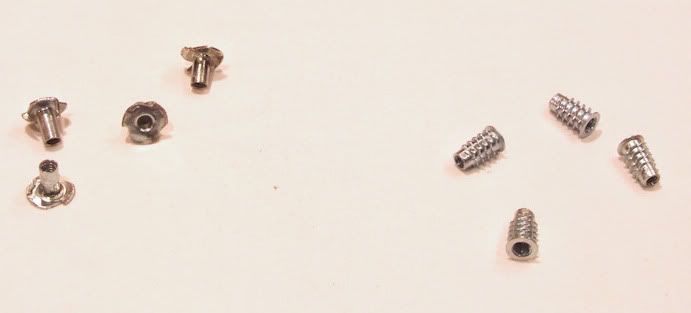
Figure 19. The old "hammer in" insert nuts for the speaker feet (left) could not be reused.
New heavier duty "screw in" insert nuts were used.
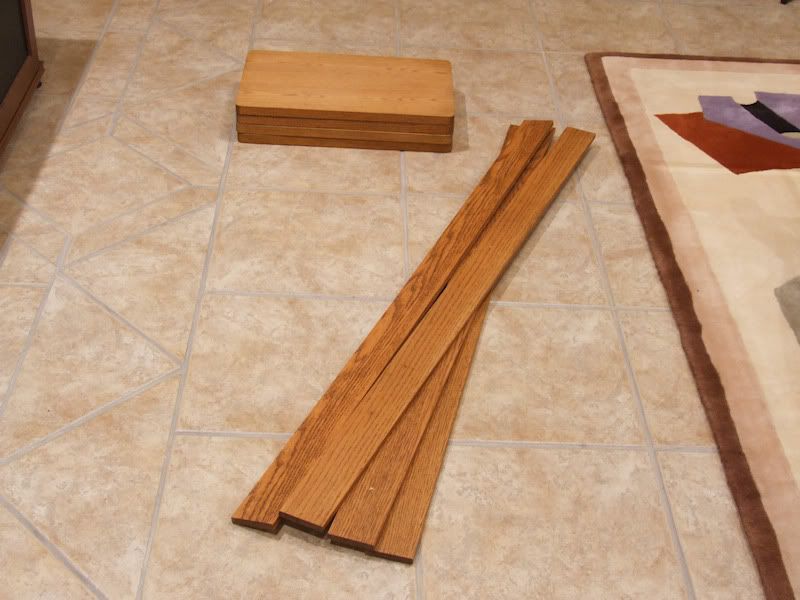
Figure 20. Original oak veneered trim ready for attic storage.
Reader's Discretion Advisory: This is a true wood **** story. If you don't like viewing wood ****, then you should exit this thread now.
If you have been reading me for a while, you may know of my dislike for the look of oak. I have wanted to replace the oak veneer end caps and side strips for a long time, but it took a while to decide what I wanted. Many options were considered such as anodized aluminum, clear-coated etched aluminum in various colors, various colors of glossy automotive paint and various solid wood and veneered exotic wood finishes. Once I decided to go with wood, these were the top candidates:

Figure 1. Bubinga.

Figure 2. Amboyna Burl.

Figure 3. Pomelle Sapele.

Figure 4. Highly-figured Quilted Maple.

Figure 5. Highly-figured Tiger Maple.
The expense of the first four options was difficult to justify considering that most of the wood would be out of sight most of the time (end cap tops and bottoms and side strips). Also for the first four, there was the consideration of acquiring the quantities required in a reasonable length of time. Tiger maple met my criteria for cost, aesthetics and ease of acquisition.
Excellent Craftsmanship
Those of you who have sought to have this kind of work done know that it can be difficult to find a wood craftsman willing to do it. I found an outstanding custom furniture builder, Mike Delnero, in New York state (DelneroFurniture.com). Mike was a pleasure to work with and kept in frequent contact, even sending pictures as my project progressed.

Figure 6. Rough cuts of solid tiger maple end caps and side strips.

Figure 7. Insane figuring: rough cut side strips. If the figure is this pronounced
after rough cutting, you can imagine how outrageous it will look after finishing.

Figure 8. Color sample submitted for approval.
I specified highly-figured tiger maple with an aniline dyed color and oil finish. Color samples were to be sent prior to applying final color. To avoid delays, in lieu of having actual samples sent, I decided to accept color pictures. The color shown above was what I originally specified. However, I decided to go redder and darker.

Figure 9. My order arrived in a custom built padded wood crate.

Figure 10. This is a picture of me getting wood.
I was nervous when I saw the large "FRAGILE" notice. UPS sometimes takes such notices as a "challenge" to test the customer's packing skills.
The picture in figure 10 was taken with a lot of natural light coming into the room. This picture is closest to the true color of the caps and strips. In the following pictures, the wood will take on more of a red, brown or orange color due to the interior lighting and viewing angle.
Goodbye Golden Oak
I don't know why I loathe oak so much. I like looking at stately old oak trees, I just don't like looking at finished oak wood. It is a relief not to have to look at it in my home anymore.

Figure 11. Tiger maple and oak end cap.

Figure 12. Tiger maple and oak side strips.

Figure 13. Tiger maple top cap angle view.

Figure 14. Rounded top and bottom edges.
I requested the corners of the maple end caps to have the same 5/8" radius as the original oak caps. I was pleasantly surprised to find that the upper and lower edges of the caps, as well as the two visible edges of the strips, were rounded. I was also pleasantly surprised that all pieces were sanded to a glassy-smooth finish.

Figure 15. Finished side strip figure closeup.

Figure 16. Finished side strip with striping and "burl" pattern.
Two of the side strips had the typical tiger striping pattern and two strips had a nice combination pattern of striping plus a "burl-like" pattern underneath the stripes. I put the stripe and burl strips on the inside sides of the speakers since I would see these the most when I am at the stereo equipment cabinet.
Unfortunately, these casual photographs cannot capture and convey the thrilling iridescent, three-dimensional "strike" (chatoyancy) of this wood.
Assembly Notes
Including time spent buying assembly hardware and cleanup, assembly took a tedious 20 hours. Care must be exercised when measuring the placement of drill holes for the feet and hanger bolts. The drill must be held steady and level. For the top cap's hangar bolt holes, I used a band of colored tape as a stop marker for the hole depth. If I would have accidentally drilled all the way through one of these caps, people in Siberia would have wondered who was screaming.

Figure 17. Backs of my SDA SRS 1.2TL side panels.
Figure 17 shows the backs of my SDA SRS 1.2TL side panels. The two panels at the left, which were assembled by Ms. Molly Jones, had an abundance of glue securing the oak veneered particle board strips to the side panel cloth. When the cloth was pulled off the back of side strip, clumps of particle board came off with it. These clumps of glue and particle board had to be cut off or else the new strips would not have fit flush. The two panels at the right were dated and initialed by "V. E." V. E. used a much smaller amount of glue. Therefore, only tiny bits of particle board peeled off with the cloth on his panels.

Figure 18. Each oak strip was secured to the side panel with 6,855 5/8" finishing nails.
The side strips had to be carefully pried loose from the side panels. This was not easy due to the glue and the 6,855 finishing nails holding the strips. There were already 11 pre-drilled countersunk holes behind the strip slots in the side panels. Rather than use nails, I secured the new strips to the side panels with 5/8" long, #8 wood screws.

Figure 19. The old "hammer in" insert nuts for the speaker feet (left) could not be reused.
New heavier duty "screw in" insert nuts were used.

Figure 20. Original oak veneered trim ready for attic storage.
Proud and loyal citizen of the Digital Domain and Solid State Country!
Post edited by DarqueKnight on
Comments
-
Finished Project
The canned lighting in my living room causes "hot spots" which sometimes washed out the wood's fine details. The lighting in the home theater room would have been more advantageous, but I did not want to endure the inconvenience of wheeling these 64 inch, 180 pound speakers in and out of another room.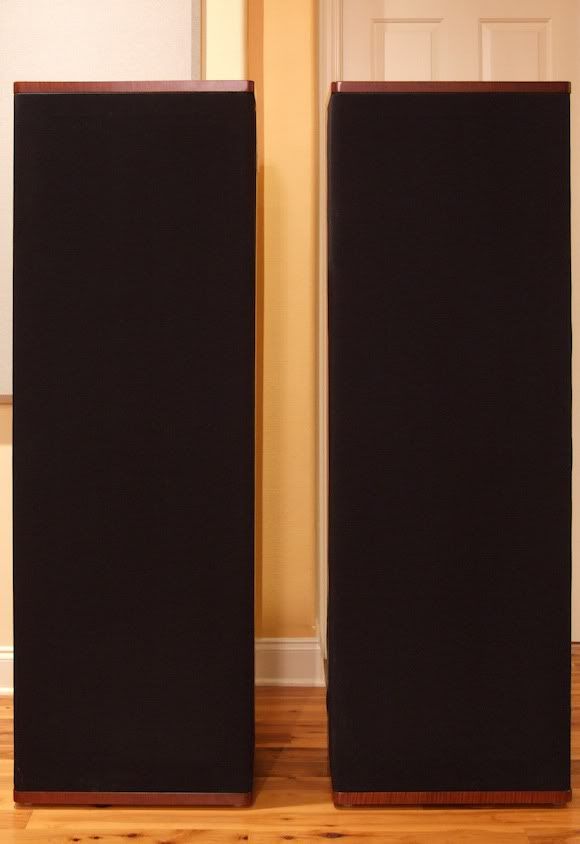
Figure 21. Front view.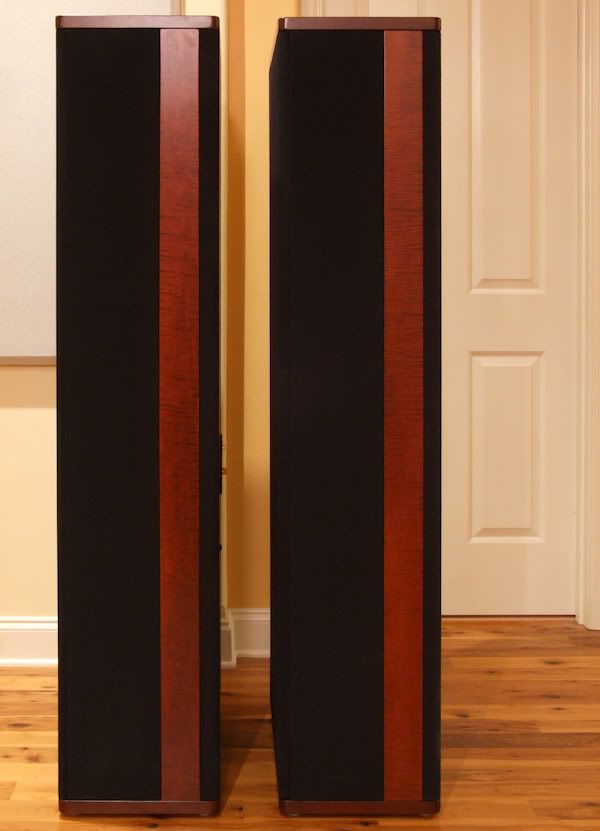
Figure 22. Right sides.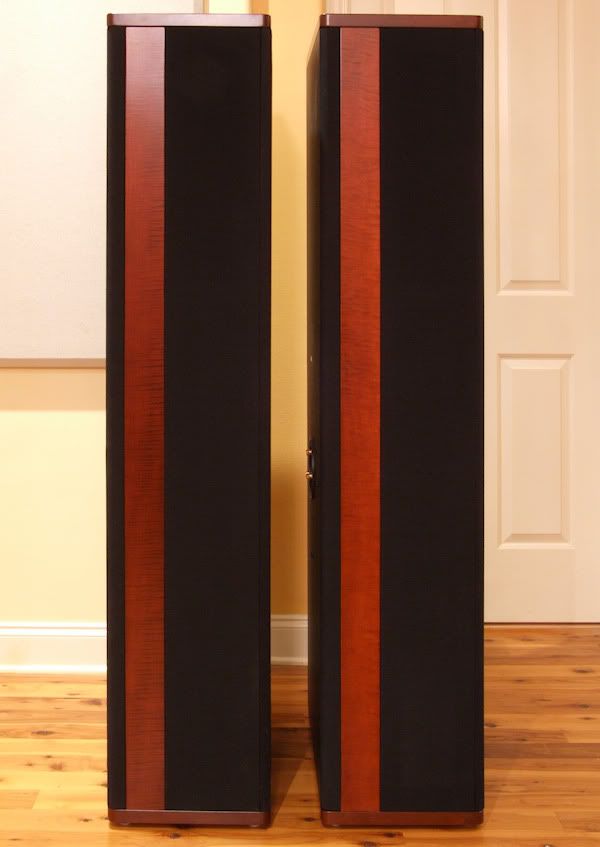
Figure 23. Left sides.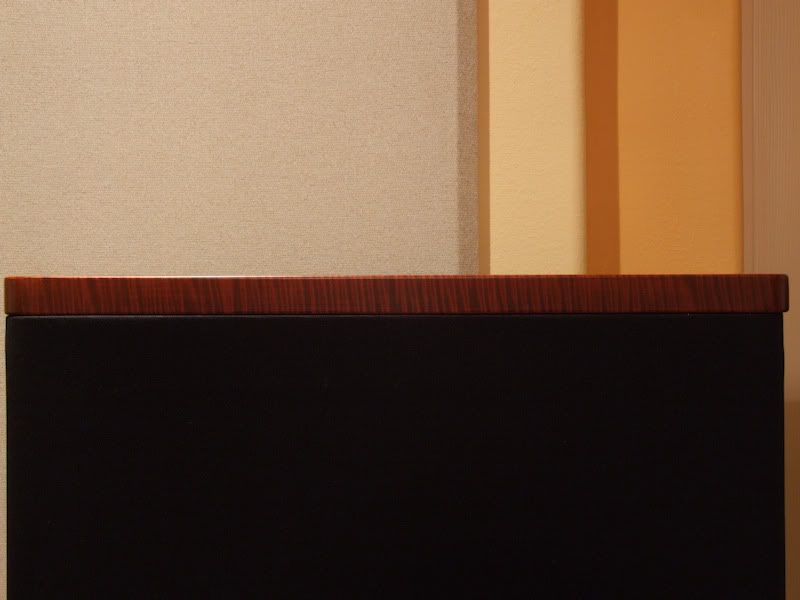
Figure 24. Front edge of left top cap.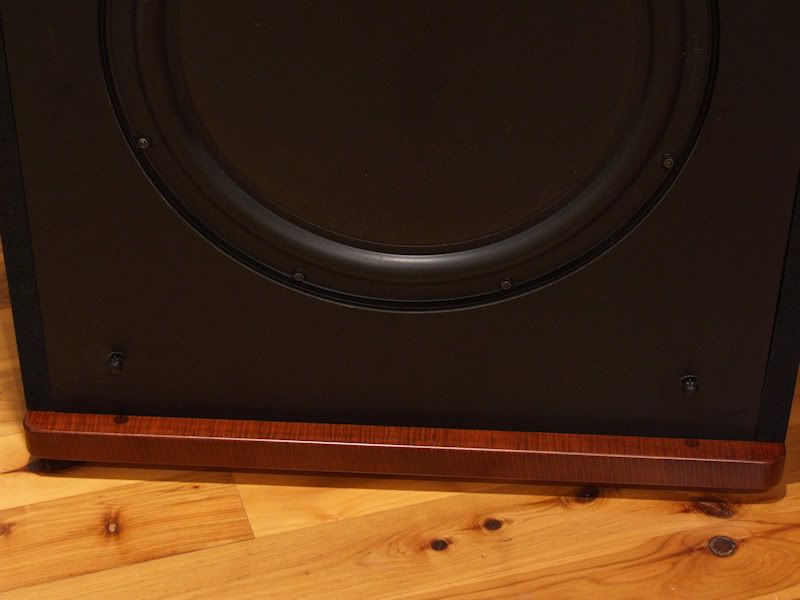
Figure 25. Front edge of left bottom cap.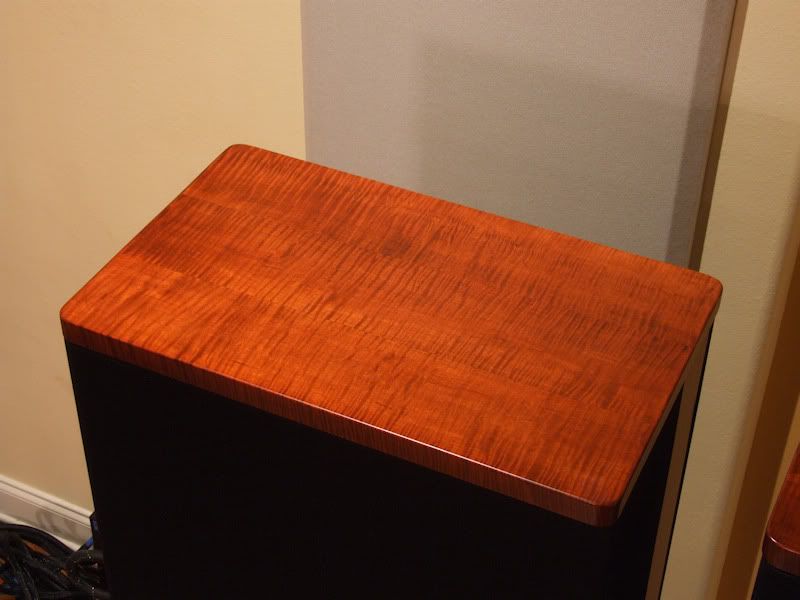
Figure 26. Left top cap.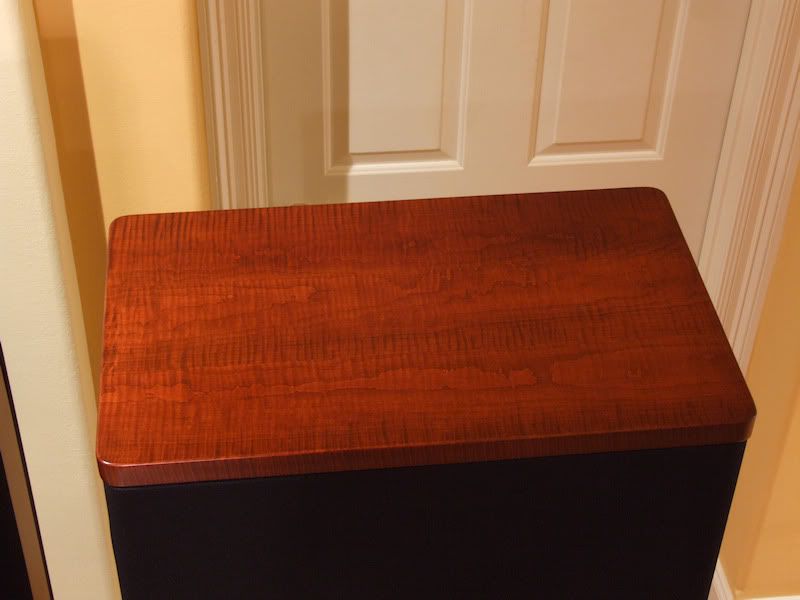
Figure 27. Right top cap.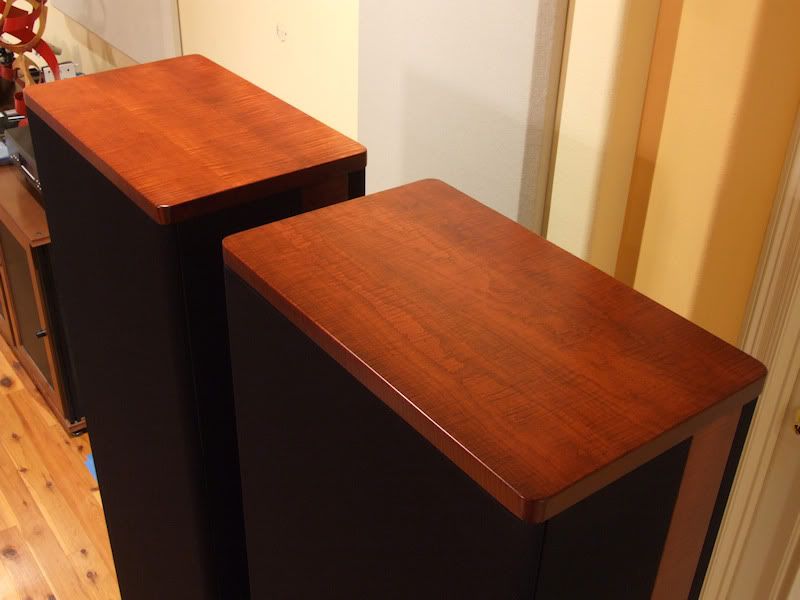
Figure 28. Left and right top caps.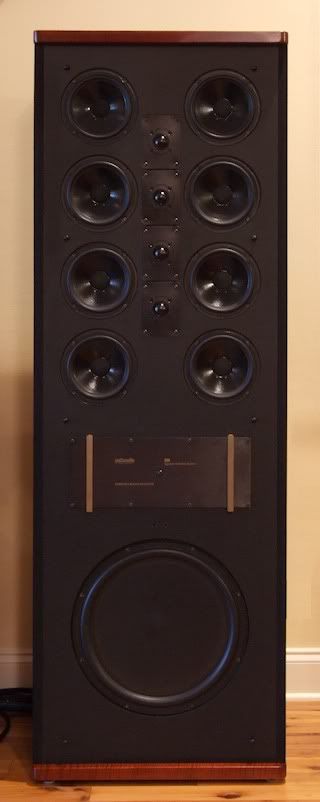
Figure 29. Right SDA SRS 1.2TL without grille.
Fitting In
The figured maple finish of the new end caps and sides strips is a much better aesthetic compliment to the stereo equipment cabinet (dark cherry veneer), turntable (cocobolo veneers and solids) and hardwood floor (Australian Cypress).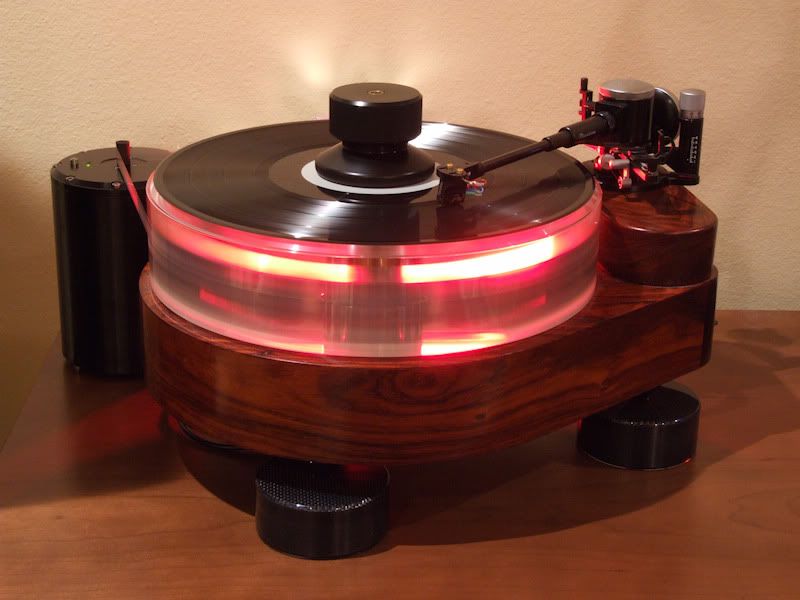
Figure 30. Teres Audio Model 255 turntable base in cocobolo veneer.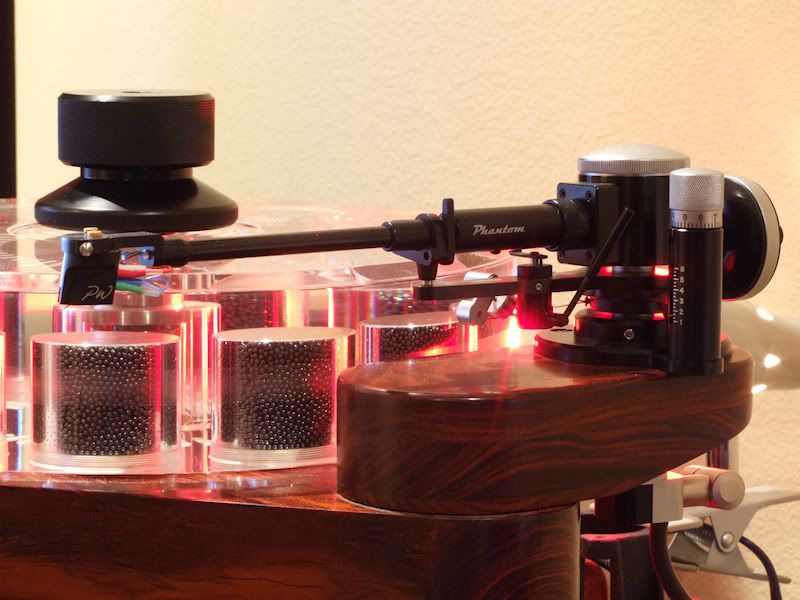
Figure 31. Teres Audio Model 255 turntable arm board in solid cocobolo.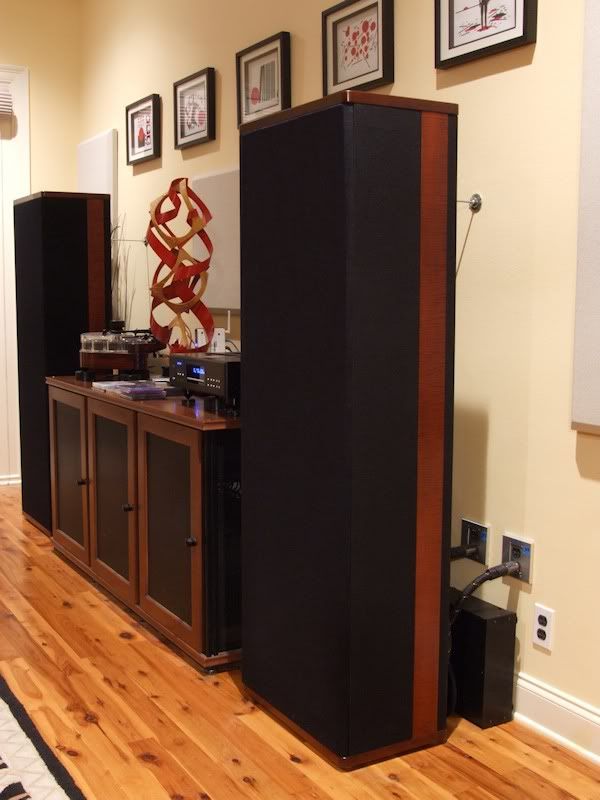
Figure 32. Now I no longer have to endure the visual assault of golden oak
every time I look at my two channel stereo system.Now, I can feast my eyes
on something elegant, dark, rich and exotic.
The Last Words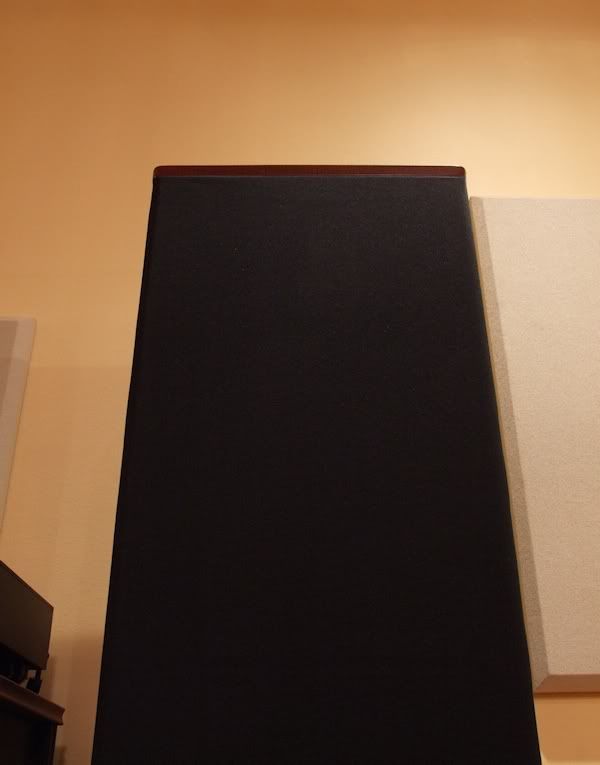
Figure 33. The spoiled Monoliths now want Cardas internal
wiring and a custom binding post plate with Cardas posts.
In the future, when I am more dedicated to audio than I am now, and when I find some loudspeakers I like better than what I have now, I will invest in a pair of modern high end loudspeakers to go with my modern high end electronics, cables and low noise power infrastructure. For now, these hotrodded 23 year old "true stereo" speakers will stay put because they make Such Good Sound.
The previous pictures didn't do a very good job of capturing the figuring.
. These are a little better.
The intensity of tiger maple figure pattern is grouped in three ranges:
1. Lightly Figured Grade (1 in 10 trees).
2. Heavily Figured Grade (1 in 100 trees).
3. Heirloom Grade (1 in 1000 trees).
The caps below are heirloom grade.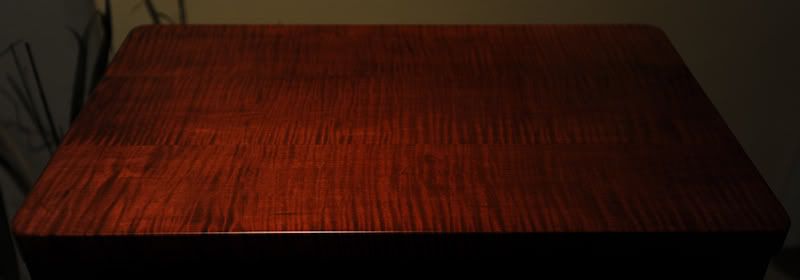
Left Cap.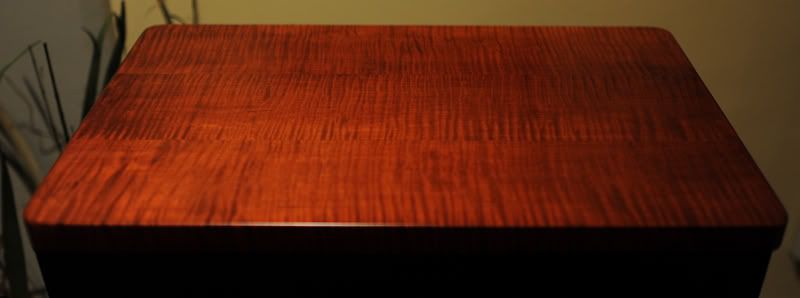
Left Cap.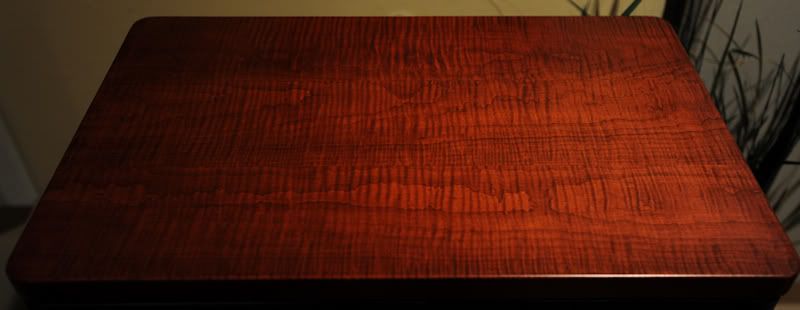
Right Cap.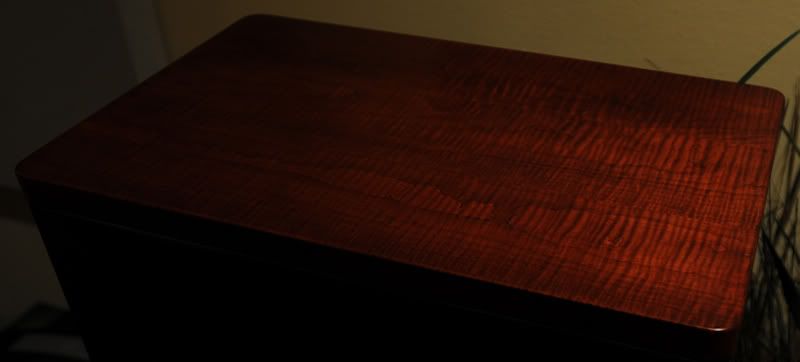
Right Cap.Proud and loyal citizen of the Digital Domain and Solid State Country! -
WOW!!!! Very nice ray!!!
-
Sexual!
-
Proud and loyal citizen of the Digital Domain and Solid State Country!
-
What made you switch from Jeff's figured maple end caps and sides?
These do look good!
Edit: Sorry, I believe I was confusing your theater SRS's. I guess you could not have taken off your oak wood caps and sides twice for the same speaker.

Taken from a recent Audioholics reply regarding "Club Polk" and Polk speakers:
"I'm yet to hear a Polk speaker that merits more than a sentence and 60 seconds discussion."
My response is: If you need 60 seconds to respond in one sentence, you probably should't be evaluating Polk speakers.....
"Green leaves reveal the heart spoken Khatru"- Jon Anderson
"Have A Little Faith! And Everything You'll Face, Will Jump From Out Right On Into Place! Yeah! Take A Little Time! And Everything You'll Find, Will Move From Gloom Right On Into Shine!"- Arthur Lee -
Looks awesome
But will this have a cause and effect for ABX testing:cheesygrin:2-channel: Modwright KWI-200 Integrated, Dynaudio C1-II Signatures
Desktop rig: LSi7, Polk 110sub, Dayens Ampino amp, W4S DAC/pre, Sonos, JRiver
Gear on standby: Melody 101 tube pre, Unison Research Simply Italy Integrated
Gone to new homes: (Matt Polk's)Threshold Stasis SA12e monoblocks, Pass XA30.5 amp, Usher MD2 speakers, Dynaudio C4 platinum speakers, Modwright LS100 (voltz), Simaudio 780D DAC
erat interfectorem cesar et **** dictatorem dicere a -
txcoastal1 wrote: »Looks awesome
But will this have a cause and effect for ABX testing:cheesygrin:
I thought better looking gear was supposed to sound better, but I don't hear any difference....what did I do wrong?:question: :question:
I might have had better audible results if I had done cosmetic surgery on a younger pair of speakers.:cheesygrin:Proud and loyal citizen of the Digital Domain and Solid State Country! -
Beautiful wood,nicely done.As always,Dan
-
nice work thanks for the write up
-
Nice work and beautiful figure. I agree with you about the Oak. The only place I want to see White Oak is in my boat building.
Your cabinet maker is a true craftsman -
Holy Cow Batman!, I really like the look of that "Highly-figured Tiger Maple" and the redder and darker color choice. Very nice indeed!.
I think I know why you dislike finished oak so much for the same reason I do, IMO it just looks flat and lifeless especially when compared to something like that tiger maple.
BTW: Have you been listening to Alice's Restaurant again.:cheesygrin:They took twenty seven eight-by-ten colour glossy photographs with circles and arrows and a paragraph on the back of each one explaining what each one was to be used as evidence against us. Took pictures of the approach, the getaway, the northwest corner the southwest corner and that's not to mention the aerial photography.
On aside note maybe it's just me but there's so much wood around here today I just have to ask, Who's passing out the Viagra ?.“The two most important days in your life are the day you are born and the day you find out why.” ~ Mark Twain -
Looks great!
When does the exotic flooring go in? :razz:"He who fights with monsters should look to it that he himself does not become a monster. And when you gaze long into an abyss the abyss also gazes into you." Friedrich Nietzsche -
When does the exotic flooring go in? :razz:
Sometime after the next amp upgrade. I'm leaning toward pomelle sapele for the floor.:cool:Proud and loyal citizen of the Digital Domain and Solid State Country! -
OK, you win! Dammn!
System 1:Nakamichi PA-7Kenwood Basic C2Polk SDA 1C moddedSystem 2:Dynaco ST-70Polk Monitor 5B modded -
DarqueKnight wrote: »
 As you read this, his speakers are touching themselves.
Did I offend you yet again? -
Superb!!!
-
Did I offend you yet again?
Not at all. Why did you think that?OK, you win! Dammn!
I hope the prize is cash. That pommele sapele flooring is pricey.Proud and loyal citizen of the Digital Domain and Solid State Country! -
Wow, DK, those are just awesome! Sweet upgrade. :cool:
You never fail to impress - in your detailed workmanship or your presentation of it. -
Stunning! And as always great documentation."Science is suppose to explain observations not dismiss them as impossible" - Norm on AA; 2.3TL's w/sonicaps/mills/jantzen inductors, Gimpod's boards, Lg Solen SDA inductors, RD-0198's, MW's dynamatted, Armaflex speaker gaskets, H-nuts, brass spikes, Cardas CCGR BP's, upgraded IC Cable, Black Hole Damping Sheet strips, interior of cabinets sealed with Loctite Power Grab, AI-1 interface with 1000VA A-L transformer
-
In one word; suwweeeeeeettt!!!!
They look awesome.If con is the opposite of pro, is Congress the opposite of Progress?!
Monitor 5Jr, Monitor 5, RTA12, RTA 15TL, SDA 2A, 1c, SRS 2, 1.2TL, CRS, Atrium. -
Awesome! I need to start spoiling my speakers like you do!

-
Im in awe.Polk Audio SDA CRS+ crossover 4.1TL by Trey/VR3 (Rings and custom stand by Larry)-Polk Audio SDA SRS2 crossovers by Trey/VR3Parasound HCA1500aYamaha rxa-3070 with musicast-Celestion SL6S presence,- sl9 surround backNHTsuper1's surroundMagnepan SMGParasound 1500pre- Sofia "Baby" tube amp - Monitor Audio Silver RX2 Marantz 2230/B&Kst140Technics 1200mk2 Gamertag: IslandBerserker I am but a infinitesimally small point meeting the line of infinity in the SDA universe
-
I've seen only a few examples of folks doing the refinishing in searching the forums. One had his SDA 2Bs finished with a high gloss black. That was nice, but these look awesome. I'll be looking at refinishing my 2Bs someday as I have a similar dislike for oak - more so the golden oak of the 80s. Did you take any pictures during the removal process? I wouldn't know where to begin trying to remove the tops and bottoms to my speakers.
As a side note, I'm sure the new speakers wood color fit a little better with your Salamander Designs audio cabinet as well. I have the same unit in color, only 4 wide and 2 high. It's a sharp look.
Well done.Speakers
Energy RC-70 Mains, Energy RC-LRC Center, Energy RC-R (x4) Rear Channels, Energy RC-R (x2) Front Effects
Polk 5jr+
Polk SDA 2B
Polk SDS 3.1TL
Equipment
Panamax 5510 Re-generator Power Conditioner
Yamaha RX-V3800 Receiver
Digital Sources: Sony CDP-X339ES CD Player, HHB CDR830 BurnIt Professional CD Recorder, Sony PS3, Oppo DV-983H DVD Player
Analog Sources: Sony TC-K890ES Cassette, Nakamichi DR-1 Cassette, Technics SL-7 Turntable -
GospelTruth wrote: »Did you take any pictures during the removal process? I wouldn't know where to begin trying to remove the tops and bottoms to my speakers.
I didn't take any pictures during the removal process. For my 1.2TL's, the top and bottom end caps are held on with four hanger bolts. The top bolts are accessed by removing the top two drivers. The bottom bolts are accessed by removing the passive radiator. The side panels are tightly held on with plastic fasteners called "trelocks". The side panels are removed by prying them off.
For your 2B's, the side panels are glued on and the end caps are stapled on. They can be removed by carefully prying them off.Proud and loyal citizen of the Digital Domain and Solid State Country! -
Was it difficult to find the wood in larger widths?
No. It was difficult to find highly figured boards over 1" think that could be finished down to the 1" thickness that I wanted. The craftsman was able to find highly figured 1-1/8" thick boards. The top and bottom plates of my 1.2tl's are one piece, so there are no seams.
Eventually I'm going to do my 2nd pair and I want to use solid pieces again.
Large solid panels of wood increase the potential for warping. I specified each cap to be made of two equal size pieces. The craftsman recommended making each cap with three equal size pieces for two reasons:
1. The intensity of the figure pattern on a single tiger maple board varies. The craftsman could create caps with more intense figuring by cutting smaller sections from the most figured areas of a board.
2.Three sections glued together is more structurally stable than one or two sections.
The solid oak caps on my SRS's have four or five oak strips glued together.Proud and loyal citizen of the Digital Domain and Solid State Country! -
I love the look of those caps Raife!

Taken from a recent Audioholics reply regarding "Club Polk" and Polk speakers:
"I'm yet to hear a Polk speaker that merits more than a sentence and 60 seconds discussion."
My response is: If you need 60 seconds to respond in one sentence, you probably should't be evaluating Polk speakers.....
"Green leaves reveal the heart spoken Khatru"- Jon Anderson
"Have A Little Faith! And Everything You'll Face, Will Jump From Out Right On Into Place! Yeah! Take A Little Time! And Everything You'll Find, Will Move From Gloom Right On Into Shine!"- Arthur Lee -
Beautiful!
-
Beautiful.
What's next, silk cloth?>
>
>This message has been scanned by the NSA and found to be free of harmful intent.< -
Polkersince85 wrote: »What's next, silk cloth?
That's a tempting suggestion, but silk would present durability and cleaning problems. The upgraded knit grille cloth I installed has a nice silky black sheen and is easy to clean.
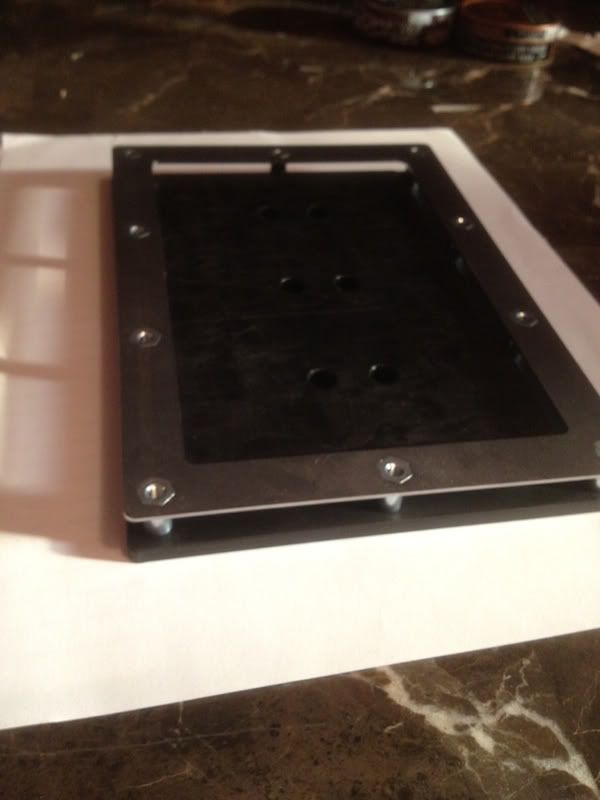
What's next is custom binding post plates: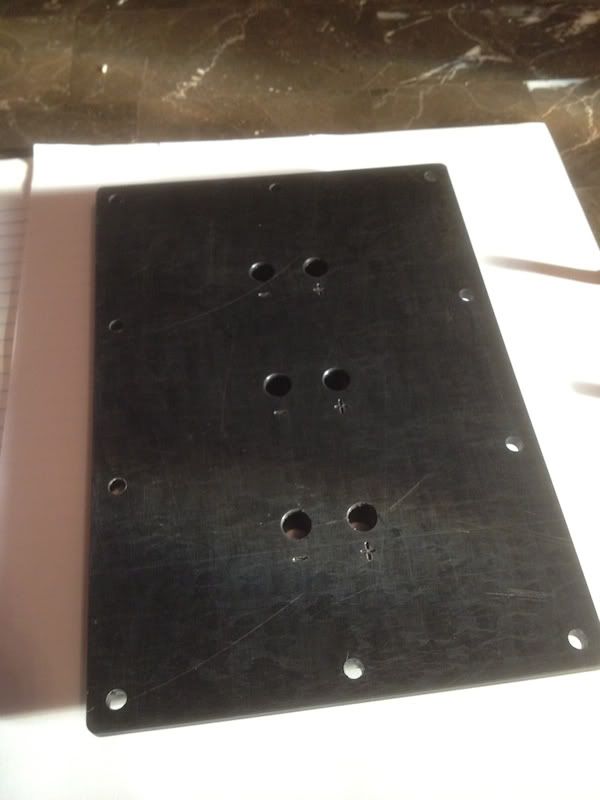
 Proud and loyal citizen of the Digital Domain and Solid State Country!
 -
Outstanding! What a beautiful job. You have just upped the mark of excellence around here 10 fold! I'm in awe of the craftsmanship involved in this makeover.Sunfire Theater Grand IV
Sunfire Cinema Grand Signature
SRS 2.1TL
SDA 2BTL's
CSiA6
FXiA4
FXiA6
SDA 2A's
Monitor 10A's
http://www.douglasconnection.com


