Advice needed: Desoldering components from a speaker crossover
Options

Sosublime
Posts: 11
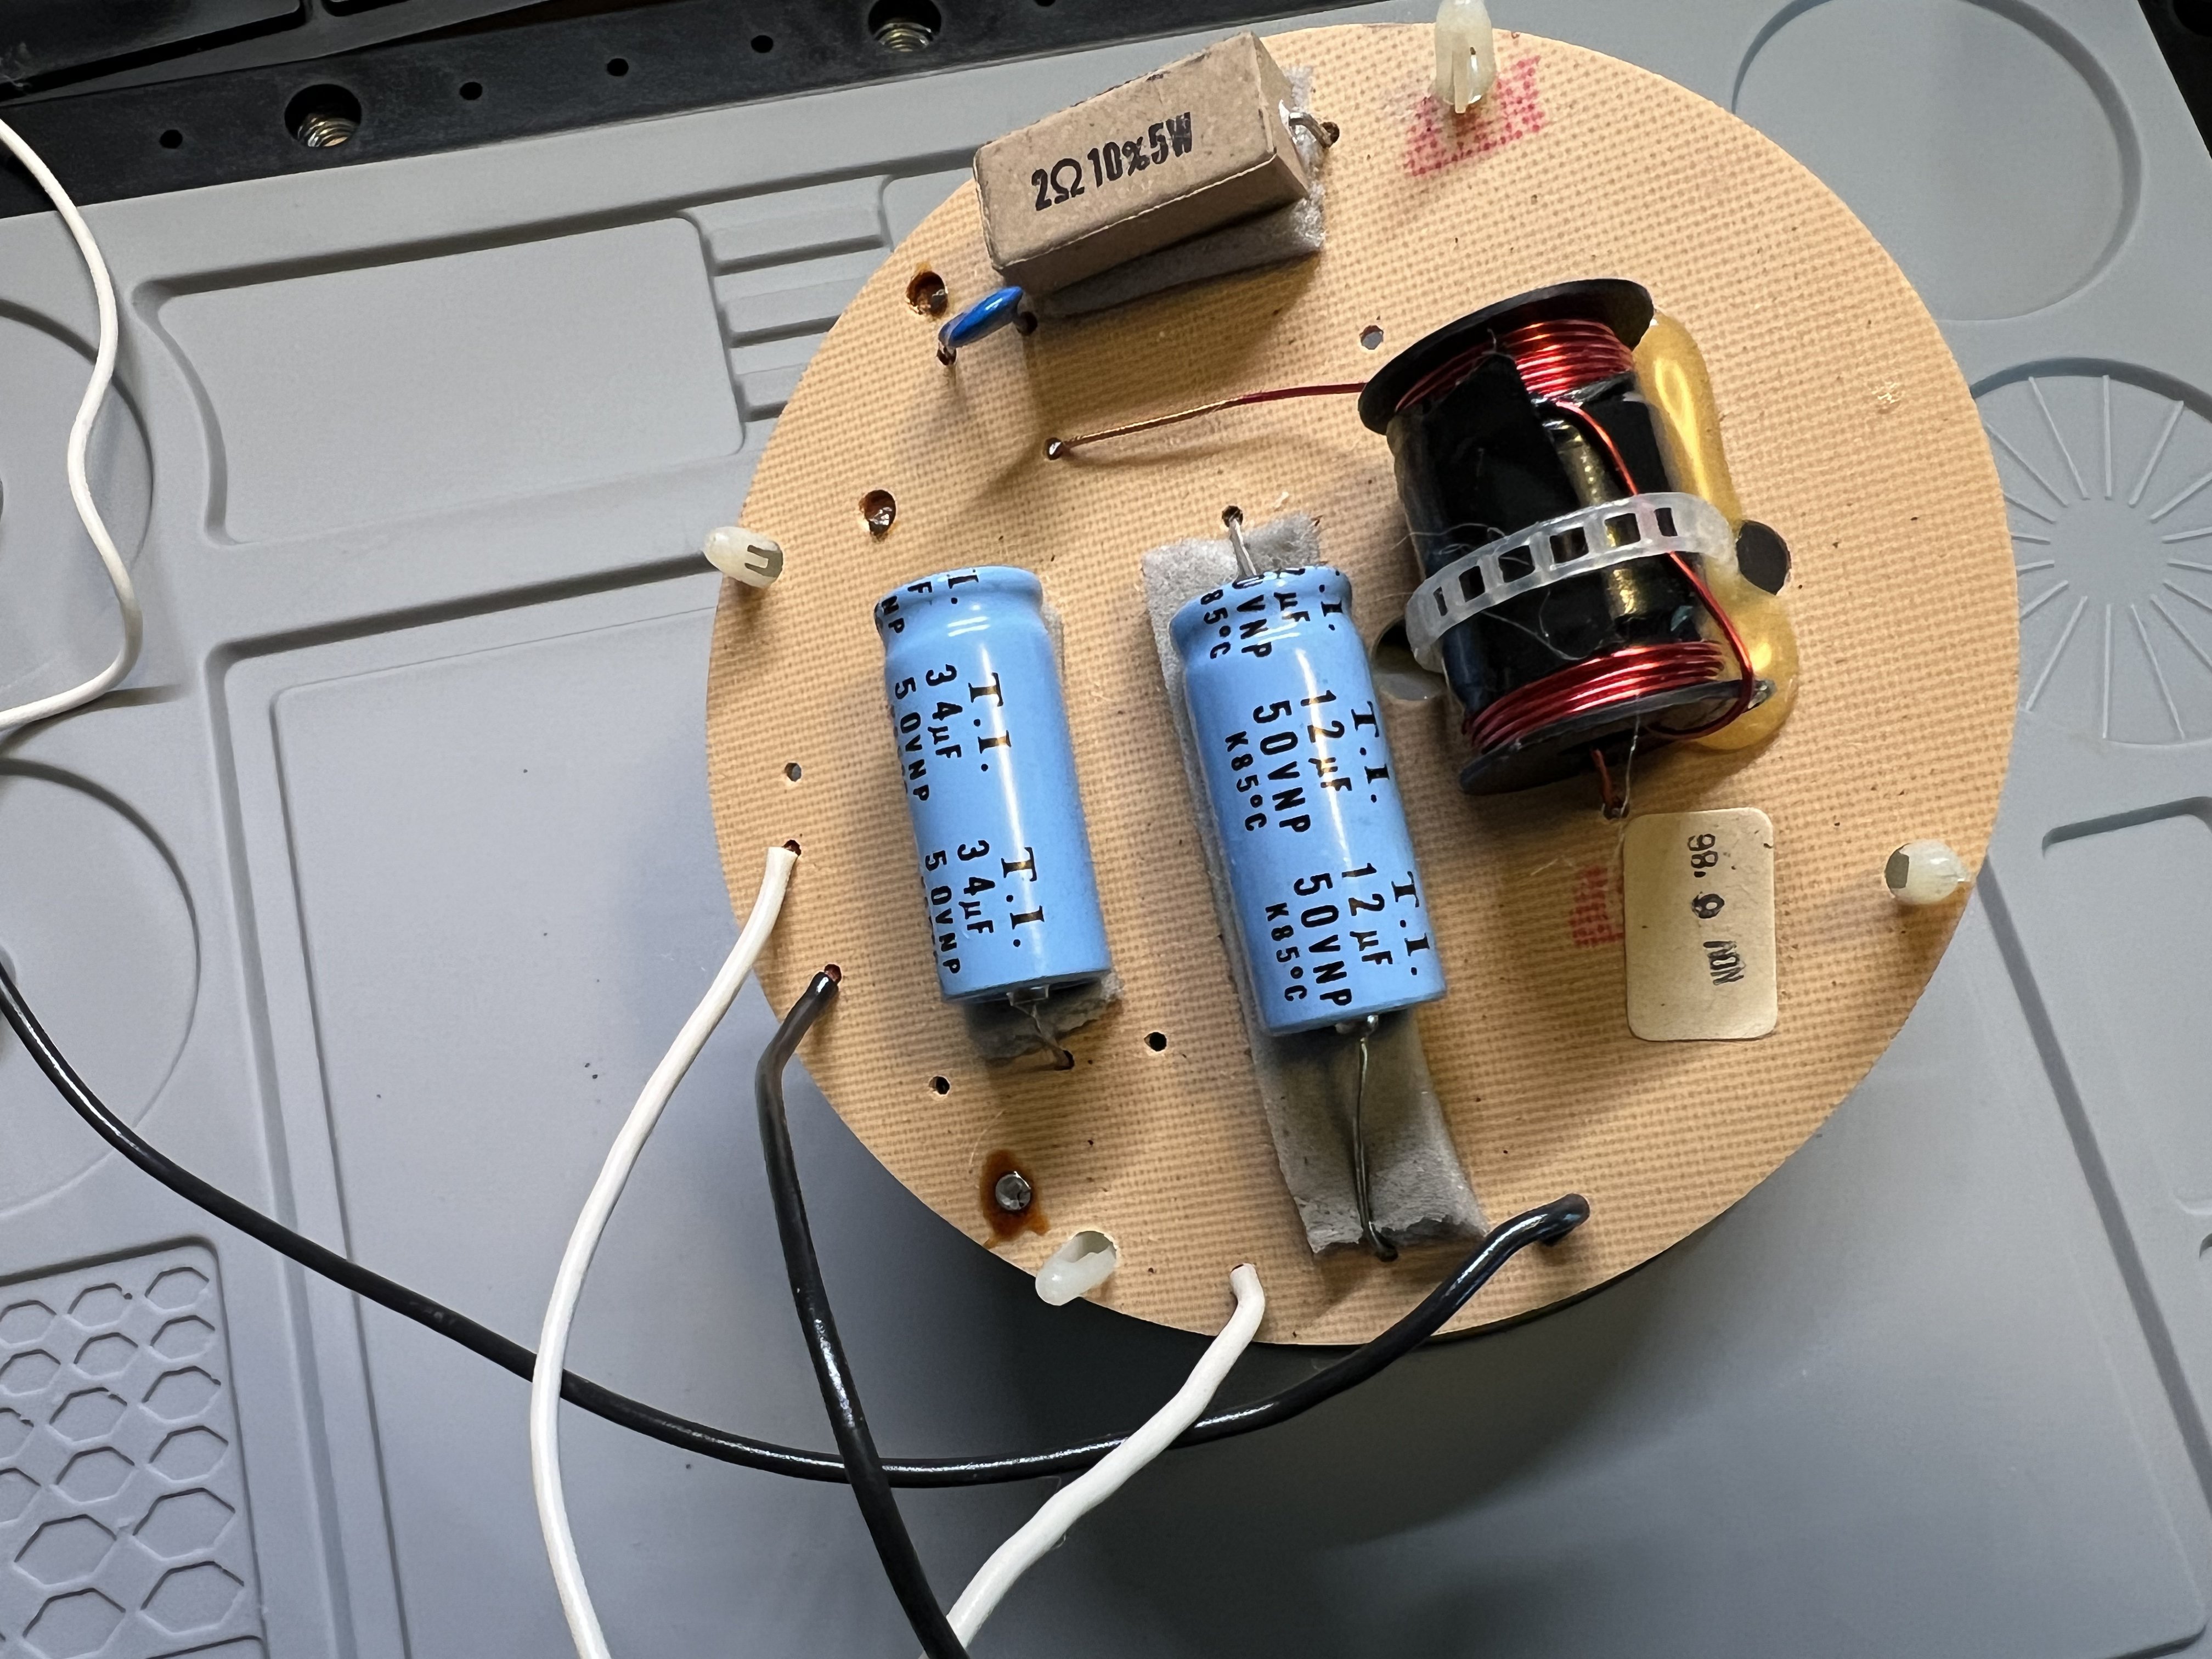
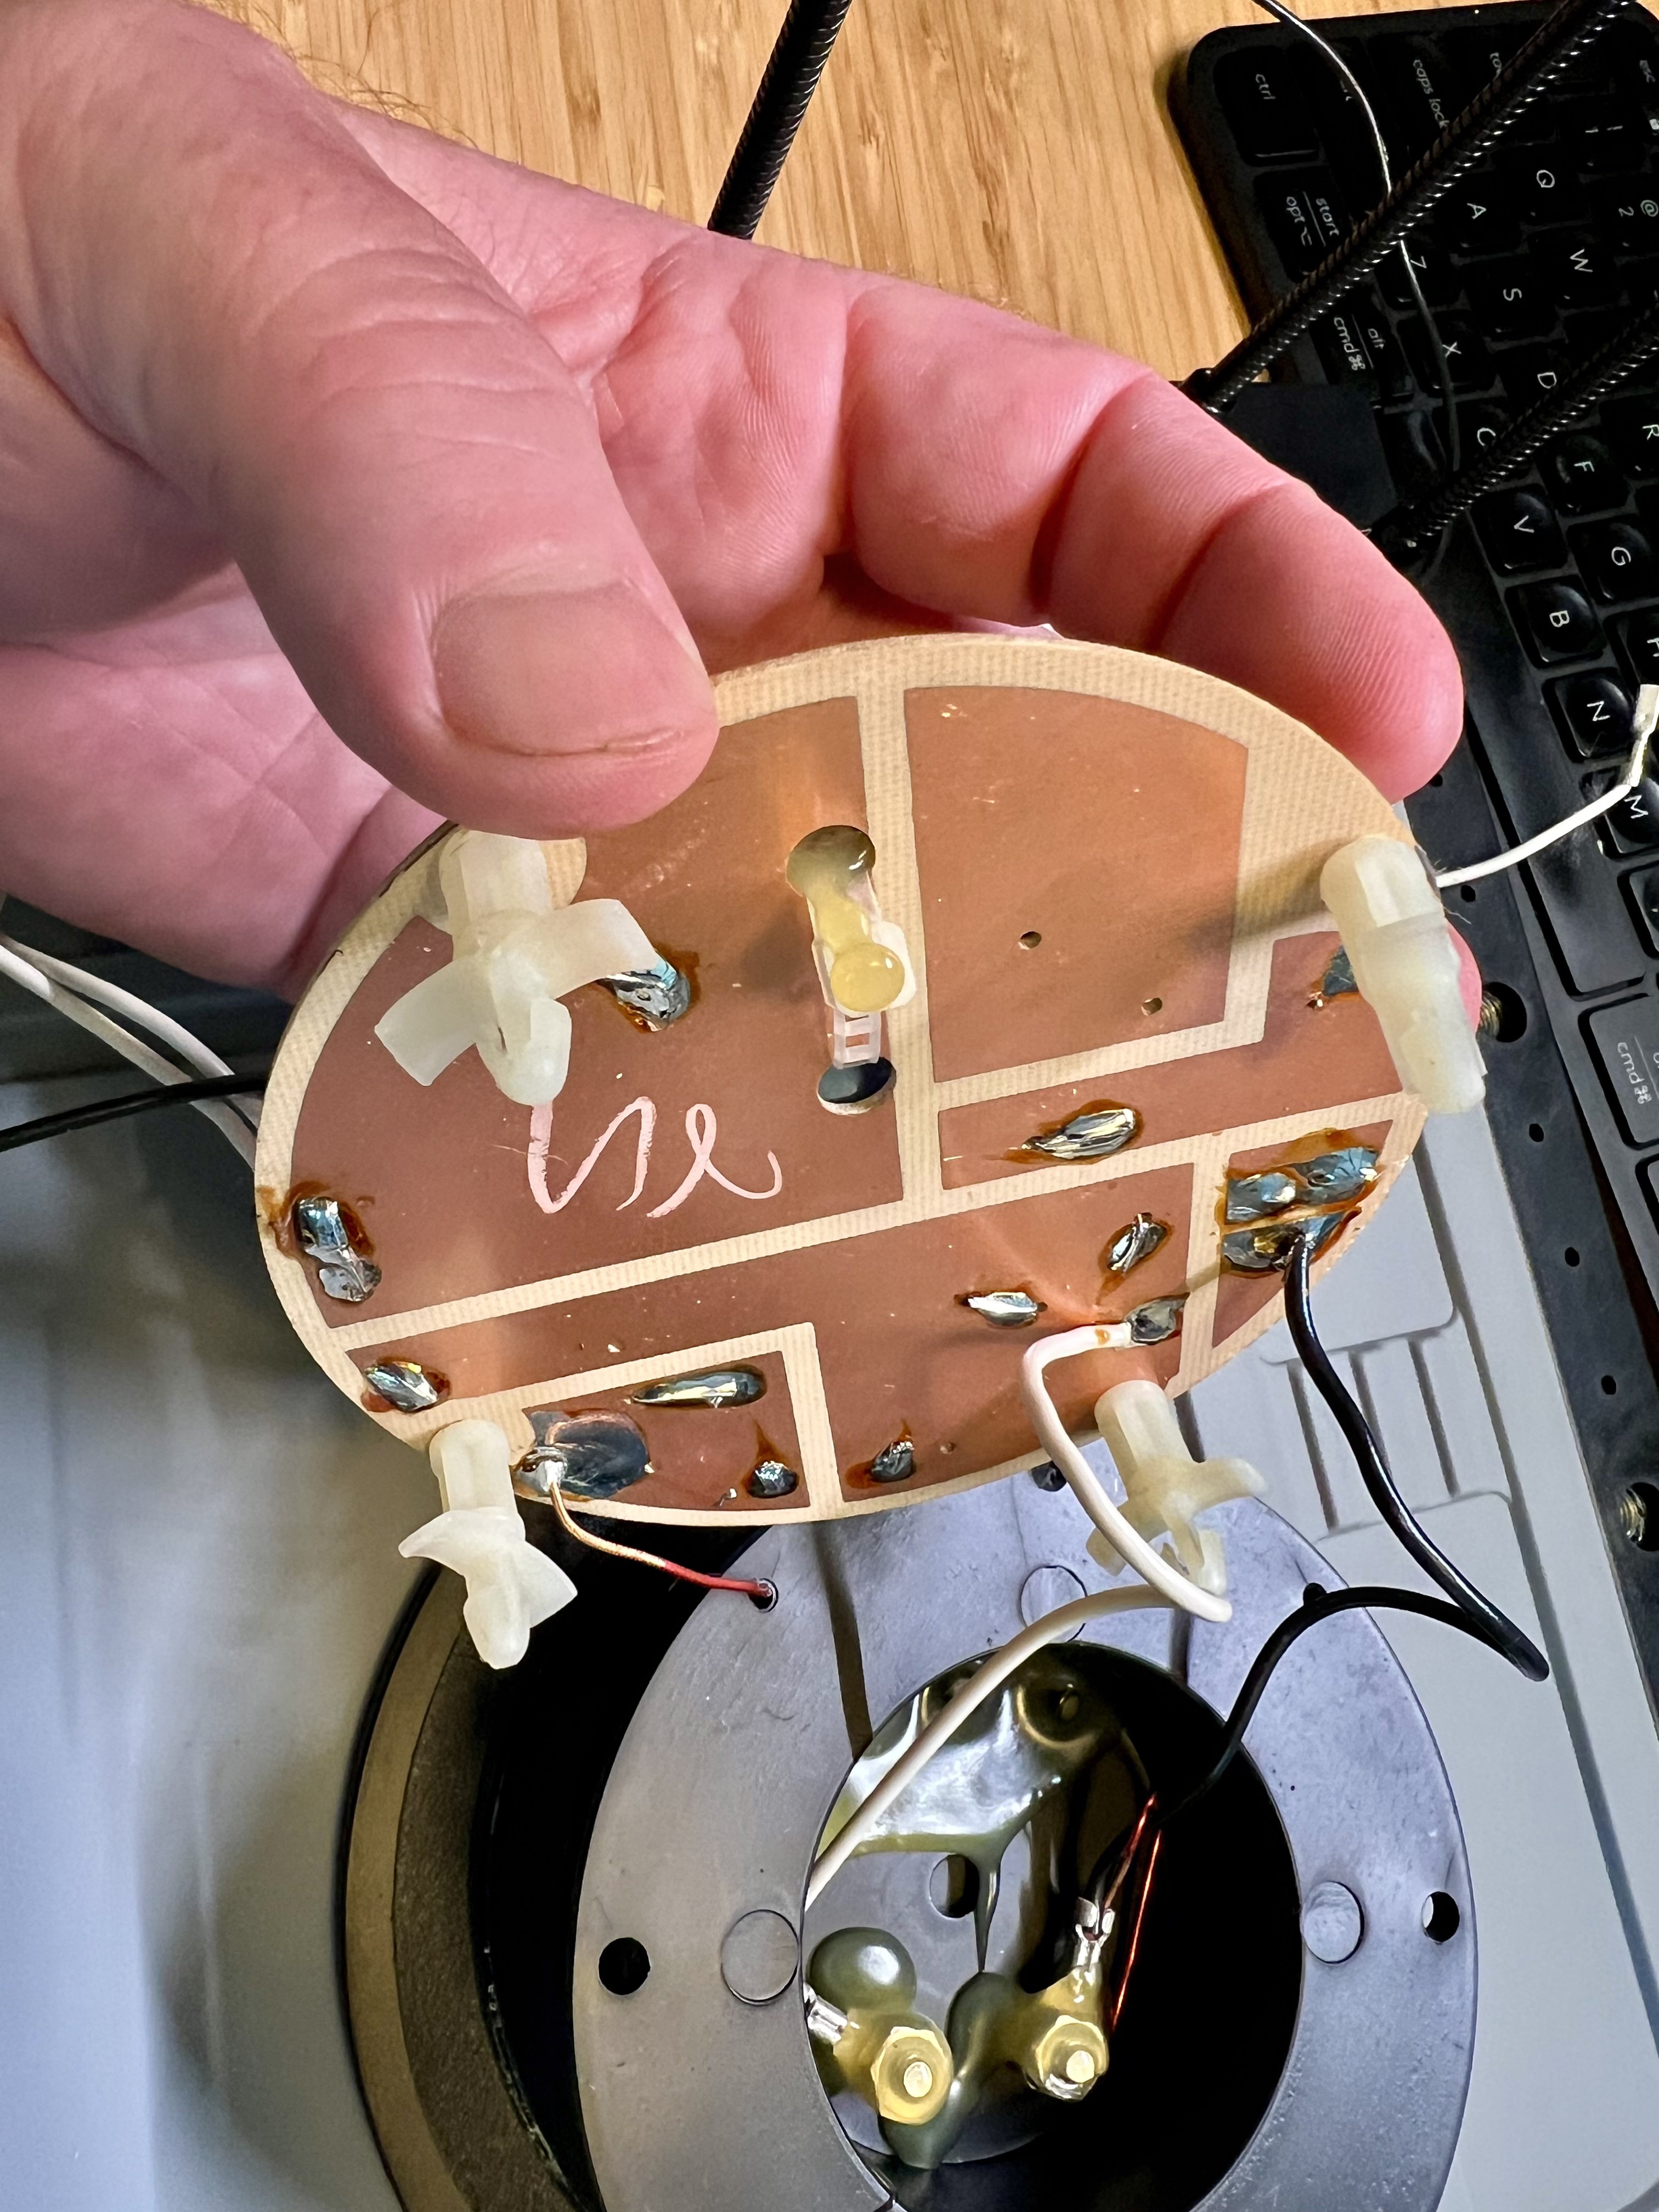
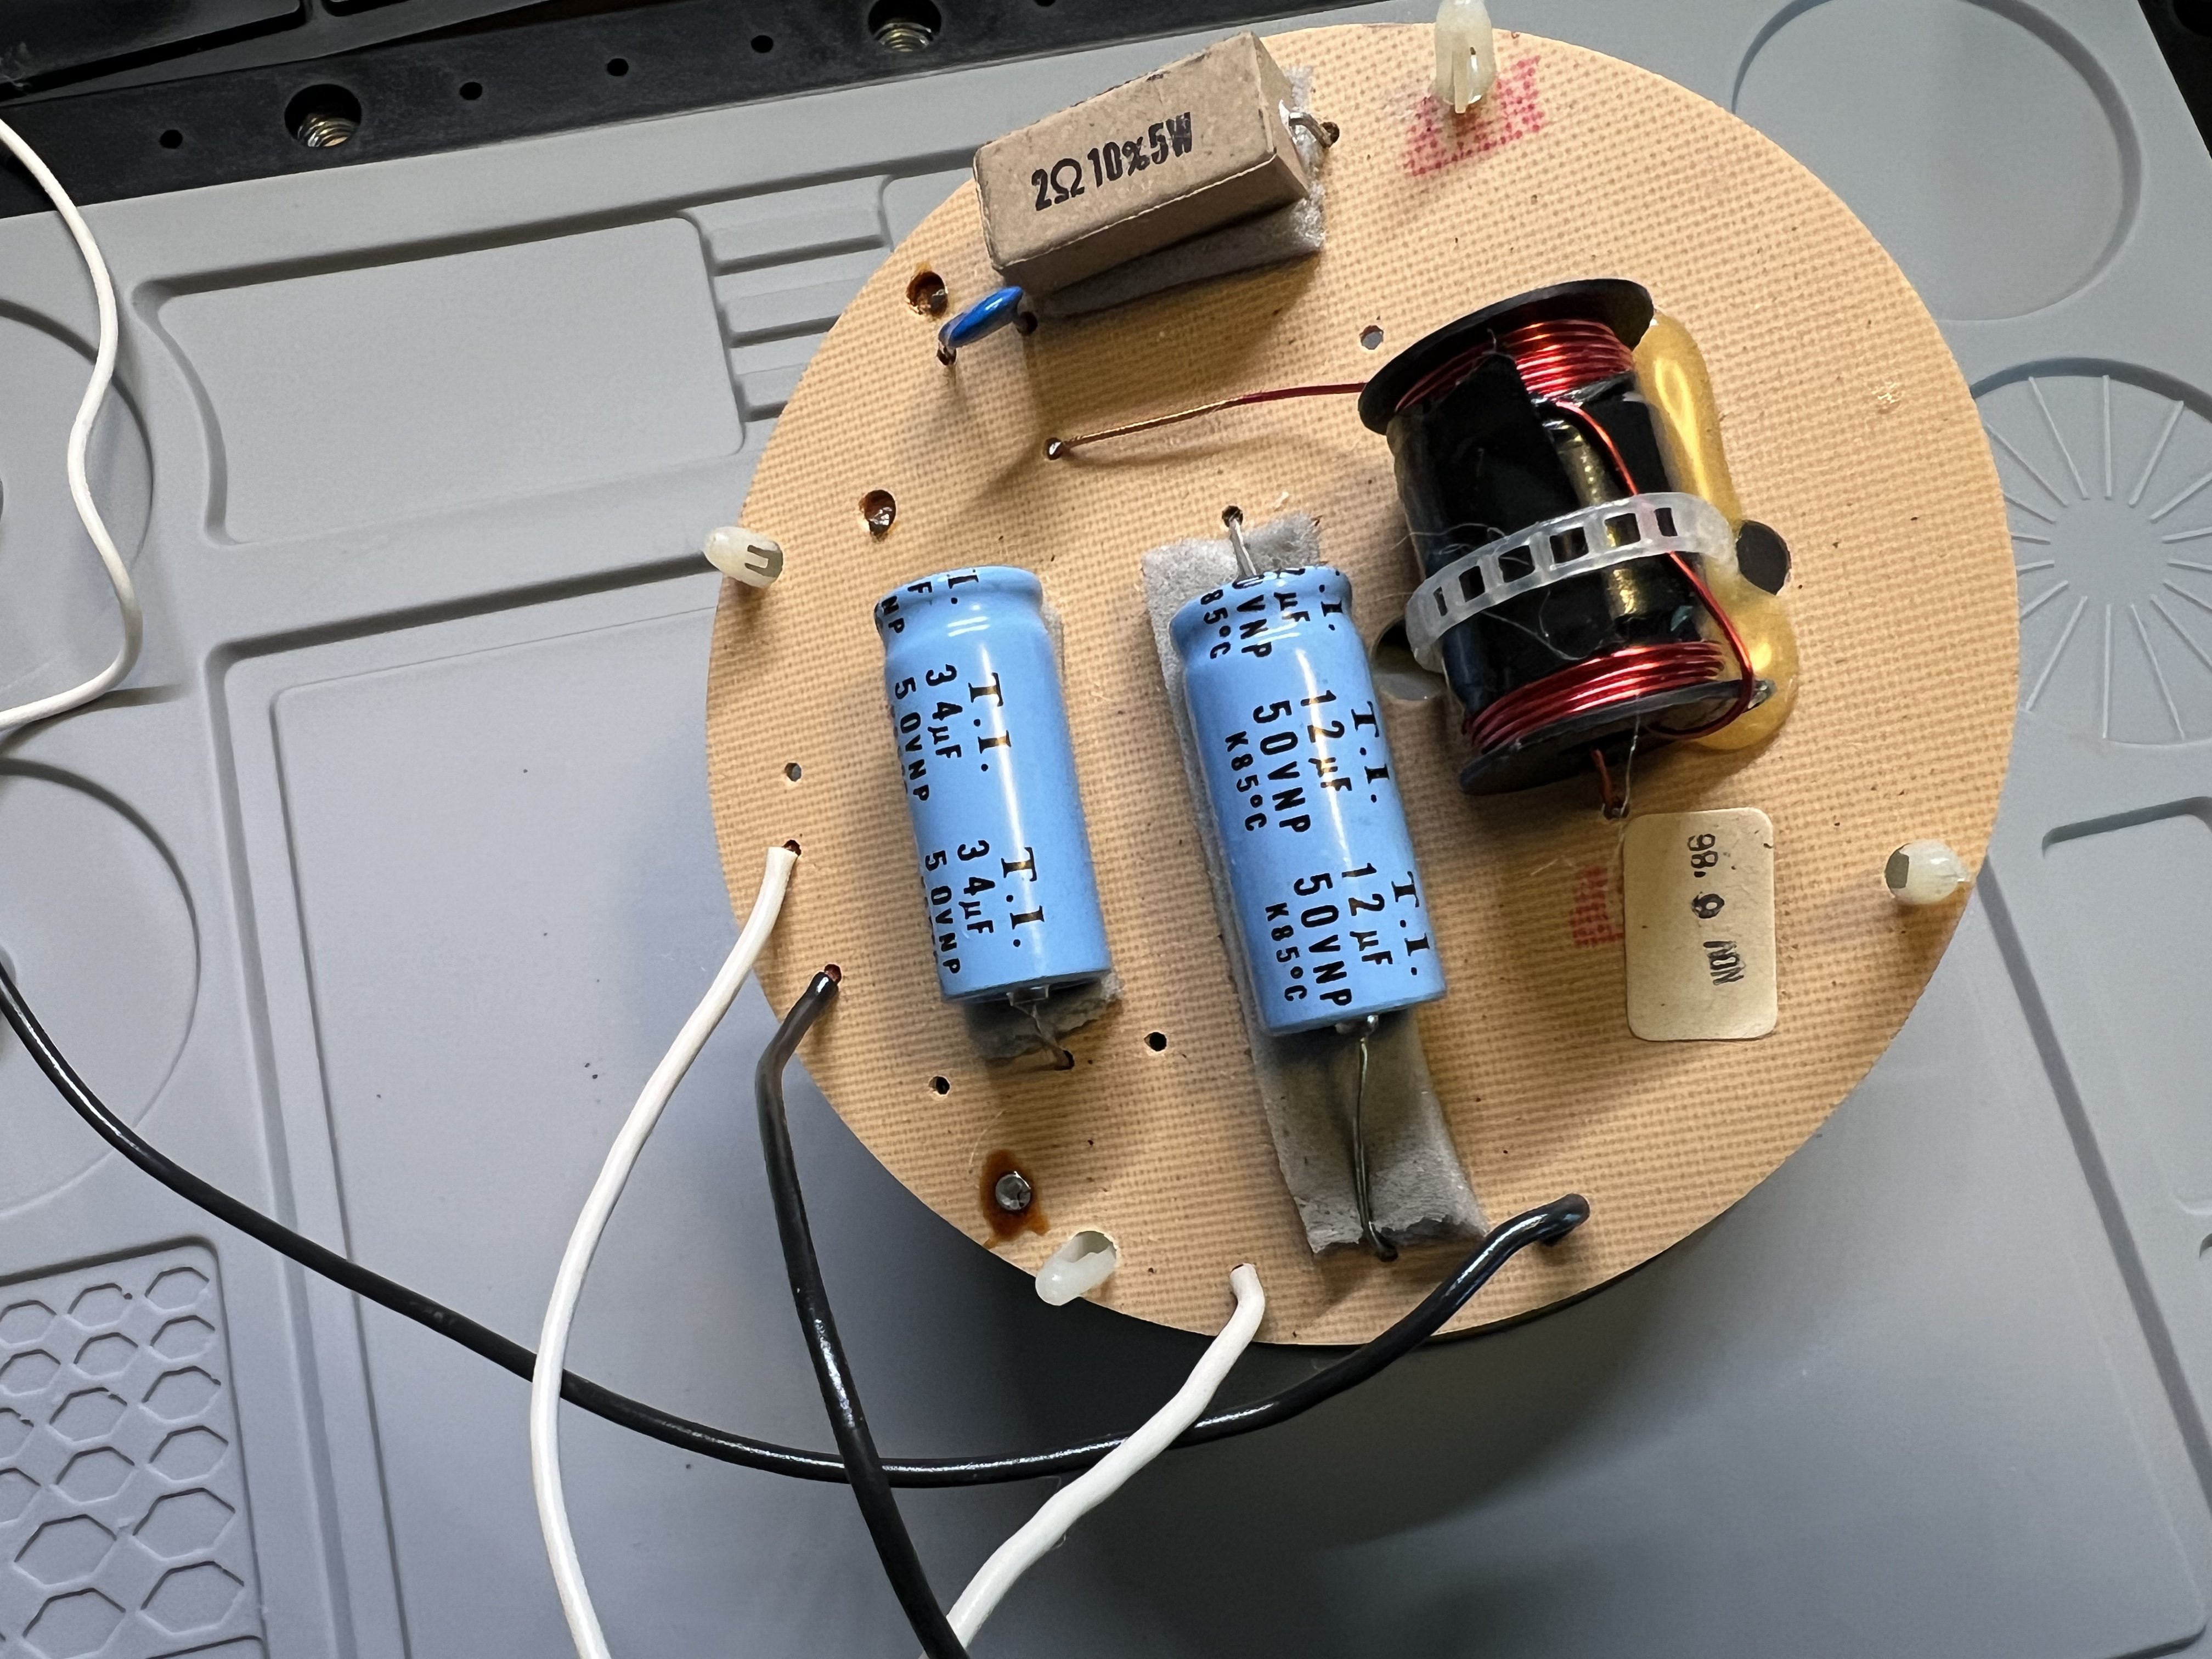
Hi everyone—I’m replacing components on a pair of Polk Monitor 5's crossovers and could use some advice on removing the old solder without damaging the board. I’ve attached a photo showing its current condition.
In the past I have done some basic repairs/replacement on much smaller PCBs and have not worked before with such large blobs of solder to remove.
I have:
- An adjustable-temperature soldering iron
- Solder and flux
- A manual solder sucker
- Desoldering braid
A few questions:
- What temperature and tip shape would you recommend for these joints?
- Should I use the solder sucker first and braid only for cleanup?
- How do I free a component lead that still seems attached after removing most of the solder since the leads are long and folded over the board?
I’m trying to avoid overheating the board or lifting the copper pads. Any practical tips would be appreciated. Thanks!
In the past I have done some basic repairs/replacement on much smaller PCBs and have not worked before with such large blobs of solder to remove.
I have:
- An adjustable-temperature soldering iron
- Solder and flux
- A manual solder sucker
- Desoldering braid
A few questions:
- What temperature and tip shape would you recommend for these joints?
- Should I use the solder sucker first and braid only for cleanup?
- How do I free a component lead that still seems attached after removing most of the solder since the leads are long and folded over the board?
I’m trying to avoid overheating the board or lifting the copper pads. Any practical tips would be appreciated. Thanks!
Comments
-
Some people like solder suckers, but I prefer to use the braid. If you have a knife edge tip, that will be most effective because you can lay it sideways on top of the braid. The board will be fine as long as you keep the temp a low as it takes to melt the solder. This is probably well before before lead-free solder was used, so it shouldn't need too much temp to flow. I'd shoot for 360-375F on the temp. Clean the tip often.
-
Thank you Bill!
-
Good luck and don't forget to stay ventilated.
-
Another member said that you might want to go hotter and there is no worries about overheating the pads since the copper is so thick, it will dissipate heat well. He suggested 500F, but just try until it liquefies fairly quickly.
-
Solder suckers are something I have had mixed results with. I think there are a lot of cr appy ones out there and a teflon tip with a proper fitting plunger is mandatory. I always wanted to go the next step if I started doing this work more frequently and get one that integrates the soldering tip with the solder sucker in one unit so there is no question of the solder staying molten or not. I think those ones just have a suction bulb.George / NJ
Polk 7B main speakers, std. mods+ (1979, orig owner)
Martin Logan Dynamo sub w/6ft 14awg Power Cord
Onkyo A-8017 integrated
Logitech Squeezebox Touch Streamer w/EDO applet
iFi nano iDSD DAC
iPurifier3
iDefender w/ iPower PS
Custom Steve Wilson 1m UPOCC Interconnect
iFi Mercury 0.5m OFHC continuous cast copper USB cable
Custom Ribbon Speaker Cables, 5ft long, 4N Copper, 14awg, ultra low inductance
Custom Vibration Isolation Speaker Stands and Sub Platform -
I've used wick and one shot solder suckers. Apply some rosin flux when using wick or a one shot sucker. Flux helps promote capillary flow.
There are times I do quite a bit of desoldering and prefer to use this Hakko FR-300. Adjustable temp, various size interchangeable nozzles. Constant heat when on. Depress the button for vacuum. Pricey for a one time user.
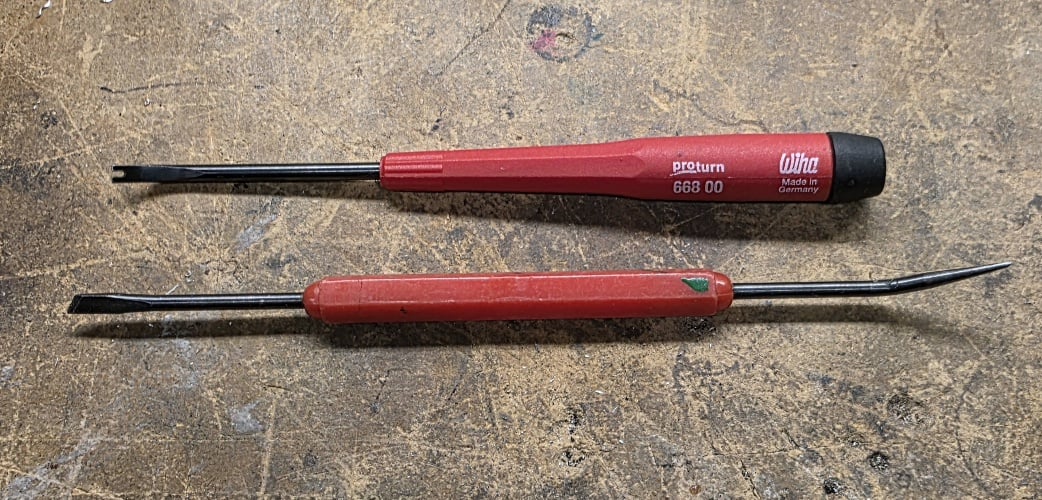
If you have a lead stuck to pcb, sometimes you have to heat it and use a tool with edge that can lift it away and turn it. A small regular screw driver will work. Whatever you use it should have a handle as heat travels.
IIRC the polk boards had a thick layer not easily pulled off. Older electronics gear with small traces can be torn away from pcb trying to move a stuck lead. Sometimes I run into multiple leads on one trace that need to be seperated.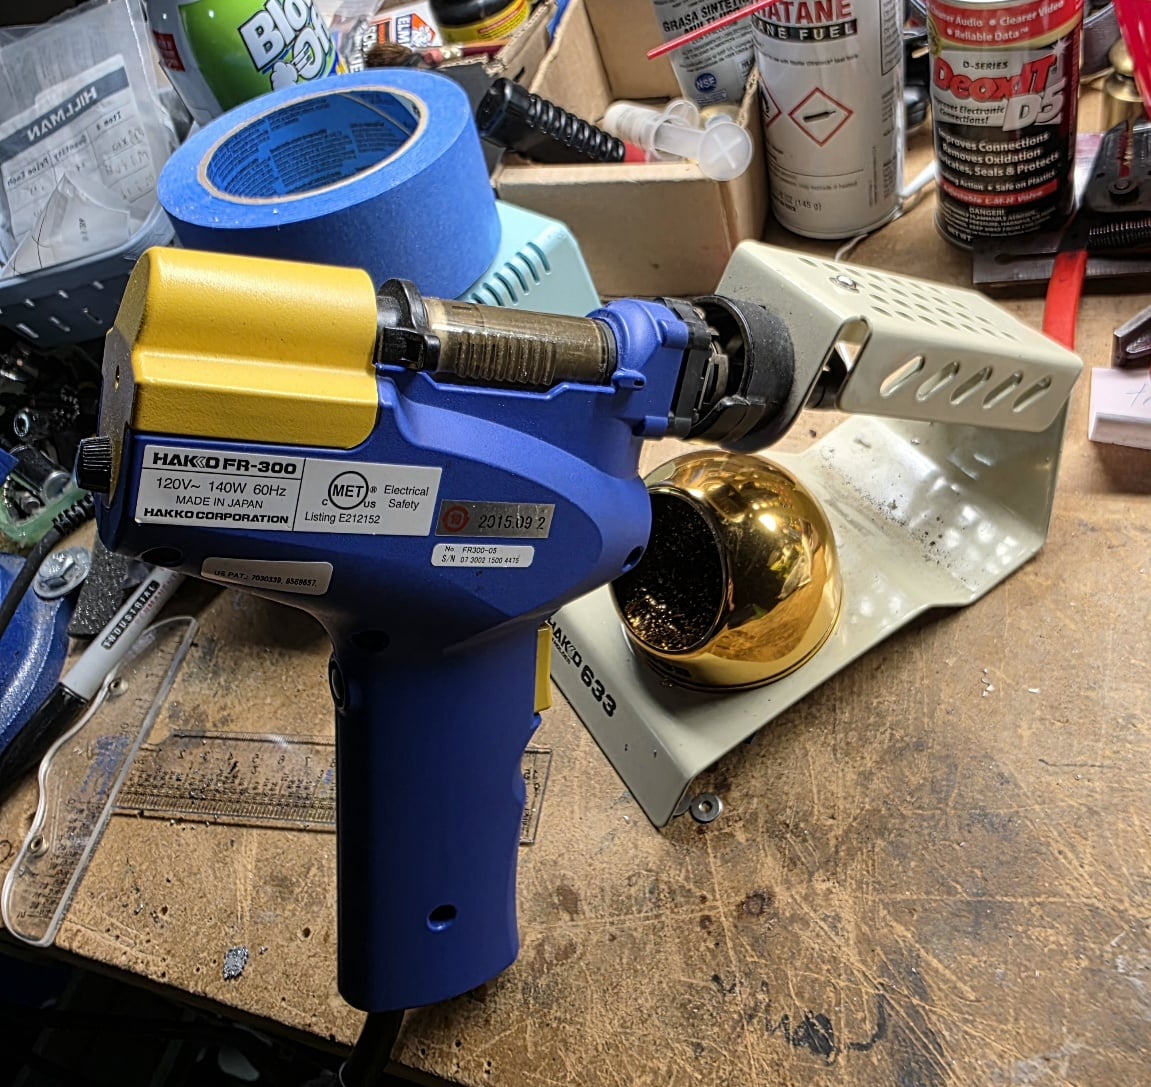
Salk SoundScape 8's * Audio Research Reference 3 * Bottlehead Eros Phono * Park's Audio Budgie SUT * Krell KSA-250 * Harmonic Technology Pro 9+ * Signature Series Sonore Music Server w/Deux PS * Roon * Gustard R26 DAC / Singxer SU-6 DDC * Heavy Plinth Lenco L75 Idler Drive * AA MG-1 Linear Air Bearing Arm * AT33PTG/II & Denon 103R * Richard Gray 600S * NHT B-12d subs * GIK Acoustic Treatments * Sennheiser HD650 * -
Just curious if you were removing the polyswitch (thermal fuse) in the tweeter circuit? I don't recall it being mentioned in your other thread. It's typically done to improve high-frequency clarity and remove potential distortion. Without it, if you overdrive your amp and it clips, you can fry the tweeter.
If you do eliminate the polyswitch, folks commonly replace it with a .5 ohm resistor. I just added .5 ohm value and used a 2.5 ohm resistor in place of the OEM 2 ohm value in my 7C xover.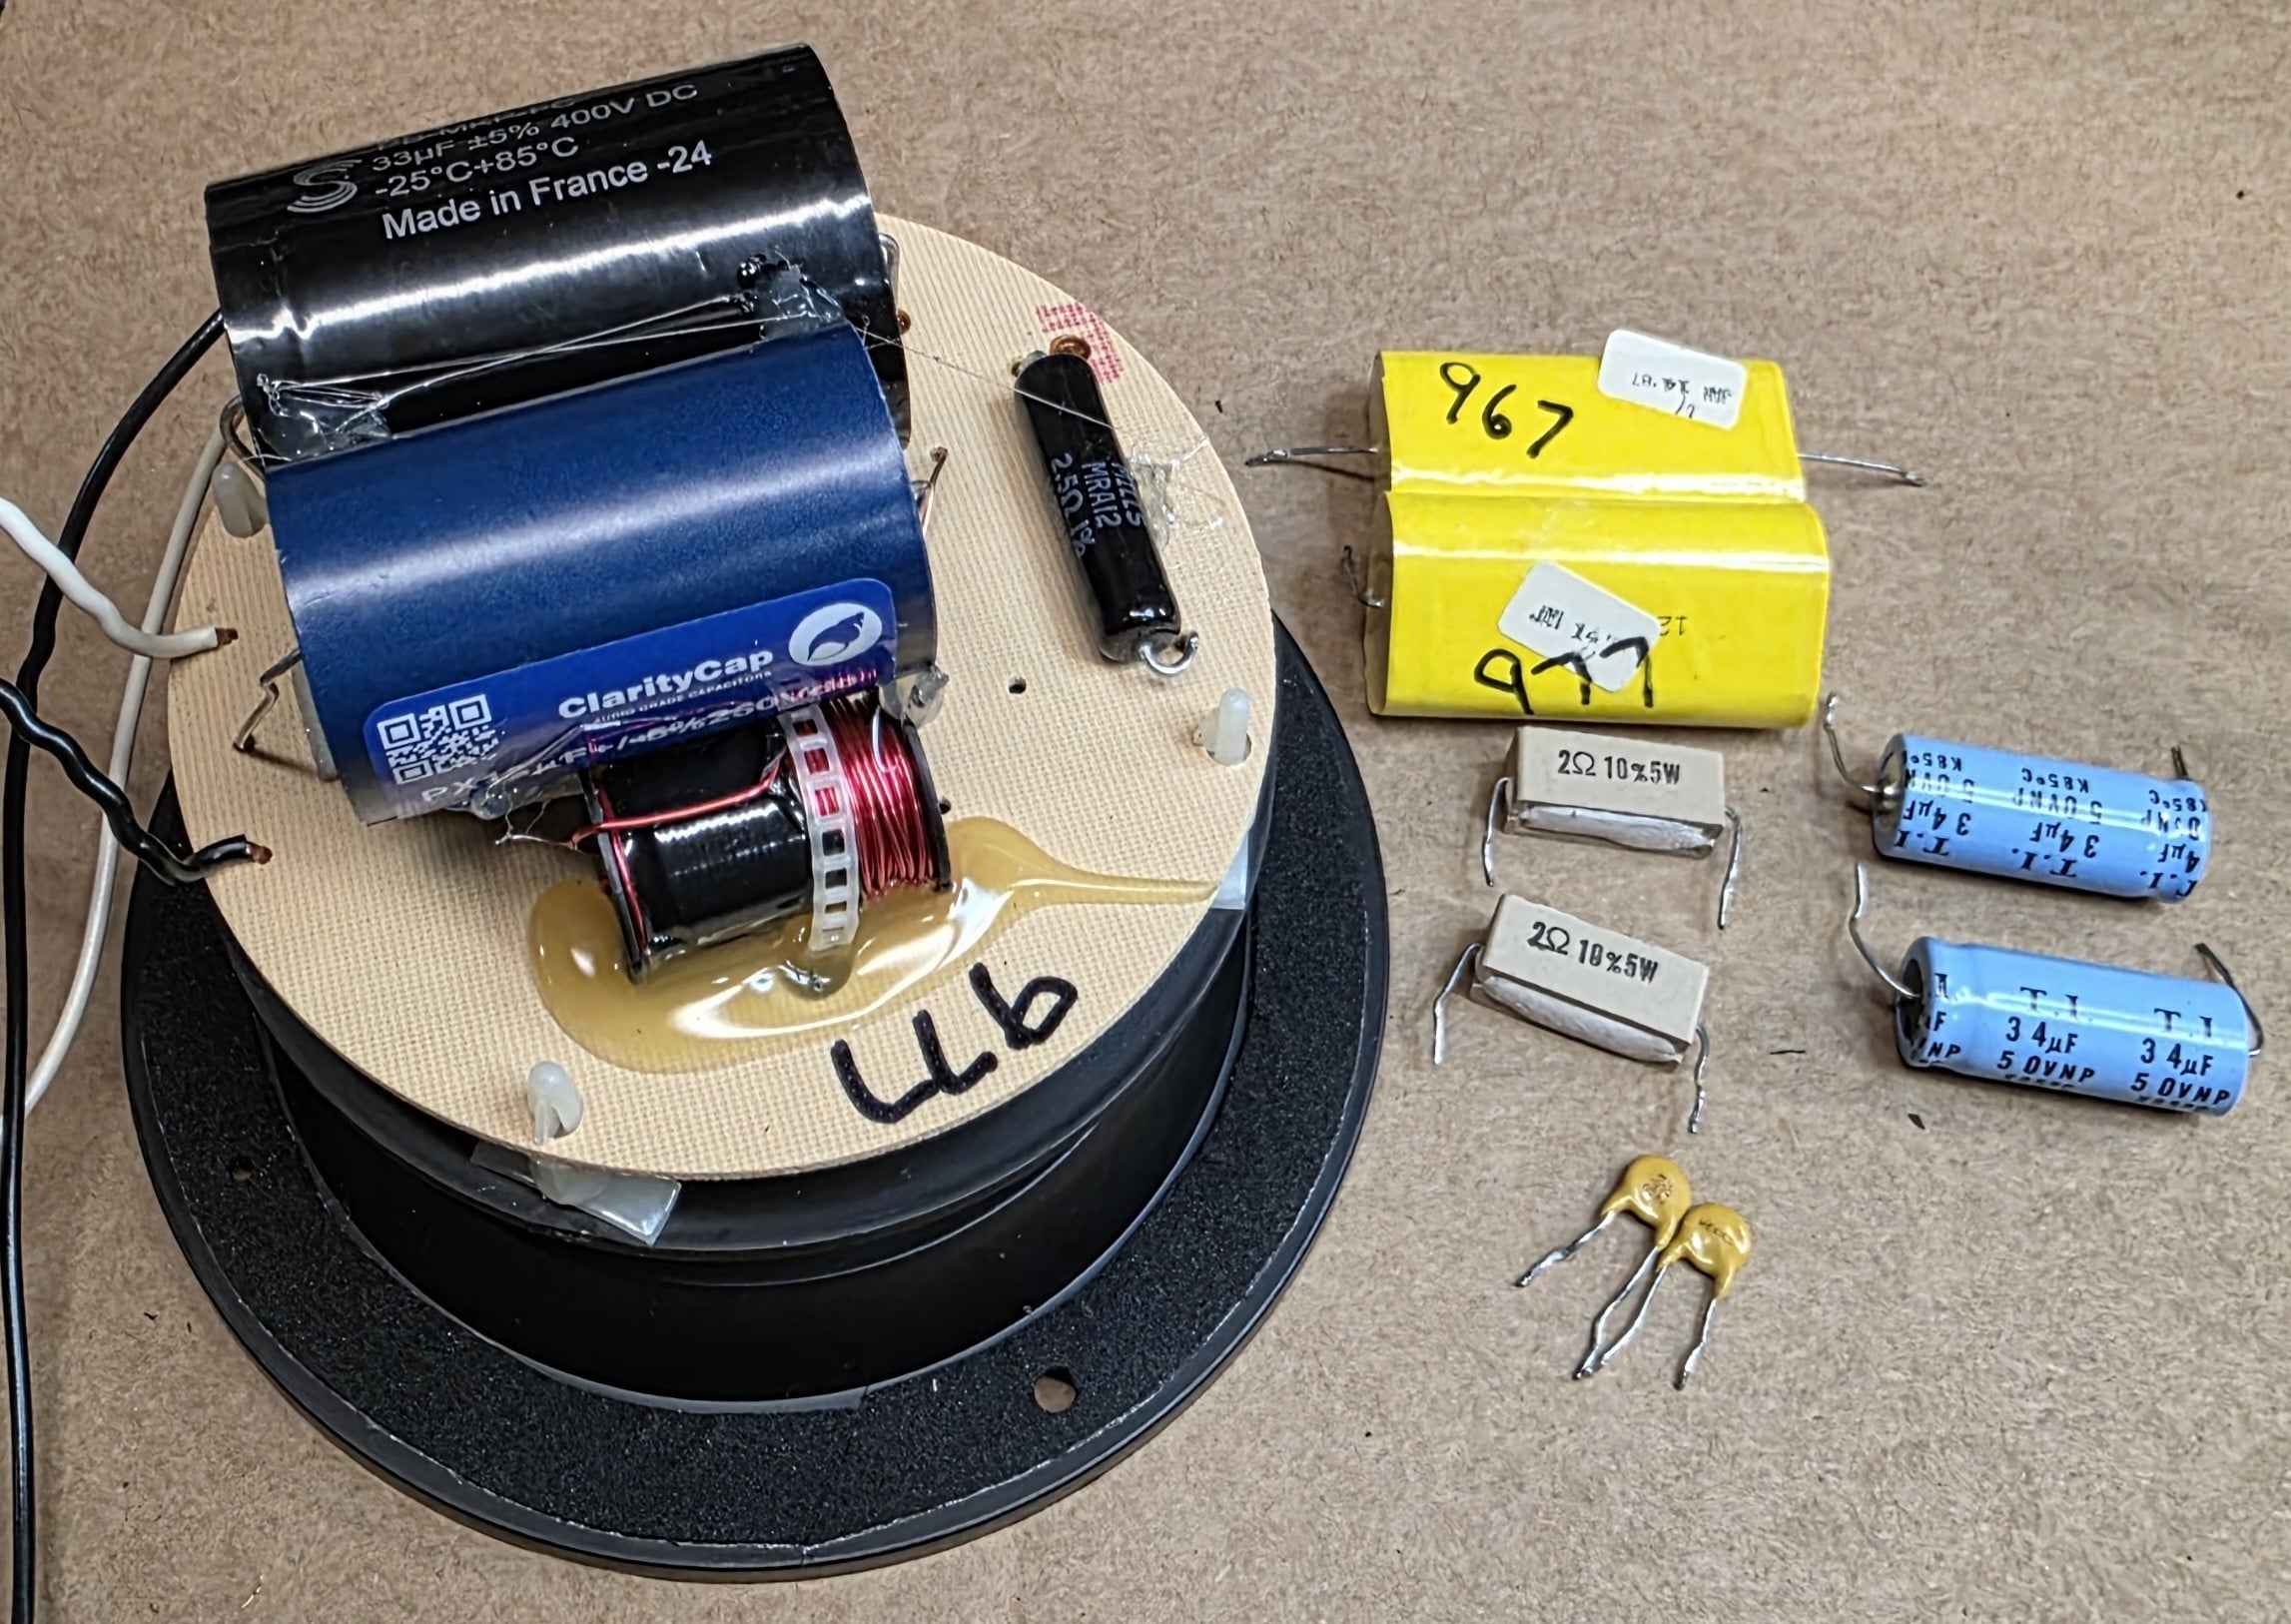
If you eliminate polyswitch and use a 2.5 ohm bypass the small pad and connect like this. No need for a small jumper where polyswitch was.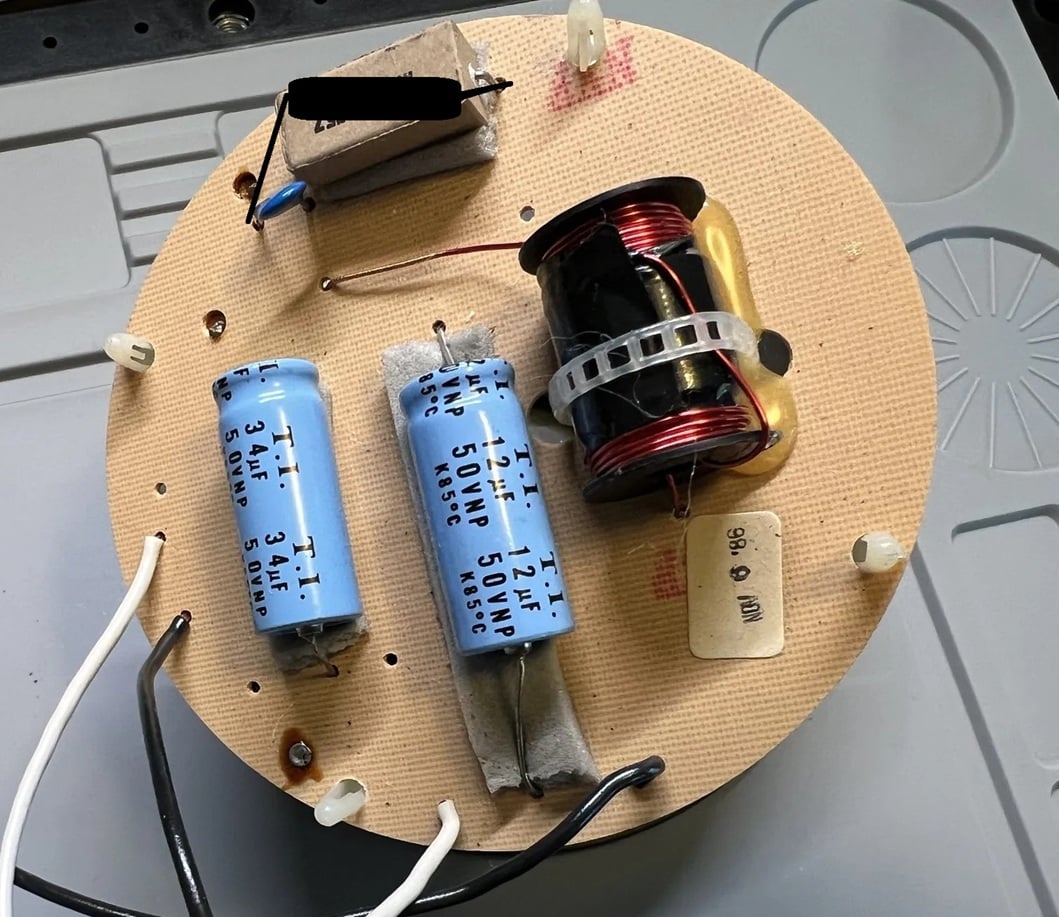
Salk SoundScape 8's * Audio Research Reference 3 * Bottlehead Eros Phono * Park's Audio Budgie SUT * Krell KSA-250 * Harmonic Technology Pro 9+ * Signature Series Sonore Music Server w/Deux PS * Roon * Gustard R26 DAC / Singxer SU-6 DDC * Heavy Plinth Lenco L75 Idler Drive * AA MG-1 Linear Air Bearing Arm * AT33PTG/II & Denon 103R * Richard Gray 600S * NHT B-12d subs * GIK Acoustic Treatments * Sennheiser HD650 * -
Only doing a couple jobs, then solder wick works fine. For a list of projects a desoldering tool like the Hakko or similar is a game changer.


