My 2024 Polk SDA 2b Modification Progress Thread (Drop1)
Options
Comments
-
The original gaskets are better. They are supposed to be ultra thin.
-
The original gaskets are better. They are supposed to be ultra thin.
I know, I know. I ripped the original gaskets out long ago. I'm of two minds but I lean in your direction. The armacell armaflex is seemingly sufficient but it does seem a bit thick. I don't like the idea of overtightening the screws for the sake getting extra compression in the gasket and coupling the woofer to the cabinet. However the cabinets will most certainly be sealed and I don't imagine I'll have any issues with SQ or otherwise. -
Moretite is the best...Gustard X26 Pro DAC
Belles 21A Pre Upgraded with Mundorf Supremes
B&K M200 Sonata monoblocks refreshed and upgraded
Polk SDA 1C's modded / 1000Va Dreadnaught
Wireworld Silver Eclipse IC's and speaker cables
Harman Kardon T65C w/Grado Gold. (Don't laugh. It sounds great!)
There is about a 5% genetic difference between apes and men …but that difference is the difference between throwing your own poo when you are annoyed …and Einstein, Shakespeare and Miss January. by Dr. Sardonicus -
This content has been removed.
-
@pitdogg2 you are absolutely right. I attached the drivers after applying the armaflex and tightened them down. After just a few hours the screws had already backed out just a tad. I removed the drivers after a day and was very surprised to see how much armacel compressed. I no longer see any issue using the armaflex.

-
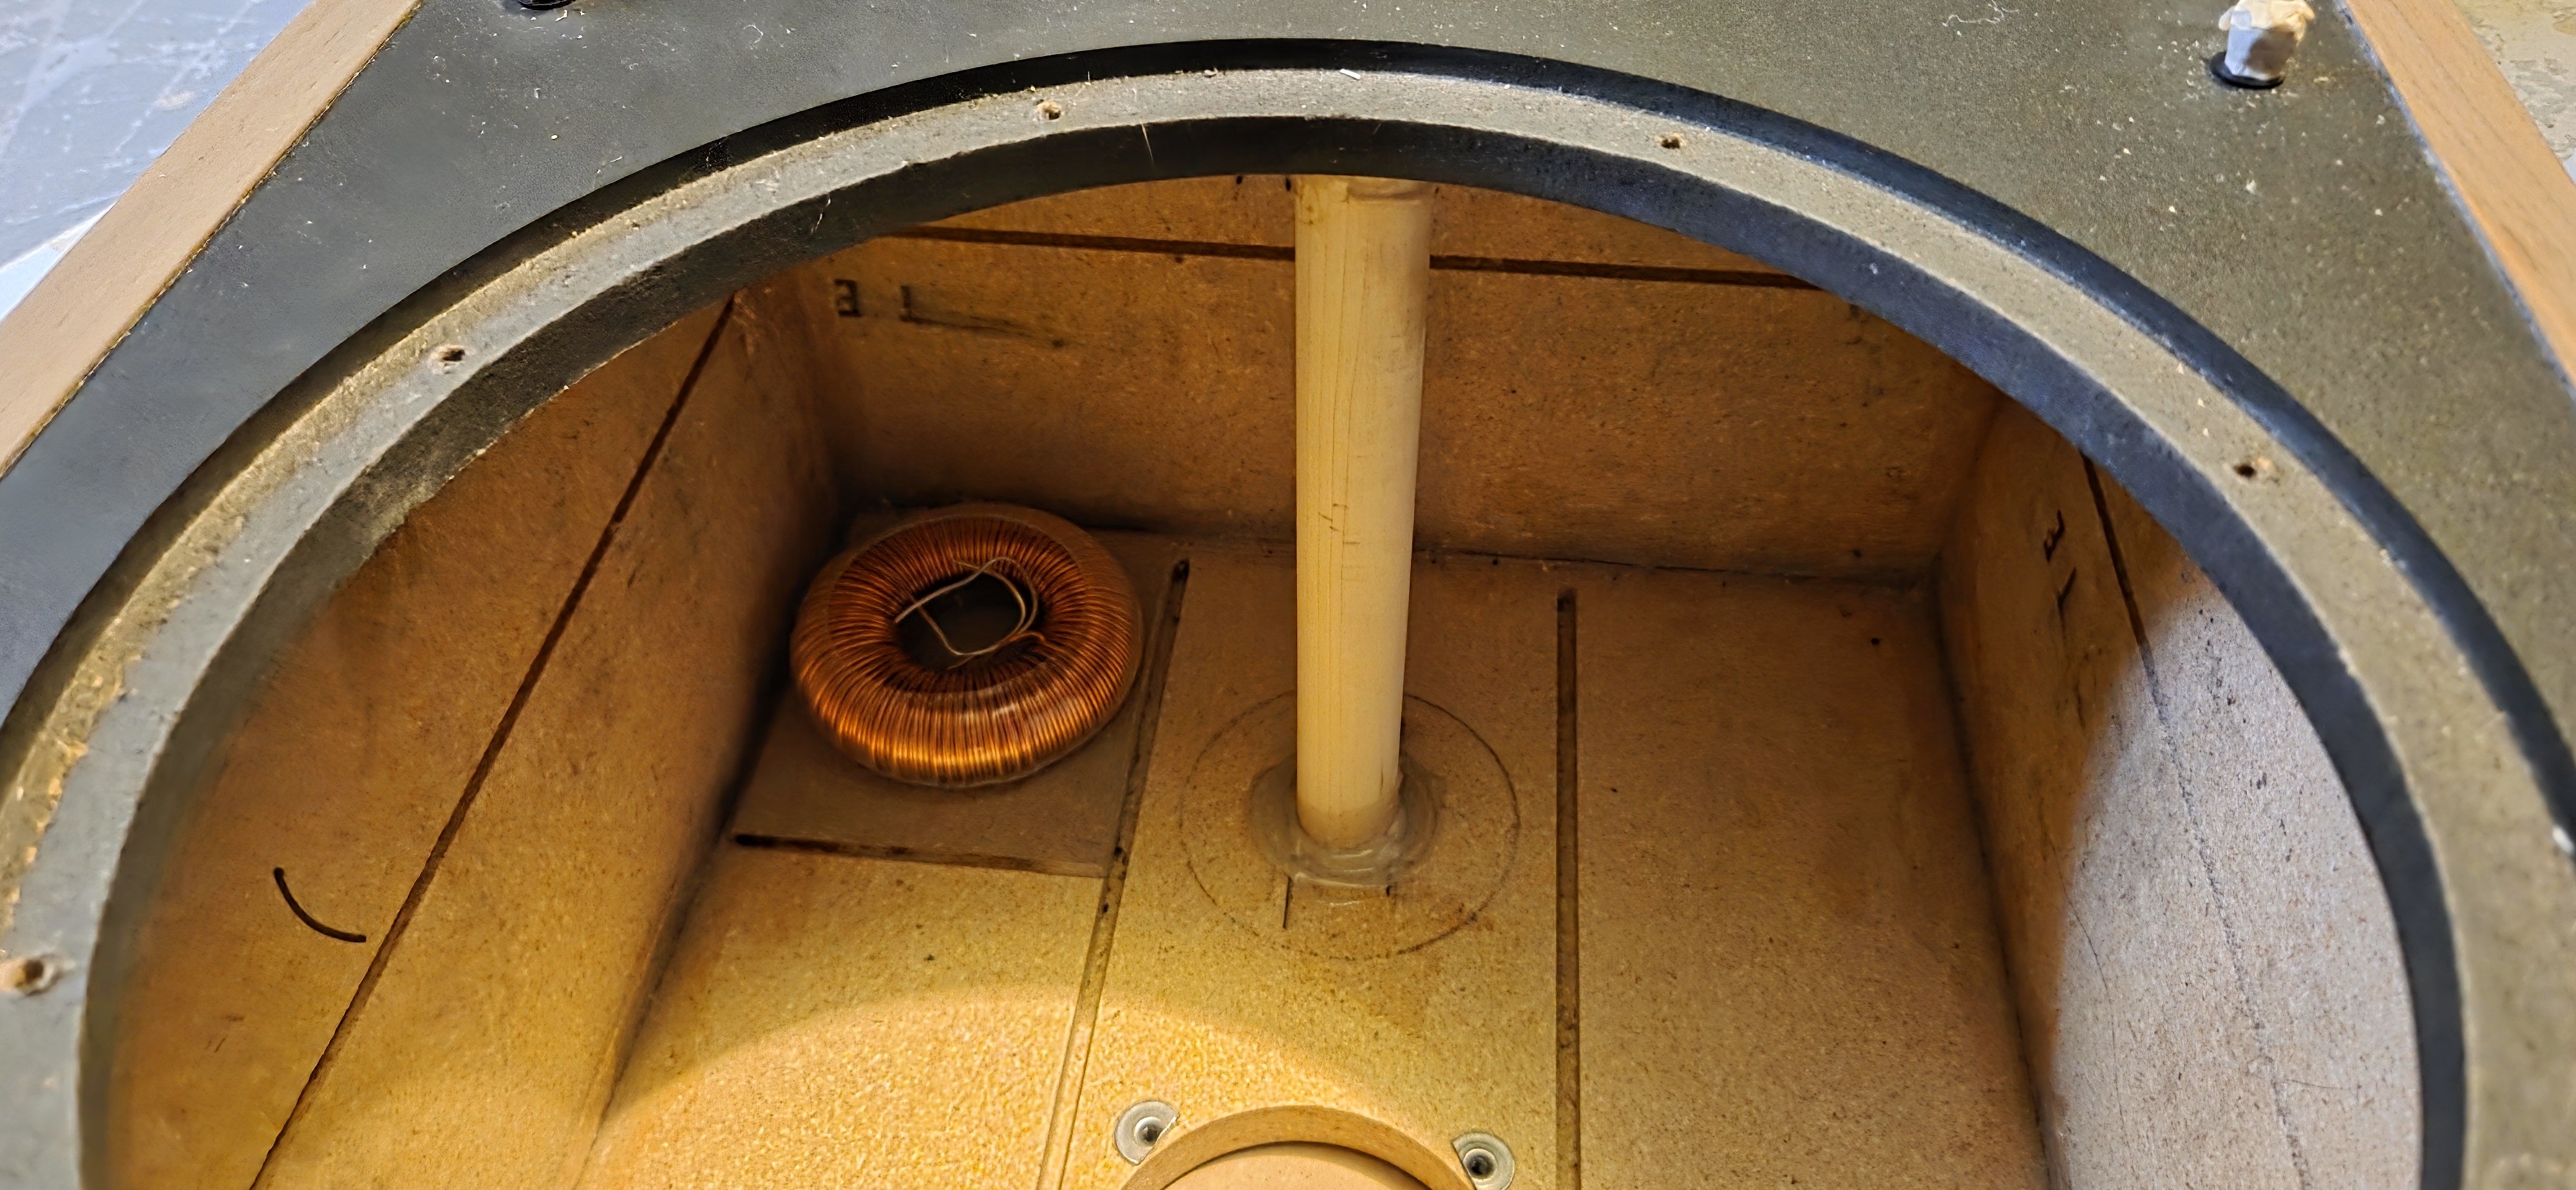
a little progress this weekend.
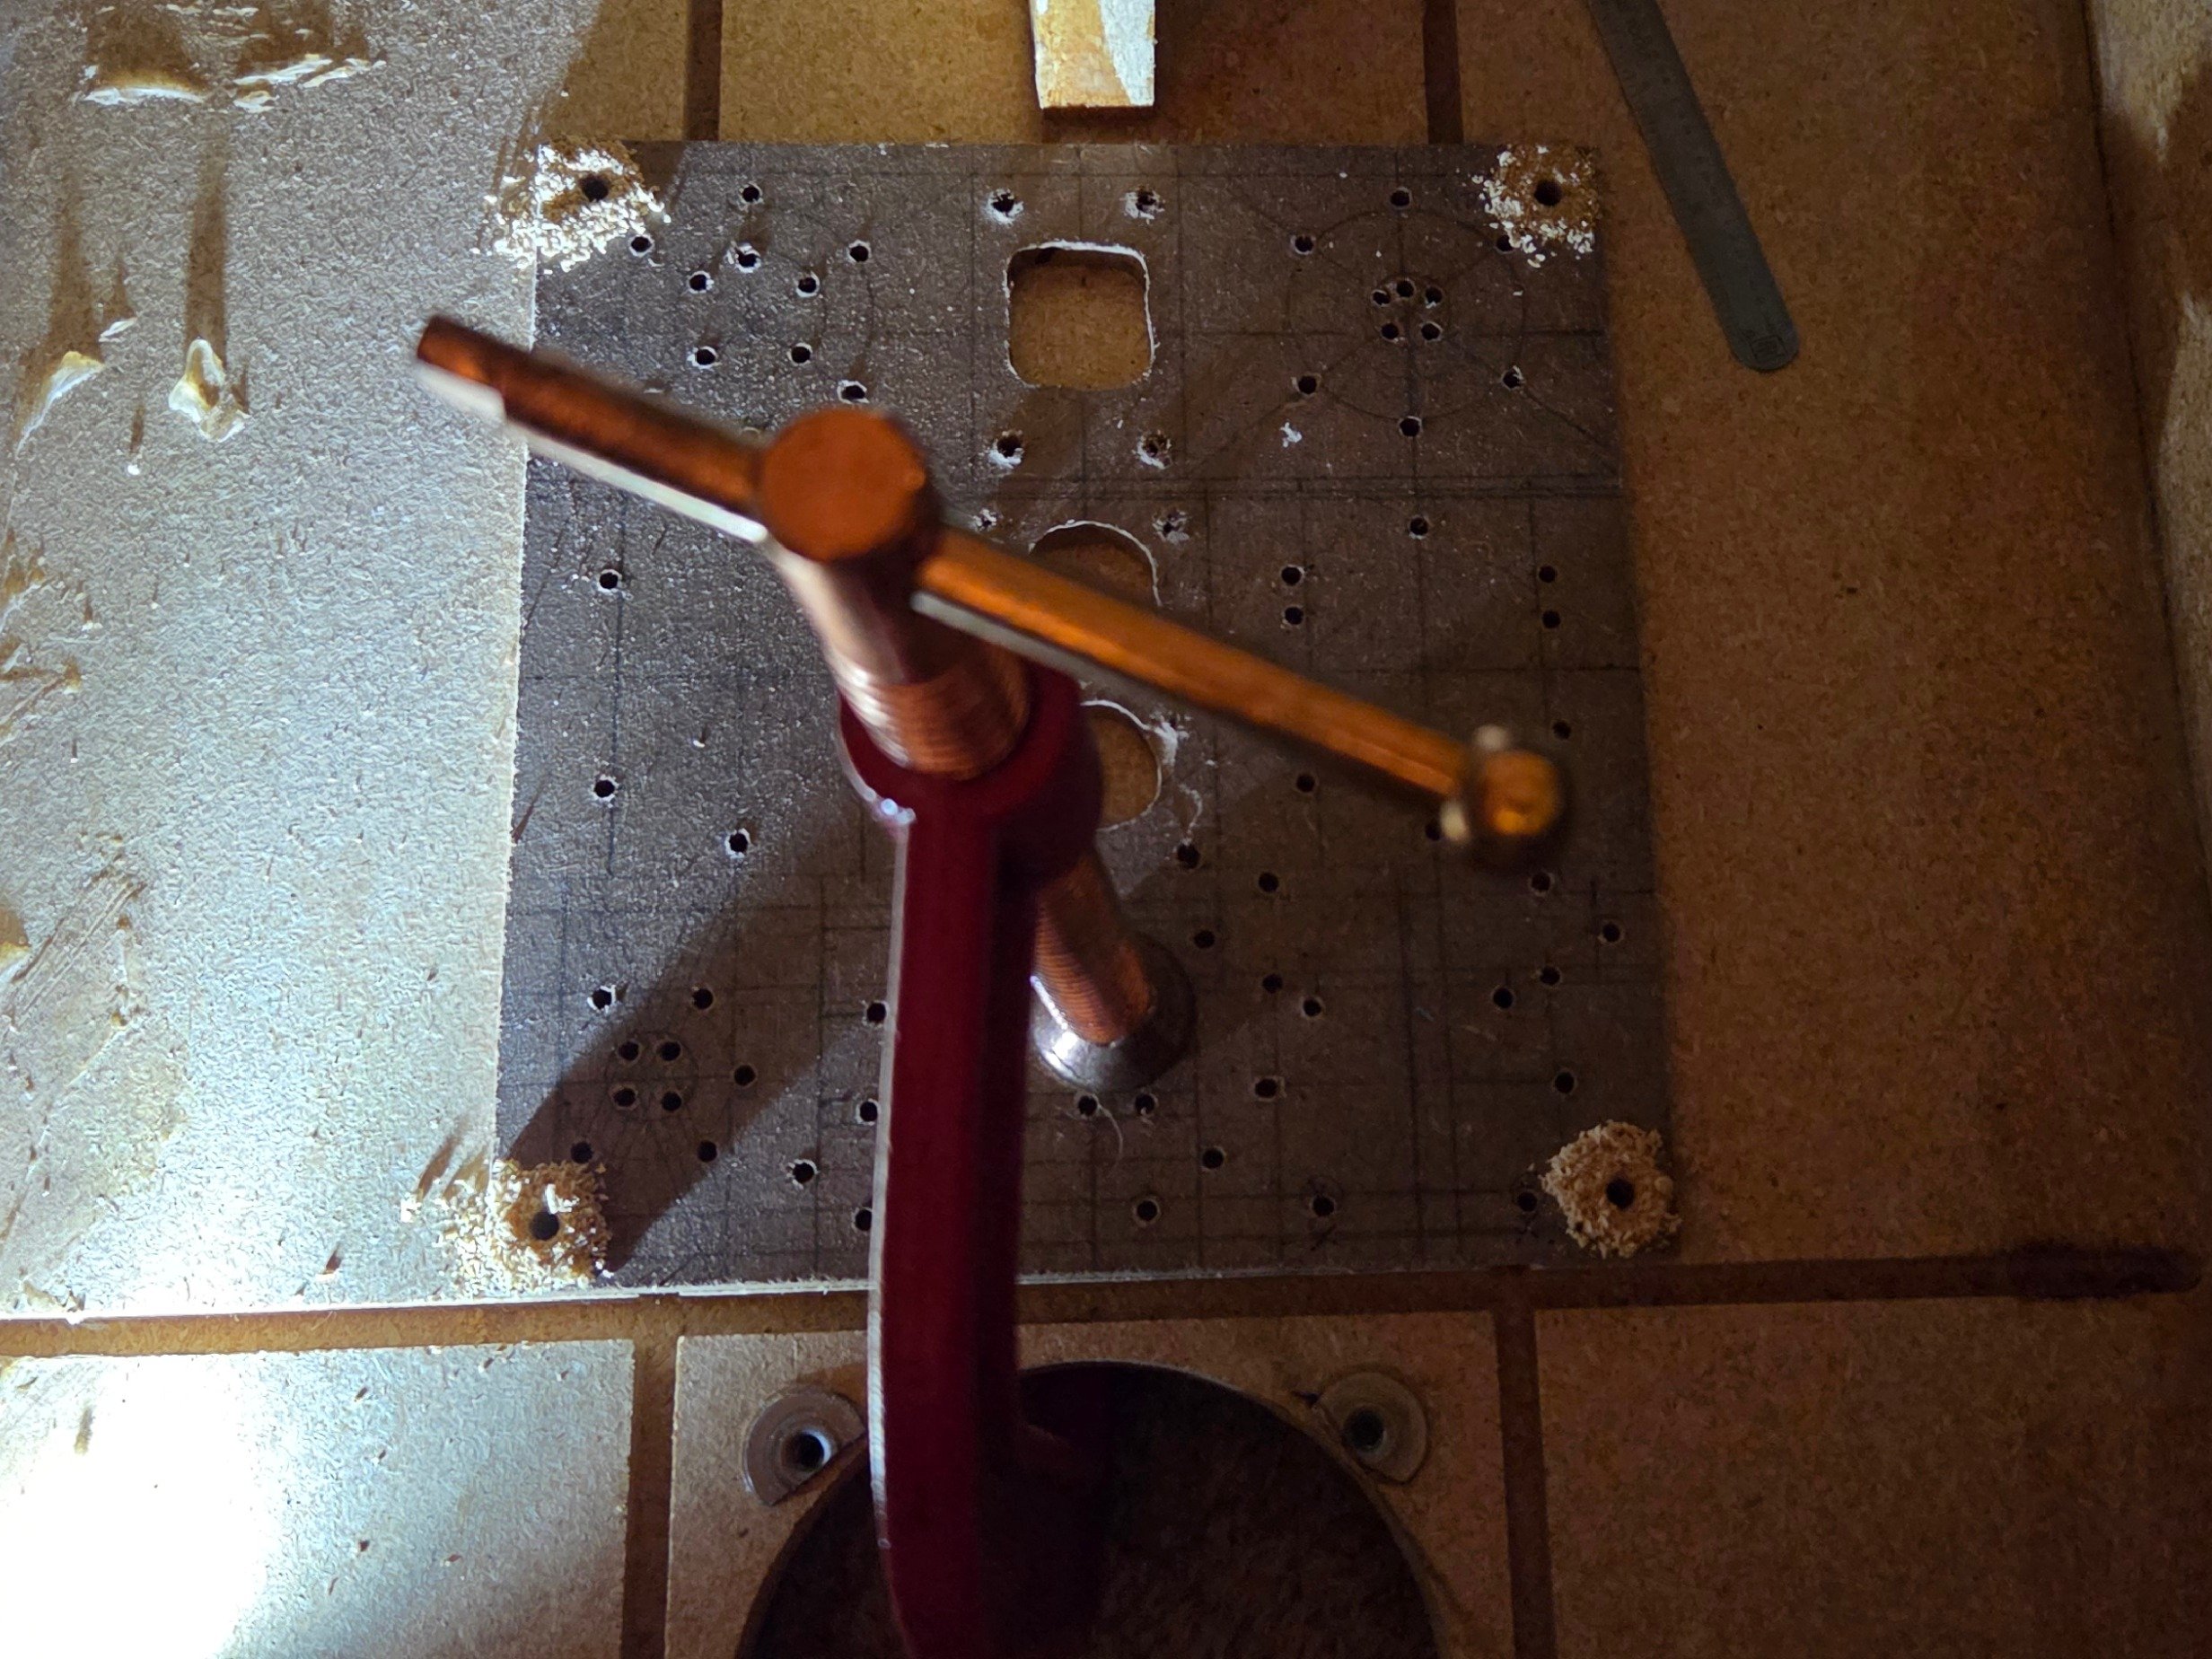
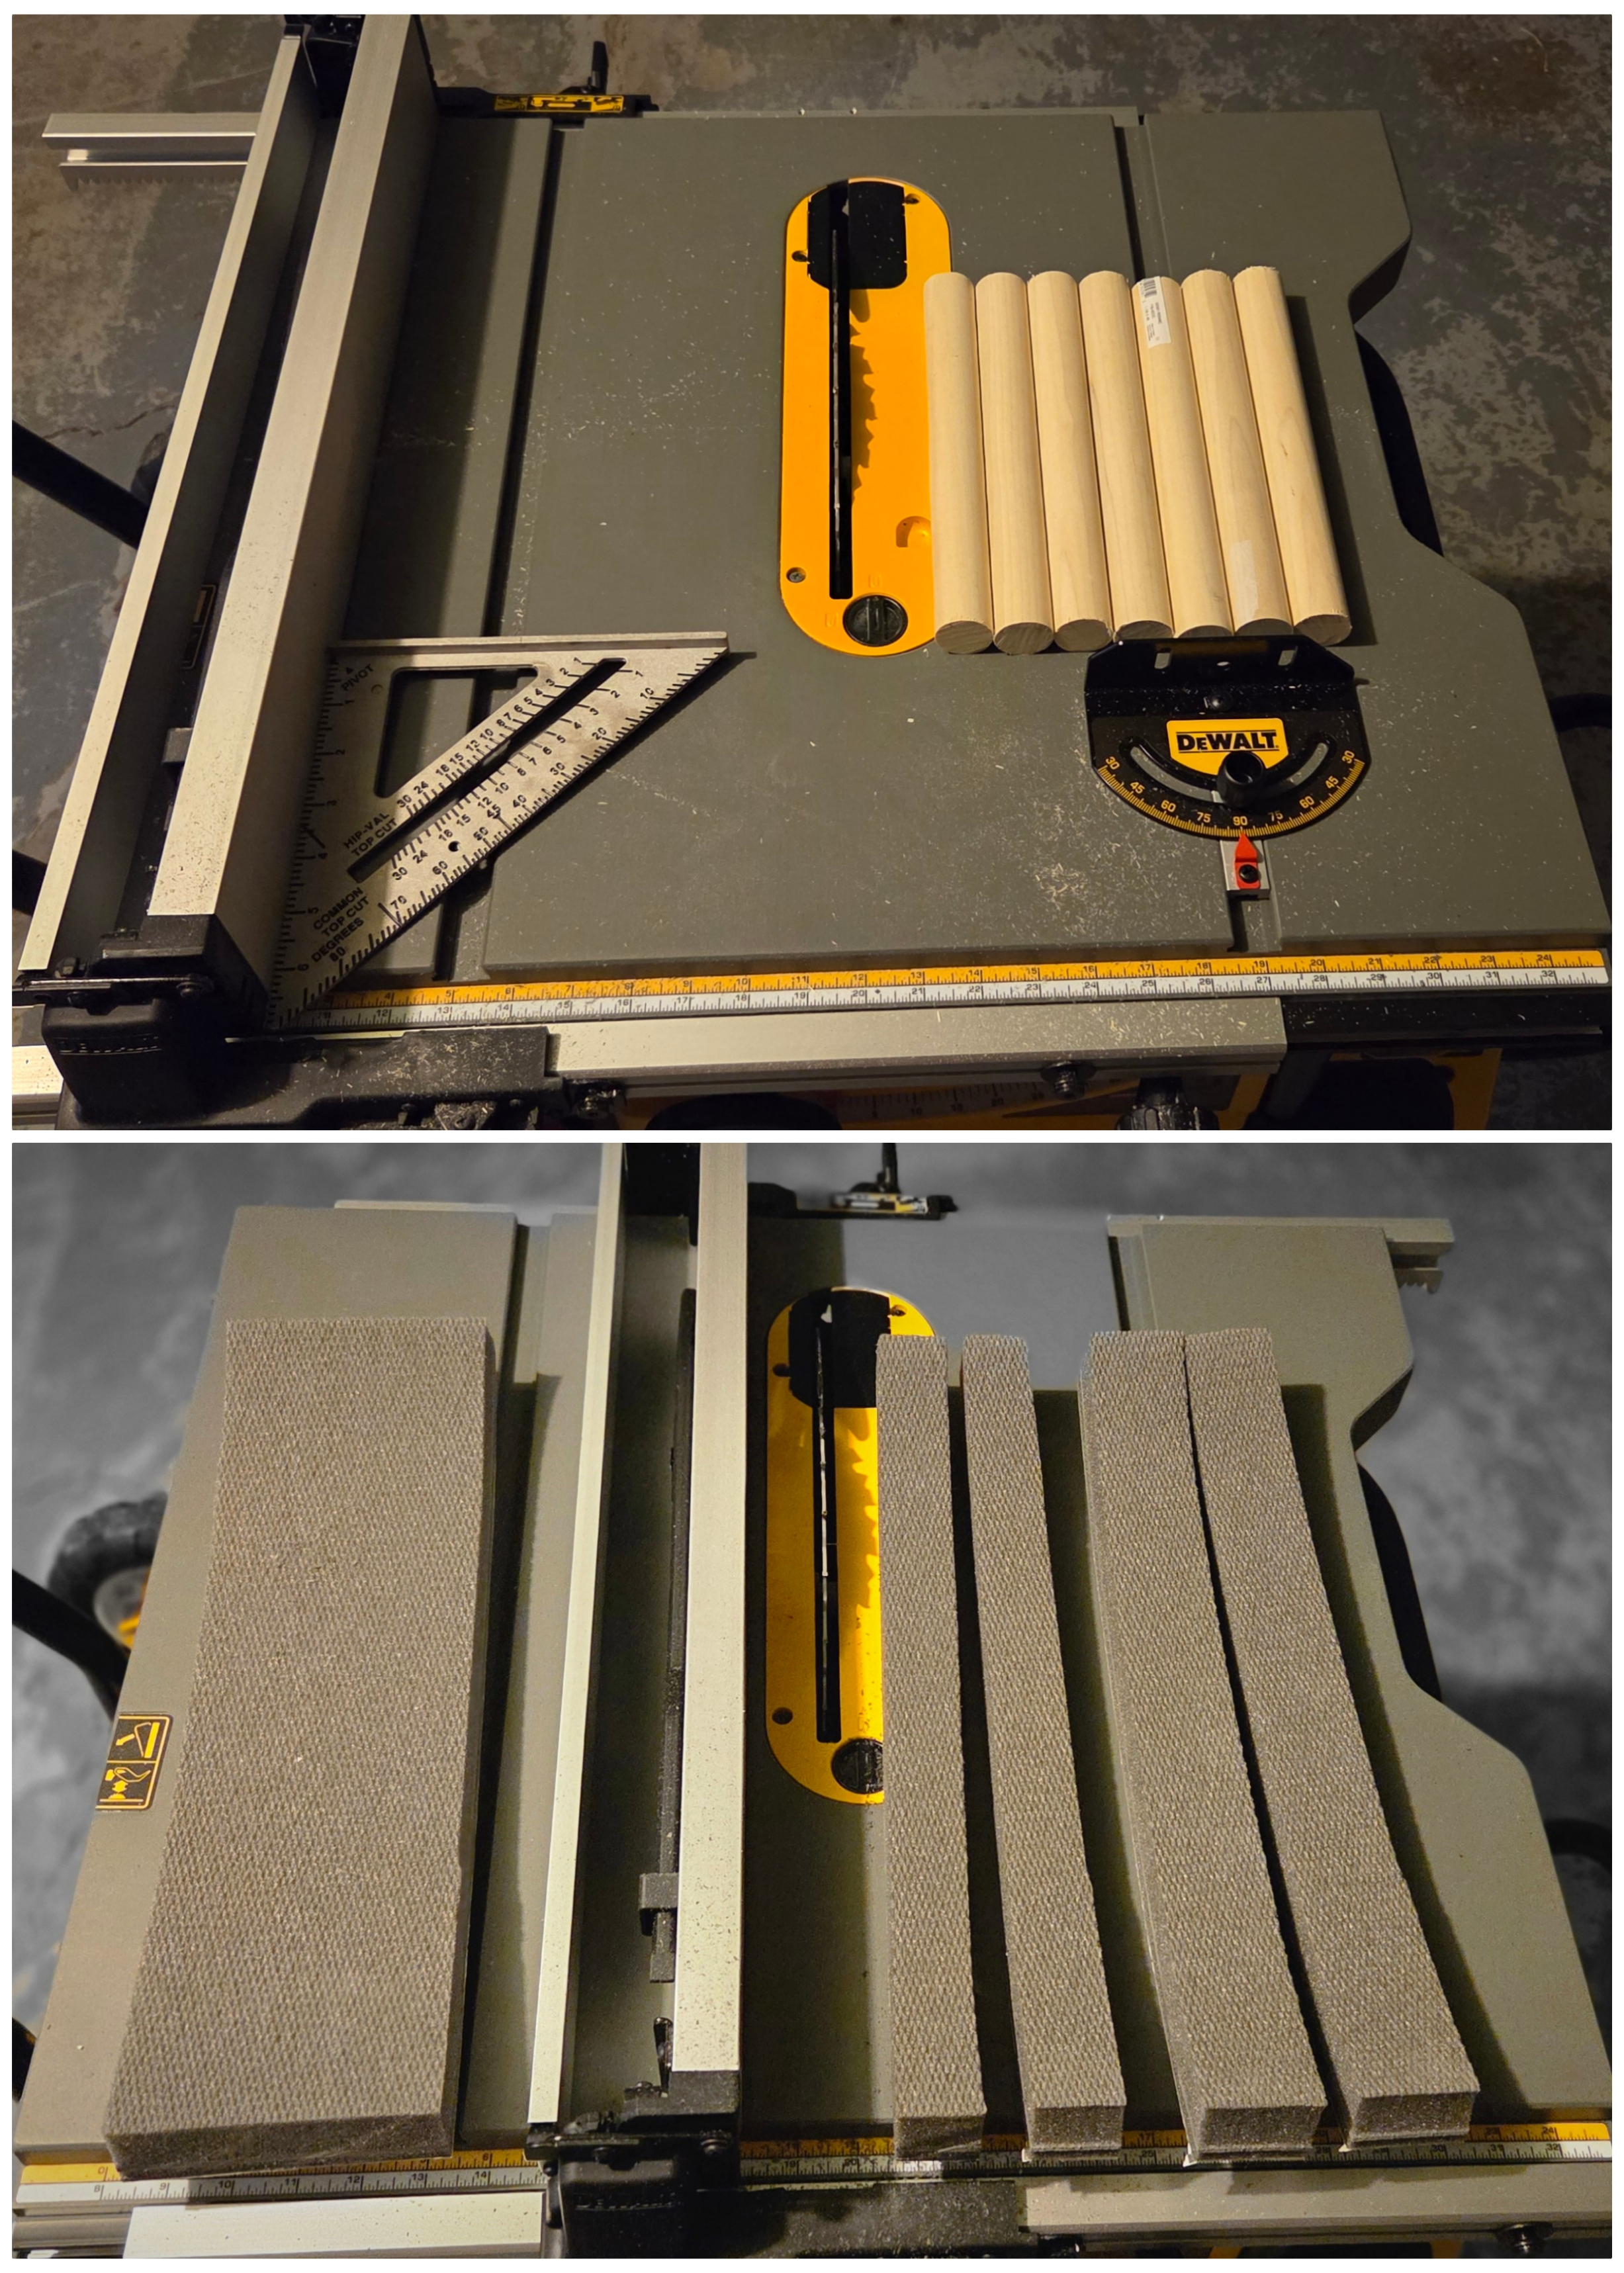
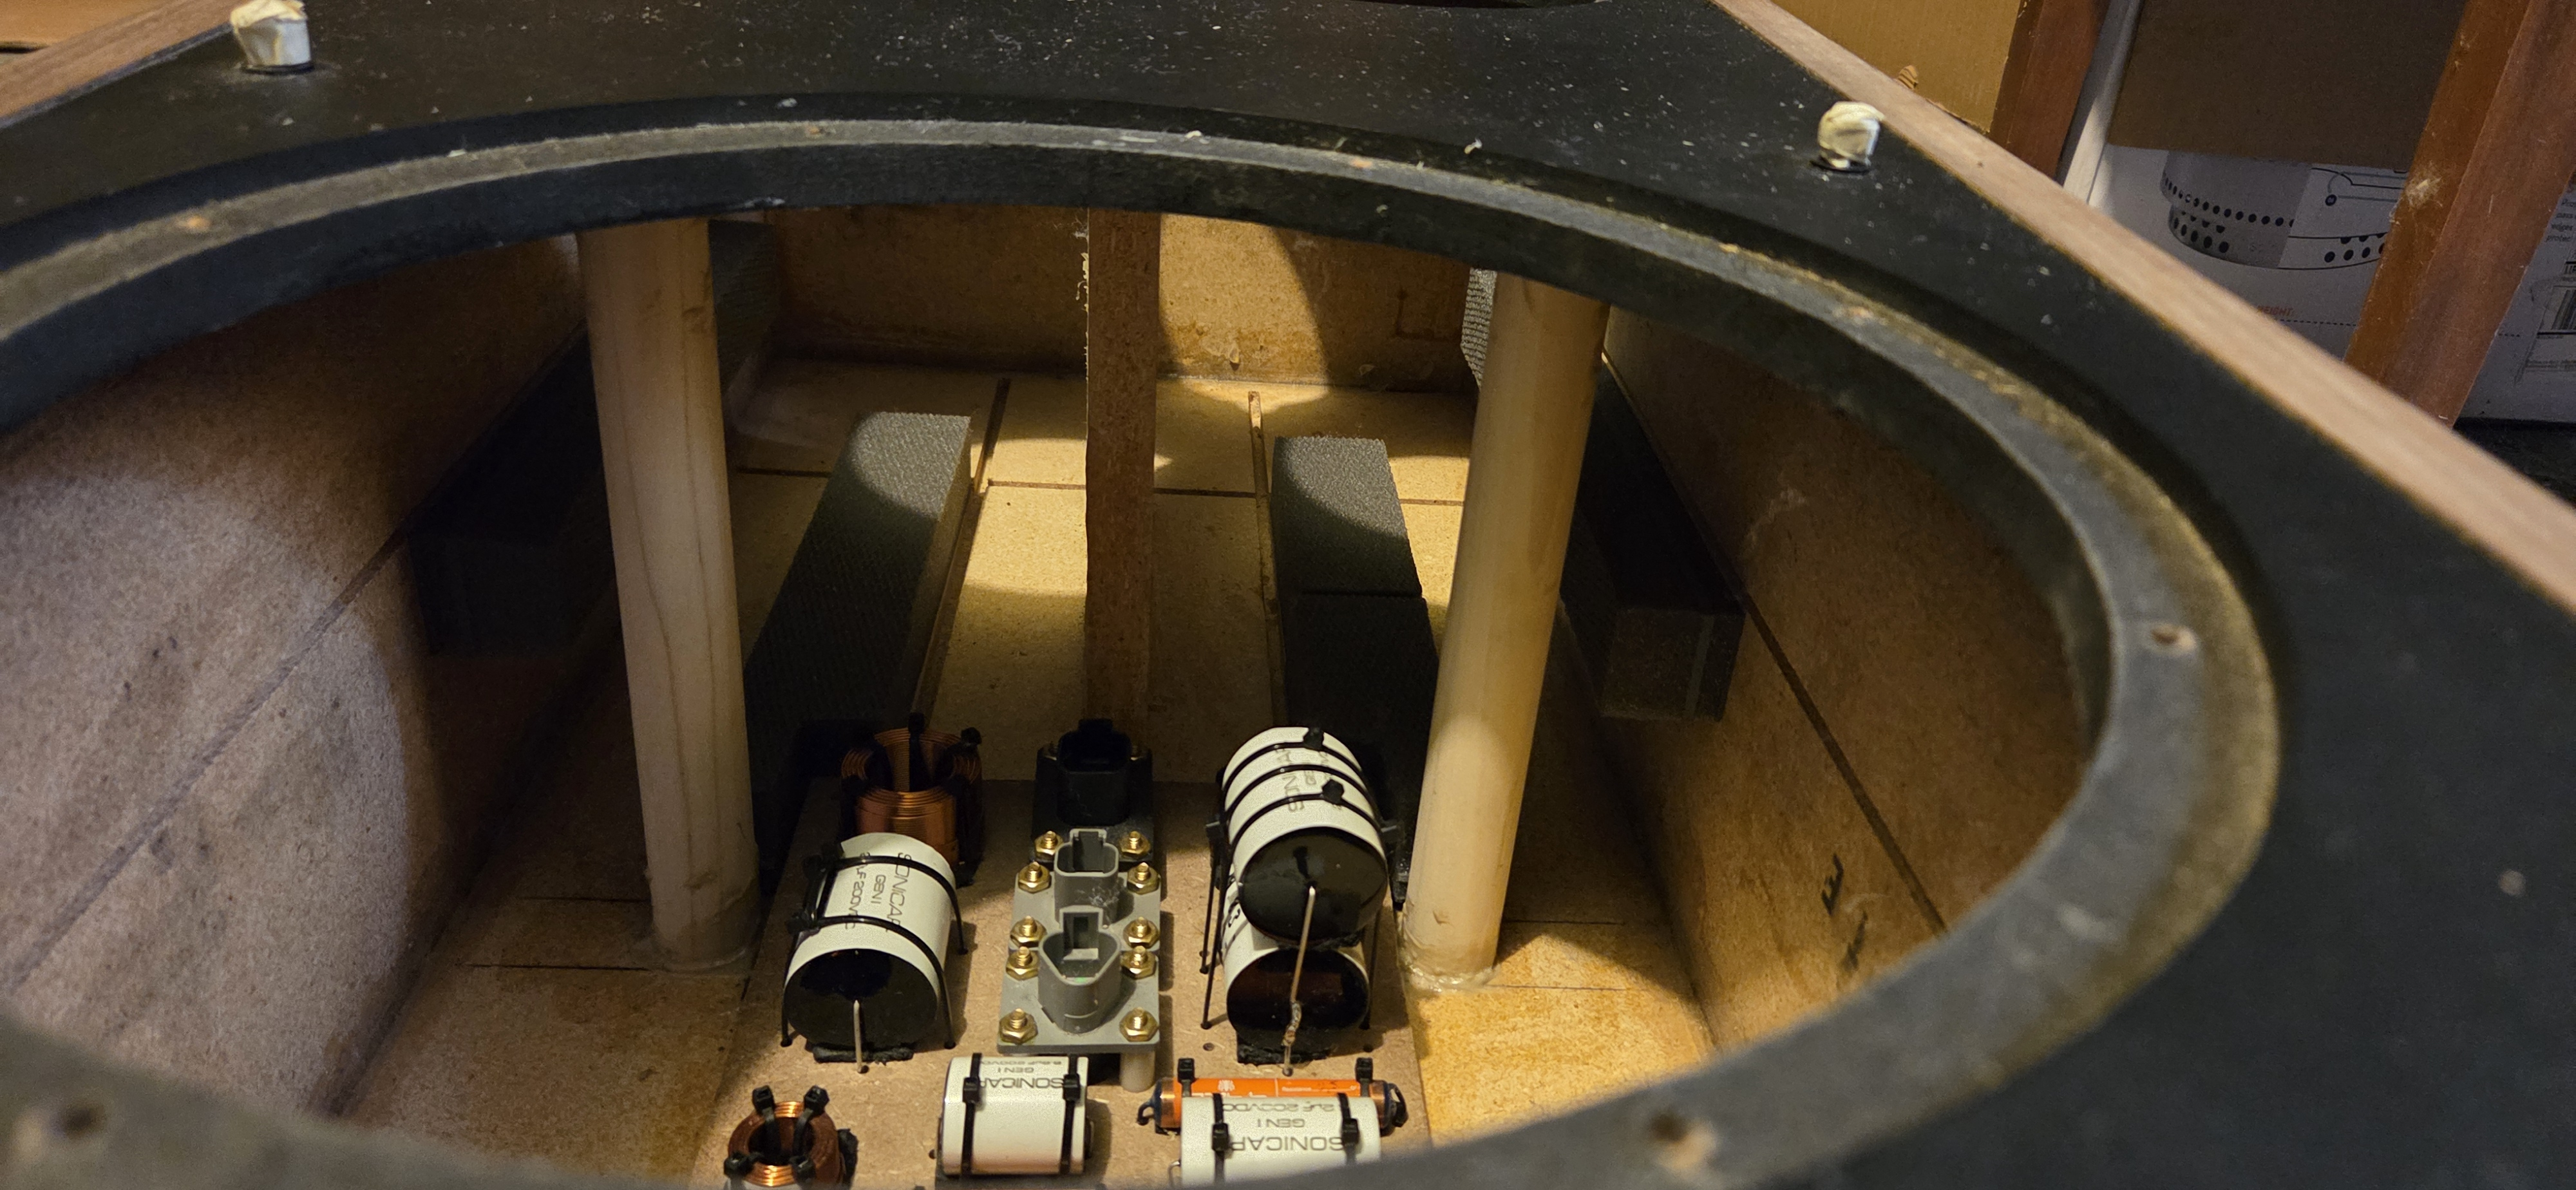
-
Looking nice!
You're reminding me that I've got a set of inductors that have been waiting to be installed in my 2BTL's for... well, let's just say I've had them for a while.
Have fun!Jay
SDA 2BTL * McCormack DNA 0.5 amp * Oppo BDP-93 * Modded Adcom GDA-600 DAC * Rythmik F8 (x2)
Micro Seiki DQ-50 * Mitsubishi LT-30 * Hagerman Cornet 2 Phono
Preamp rotation: Krell KSL (SCompRacer recapped) * Manley Shrimp * PS Audio 5.0 -
^ I hear ya, still haven't installed the resistors & caps in my SDA SRS's.
They've been sitting here looking at me, nagging, for about a year now..... -
That's why I opted to get everything done all at once. It's a lot but I deffintately wouldn't want to be in and out of here at any point once I'm done with this. I begrudgingly finished the inductor mount last night and drilled holes in the cabinets, simply because I already had everything out and ready to get it done.
I just hope my B&K Reference 200.2 can handle the lower impedance with the new inductor. Otherwise I'll have to swap back to the old inductor. -
I've pushed sda with the c coil using a 50 dollar pioneer receiver
Should be good!- Not Tom ::::::: Any system can play Diana Krall. Only the best can play Limp Bizkit. -
ok, good- appreciate the clarification!
-
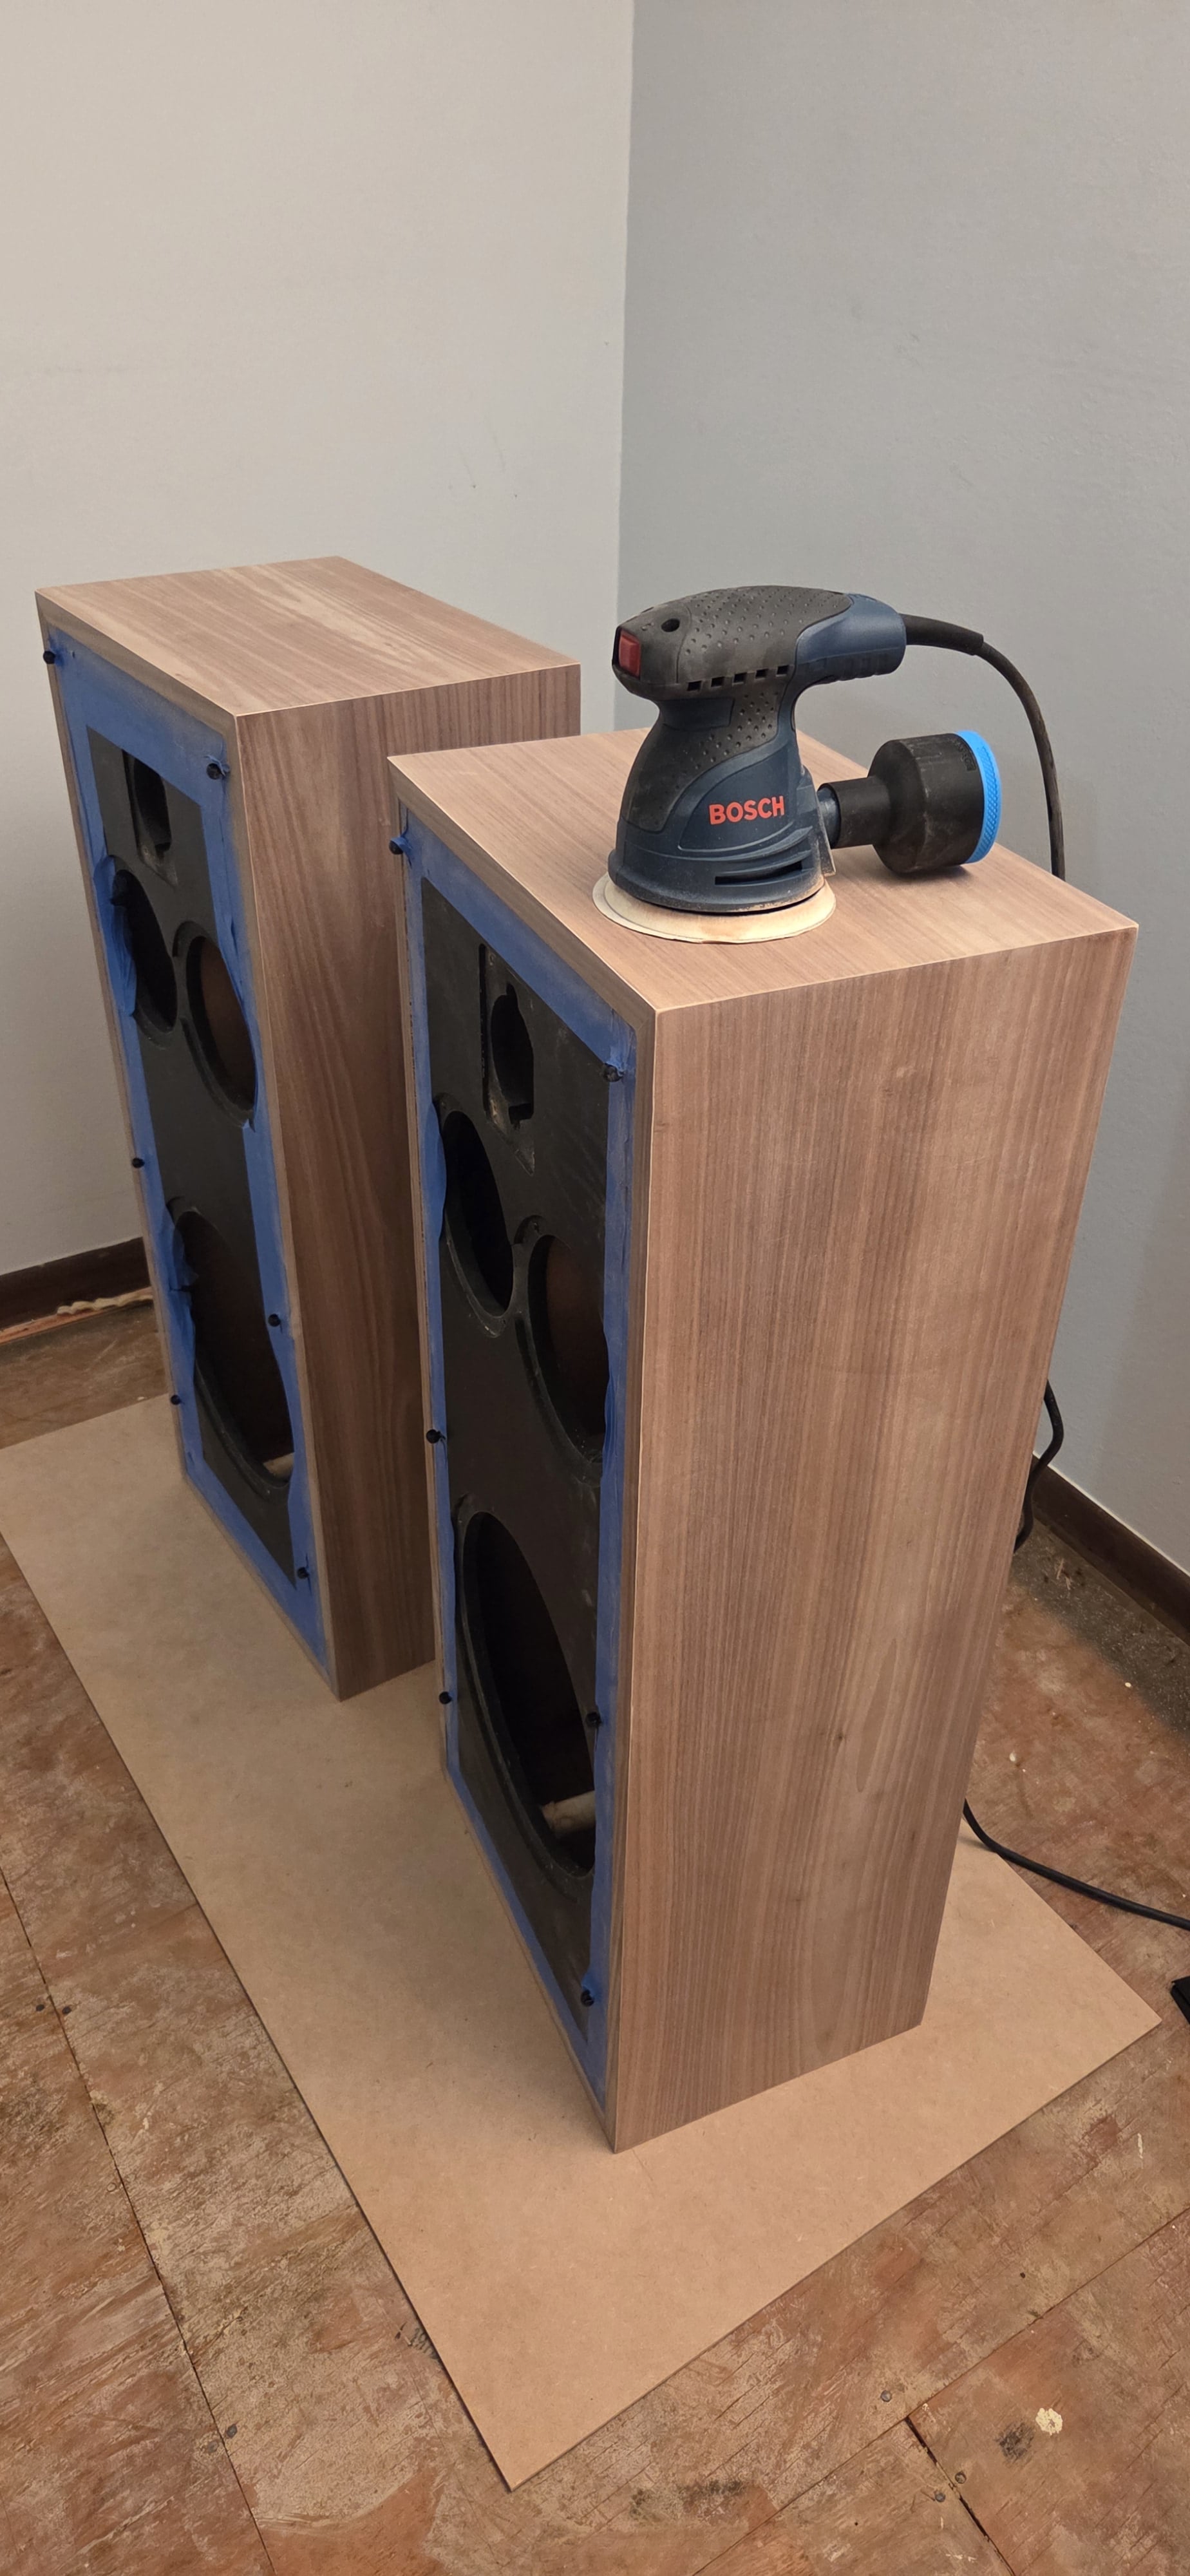
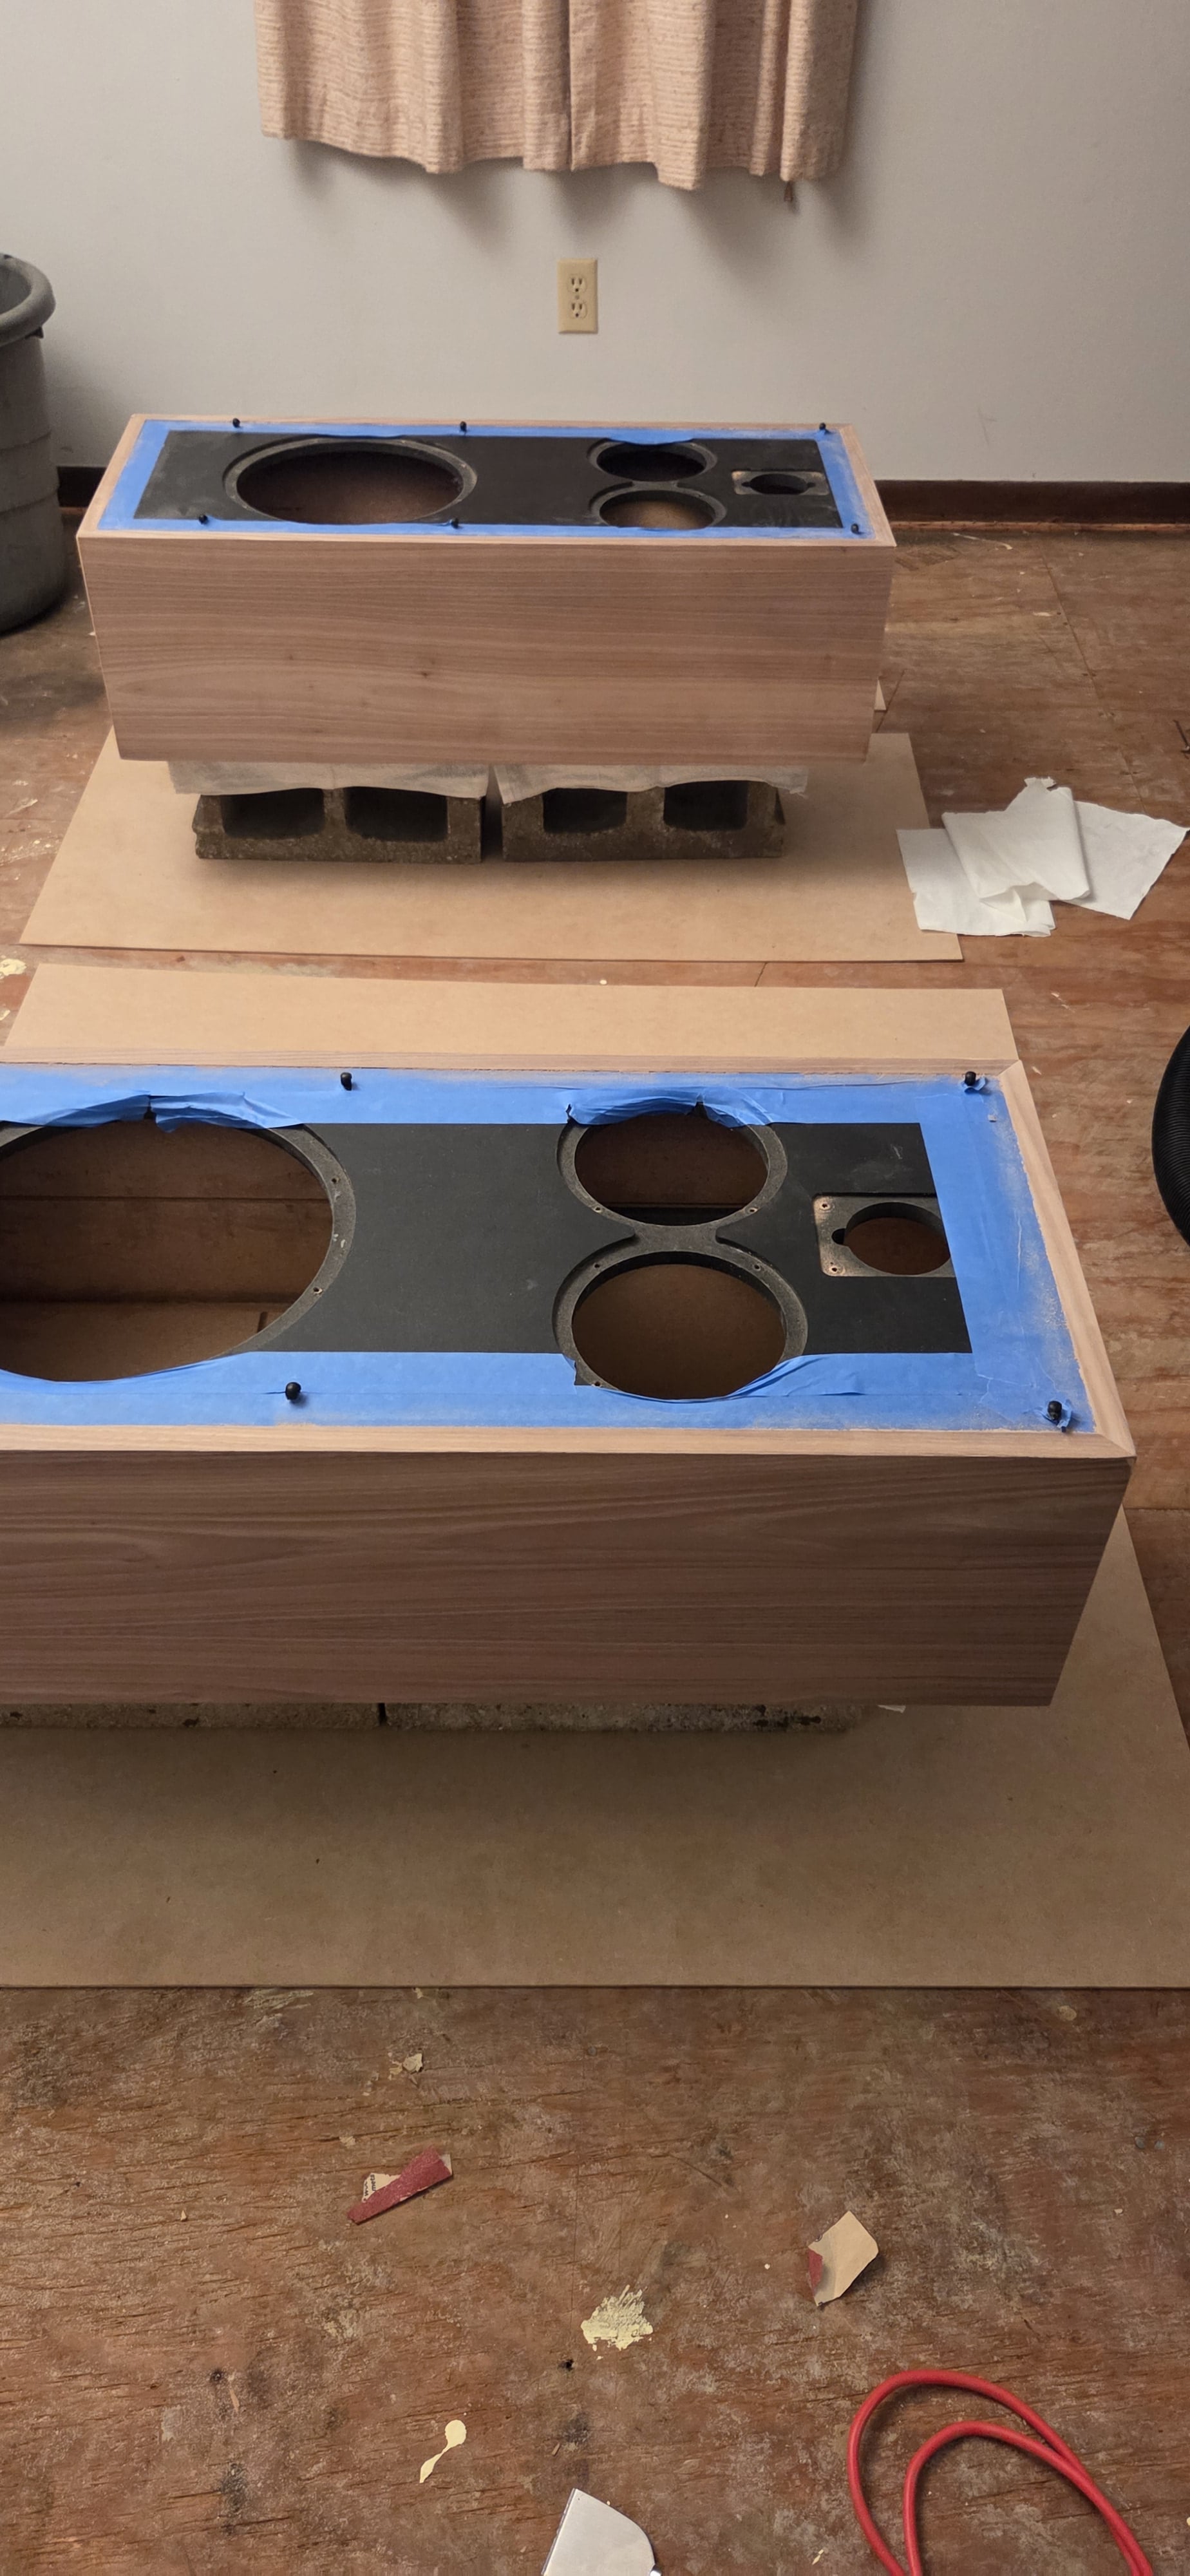
I've decided that it's about time I get to work on this neglected project again. I left off having installed a new walnut veneer. I used a 4x10 sheet of wood backed (3/64") walnut-veneer and installed using DAP Weldwood Contact Cement. I spent last night sanding to 150 grit. I wish a was a bit easier on the sanding (knicked a few corners with a bit too much emphasis). I am spending today finishing with Rubio Monocoat 2c.

-
Never use an orbital sander for something like this. Hand sand only in the direction of the grain.
-
You can see some swirls in one of those photos. I think that's mostly dust. After scouring and cleaning with mineral spirits it's all uniform and clean. It was a fairly heavy veneer and manufacturer guidance gave me the OK to use the power sander. I used a hand sander for the edges/corners and edge banding. Hand sanding is the safer route. Using the orbital sander was my choice.
-
Well you didn't start off with 60 grit, that's a no-no lol. Looks nice.Don't take experimental gene therapies from known eugenicists.
-
Yep, started and ended at 150 grit.
Ultimately wish I would have been more careful with the orbital sander. However I don't need this to be the Mona Lisa. I need the project to be done
-
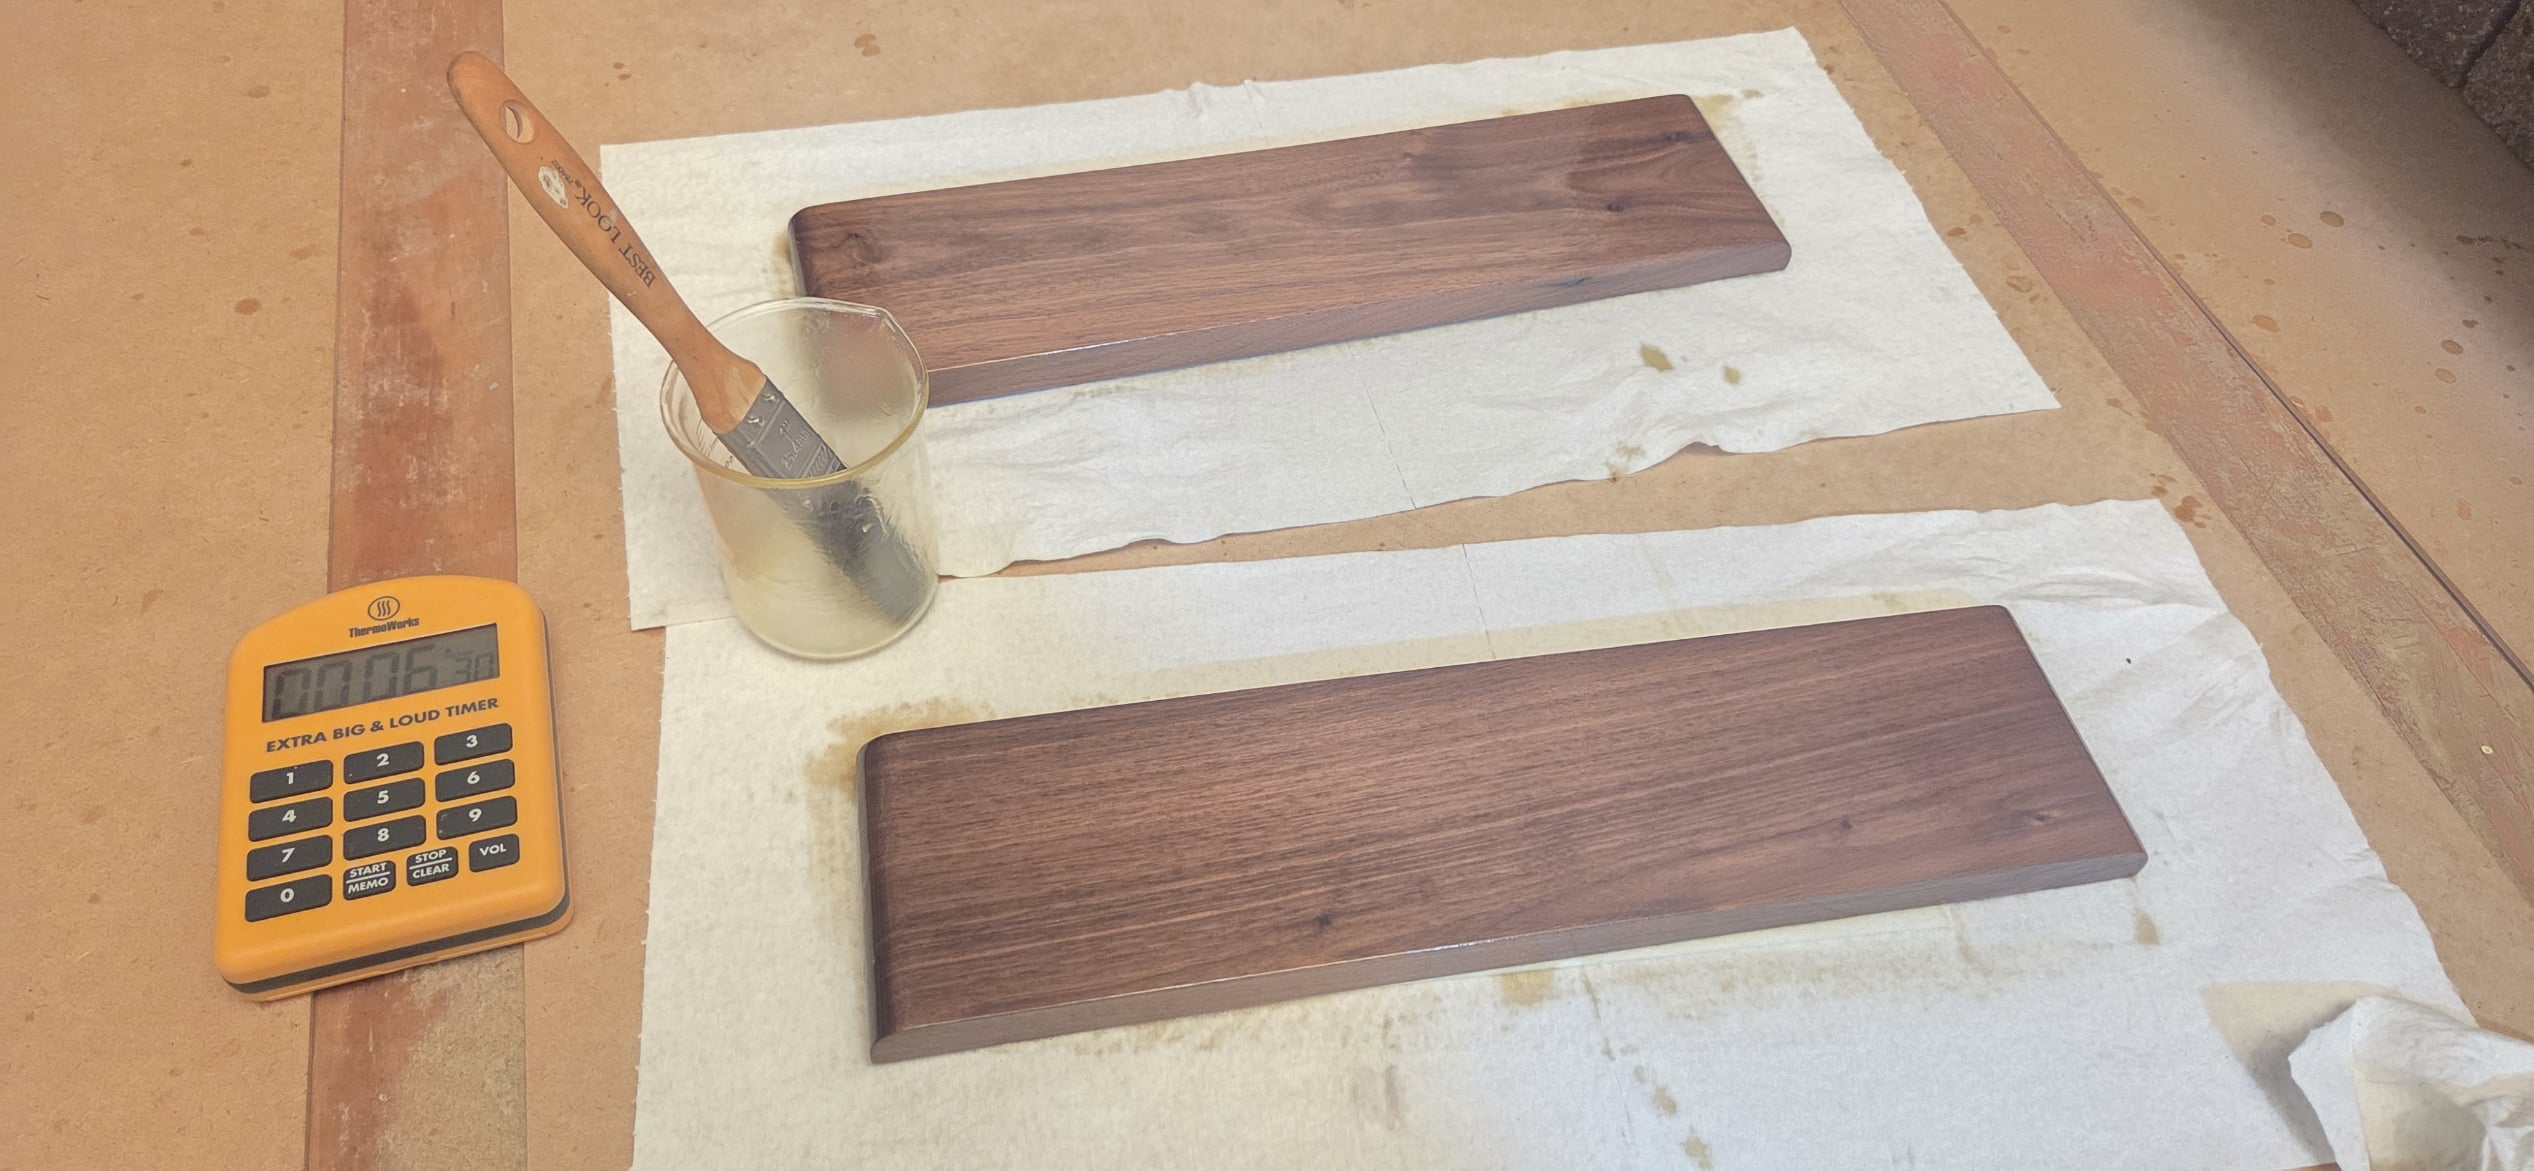
Since I used a thicker veneer, I wasn't able to veneer these trim pieces. I cut some walnut to size as a replacement. It's gonna look awesome guys.
-
There Will Be Bl̶o̶o̶d̶ Swirls
-
A tip about sanding for the future. Do as little as possible, it's highly overrated/overused. A few quick light passes by hand with the 150 would have done the job.
Good luck with the rest, I hope they turn out well for you. -
Outriggers.
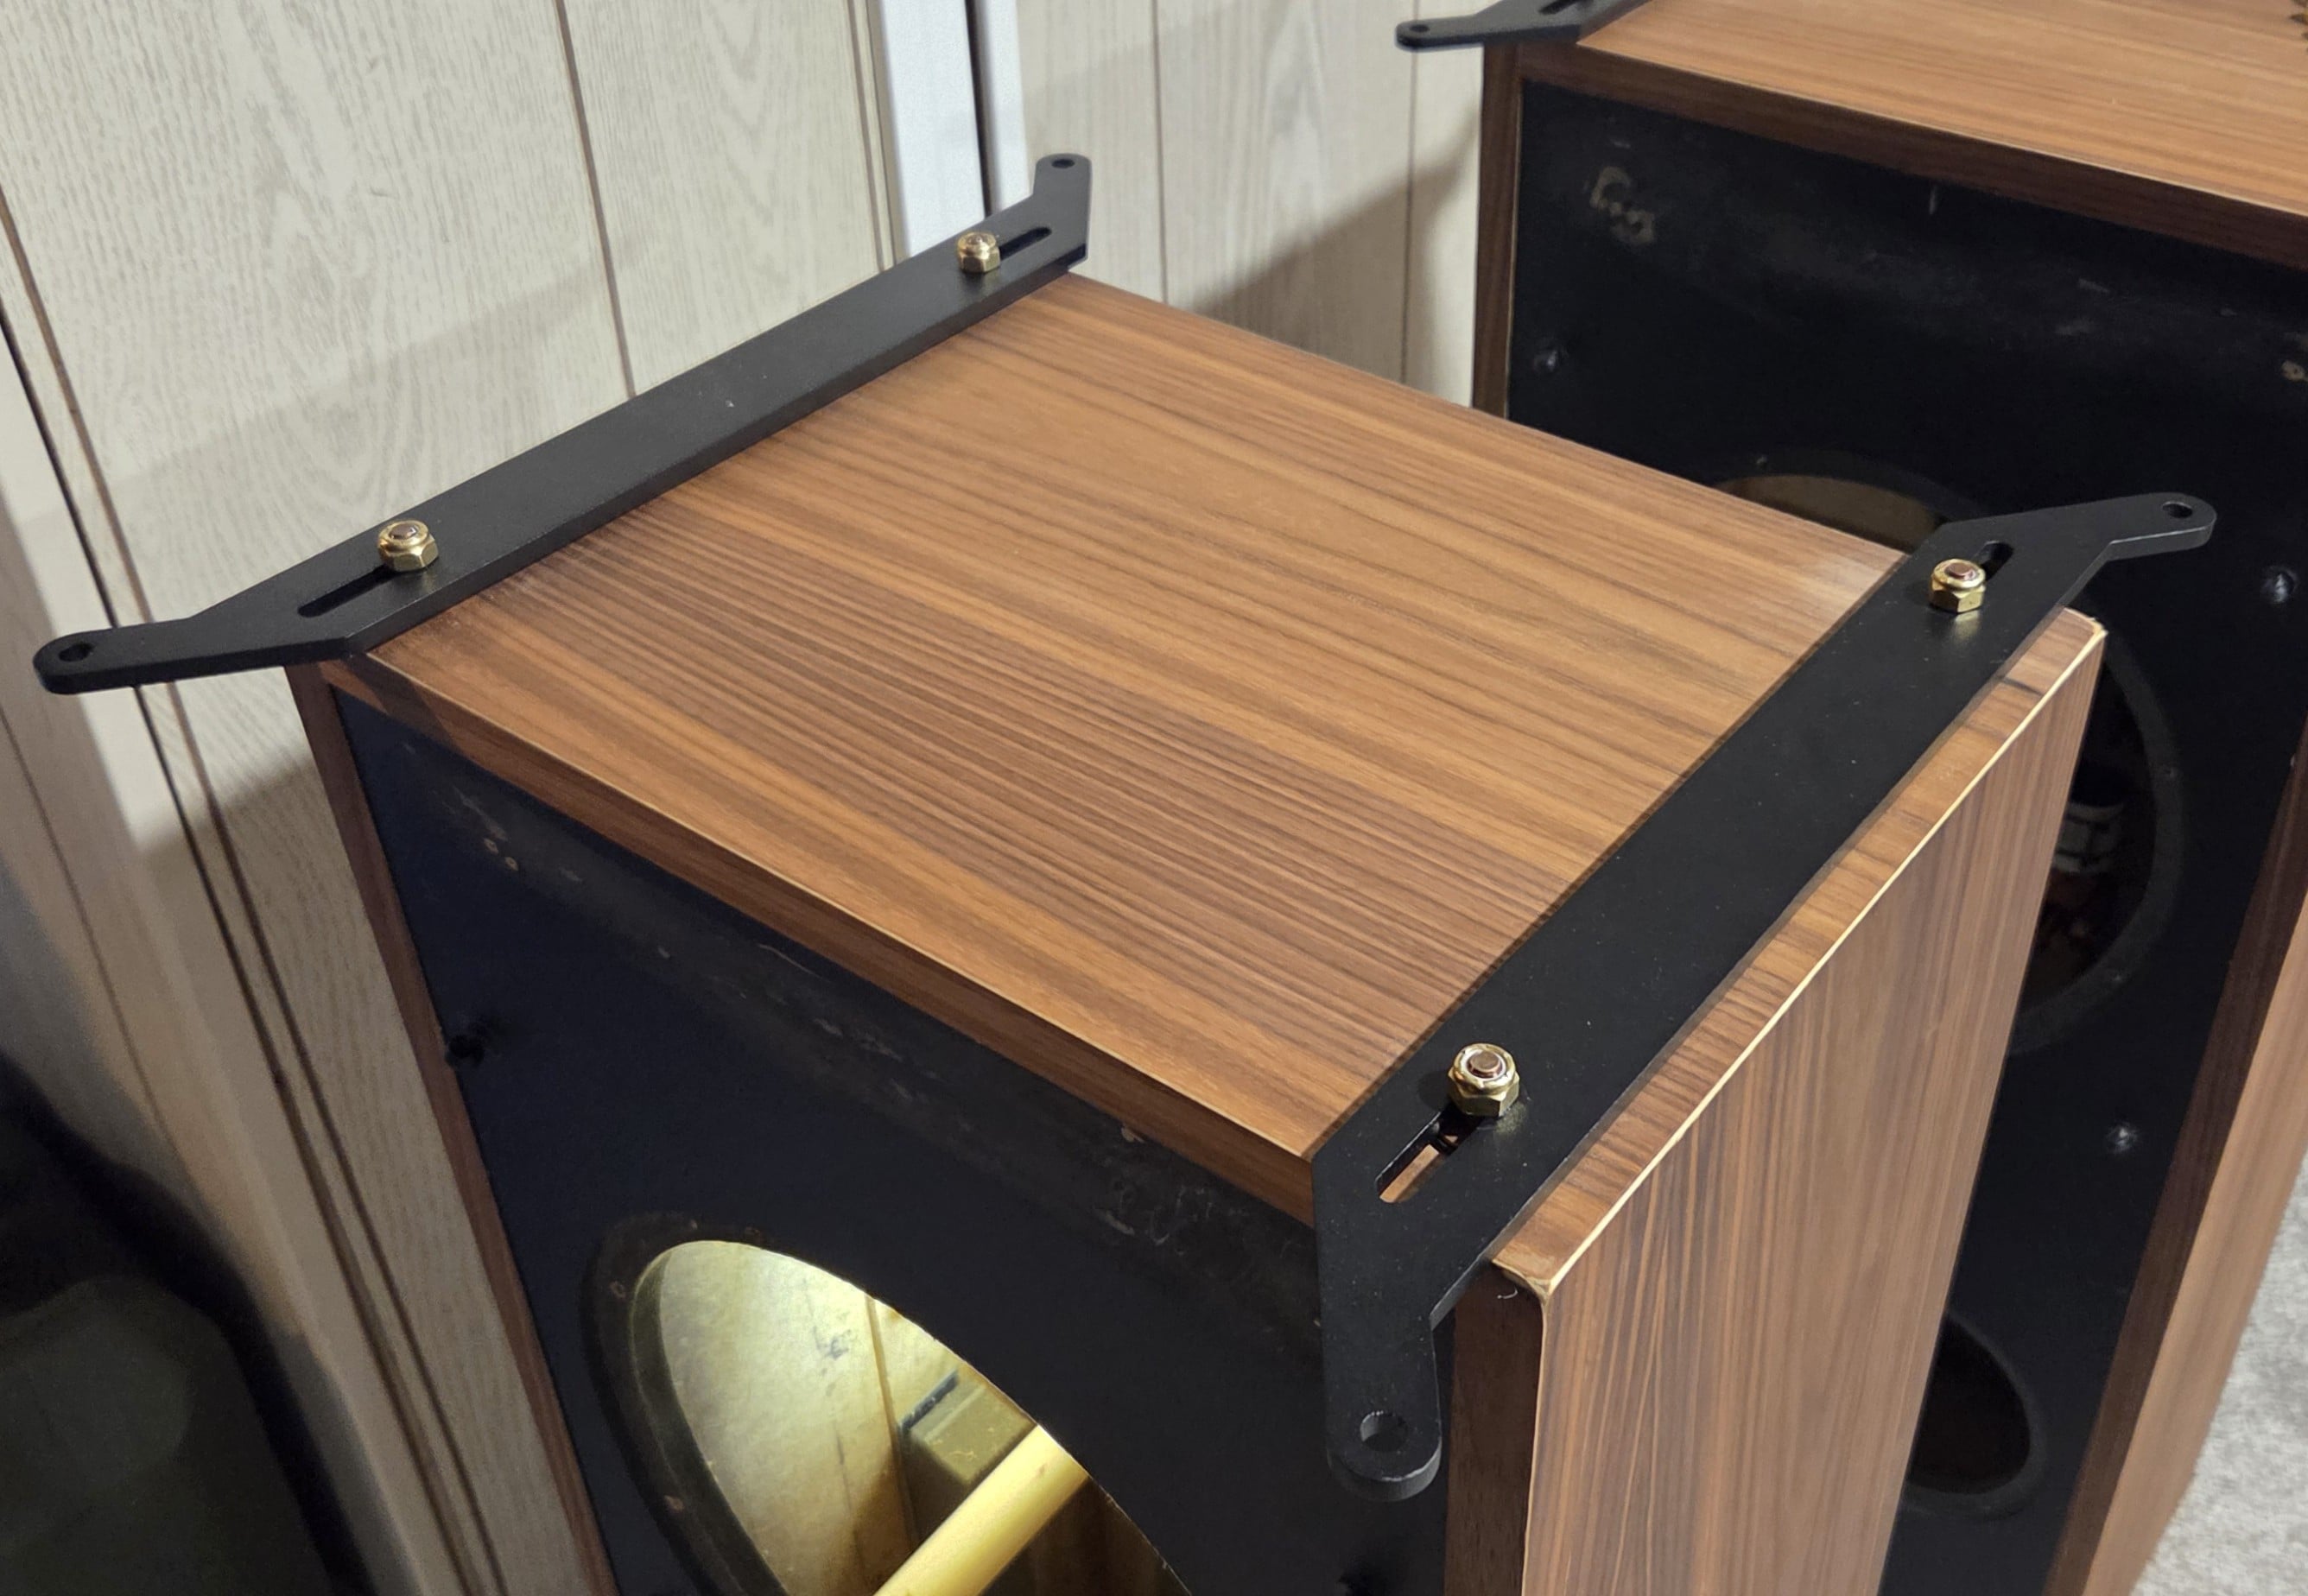
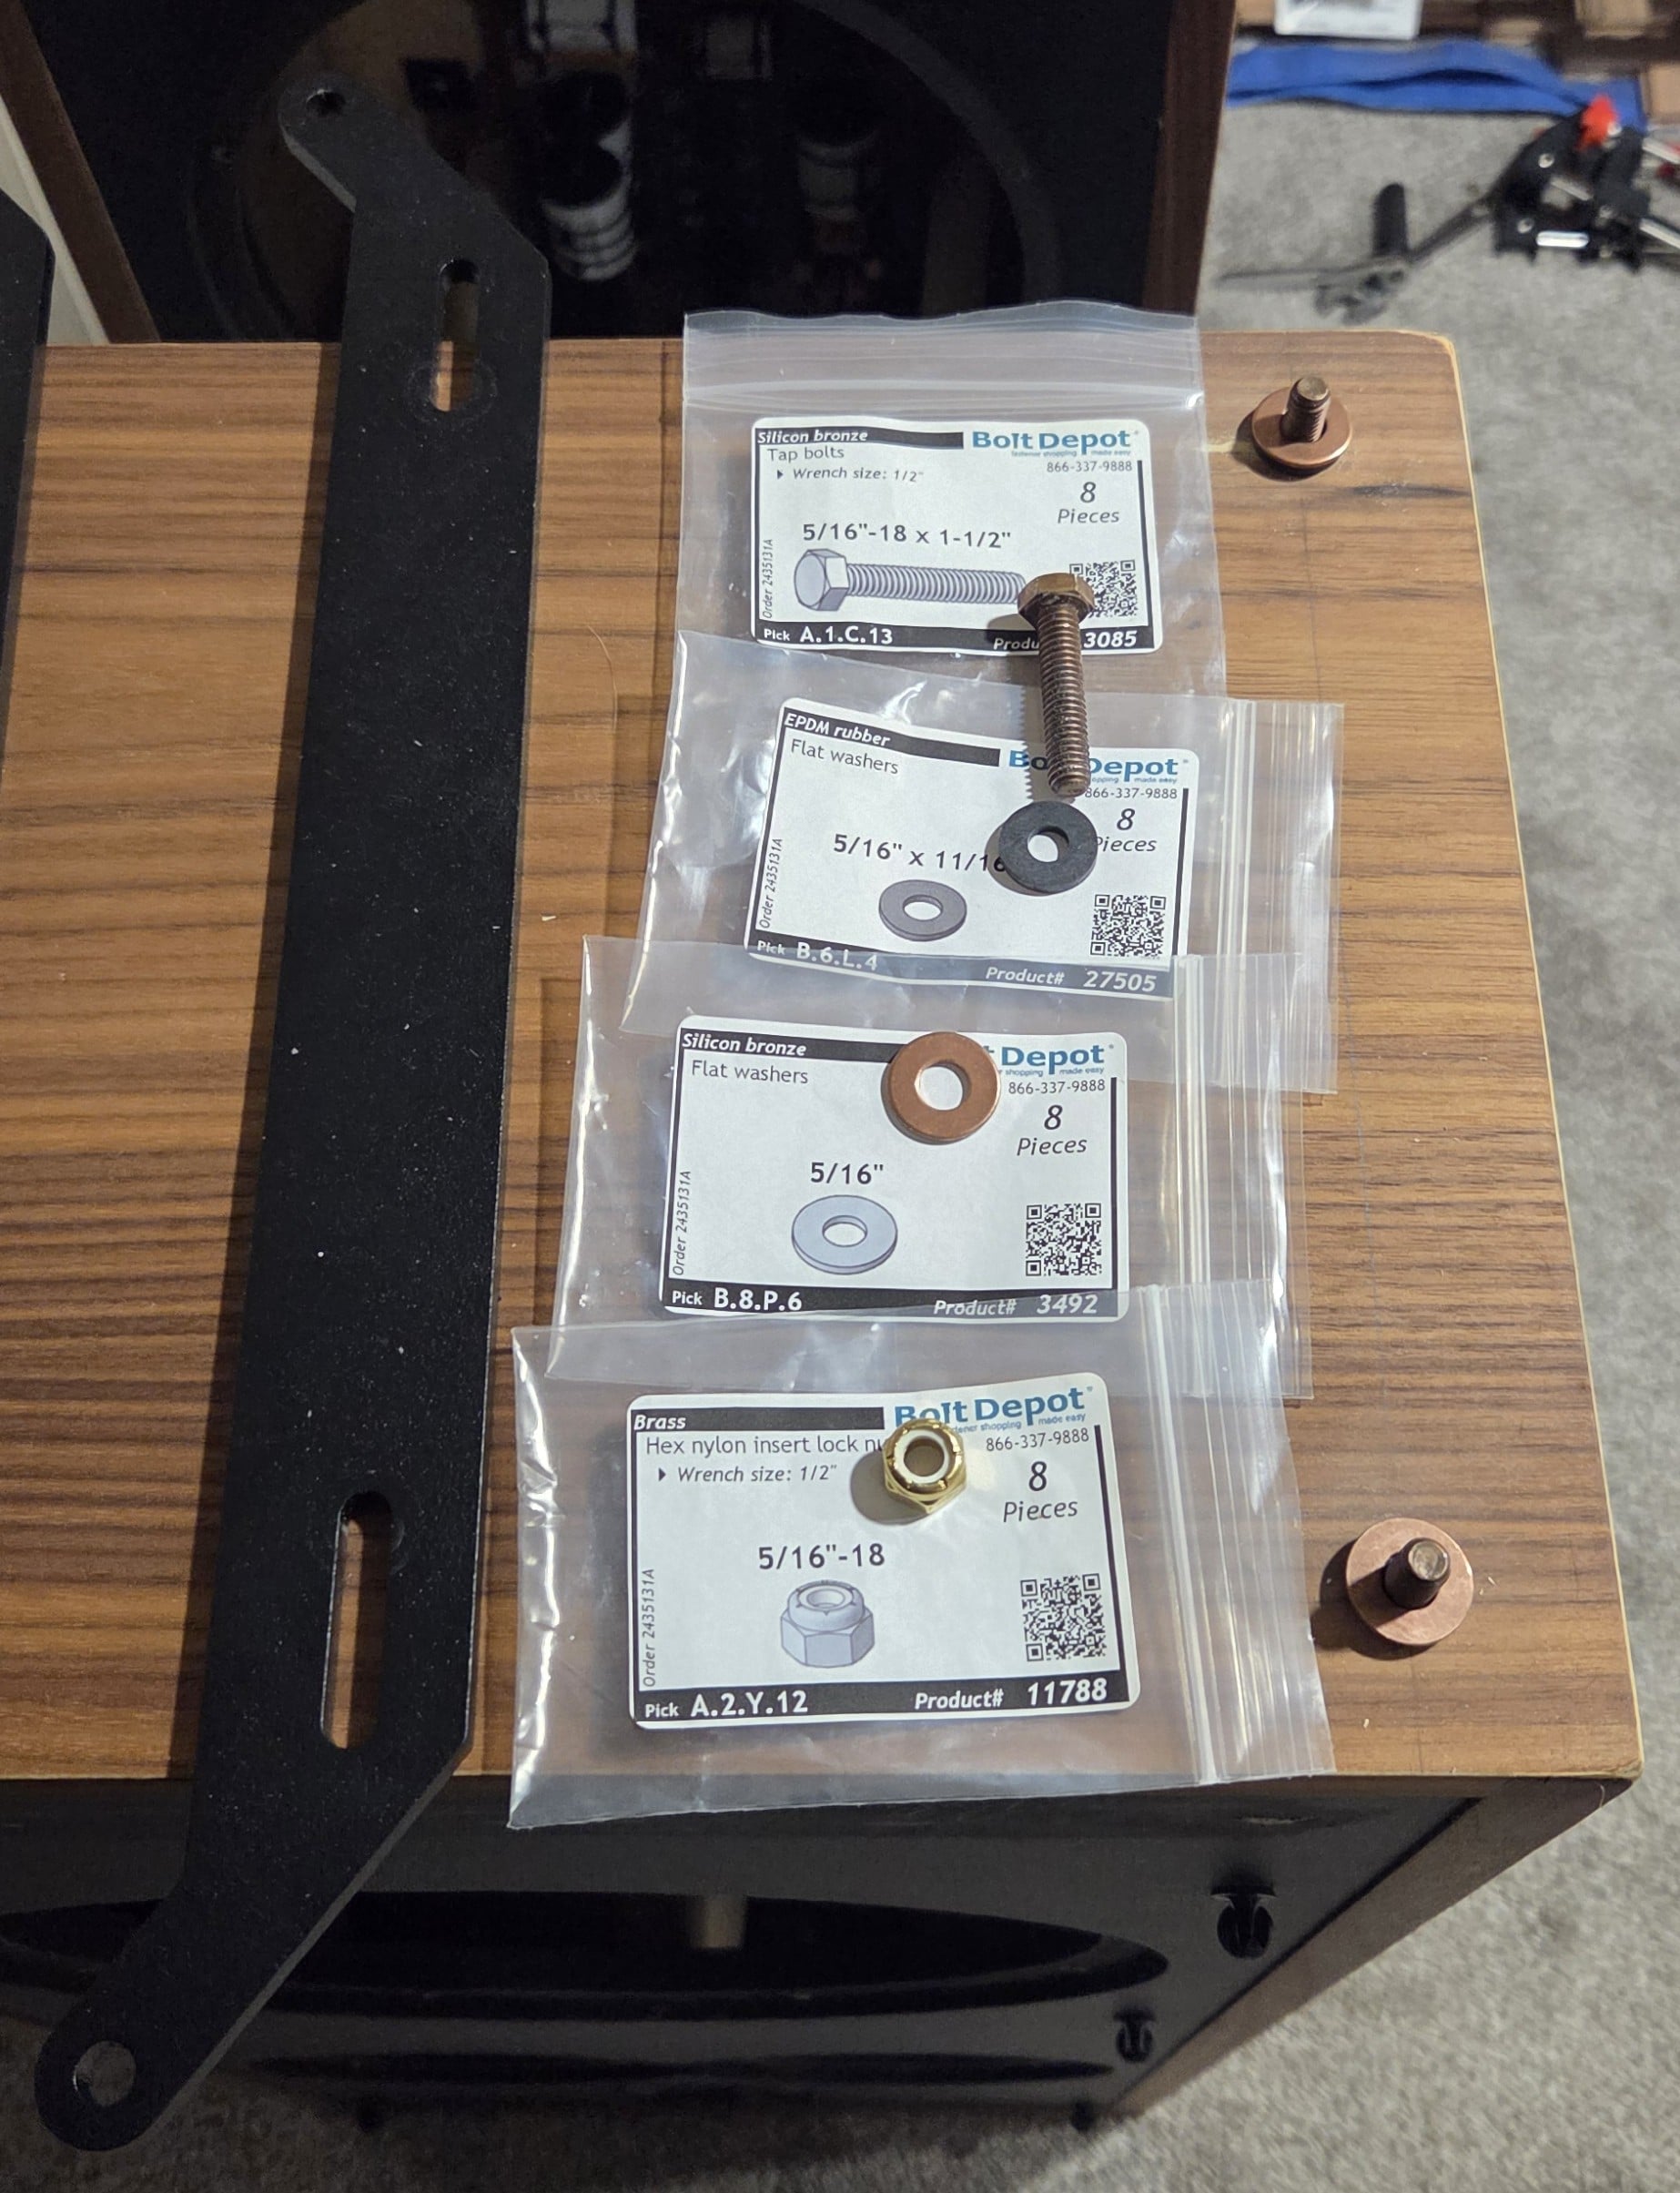
-
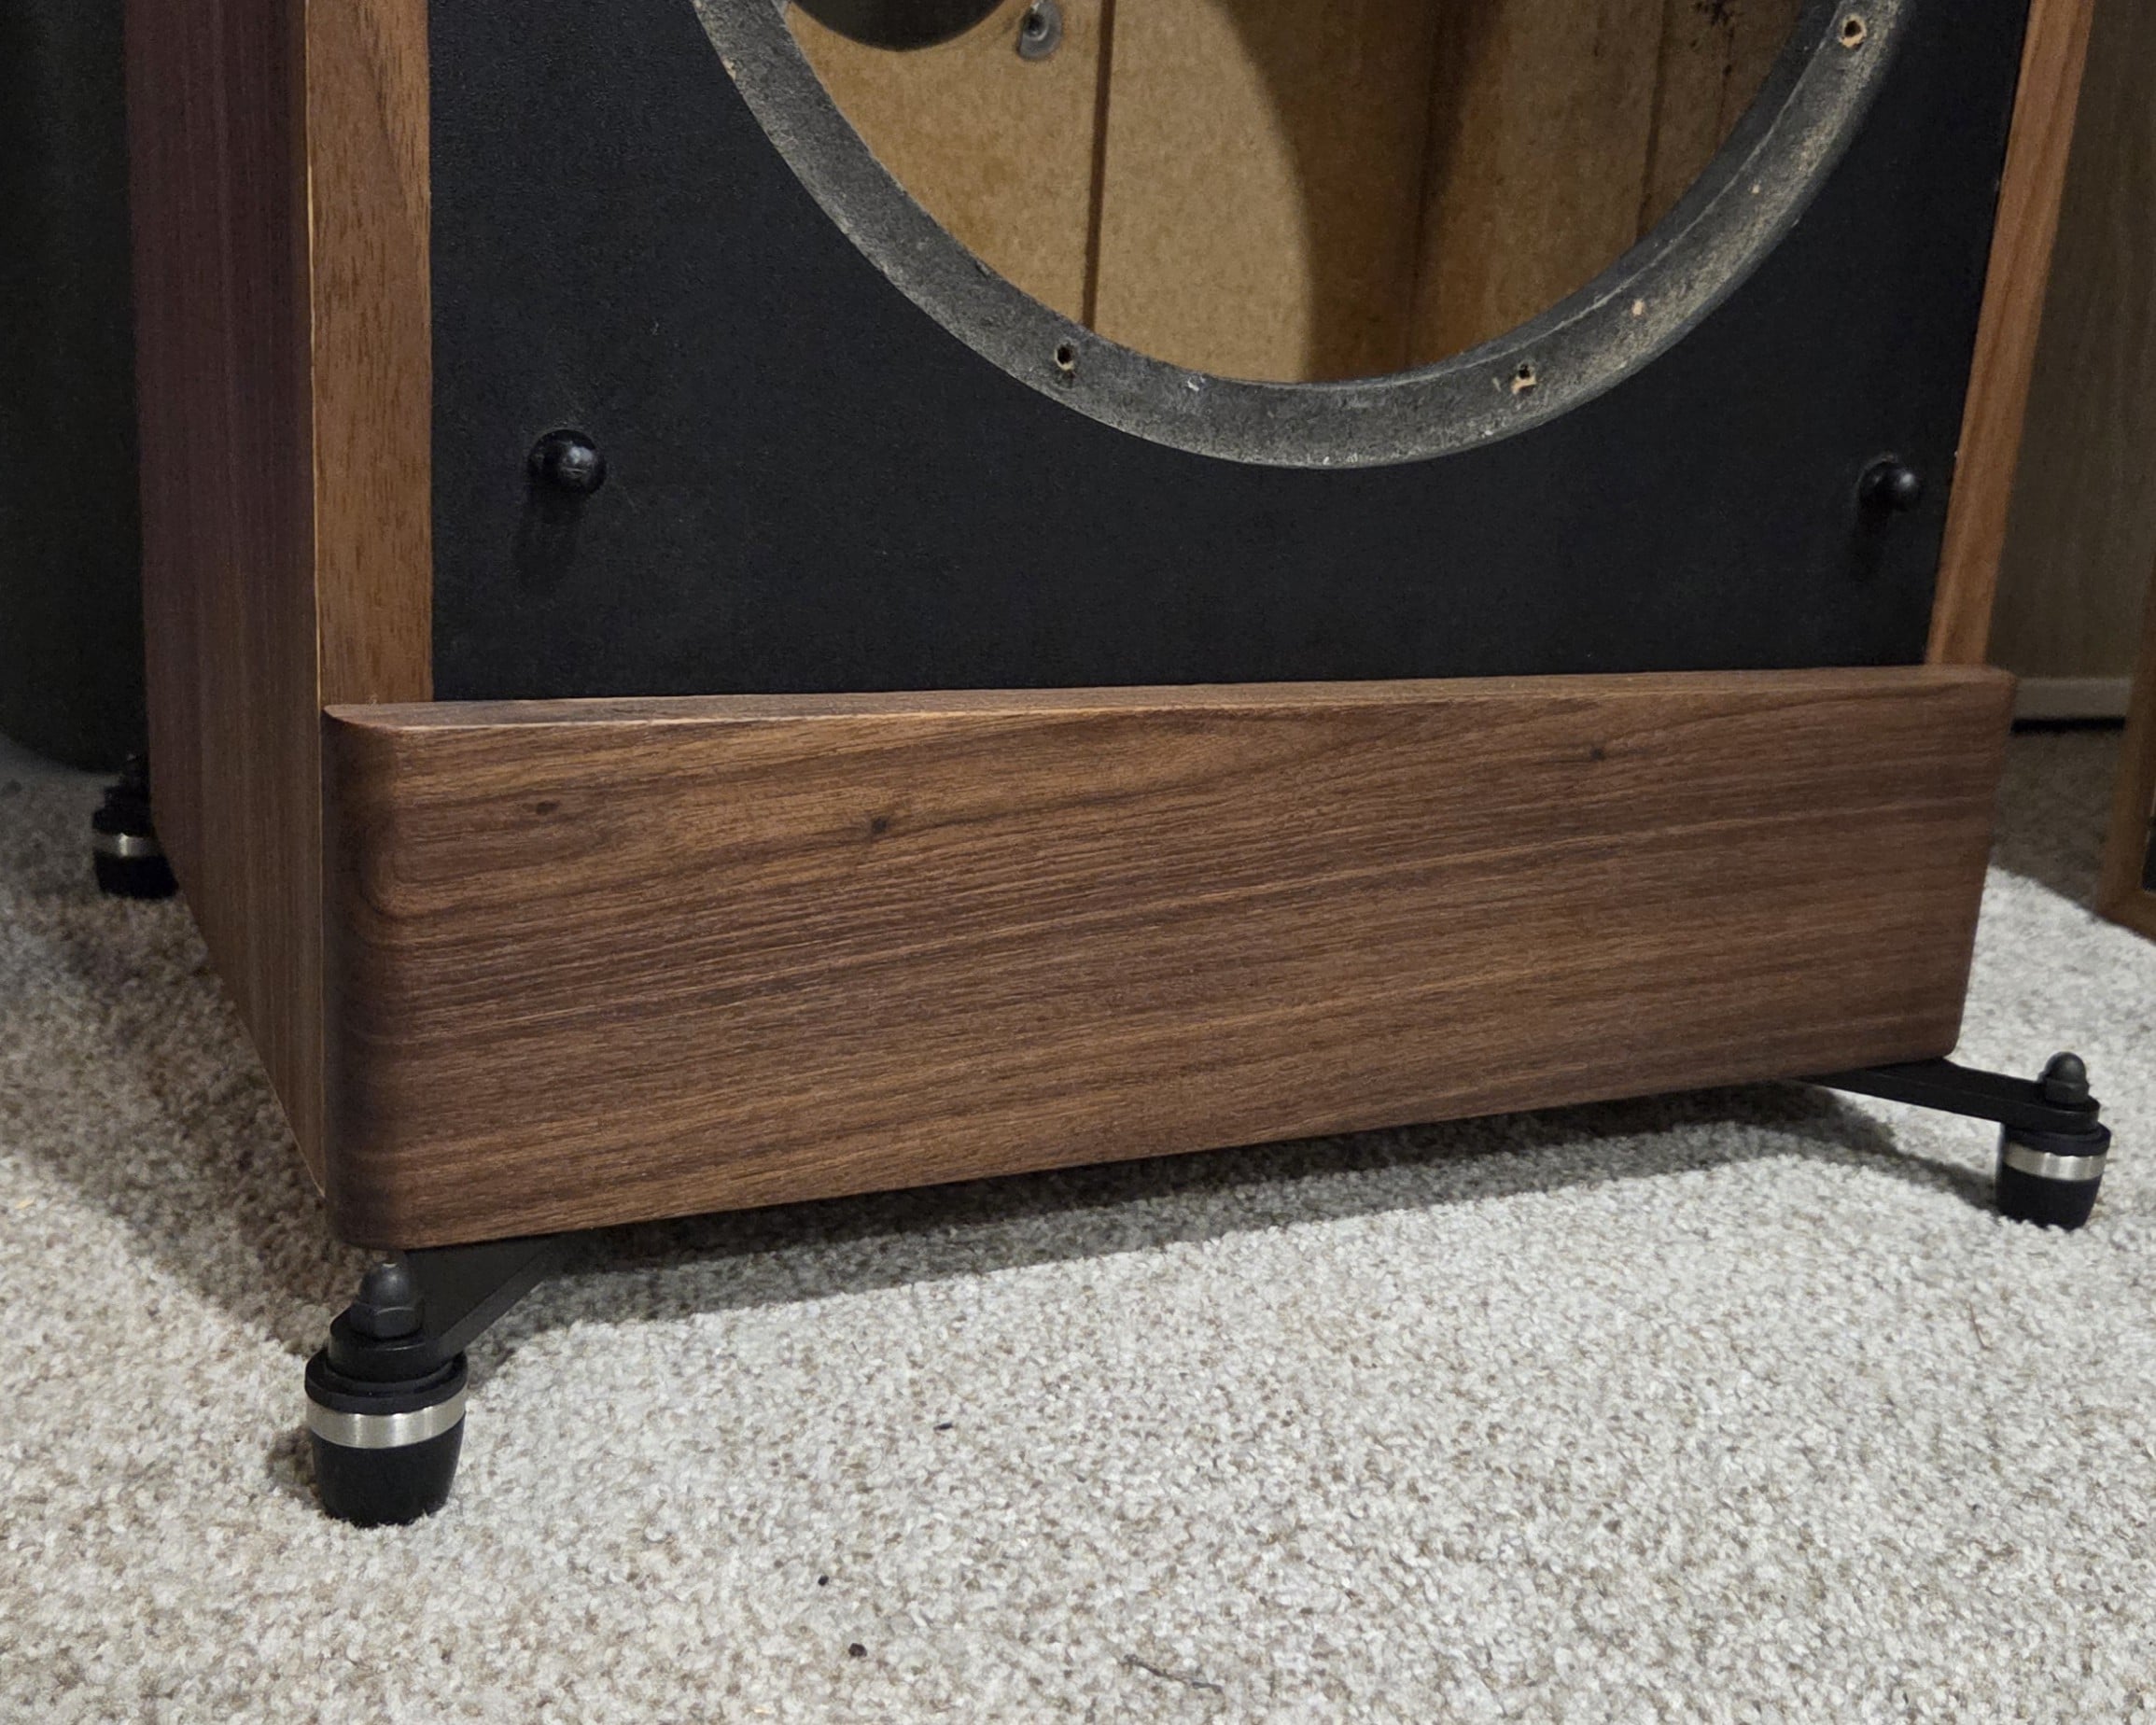
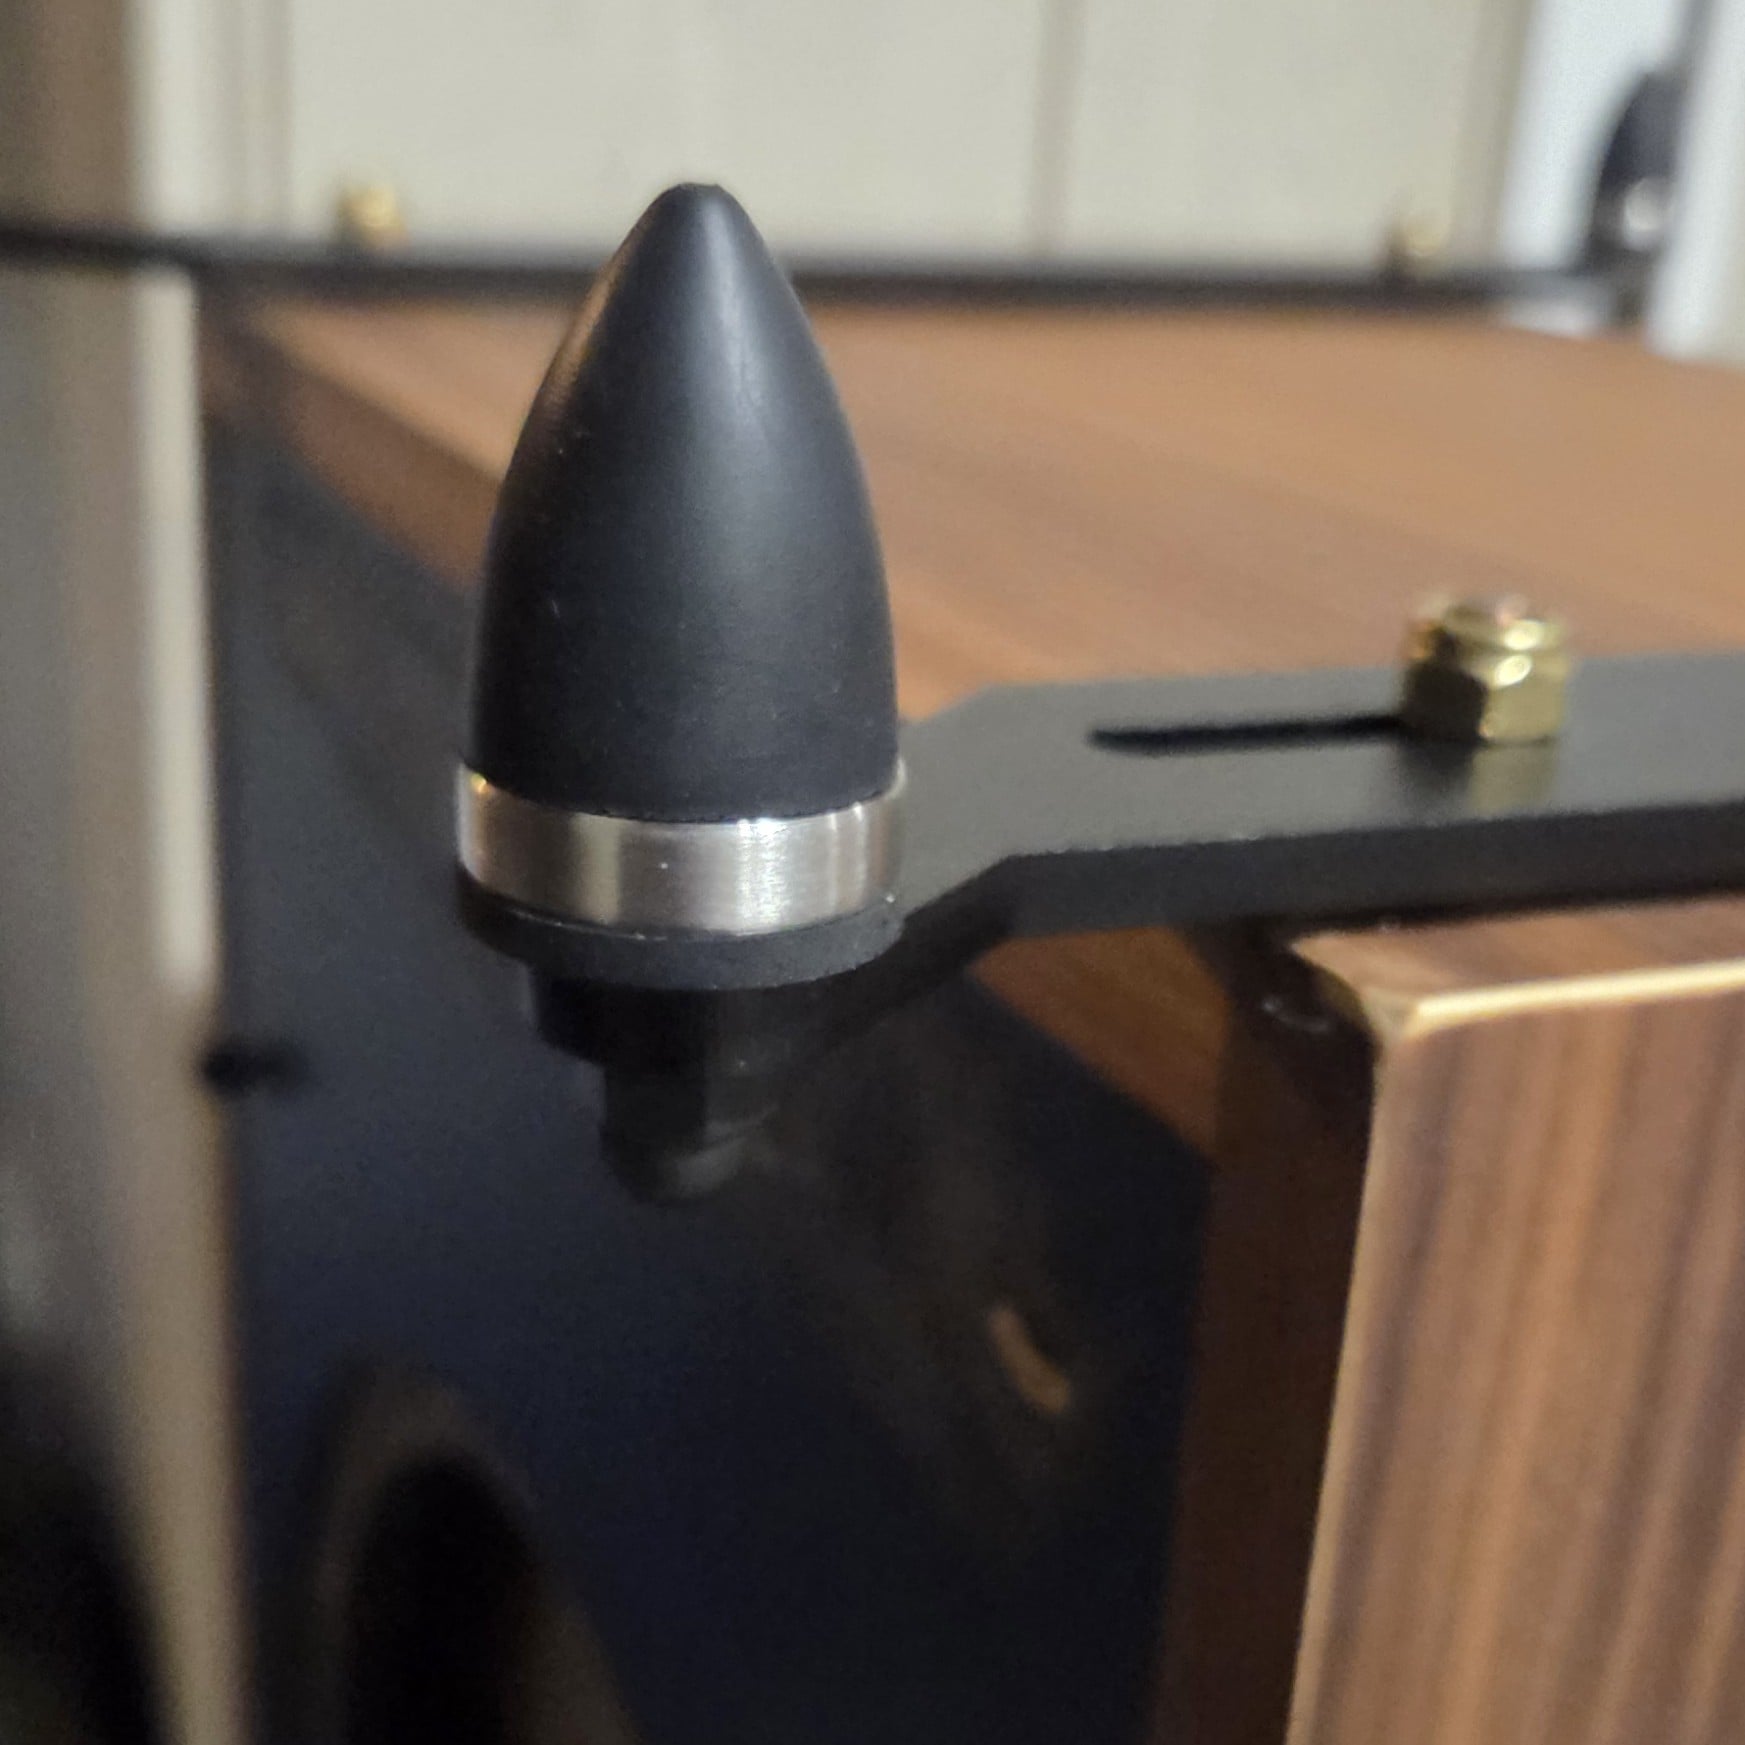
Outriggers are from NSMT Loudspeakers. I purchased the extra large size. Accounting for the 3/4" cabinet walls, the mounting holes allowed barely enough space to secure bolts on the inside of the cabinet. Tolerances were super tight. This was a risky maneuver. It worked out but not without a few small compromises on the way I intended to install them originally.
Isolation cones/feet are from Tough Nut Audio. Derrik was awesome to work with. He helped me with adapting the bolt length to specifically fit these 1/4" thick outriggers. 5/5 service. -
Spikes need to pierce the carpet in order to be of benefit. Otherwise, the speaker is still floating, which smears the mids and bloats the bass.
-
@F1nut Thank you, sir. They will be on hard surface in final application. I may still experiment later, though.
-
For a hard floor, those Nuts should work well.
-
Looks great. I like how they slotted for adjustability.Don't take experimental gene therapies from known eugenicists.
-
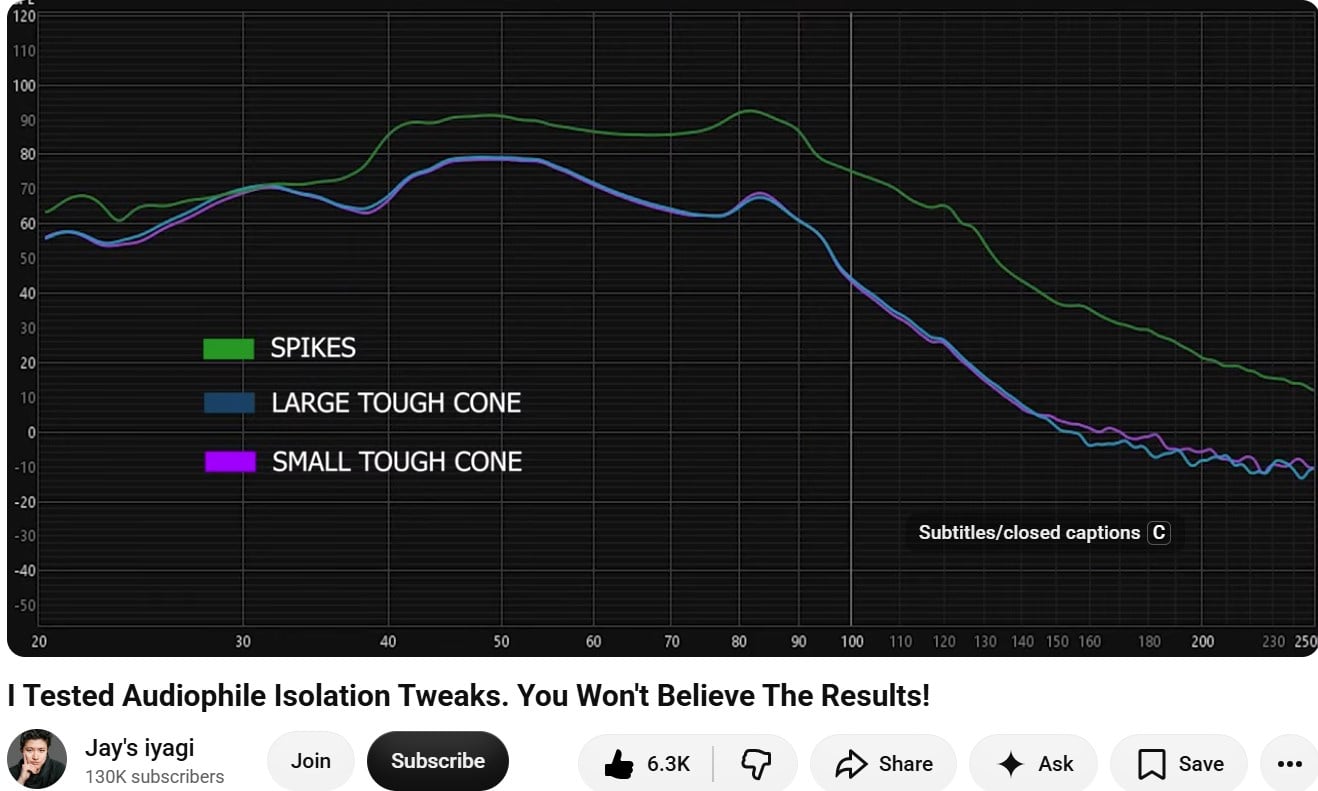
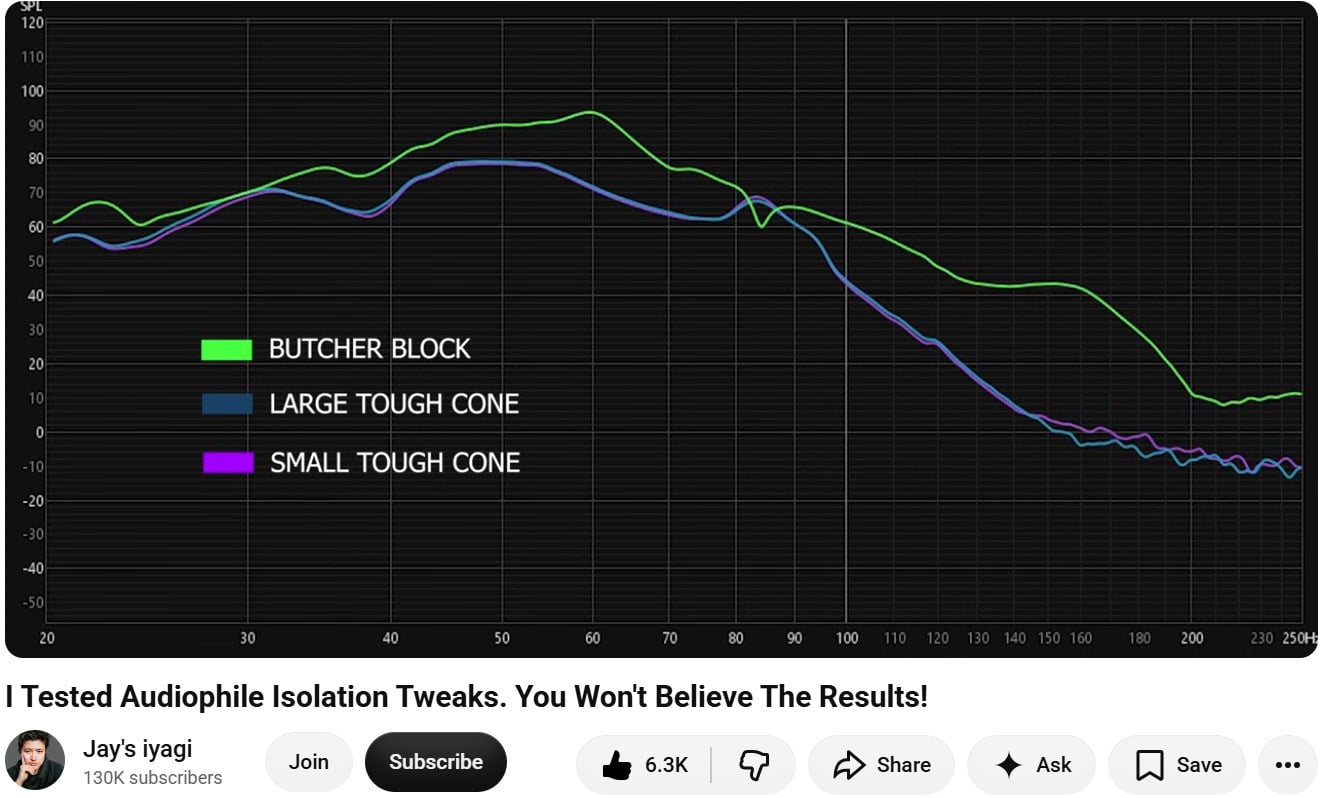
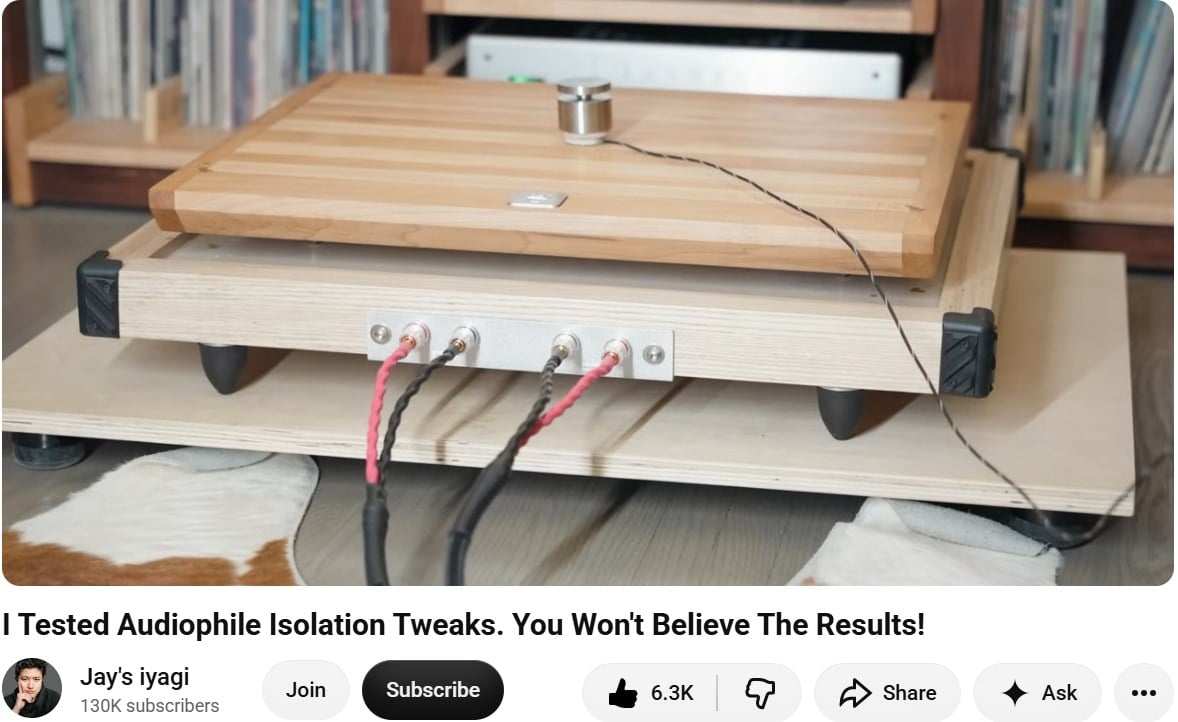
How soft is the rubber? Watching Jay video where he proves that just a butcher block alone isolates better than the same butcher block with spikes, proving that the spikes are coupling devices and are good at that. Oh and it shows the effectiveness of your cones, except for around 30Hz and 83Hz.
George / NJ
Polk 7B main speakers, std. mods+ (1979, orig owner)
Martin Logan Dynamo sub w/6ft 14awg Power Cord
Onkyo A-8017 integrated
Logitech Squeezebox Touch Streamer w/EDO applet
iFi nano iDSD DAC
iPurifier3
iDefender w/ iPower PS
Custom Steve Wilson 1m UPOCC Interconnect
iFi Mercury 0.5m OFHC continuous cast copper USB cable
Custom Ribbon Speaker Cables, 5ft long, 4N Copper, 14awg, ultra low inductance
Custom Vibration Isolation Speaker Stands and Sub Platform -
I saw that video from Jay iyagi earlier this year and I have to question the test method and the overall validity. The company that is selling the Tough Cones made the test platform, which seems on the small side and probably introduces some very peaky resonances. Do you trust that?
-
The test platform was a constant throughout and was basically just used as a platform under which the exciter loudspeakers were mounted, 4 of them I believe, although I'm not sure what was in the center, perhaps the DSP unit and amplifier. I presume he did a sweep tone. Anyways I think referring to the test platform, it could just as easily have been a sheet of plywood on 4 spikes. Maybe he was trying to remove seismic environmental noise from the equation by using that test platform which he mentions he got great results from underneath his turntable. He established a baseline by placing the surface mic on top of it. I think since all of the subsequent tests also included a butcherblock, he should have established the baseline by putting the surface mic on top of the butcher block with spikes in each corner, since we all know they just couple. That's what I compared to, not what he called his baseline which made the mistake of omitting the commonality amongst all the tested devices which was the butcher block. I guess it is somewhat debateable which should've been the baseline. Maybe just the butcher block resting on the platform although that is flawed because they are not necessarily perfectly flat. Whichever you use the measurements are pretty clearly in favor of the rubber cones, although there were a few devices that bested them in the low frequencies which is pretty important for vibration isolation in my view. Towshend Audio insists that isolation down to the single digit Hz is what you want because environmental seismic noise is in that area. I always love listening to my system late late at night the most. I have a couple highways pretty close; one major one only 1/2 mile, and another lesser one 1.2 miles. I keep forgetting to ask my next door neighbors how they like the late night listening sessions lol.George / NJ
Polk 7B main speakers, std. mods+ (1979, orig owner)
Martin Logan Dynamo sub w/6ft 14awg Power Cord
Onkyo A-8017 integrated
Logitech Squeezebox Touch Streamer w/EDO applet
iFi nano iDSD DAC
iPurifier3
iDefender w/ iPower PS
Custom Steve Wilson 1m UPOCC Interconnect
iFi Mercury 0.5m OFHC continuous cast copper USB cable
Custom Ribbon Speaker Cables, 5ft long, 4N Copper, 14awg, ultra low inductance
Custom Vibration Isolation Speaker Stands and Sub Platform -
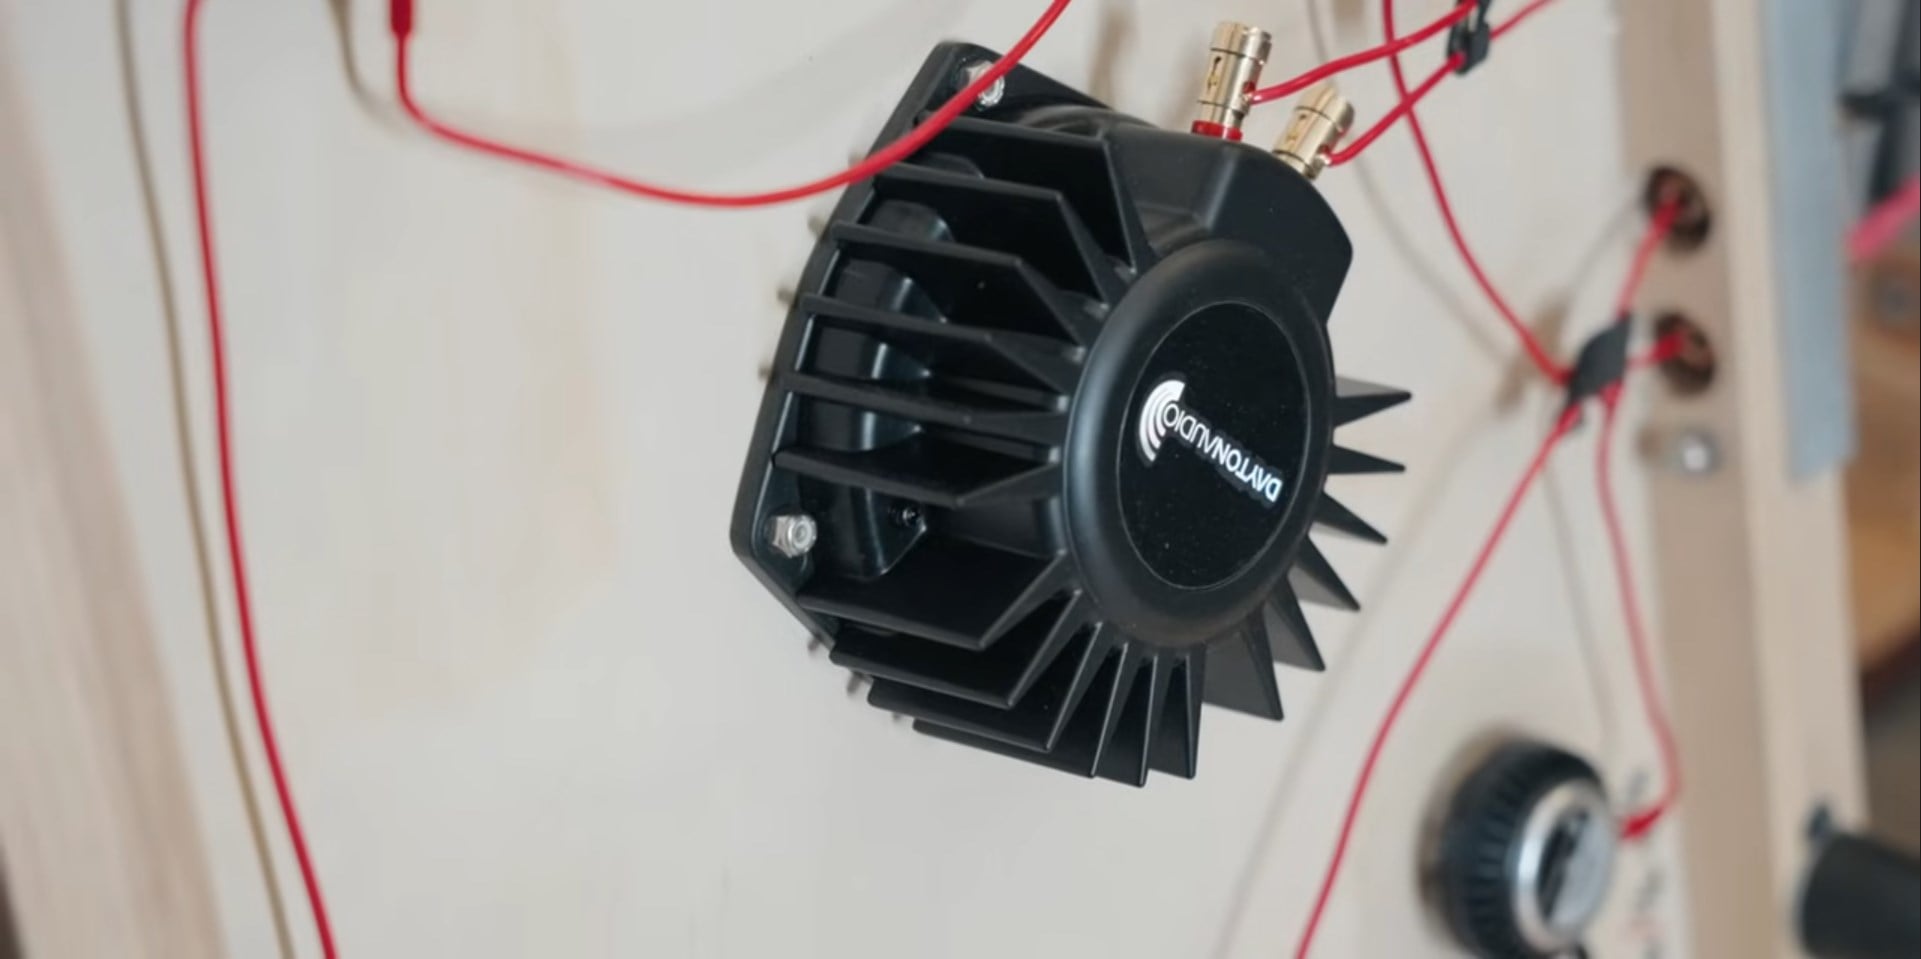
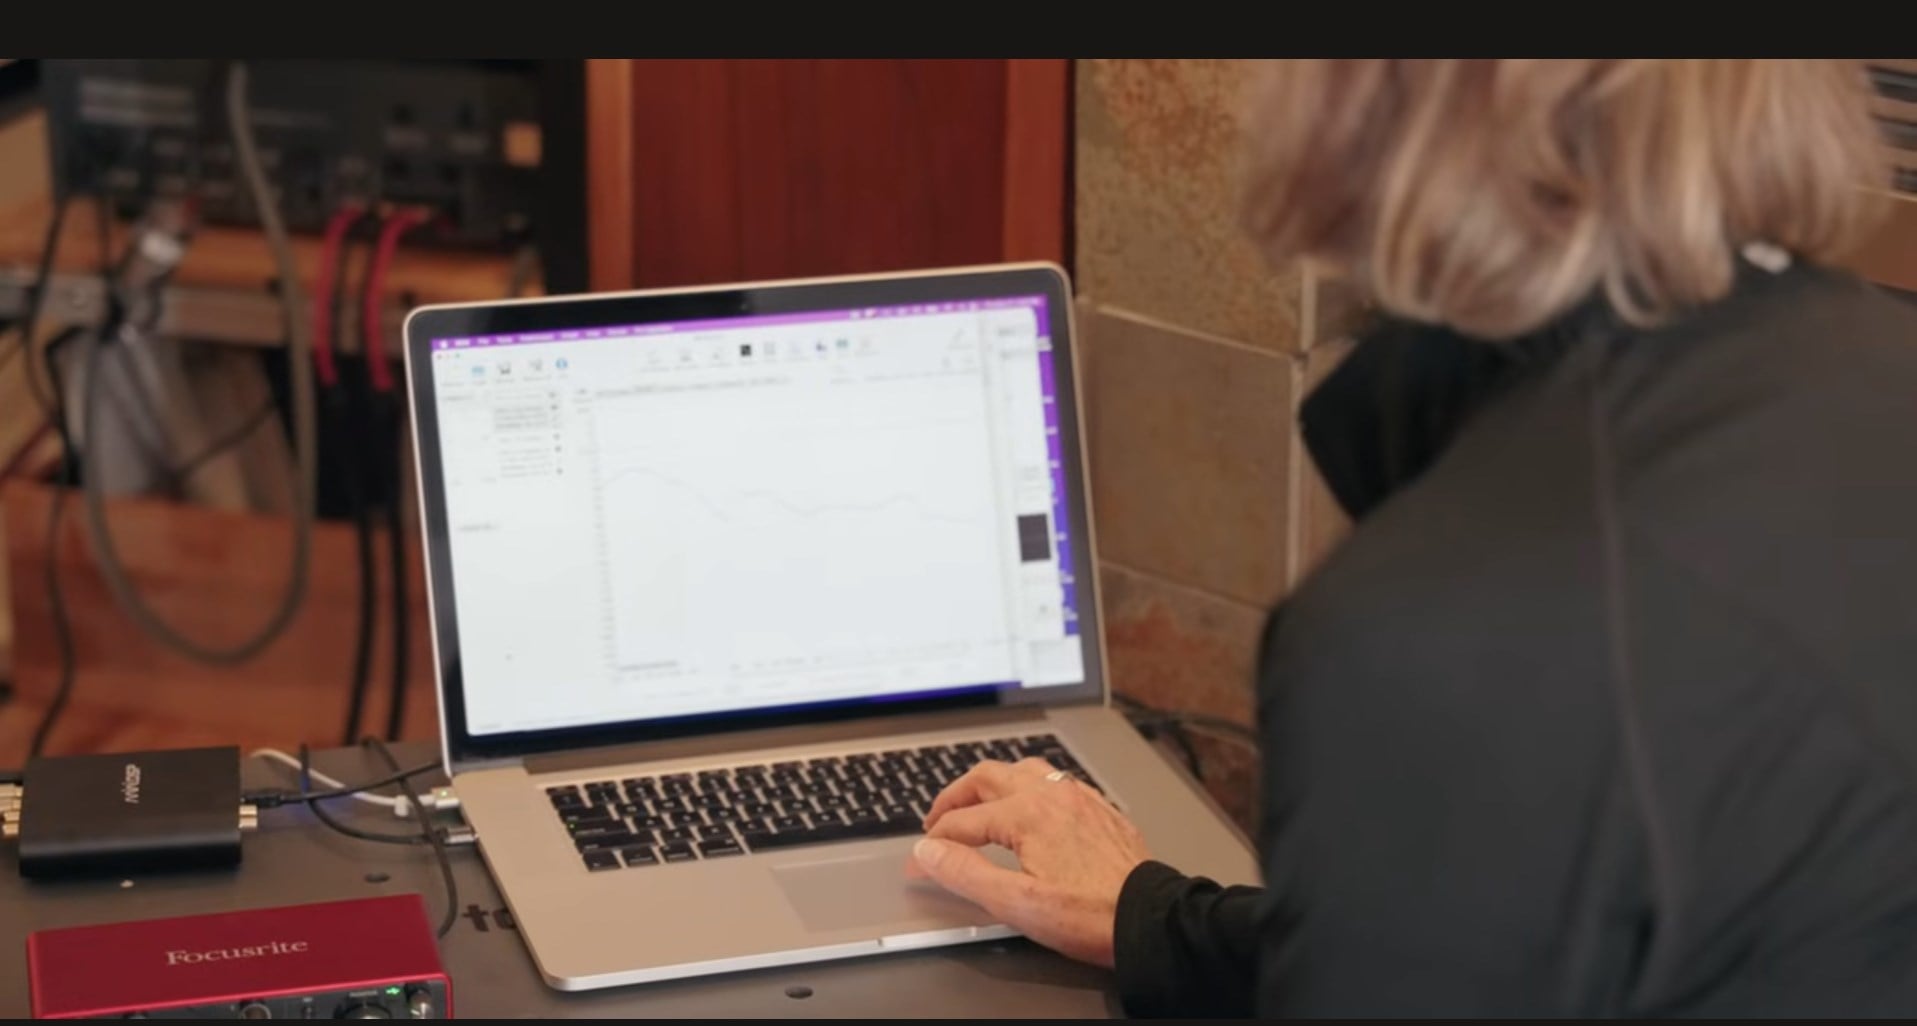
Just to correct (sorry to be sorta hijacking your thread drop1), after geeking out on the video by Jay a bit more, the item in the center of the testing platform is not an amplifier, it is a woofer. The DSP and crossover are by the laptop. Also, the testing platform and circuitry, built in cooperation with Solen, is not what Jay used under his turntable and I don't know if it even incorporates any elements of their isolation platforms except the tough nut rubber cone footers. They also use a sheet of plywood under that with what looks like 4 of their cylinder tough nuts under that. Also, thinking a bit more about this testing method, I don't know to what extent all of the devices tested had their optimal functioning load/weight placed on them which was just the butcherblock and surface mic in every case afaik. Another way to run this testing would have been to seek out the optimal load for each device with weights placed on top of the butcher block and compare them all at their optimal condition.
George / NJ
Polk 7B main speakers, std. mods+ (1979, orig owner)
Martin Logan Dynamo sub w/6ft 14awg Power Cord
Onkyo A-8017 integrated
Logitech Squeezebox Touch Streamer w/EDO applet
iFi nano iDSD DAC
iPurifier3
iDefender w/ iPower PS
Custom Steve Wilson 1m UPOCC Interconnect
iFi Mercury 0.5m OFHC continuous cast copper USB cable
Custom Ribbon Speaker Cables, 5ft long, 4N Copper, 14awg, ultra low inductance
Custom Vibration Isolation Speaker Stands and Sub Platform -
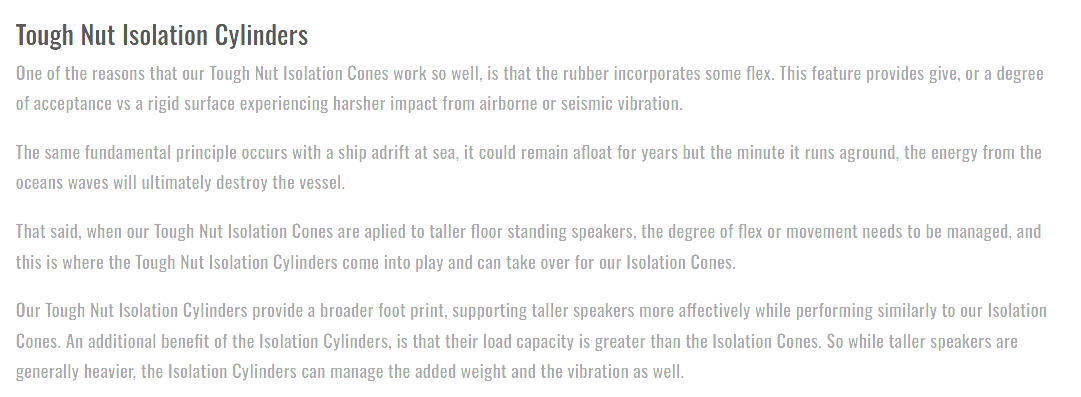
@Gardenstater No problem at all. In fact please have at it. If I could insert one concern now that the cones are installed: There's quite a bit more "flex" in these than I had expected. It's a feature that's notated on the website. I had guidance from the owner, but I'm wondering if I didn't inquire enough about whether cones or cylinders are most appropriate. I took a short video. You should be able to see the flex as I push against them. Maybe it is no issue with only the MWs and passive radiator moving but again, it's more flex than I expected.
https://youtube.com/shorts/gmTmw2S6IKk?feature=share