LSi15 Crossover Modification Project

DarqueKnight
Posts: 6,765
Introduction
I tried to get by without modding the LSi15 speakers I use for home theater surrounds. Unfortunately, due to some other upgrades in the system, the LSi15's sounded too "small" in comparison to the modded center channel and front speakers. Simply raising the volume level of the surrounds was not a satisfactory solution since the the imbalance between the front and rear stages had more to do with the "weight" and clarity of the sound rather than the level.

Figure 1. So many big parts. Such little crossover board space.:(
I cheerfully paid $328.31 for the parts, inclusive of shipping. My LSi9 modification resulted in such good sound that I just knew everything was going to turn out all right. I knew it would.
Solen PB series polypropylene capacitors were purchased from Parts Connexion.
1. 130 uF, 4@$35.81 = $143.24
2. 39 uF (schematic specifies 38 uF, which Solen does not make), 2@$13.23 = $26.46
I received 15% off the prices above due to a sale.
The Mills MRA-12 resistors and Sonicap Gen I polypropylene capacitors were purchased from Sonic Craft.
1. 18 uF (custom value), 2@$27.25 = $54.50
2. 12 uF, 2@$19.60 = $39.20
3. 10 uF, 2@$17.60 = $35.20
4. 2 ohm resistor, 6@$3.50
5. 3.5 ohm resistor, 2@$3.50.

Figure 2. All the upgrade parts could not fit on the board.
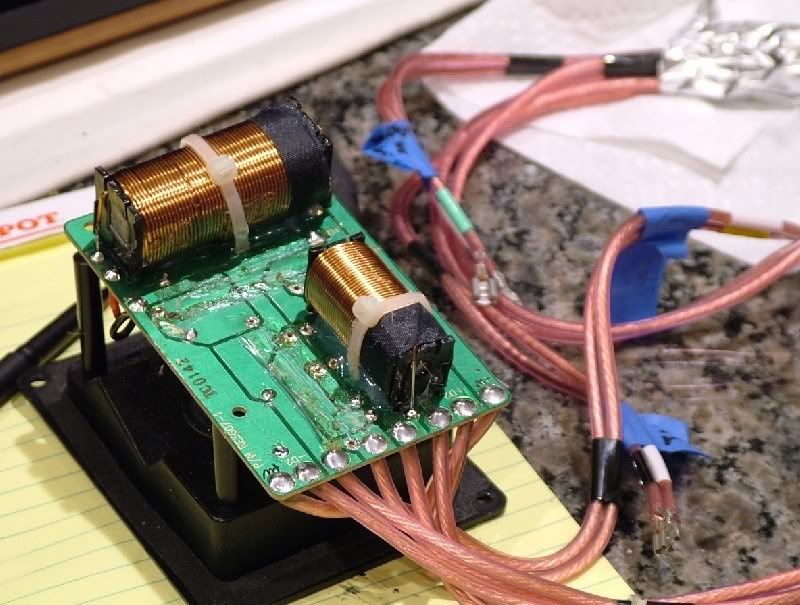
Figure 3. Stock capacitors and resistors (underside) removed.
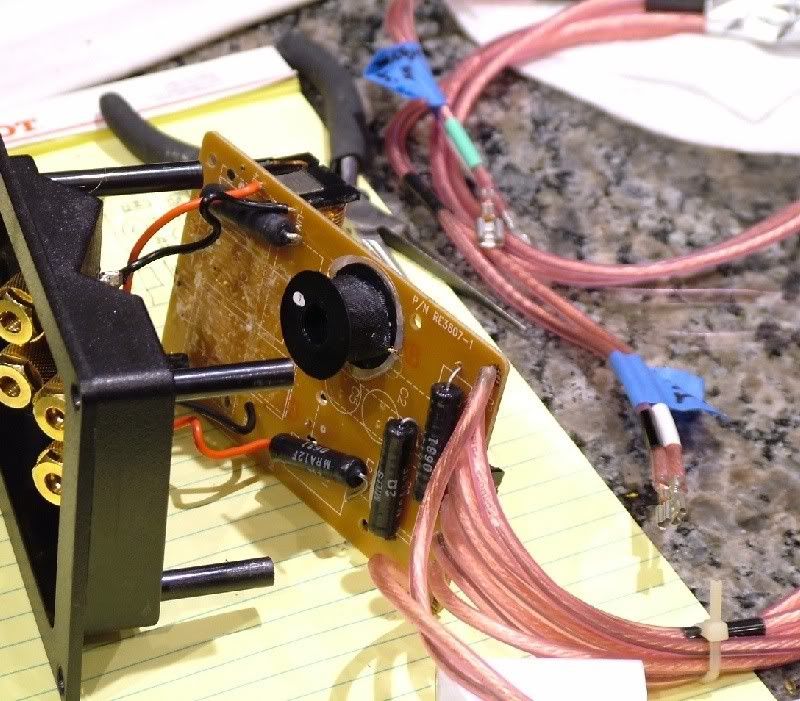
Figure 4. Mills resistors installed.
The LSi15 board did not have the obnoxious hard-as-bricks glue that was used on my LSi9 boards. The LSi15 glue was still soft and flexible. Once component leads were desoldered, most parts could easily be twisted off with pliers. The only exceptions were the two 130 uF electrolytic capacitors that were seated in thick beds of glue. Those had to be sliced off with a hot knife.

Figure 5. Installation of Sonicap 12 uF capacitor.
The 12 uF Sonicap was just short enough to fit in the same space as the stock 12 uF mylar capacitor. The 18 uF Sonicap was installed above the former location of the stock part and banded to the inductor below it.
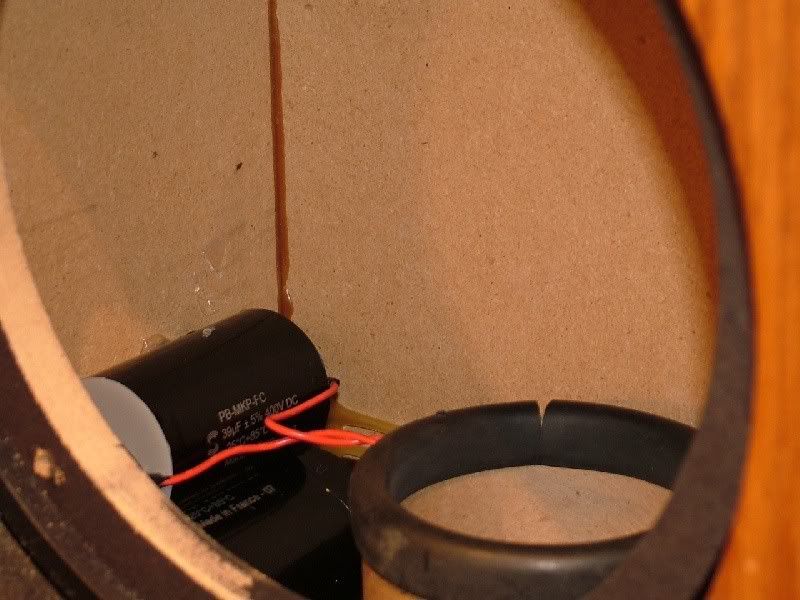
Figure 6. Installation of Solen capacitors.
The Solen 130 uF capacitors were almost as large as the crossover boards. The two 130 uF and one 39 uF capacitor were stacked and hot glued in the space in front of the bottom power port tube. Eighteen gauge solid core copper wire was used for all extension wires.
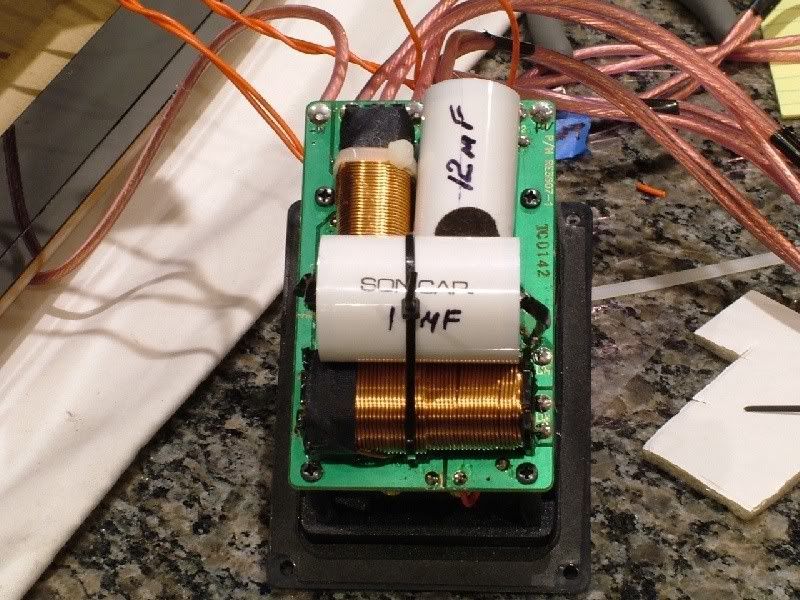
Figure 7. Finished crossover top view. Don't try this at home.:)
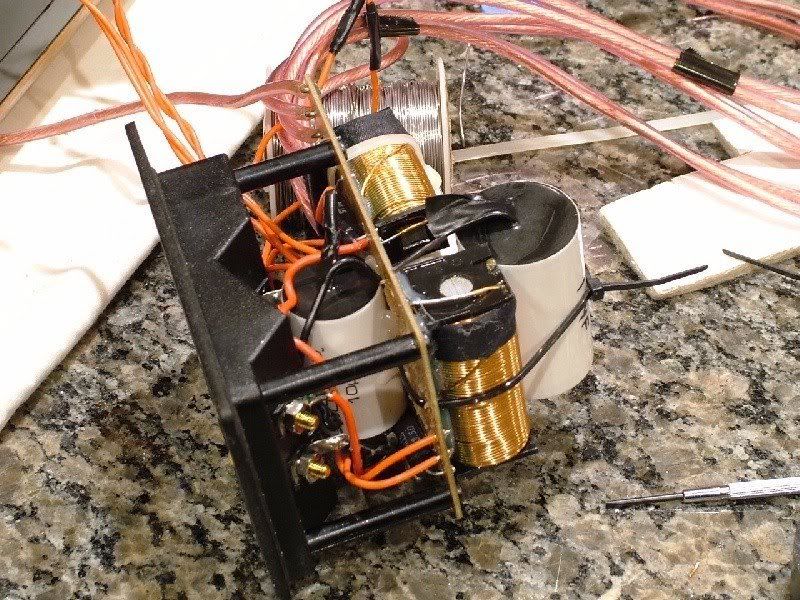
Figure 8. Finished crossover side view.
The 10 uF Sonicap was just small enough to fit in the space between the circuit board and the binding post plate. Extension wires were required for the 10 uF and 18 uF capacitors.
There is only about 2.5 inches of clearance between the surface of the crossover board and the power port tube directly behind it. This limits how high parts can be piled on the board.
The right speaker was done first and took 4.5 hours. The left speaker took 2.5 hours. The first speaker took longer due to note taking, picture taking, and topological planning.
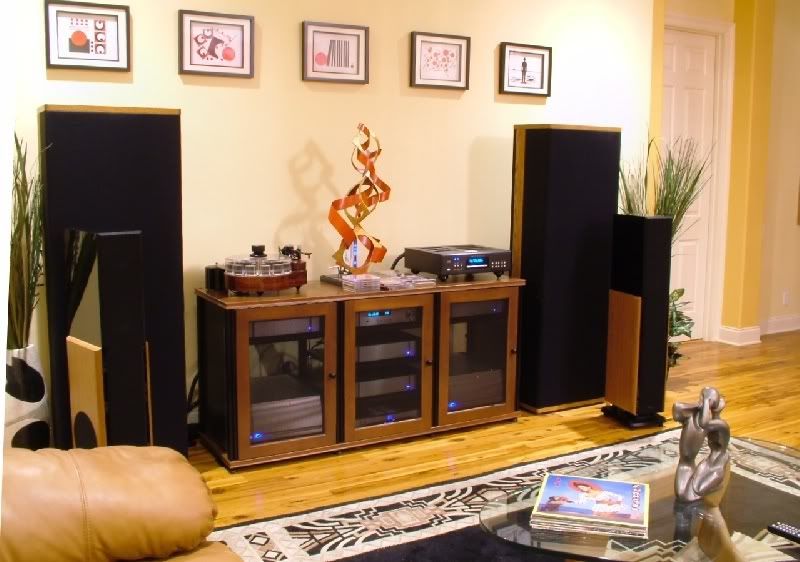
Figure 9. My LSi15's don't suck anymore.:)
After the right speaker modification was completed, I set it up with the left (stock) speaker for comparison (appropriately toed in, of course). The modified LSi15 did not completely drown out the stock speaker the way the modified LSi9 drowned out the stock LSi9. However, the modified speaker sounded much louder, although it was measured as having the same sound level as the stock speaker. I had to decrease the level of the modified right speaker by 5 dB-C in order for the sound level to sound balanced. The modified speaker had much greater overall clarity, tighter and more articulate bass, and more tactile bass. Also, whereas the bass of the stock speaker was "disconnected" from the midrange and treble, the modified speaker had a cohesive presentation throughout its frequency range. If I panned the balance control all the way to the right modded speaker and gradually turned back toward the center, the sound of the bass got heavier, slower, and muddier as the stock speaker came up.
As with the LSi9 mod, the single modded LSi15 speaker was such a revelation that I enjoyed listening to it just by itself. I let it play while the left speaker underwent its transformation.
Listening to both modded speakers was a treat in delicious sound: smooth airy highs, rich detailed midrange, tight articulate bass, and a tactile and layered sound stage. It seemed a bit of a shame to put them back into home theater surround duty.
I initially planned to let the LSi15 burn in over several days on my two channel system. However, after several hours, I missed the tall, coast to coast sound stage of my SDA SRS 1.2TL's.:) The LSi15's were moved to the home theater system for audition and burn in.
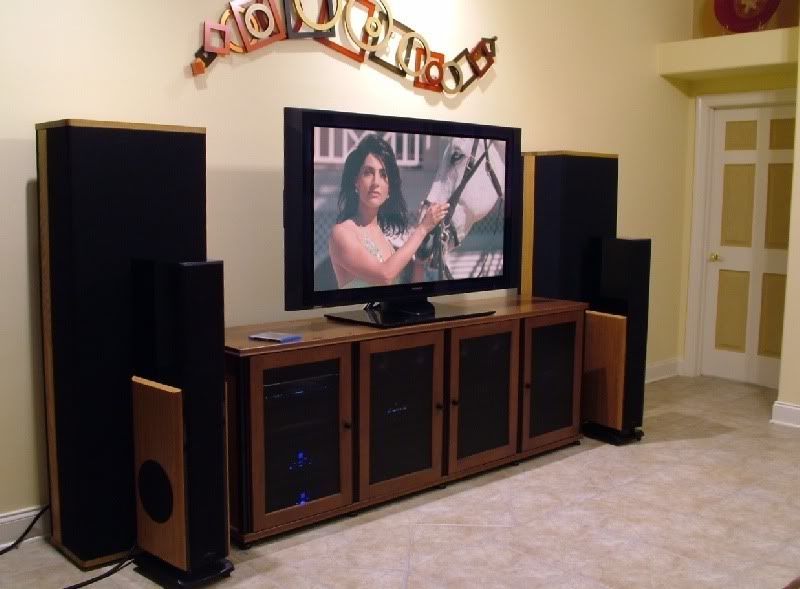
Figure 10. Home theater trials.
I auditioned the modded LSi15's as front and surround speakers. Compared to the SDA SRS's, they performed well with regard to sound quality, but the front stage was scrunched down below the TV. With the SRS's, the sound appears to come from the area in front of, and to the sides of, the TV, even though the center channel speakers are below the TV (but angled upward).
The LSi15 modification remedied the problem of "small sound" in the rear stage. I now have a thick, balanced and cohesive sound field in 360 degrees.:)

Figure 11. Goodbye forever.
References
LSi9 Crossover Modification Project
LSi Owners Your Speakers Suck!
I tried to get by without modding the LSi15 speakers I use for home theater surrounds. Unfortunately, due to some other upgrades in the system, the LSi15's sounded too "small" in comparison to the modded center channel and front speakers. Simply raising the volume level of the surrounds was not a satisfactory solution since the the imbalance between the front and rear stages had more to do with the "weight" and clarity of the sound rather than the level.

Figure 1. So many big parts. Such little crossover board space.:(
I cheerfully paid $328.31 for the parts, inclusive of shipping. My LSi9 modification resulted in such good sound that I just knew everything was going to turn out all right. I knew it would.
Solen PB series polypropylene capacitors were purchased from Parts Connexion.
1. 130 uF, 4@$35.81 = $143.24
2. 39 uF (schematic specifies 38 uF, which Solen does not make), 2@$13.23 = $26.46
I received 15% off the prices above due to a sale.
The Mills MRA-12 resistors and Sonicap Gen I polypropylene capacitors were purchased from Sonic Craft.
1. 18 uF (custom value), 2@$27.25 = $54.50
2. 12 uF, 2@$19.60 = $39.20
3. 10 uF, 2@$17.60 = $35.20
4. 2 ohm resistor, 6@$3.50
5. 3.5 ohm resistor, 2@$3.50.

Figure 2. All the upgrade parts could not fit on the board.

Figure 3. Stock capacitors and resistors (underside) removed.

Figure 4. Mills resistors installed.
The LSi15 board did not have the obnoxious hard-as-bricks glue that was used on my LSi9 boards. The LSi15 glue was still soft and flexible. Once component leads were desoldered, most parts could easily be twisted off with pliers. The only exceptions were the two 130 uF electrolytic capacitors that were seated in thick beds of glue. Those had to be sliced off with a hot knife.

Figure 5. Installation of Sonicap 12 uF capacitor.
The 12 uF Sonicap was just short enough to fit in the same space as the stock 12 uF mylar capacitor. The 18 uF Sonicap was installed above the former location of the stock part and banded to the inductor below it.

Figure 6. Installation of Solen capacitors.
The Solen 130 uF capacitors were almost as large as the crossover boards. The two 130 uF and one 39 uF capacitor were stacked and hot glued in the space in front of the bottom power port tube. Eighteen gauge solid core copper wire was used for all extension wires.

Figure 7. Finished crossover top view. Don't try this at home.:)

Figure 8. Finished crossover side view.
The 10 uF Sonicap was just small enough to fit in the space between the circuit board and the binding post plate. Extension wires were required for the 10 uF and 18 uF capacitors.
There is only about 2.5 inches of clearance between the surface of the crossover board and the power port tube directly behind it. This limits how high parts can be piled on the board.
The right speaker was done first and took 4.5 hours. The left speaker took 2.5 hours. The first speaker took longer due to note taking, picture taking, and topological planning.

Figure 9. My LSi15's don't suck anymore.:)
After the right speaker modification was completed, I set it up with the left (stock) speaker for comparison (appropriately toed in, of course). The modified LSi15 did not completely drown out the stock speaker the way the modified LSi9 drowned out the stock LSi9. However, the modified speaker sounded much louder, although it was measured as having the same sound level as the stock speaker. I had to decrease the level of the modified right speaker by 5 dB-C in order for the sound level to sound balanced. The modified speaker had much greater overall clarity, tighter and more articulate bass, and more tactile bass. Also, whereas the bass of the stock speaker was "disconnected" from the midrange and treble, the modified speaker had a cohesive presentation throughout its frequency range. If I panned the balance control all the way to the right modded speaker and gradually turned back toward the center, the sound of the bass got heavier, slower, and muddier as the stock speaker came up.
As with the LSi9 mod, the single modded LSi15 speaker was such a revelation that I enjoyed listening to it just by itself. I let it play while the left speaker underwent its transformation.
Listening to both modded speakers was a treat in delicious sound: smooth airy highs, rich detailed midrange, tight articulate bass, and a tactile and layered sound stage. It seemed a bit of a shame to put them back into home theater surround duty.
I initially planned to let the LSi15 burn in over several days on my two channel system. However, after several hours, I missed the tall, coast to coast sound stage of my SDA SRS 1.2TL's.:) The LSi15's were moved to the home theater system for audition and burn in.

Figure 10. Home theater trials.
I auditioned the modded LSi15's as front and surround speakers. Compared to the SDA SRS's, they performed well with regard to sound quality, but the front stage was scrunched down below the TV. With the SRS's, the sound appears to come from the area in front of, and to the sides of, the TV, even though the center channel speakers are below the TV (but angled upward).
The LSi15 modification remedied the problem of "small sound" in the rear stage. I now have a thick, balanced and cohesive sound field in 360 degrees.:)

Figure 11. Goodbye forever.
References
LSi9 Crossover Modification Project
LSi Owners Your Speakers Suck!
Proud and loyal citizen of the Digital Domain and Solid State Country!
Post edited by DarqueKnight on
Comments
-
Thanks and great job as always."He who fights with monsters should look to it that he himself does not become a monster. And when you gaze long into an abyss the abyss also gazes into you." Friedrich Nietzsche
-
As Lord Darth Vader would say: "Impressive. Most Impressive."
If I went Frankenstein on my LSi15s, she'd shoot me. Mainly because I would have forked up the entire project.Do you hear that buzzing noise?
-
That's alotta big parts to jam in there! Good thing it has the tall stand-offs on the terminal cup.
Don't even need to read about sound improvements.
Wire bending is a **** ain't it?
And how old are you speakers?
Looks great! Great job!
Paul
Egads!!! Looked at the LSi9 job. Your kitchen is the same color as mine. I call it ManDingoMan Orange.
8^) -
I bought the LSi15's new in Dec. of '03.Proud and loyal citizen of the Digital Domain and Solid State Country!
-
I just did this mod to my Lsi 15s the other day. WOW! what an improvement. Thought the bass on the stock speakers sounded kind of boomy but that went away with the upgrade. Thanks for the great write up, it took some of the guess work out when positioning the various components.
-
Having heard a pair of sonicapped LSI 15's,,night and day difference.Have fun guys.:)JC approves....he told me so. (F-1 nut)
-
Monster Jam wrote: »As Lord Darth Vader would say: "Impressive. Most Impressive."
If I went Frankenstein on my LSi15s, she'd shoot me. Mainly because I would have forked up the entire project.
You presume to quote ME??? I am honored, however the work the OP has done here goes beyond merely "Impressive". It displays abilities in the Force even I have not mastered. If he could be turned to the Dark Side, I would have a powerful ally.:D
Great job! -
LOL
Please dont force choke me out! I want to live long enough to see Keiko's next post!Do you hear that buzzing noise?
-
who has the schematic for lsi15's i went with sonic caps, the difference i went with axon true cap instead of the solens.receiver- pioneer elite sc-37 thx ultra w/kimber kable.pk14.
mains-lsi15 4ohm 250w modified&db840 nordost blueheaven spk/rca
center : snell xa1900 4ohm 250w,nordost flatline
subs-klipsch-ksw10/athena asp-4100
rear-OWM3 - 8ohm 100w
surrounds-klipsch rs-7 150w
amp-5ch.-aragon 3005 thx ultra 2 nordost blue heaven ls pc
power.c-bpt cpc/ps.soloist ci. -
so i did the sonic caps and mills upgrade, not the 2 130 uf/39 uf upgrade yet.waiting for parts. already can hear the clarity ,compared to stock lsi15.receiver- pioneer elite sc-37 thx ultra w/kimber kable.pk14.
mains-lsi15 4ohm 250w modified&db840 nordost blueheaven spk/rca
center : snell xa1900 4ohm 250w,nordost flatline
subs-klipsch-ksw10/athena asp-4100
rear-OWM3 - 8ohm 100w
surrounds-klipsch rs-7 150w
amp-5ch.-aragon 3005 thx ultra 2 nordost blue heaven ls pc
power.c-bpt cpc/ps.soloist ci.


