Help putting banana plugs into speakers
Options

hookem12
Posts: 22
I was wondering if someone could clear things up on how to put in my banana plug speaker cables. I have the polk rti a3 and all I can gather from the manual is to:
Carefully pry out the binding post plugs
to expose banana plug holes.
Do I unscrew the entire cap and does it matter if I use the top or bottom row?
Thanks
Carefully pry out the binding post plugs
to expose banana plug holes.
Do I unscrew the entire cap and does it matter if I use the top or bottom row?
Thanks
Post edited by hookem12 on
Comments
-
Do NOT unscrew - would make too fragile.
As long as you have the jumper (brass piece) in place, it doesn't matter. -
remove the "nut" and the little inserts will come out,,pop those nanners in place--I would use the lower posts,,just be sure the jumpers(if applicable) are in place,,as long as you have jumpers in place,it does not matter.JC approves....he told me so. (F-1 nut)
-
I just unscrewed the caps on my monitor 70s, the small plug inside came right out.You shouldn't have to pry, I use the top posts but don't think it matters witch ones you use.Maby some of the long time members can give you more info.I'm just telling you how I did mine. Good luck Dan
-
George, is there any particular reason you use the bottom posts?
-
I should do a instructional video on this subject. It's the new thing how people have no idea how to use banana plugs. It's cool and all I'll at least post some picks here for you to see how they look when properly inserted.
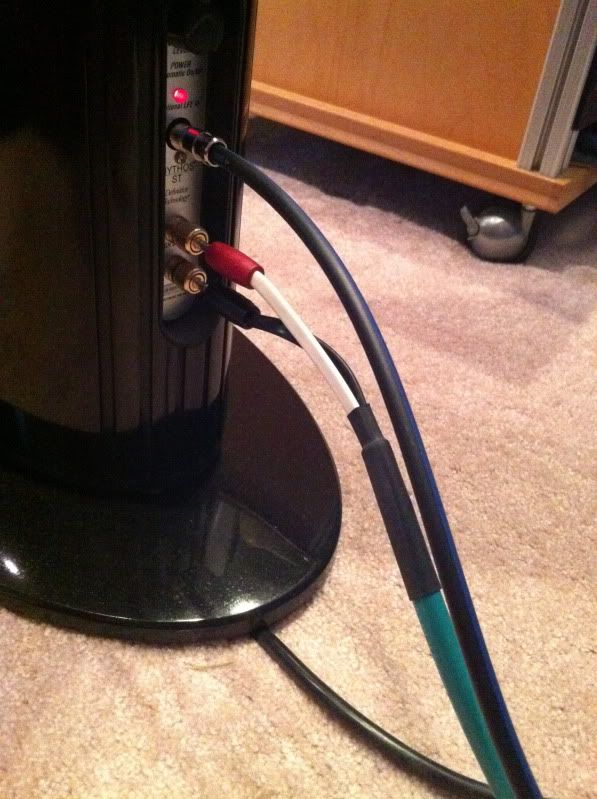
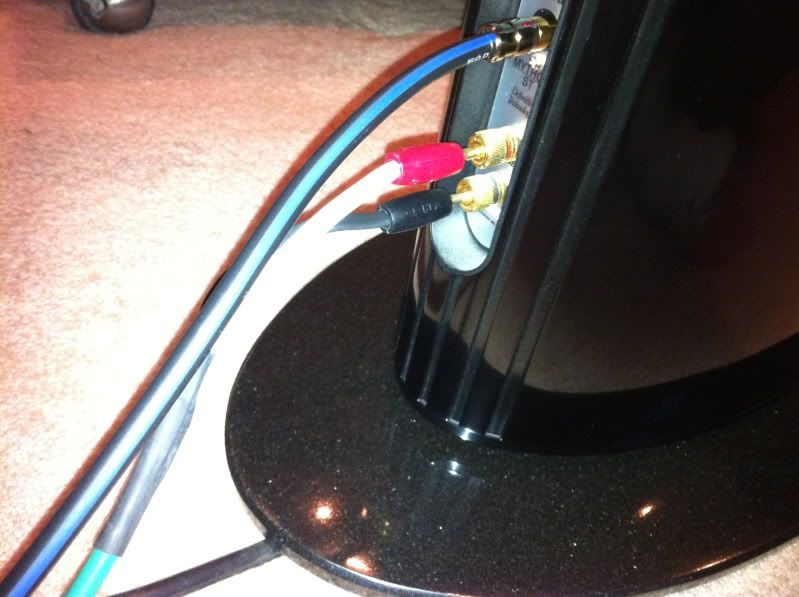
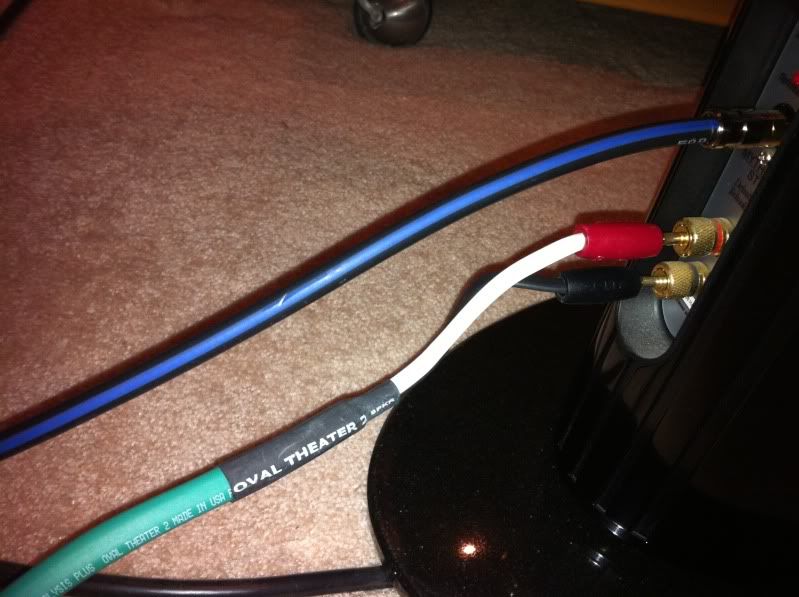
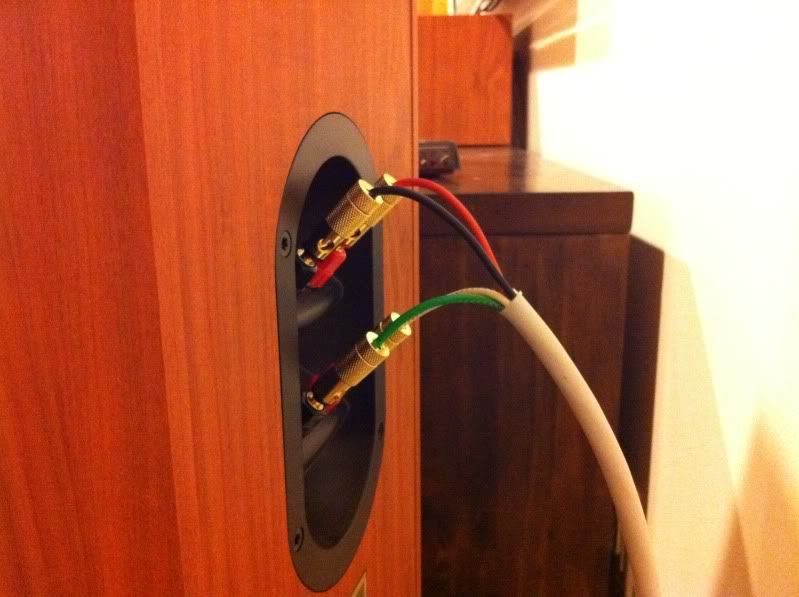
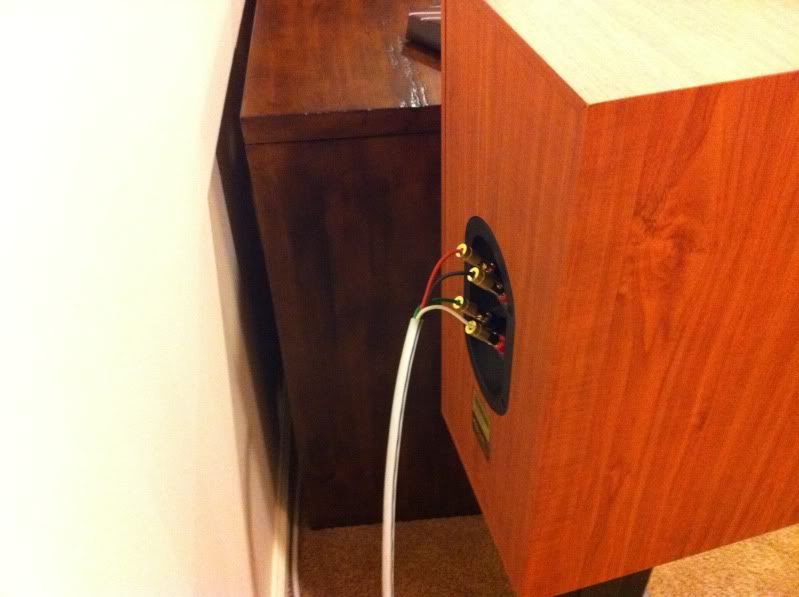 Dan
Dan
My personal quest is to save to world of bad audio, one thread at a time. -
http://www.aperionaudio.com/AperionU/banana-plugs.aspx
Please watch this video at least 10 times over so you have a deep understanding.Dan
My personal quest is to save to world of bad audio, one thread at a time. -
http://www.youtube.com/watch?v=ZbymrIeOhQA&feature=related
Here is another video for your viewing pleasure and learning curve.Dan
My personal quest is to save to world of bad audio, one thread at a time. -
Dan
My personal quest is to save to world of bad audio, one thread at a time. -
I'm so proud, because somehow I figured all of this out on my own without ever having to read instructions or watch a movie!!!! :redface::biggrin:
I don't know how I ever did it??
-
mdaudioguy wrote: »I'm so proud, because somehow I figured all of this out on my own without ever having to read instructions or watch a movie!!!! :redface::biggrin:
I don't know how I ever did it??
Me,too!!!!!!!If you can't hear a difference, don't waste your money. -
Some people just are not mechanically inclined , and thats ok.Dan
My personal quest is to save to world of bad audio, one thread at a time. -
Some people just are not mechanically inclined , and thats ok.
That's it in a nut shell.
I was mech. inclined but my brother wasn't. He could remember every joke he ever heard, I can't. It's just the cards we're dealt with.
Then there's common sense.....that's not so common anymore..:eek:Most people just listen to music and watch movies. I EXPERIENCE them.
“Anger is an acid that can do more harm to the vessel in which it is stored than to anything on which it is poured.”
--Mark Twain.
“If at first you don't succeed, then skydiving definitely isn't for you.” - Steven Wright -
Some people just are not mechanically inclined , and thats ok.
Yeah, I kinda get that, but how much inclination does it take? It just seems so simple, and yet, the next thing you know, some dude's snapping off his binding post. I mean, I could do something dumb like that, too...
But the questions that come up on here... Perhaps someone at Polk should spend a little time and add some info to the manuals. Maybe some better diagrams and explanations of the various connection options. The first thing they should include is something about the jumpers - their purpose, the fact that if they're in place it really doesn't matter whether you connect to the top or bottom, etc... You wouldn't need more than a page to clear up a lot of the confusion that's caused, such as it seems. -
To add to the confusion, sometimes the binding post can be removed all the way and other times it can only be loosened to a maximum.
Polk Monitor 40 can be removed all the way, then it's just a question of inverting the binding post and the small plug pops out without any problem.
Polk CSM cannot be removed all the way, for some reason--the plug can be loosened only to a certain point. Need to use a needle nose pliers (also called mini long nose pliers in some tool kits) to pry out the plug when the binding post is in the fully tightened position.
As for the banana plugs themselves, it's usually just a matter of twisting the speaker wire and then **** on the banana plug; however, check the direction. I have some where the protective cover shows a COUNTERCLOCKWISE direction, therefore, the speaker wire has to be twisted counterclockwise, then the banana plug is tightened over the twisted wire in a counter clockwise direction.
Assuming all that is known, the procedure becomes:
1. Remove plugs from the binding posts.
2. Reinstall binding posts by tightening all the way.
3. Twist the speaker wire strands in the direction the banana plug tightening direction for both the positive and negative speaker wires.
4. Slide the protective cover (if included) on the wire past the speaker wire strands.
5.Tighten one banana plug for the positive side, another one for the negative side.
6. Slide the protective cover (if included) over the non-connecting side of the banana plug.
7. Insert each banana plug into the hole in the binding post.
Repeat for each speaker to be connected by the banana plug method. -
Mon40CSMM10 wrote: »To add to the confusion, sometimes the binding post can be removed all the way and other times it can only be loosened to a maximum.
Polk Monitor 40 can be removed all the way, then it's just a question of inverting the binding post and the small plug pops out without any problem.
Polk CSM cannot be removed all the way, for some reason--the plug can be loosened only to a certain point. Need to use a needle nose pliers (also called mini long nose pliers in some tool kits) to pry out the plug when the binding post is in the fully tightened position.
As for the banana plugs themselves, it's usually just a matter of twisting the speaker wire and then **** on the banana plug; however, check the direction. I have some where the protective cover shows a COUNTERCLOCKWISE direction, therefore, the speaker wire has to be twisted counterclockwise, then the banana plug is tightened over the twisted wire in a counter clockwise direction.
Assuming all that is known, the procedure becomes:
1. Remove plugs from the binding posts.
2. Reinstall binding posts by tightening all the way.
3. Twist the speaker wire strands in the direction the banana plug tightening direction for both the positive and negative speaker wires.
4. Slide the protective cover (if included) on the wire past the speaker wire strands.
5.Tighten one banana plug for the positive side, another one for the negative side.
6. Slide the protective cover (if included) over the non-connecting side of the banana plug.
7. Insert each banana plug into the hole in the binding post.
Repeat for each speaker to be connected by the banana plug method.
I couldn't find an answer to banana plugs- why? Because my binding posts wouldn't come all the way out on our signature elite gear... so thank you for spelling it out for someone who is very mechanically inclined but isn't going to go pulling and prying on $1,500 worth of wedding presents!
Thank you Mon40CSMM10!!