Any interest in Physical speaker setup?

Hello everyone,
I just finished setting up my front new 3 in my system. I haven't talked about it on here on exactly how I do it or even how to do it other than answering some questions over the years.
So it got me thinking that I could go over what I do and how I achieve the best sound I can with what I got in the room and limitations I have . If you're interested in a thread like that , I can continue on this one as such.
Also I would like you to share your ideas thoughts and take my setup , try it out on your system and see what it does for you. Then if you find ideas on how you have to modify it to fit your situation, pleas share with the class.
for
So the idea is Physical, not calibration. We can go deep as you want there on another thread , which would be better than doing it on this one. I think this one should stay on track for physical placement.
We can go as deep as you like and we can share pictures of your system and what I think could tweak it to help you enjoy it more.
So post some comments and let me know if you want me to go into this . I'll break it into sections like "setting up the center channel" ,"how to place your front main speakers".
Once we get the front 3 the best our rooms will allow, we can dig into surround placement , Atmos placement and then finally subwoofer placement which can include 1-4 subs in the room.
Dan
My personal quest is to save to world of bad audio, one thread at a time.
My personal quest is to save to world of bad audio, one thread at a time.
Comments
-
HOW TO POSITION YOUR CENTER CHANNEL.
This pertains to table top Center channels in in ceiling , In wall on wall models.
After you remove from the box or if you had it for a very long time doesn't matter. You want to try and position the center channel as dead center as your space will allow underneath the Display.
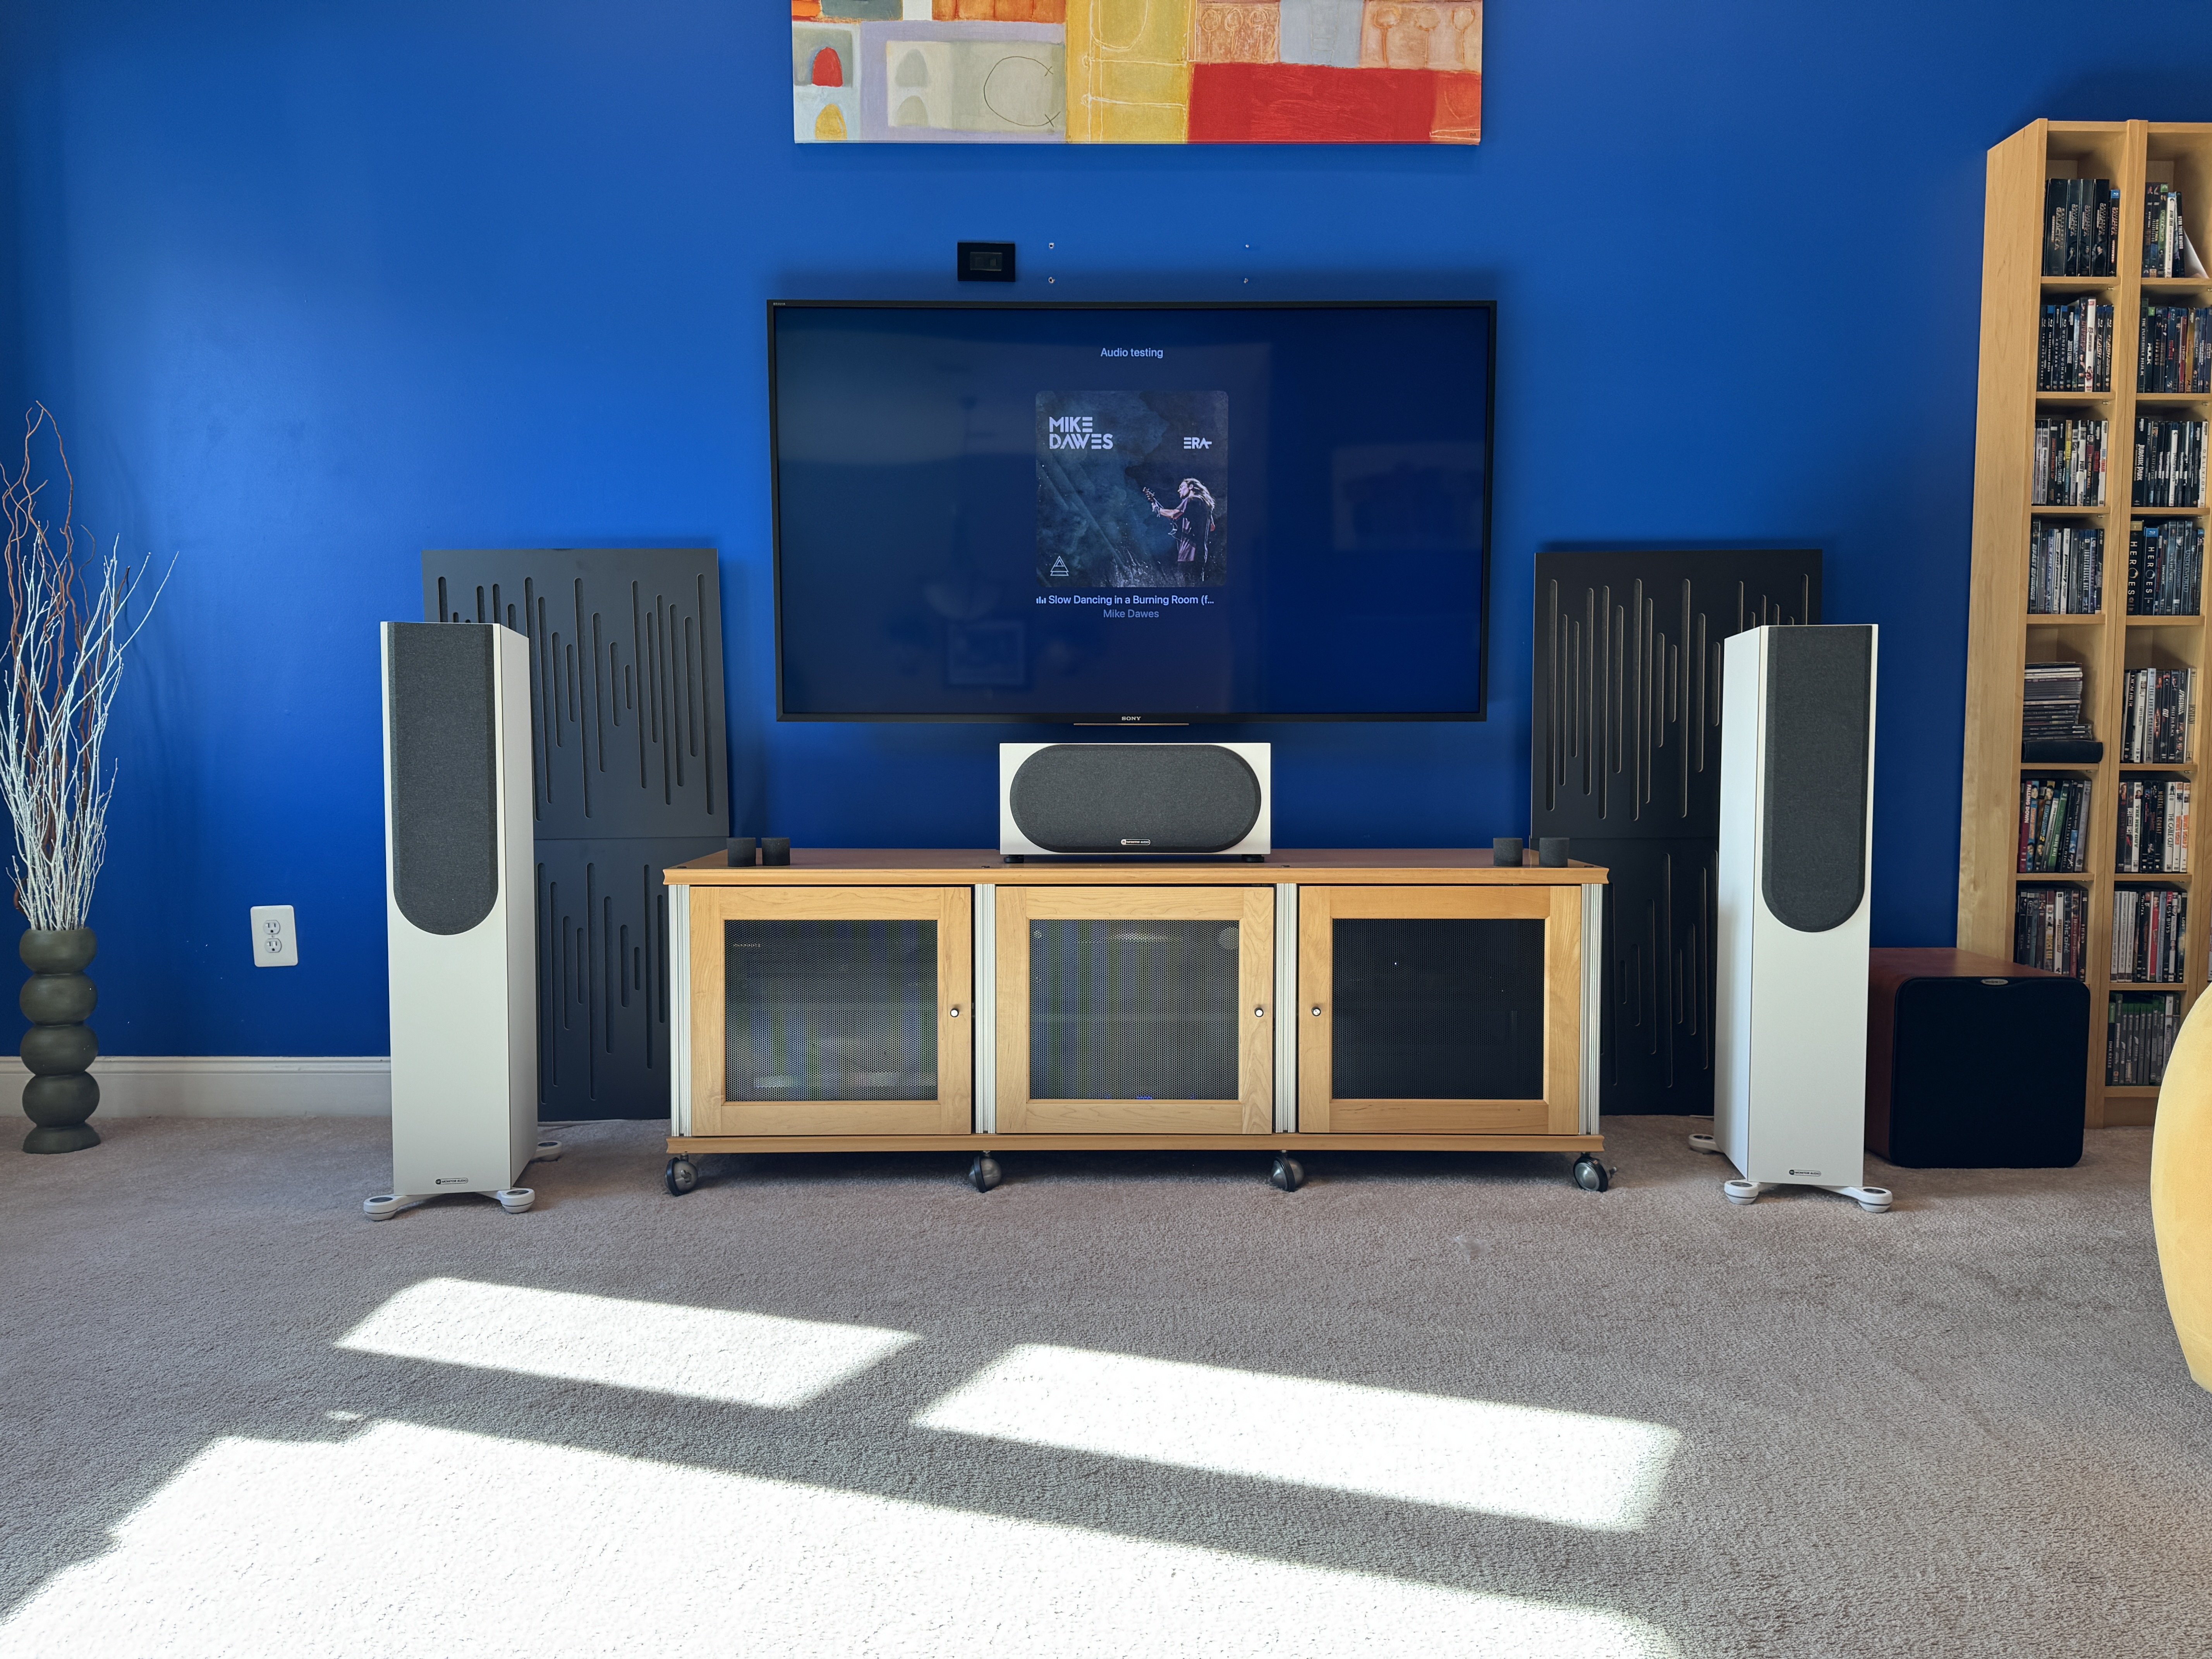
If you're putting it on top of an equipment cabinet, you want to move it slightly forward so it's not all the way in the back .
REASON
If you have your center channel pushed to the back of the top of your cabinet , you now created a first order reflection. Now you have to address that issue and that could mean deadening material as used as a Doyley type thing so it looks nice while removing your reflection point.
So what I like to do is move the center channel about 2/3 of the way. You can go center if that makes sense to you and your other. Now you still will have a reflection point but being slightly closer to the front you can then angle the speaker upwards.
There are tons of ways to get this done. ISOLATION feet , rubber feet , Home Depot rubber feet or any hardware store, you can go on amazon and find things etc.
I usually throw out the factory small thin rubber feet most speakers come with. I replace them with thicker ones and then I also use rubber feet I keep from when I rack equipment as a lot of nice feet you can collect and find uses later. So the Center channel with the Rubber feet even if level mounted decouples the center from the furniture . Squesy things underneath usually do a fine job at that but if you want to spend alot more money, ISO ACOUSTICS makes some nice stuff. We will keep it simple to get going. You can venture down that road with more experience.
You want to try to get your angle to open up the center channel sound , point it at ear level or even slightly higher.
REASON
This does 2 things 1 it makes voices more clear and open and it helps remove the first order reflection we caused by placing a speaker on top of a piece of furniture.
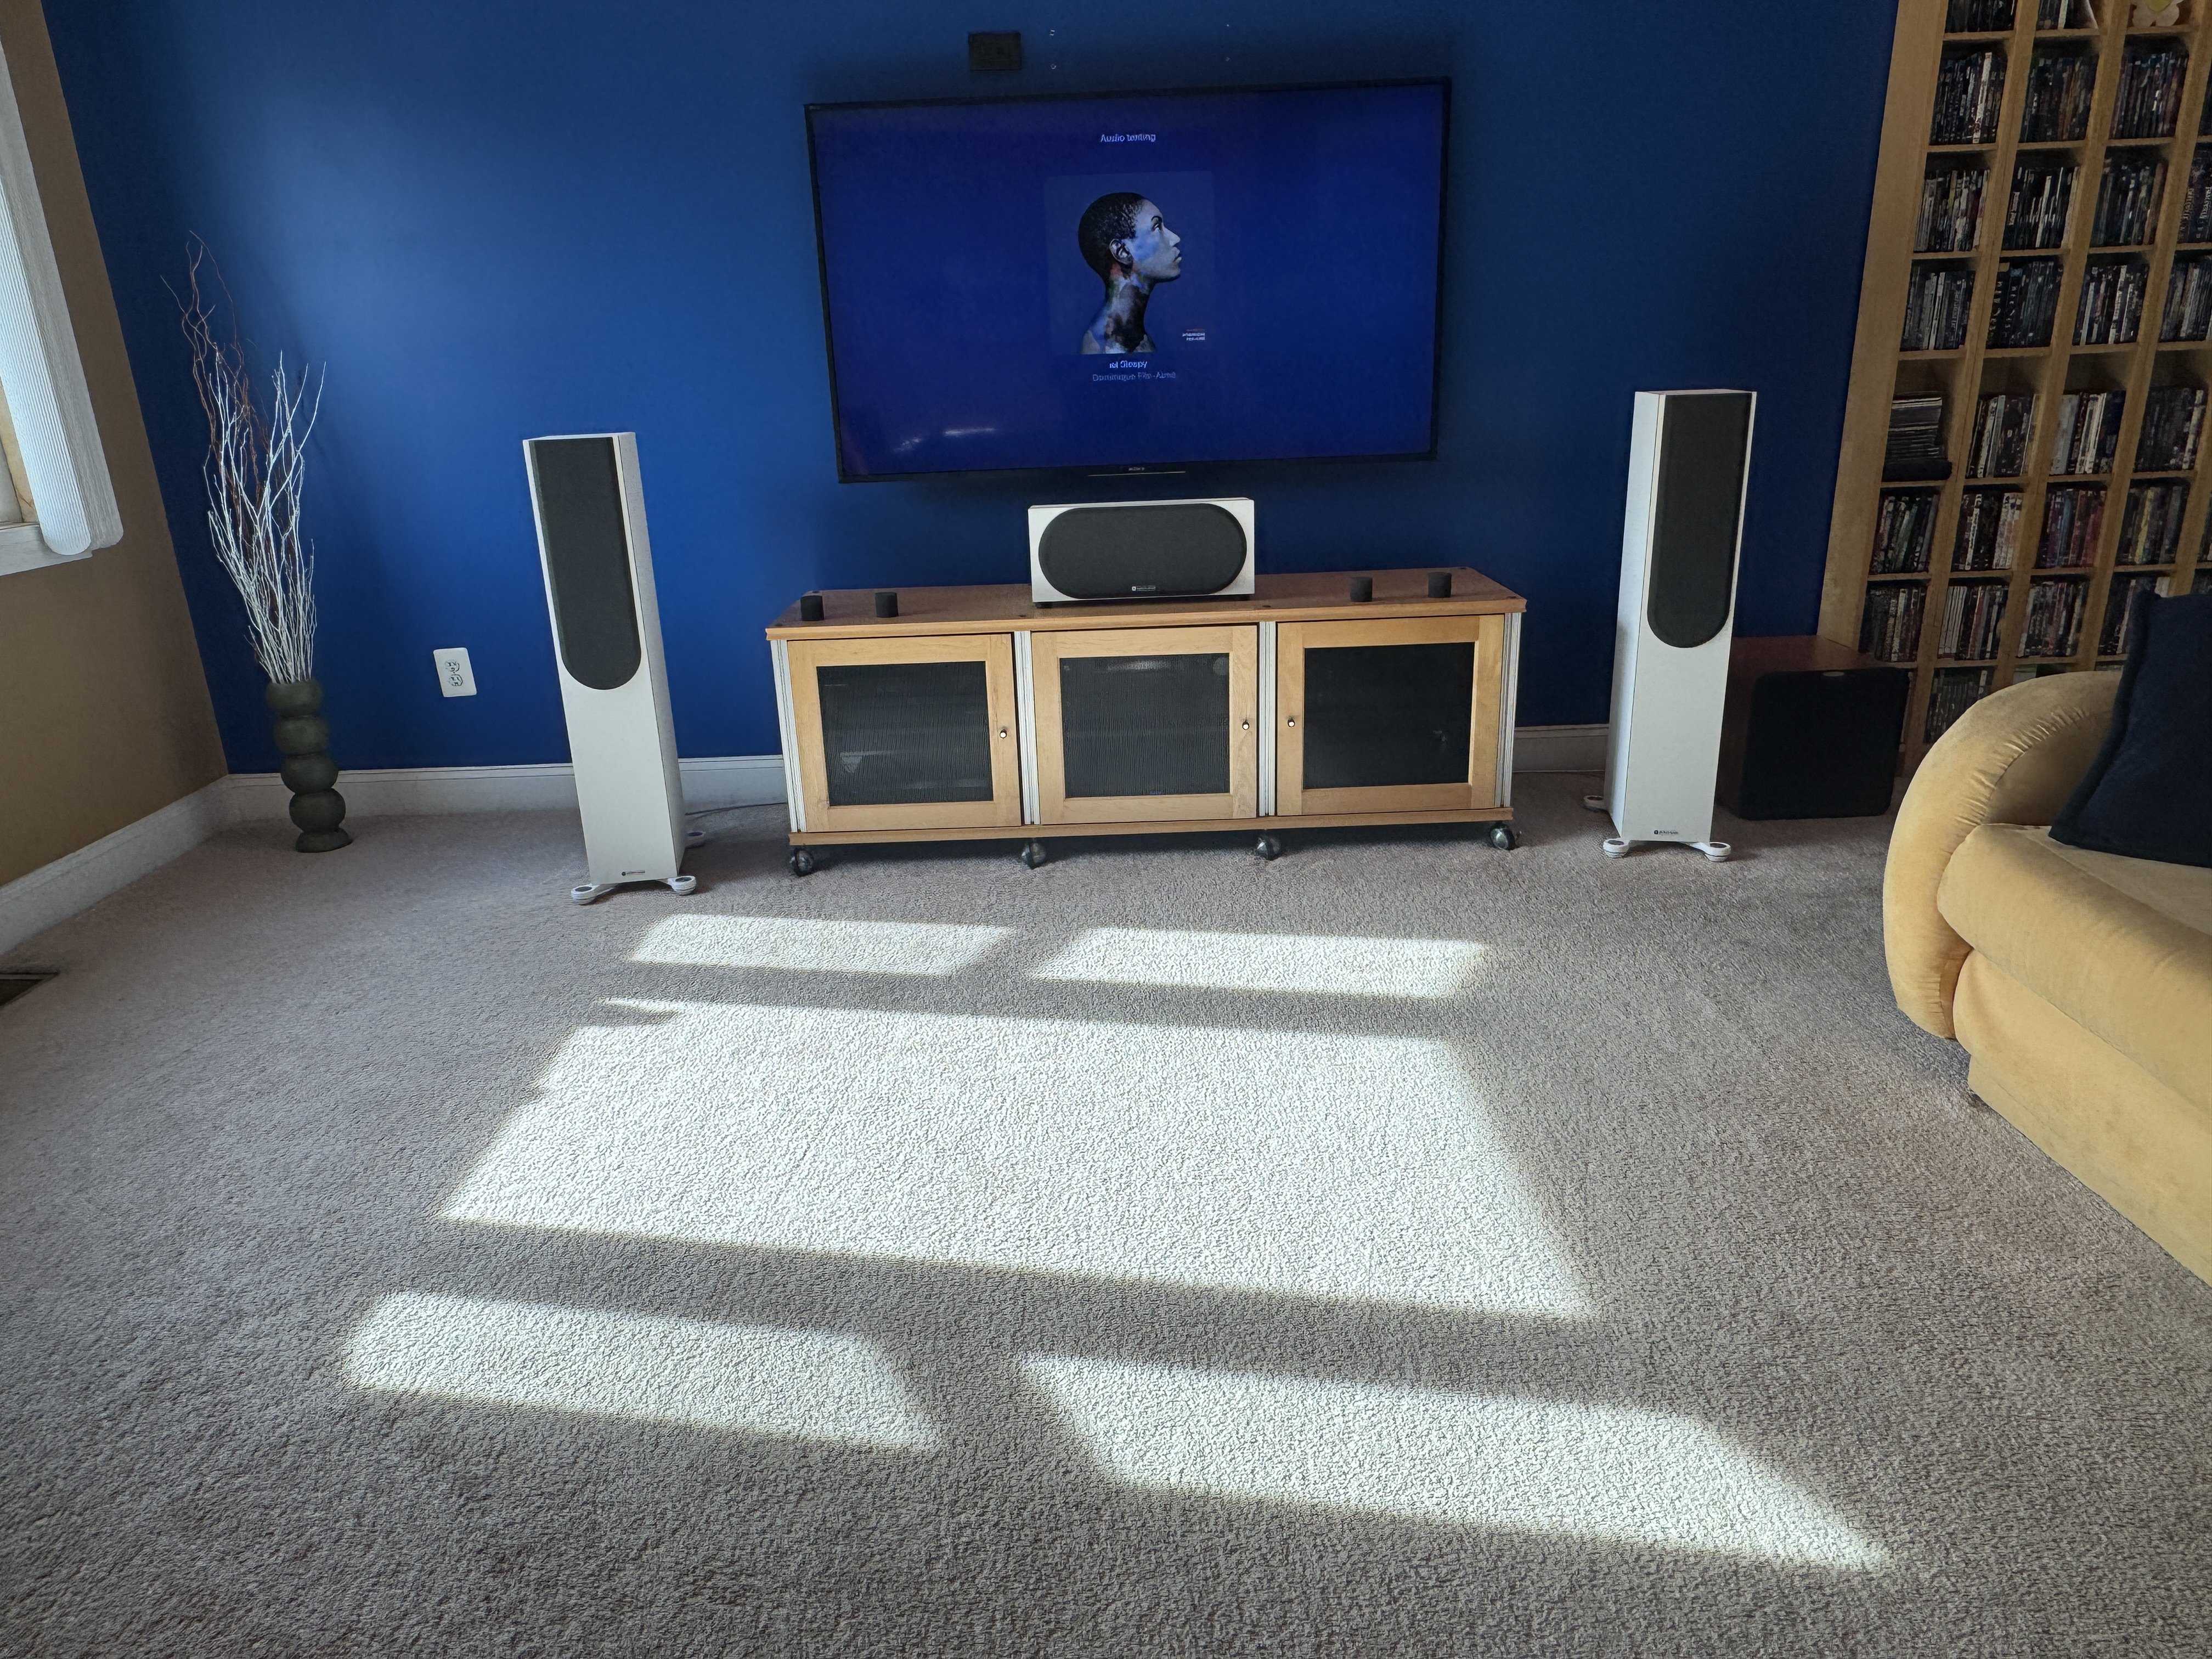
Here is my new center channel not perfectly dialed in, but my first dial as I 'm gonna sit and watch a movie tonight to hear how it sounds. Check it out.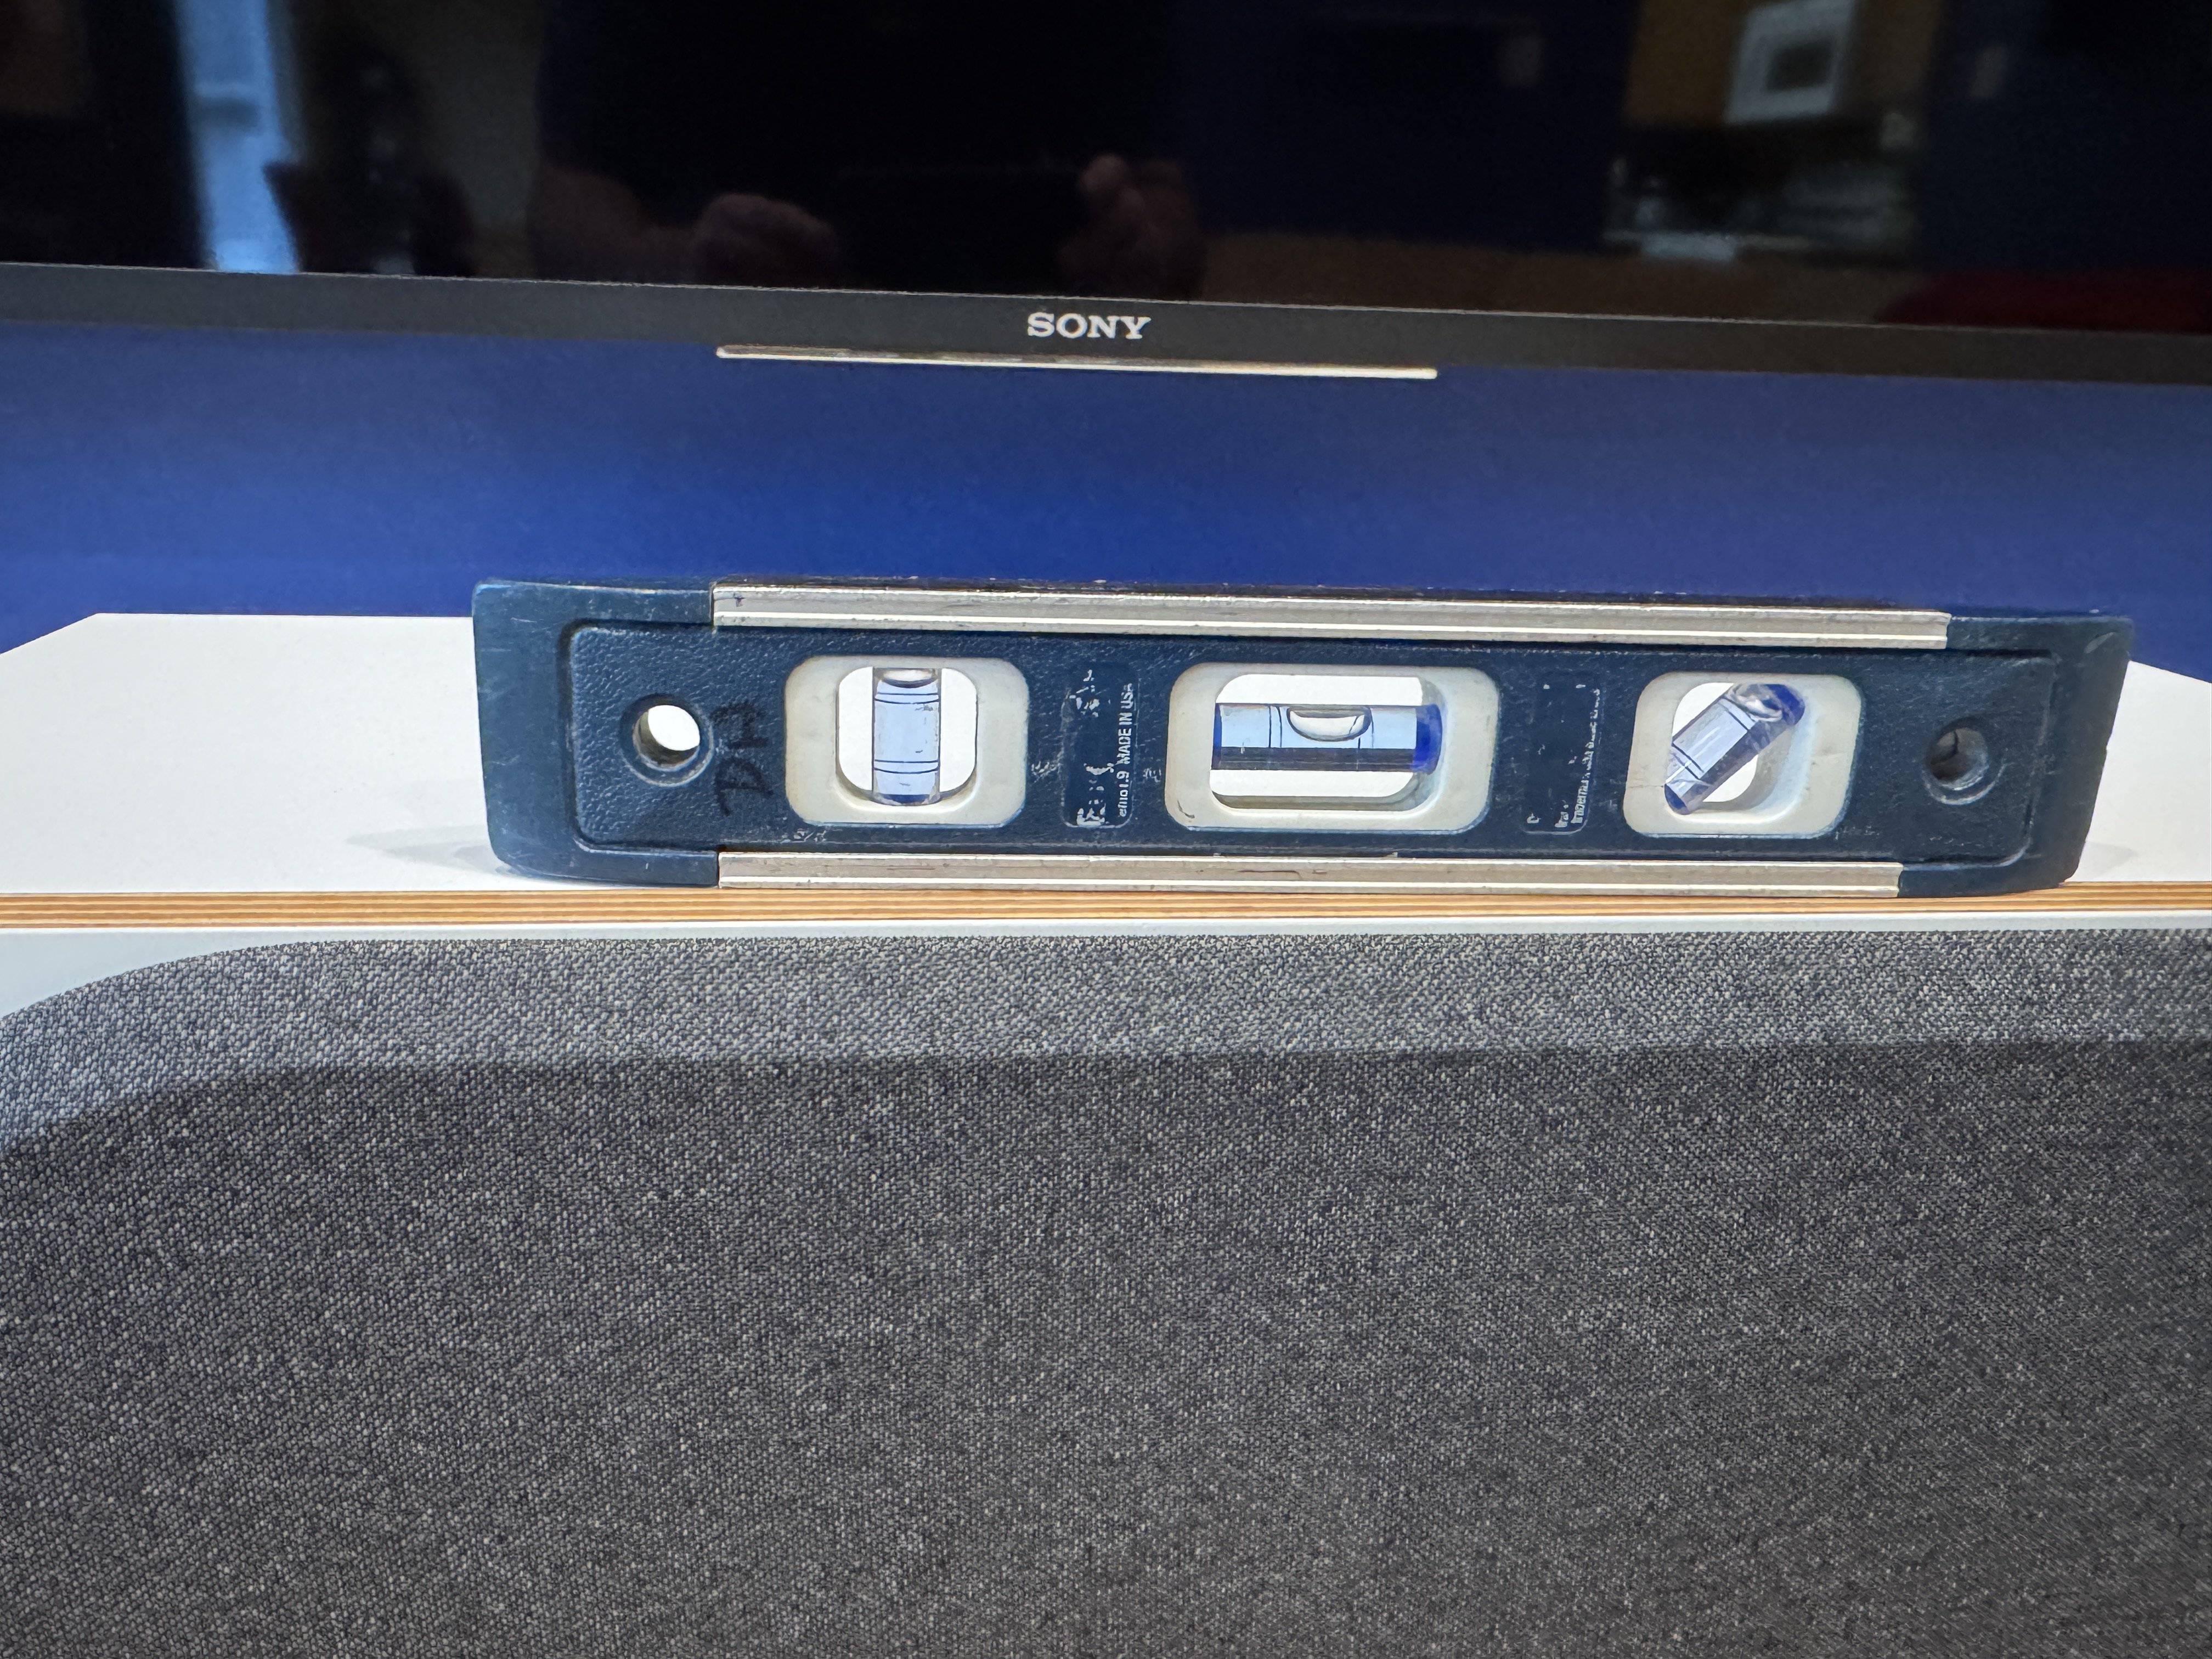


Dan
My personal quest is to save to world of bad audio, one thread at a time. -

Dan
My personal quest is to save to world of bad audio, one thread at a time. -
What are your feelings on the height consistency of the tweeters on the front 3 speakers? I have always read and been told that this was the ideal. Ironically, my current HT is the first time I have managed to accomplish this, when I built my equipment rack, I measured the height of the tweeters in my main towers, and got to within 1/2” (I blame the carpet for the variance🤣). It does present a very seamless front image between the 3 speakers…
“Human beings are born with different capacities. If they are free, they are not equal. And if they are equal, they are not free.”
― Aleksandr Solzhenitsyn -
I take Dan's approach and get the video display set up so the tweeters on the main speakers are level with the area somewhere within the bottom half of the screen with closer to the center being best. In my case with systems I've set up the tweeters for the main speakers tend to be level with about 1/3rd from the bottom of the screen. It doesn't have to be exact. The center channel speaker is below the screen and angled up a bit so it's directed at ear level for the listening area. There is more flexibility this way.
I use silicone pads of different sizes to angle the center speaker unless it already has a built in adjustment or is sitting on a dedicated center speaker stand with adjustment features.
The ideal is to have an acoustically transparent screen with the mains and center level with the center of the display screen to anchor the sound right in the center of the screen but few people can do that unless they have a dedicated home theater room and a projector.Post edited by Emlyn on -
What are your feelings on the height consistency of the tweeters on the front 3 speakers? I have always read and been told that this was the ideal. Ironically, my current HT is the first time I have managed to accomplish this, when I built my equipment rack, I measured the height of the tweeters in my main towers, and got to within 1/2” (I blame the carpet for the variance🤣). It does present a very seamless front image between the 3 speakers…
When I do theater rooms with behind the screen speakers, I line up all the speakers at the exact same height. This makes for a very pleasing experience. However in an on wall situation, Speakers mounted left and right of the screen , I usually go center or adjust depending on screen height and the center Channel usually goes below. With speakers mounted on the wall, you have little adjustments.I'll sometimes depending on the limited displacement of how the speakers fire into the room use washers behind the mounting brackets to give the center channel a slight angle upwards. Not really to noticeable so no one Aesthethic gets upset up I've done my job in getting the system to perform the best I can with what I have to work with.
So trying to get all the tweeters on the same level is a very good thing but you can play with angles to try to achieve it sonically instead of physically. When you have in room speakers on wall on floor on furniture with a display above, usually that display gets mounted more eye level and physically it's not possible. So that is where you start to play with angles upwards or downwards if the center gets mounted above the display which I have done many times including in my own home.Dan
My personal quest is to save to world of bad audio, one thread at a time. -
SETTING UP YOUR MAIN CHANNEL SPEAKERS.
This setup can be for 2 channel or Theater use. I find combining the 2 makes for a very sadisfying experience.
What's great about this is without spending any money at all, you can make small easy tweaks to position and get a lot of benefits out of your system. I'm willing to bet that if you have your speakers Not setup to the best you can and you do these steps, you may fall in love all over again with whatever speakers you are using.
So if you have bookshelf speakers on stands or floor standers, doesn't matter, the setup is exactly the same. This can apply to On wall or in wall speakers .
So if you know or not, there is a general rule many people and companies have gone buy for decades , it's called the equal triangle setup.
WHAT DOES THAT MEAN?
So you want to measure your distance from where your "KING SEAT" is to the left or right speakers. Let's say it's 11 feet 2 inches to the front of the speaker. Following the Triangle, you would want the speakers to be 11 feet 2 inches apart and the same distance for the other speakers left of right to also be 11 feet 2 inches.
Now with that being said, over the years I have found that NOT to work out for all speakers. Trying to follow a general rules of this nature just doesn't work out. Your best best for this triangle rule would be to first check your owners manual of whatever speakers you use for your main channel speakers.
Now for me and all the different brand speakers I have setup, I usually go against the recommended setup for a given pair of speakers and I take the room into account and the actual listening distance into account. What I do is look at the room I'm working in, measure the front sound stage wall. This is if you have walls on either side, don't sweat if you don't have side walls I'll get to what to do there.
So I measure the front wall and divide it up into 1/4's. I'll take the speakers and place them 1/4 in on both sides , sit at the listening position and play a clip of a song I know extremely well. I learn how the speakers I'm working with how they sound, how they project and how they like living where I put them. This works some of the time as they could live exactly in this position.
The next thing I use is the 3/4 rule. This is one of my rules I discovered that seems to be more universal Than the equal triangle rule. So I will position the speakers apart 3/4 the distance that the listening portion measurement is. So easy math 10 feet seating distance will be 7 feet or so the speakers will be apart. At this point it's a game of inches. You listen to them at this position and see how they sound strage. How do they Image?
Once you figure out the best distance apart we will now talk about my soft curve technic and toe in.
Distance from the front wall . Sometimes we can't get away enough like 3 or 4 feet out into the room. Some of us don't have that kind of space OR our wife's might not want giant ugly speakers in the middle of HER or HIS room. So again don't worry about perfection. If you can achieve that, great I can get you there, if you can't I can help get you as close as possible.
So the soft curve, Imagine in your head a very soft curve line that your speakers live on. This will not work with on wall or in wall speakers unless you build a false wall. We have flat walls that are usually straight and well flat. Skip this if this is you. Think about the failed CURVE TV's. The idea was to WRAP you in a picture that put you more into the movie. The failure here is no one purchased one big enough to actually experience this unless you sat 2-3 feet away from a 75 inch screen.
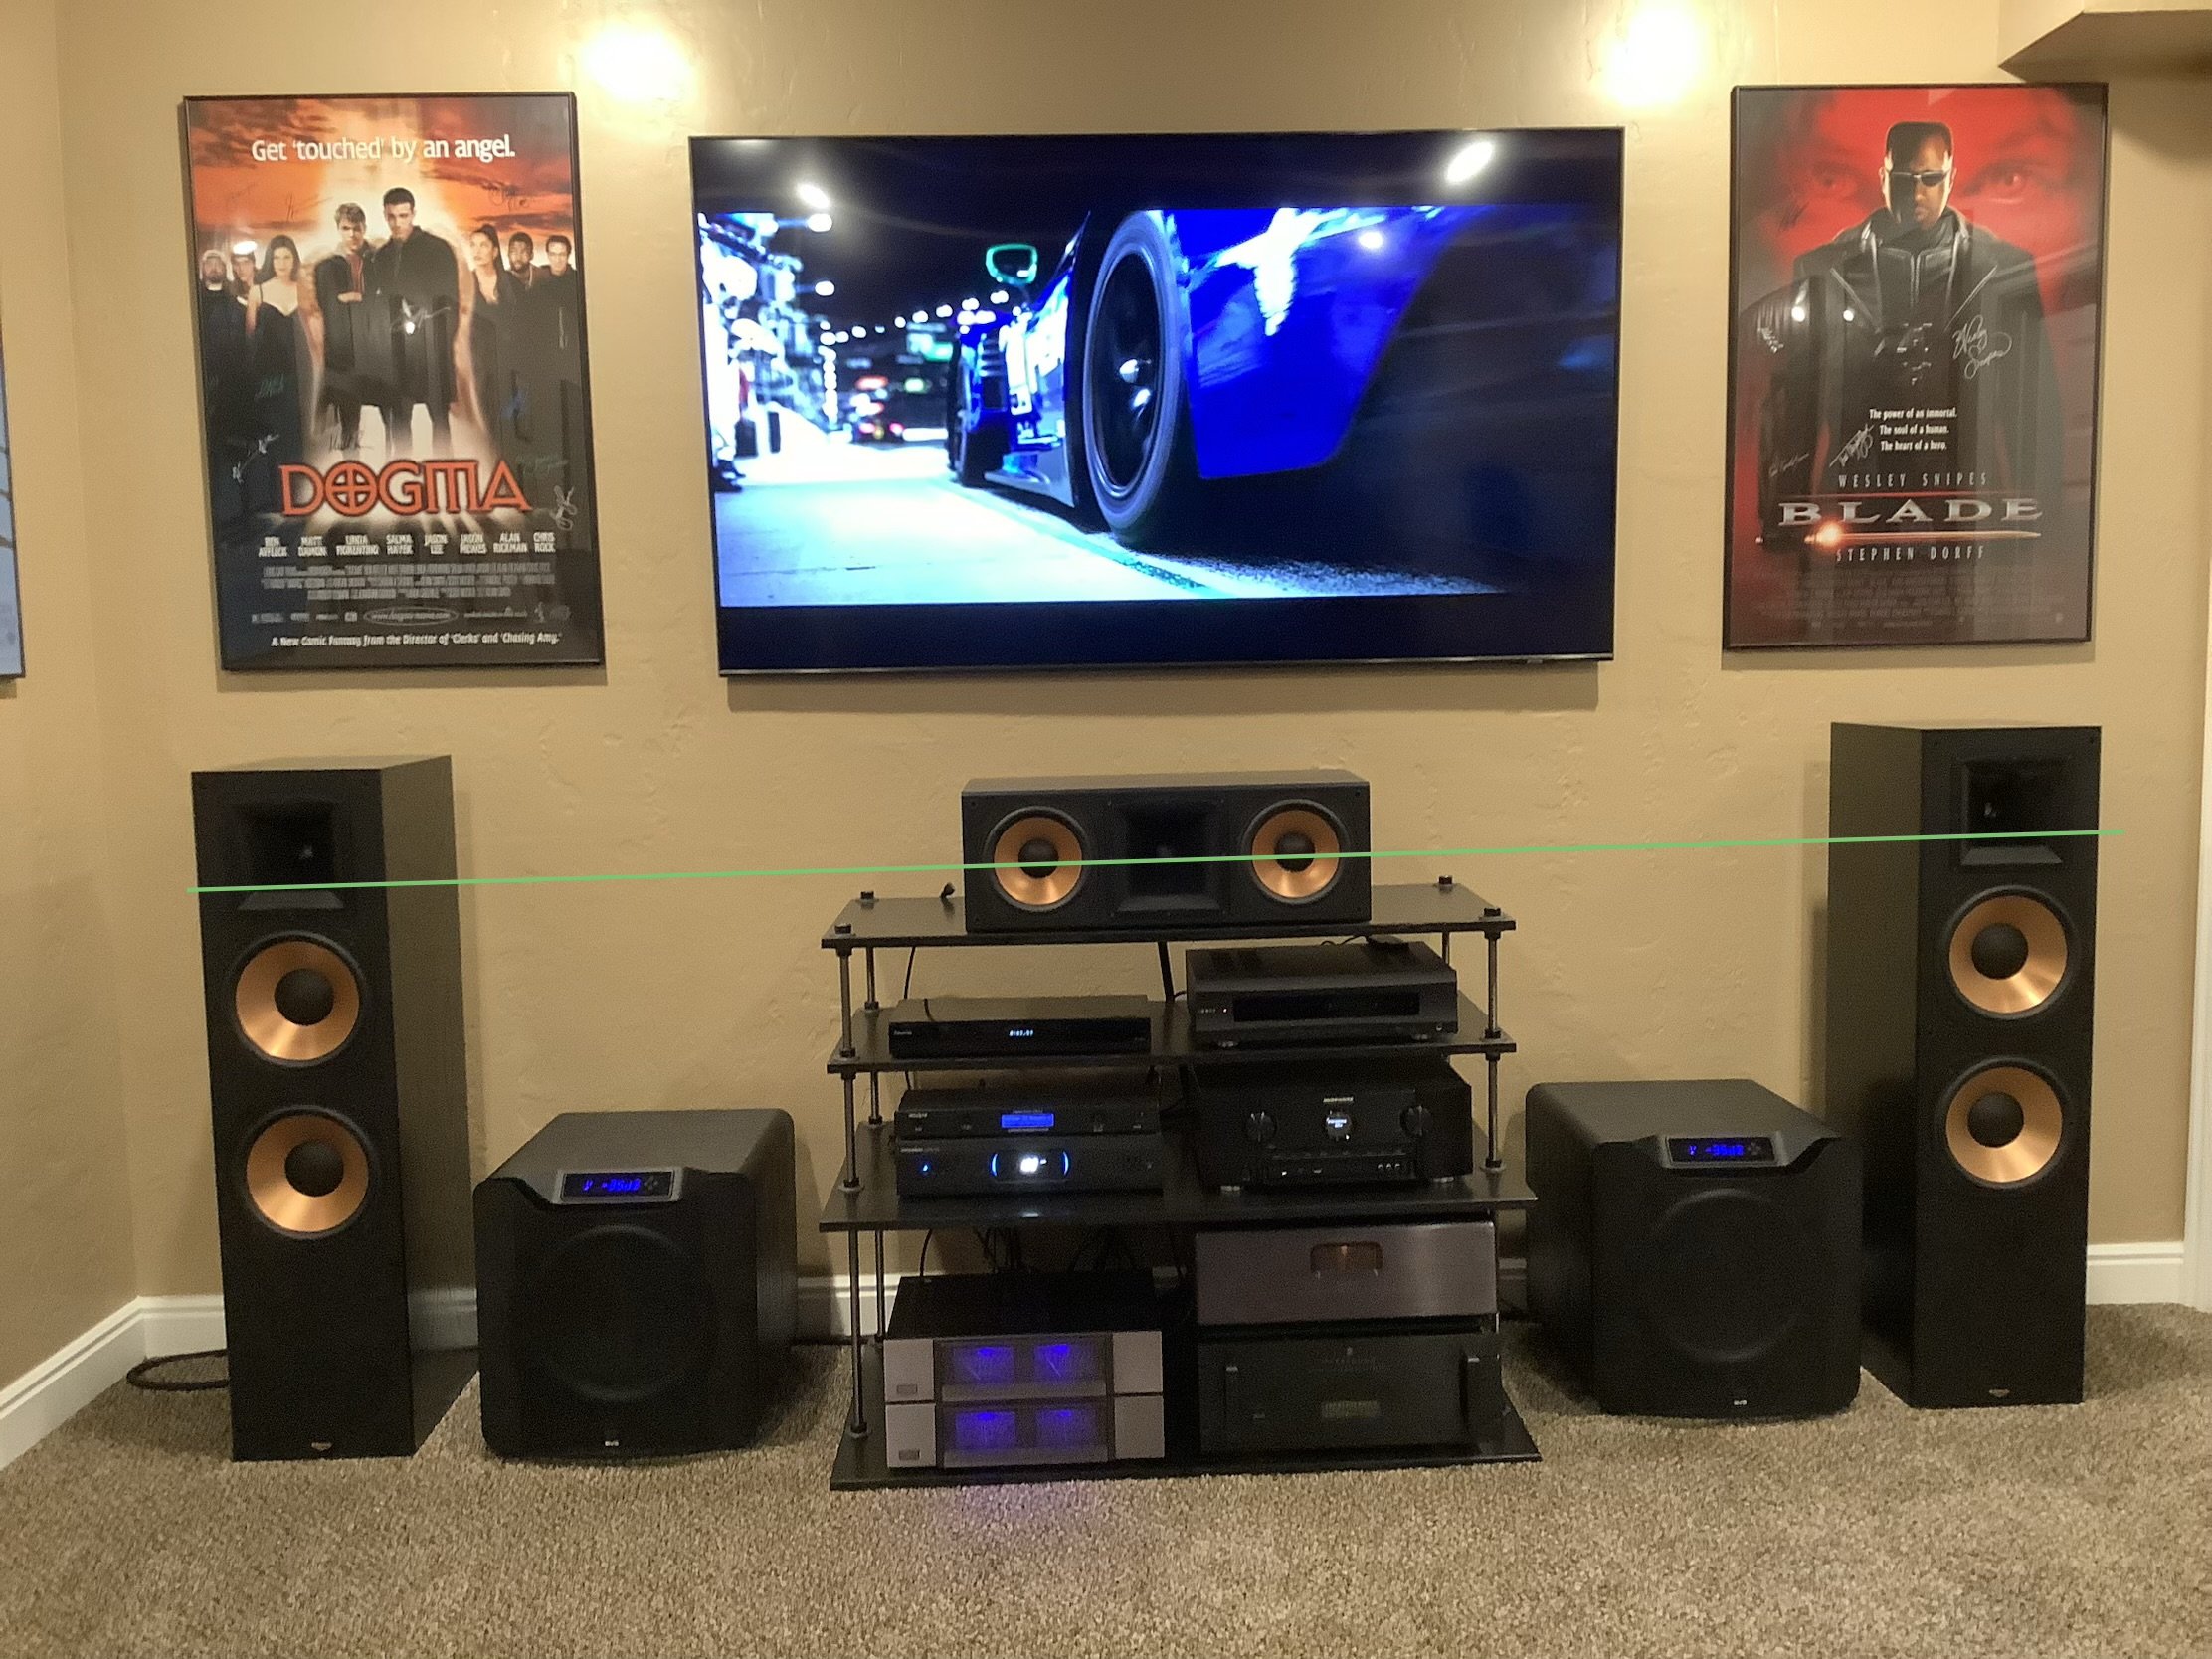
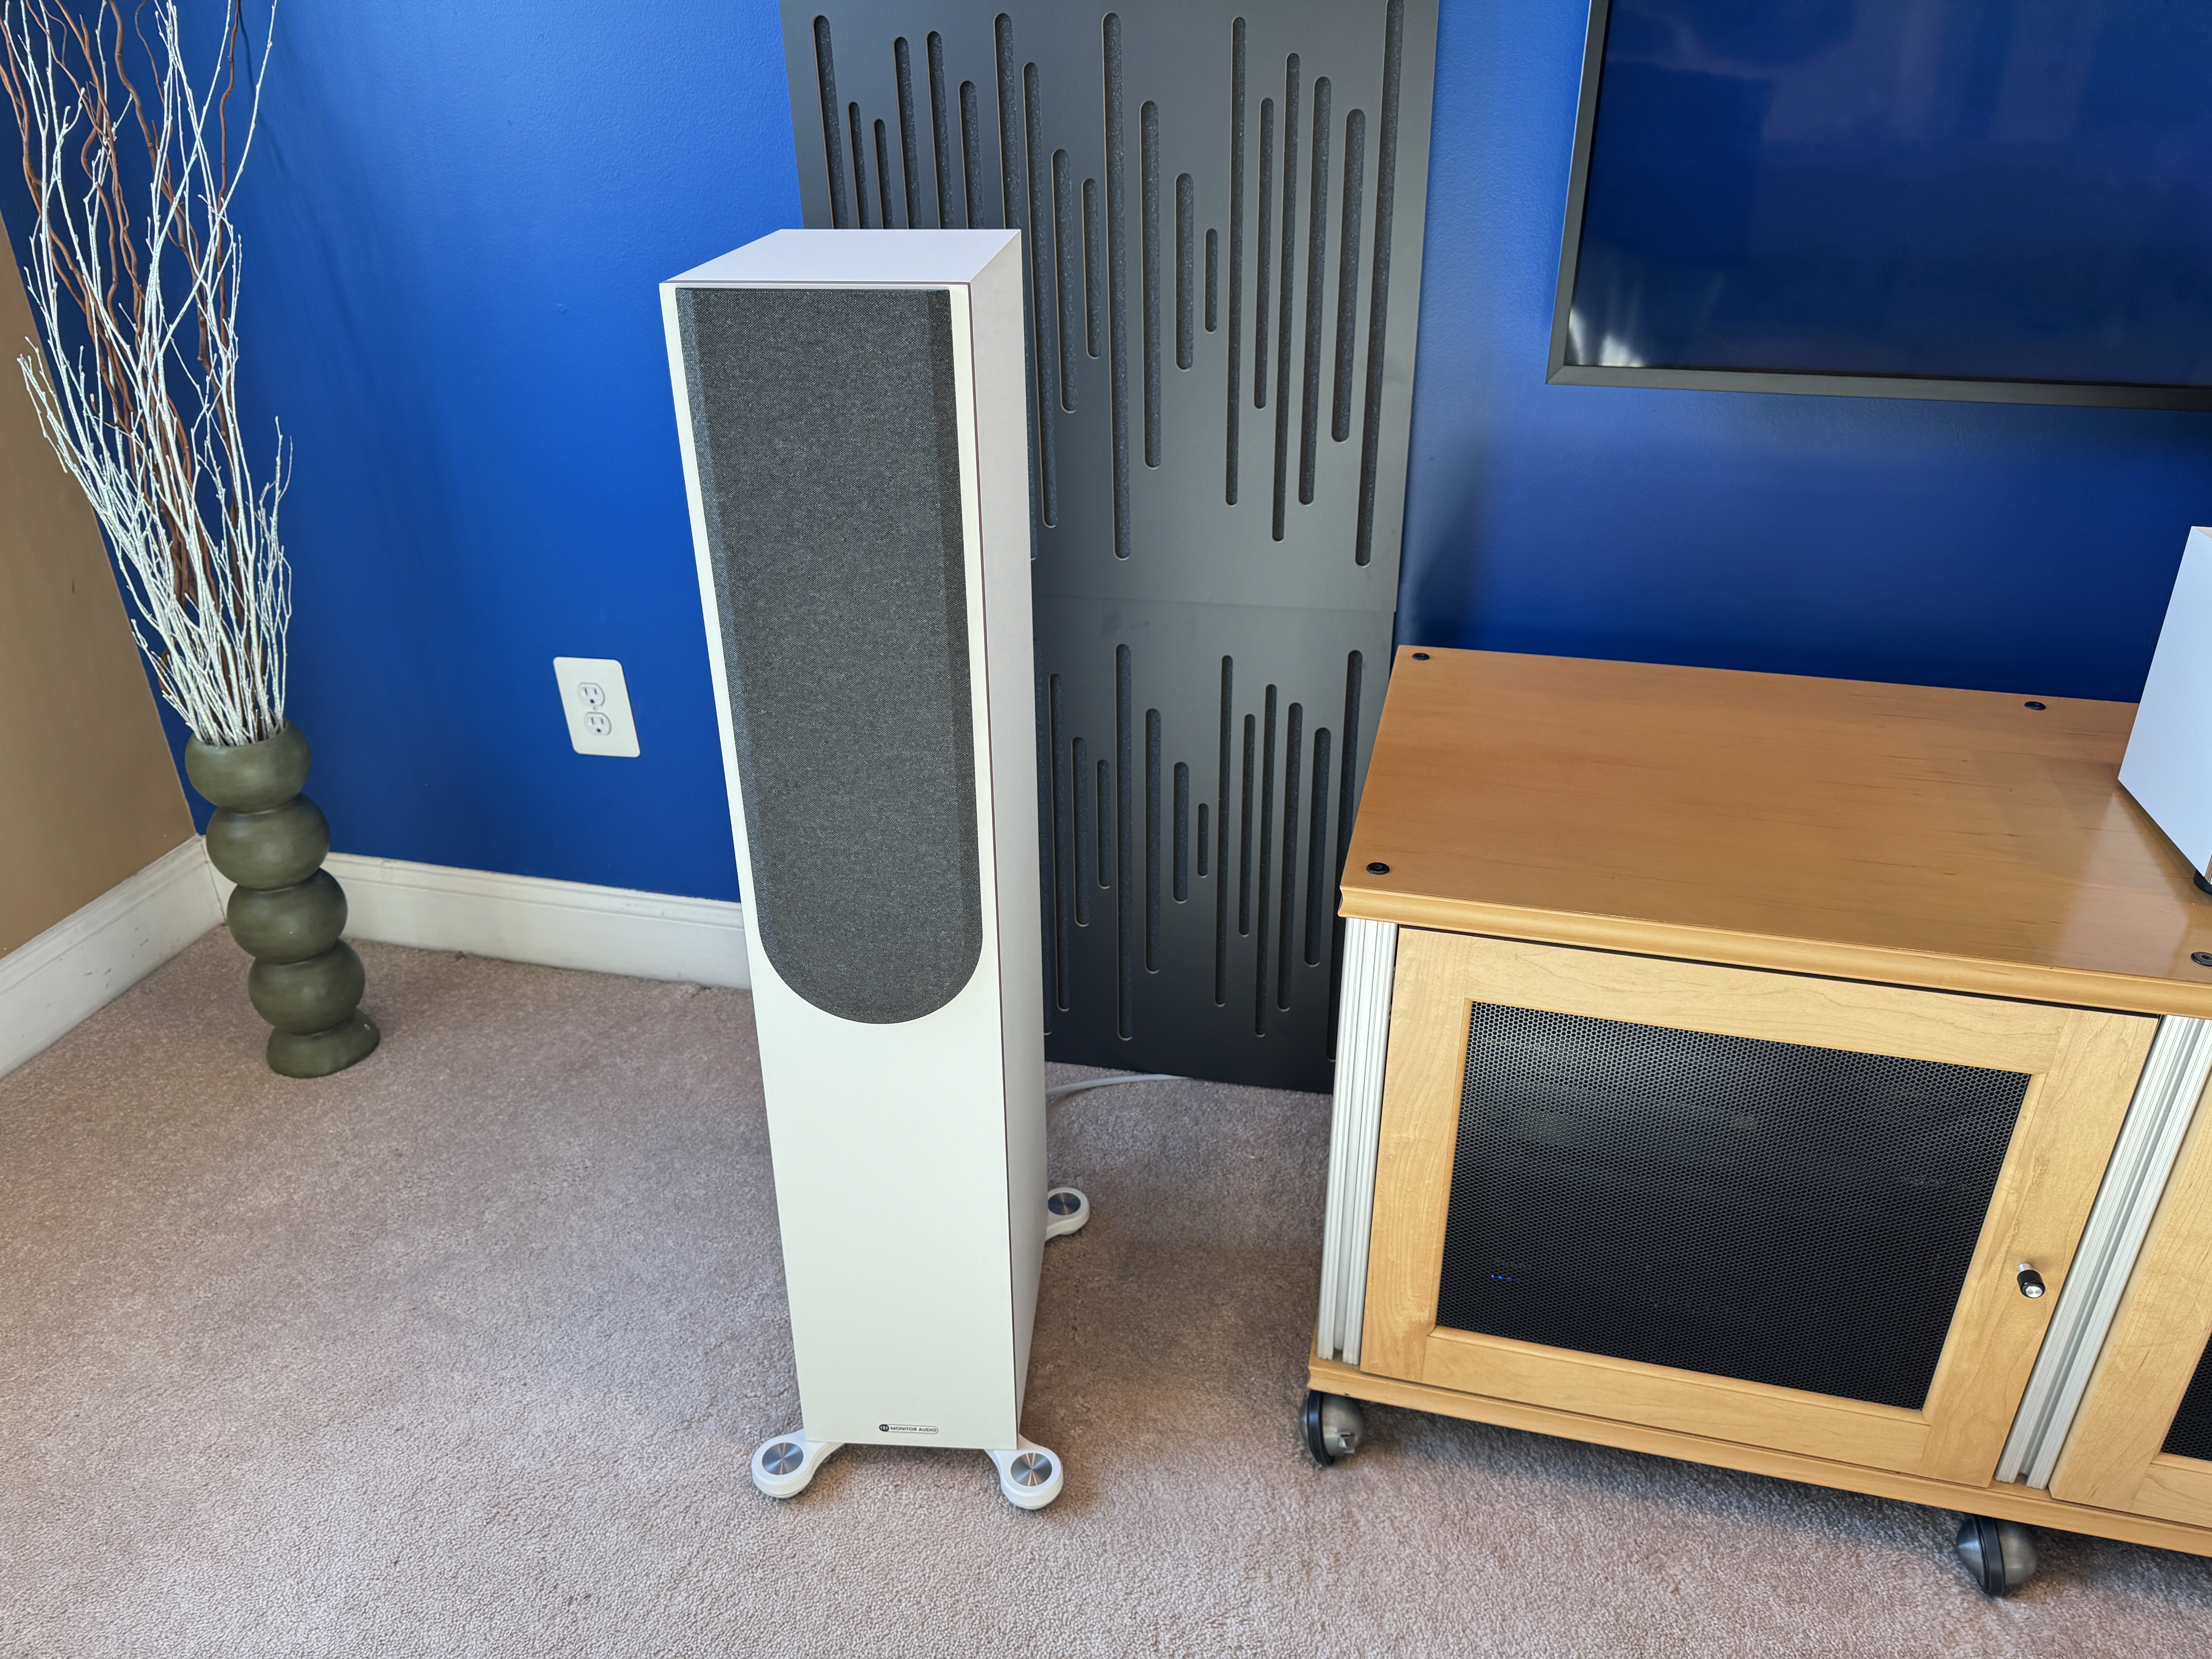
So with your speaker distance apart, now start pulling them away from the front wall a few inches, a foot or 2 if you can. But start out with just 6 inches , then go 12 then 18 and so on and so forth to you build a soft curve. let me show you my soft curve to give you the idea of that the hell I'm talking about. A video would probably be better BUT I'll get this to work just fine.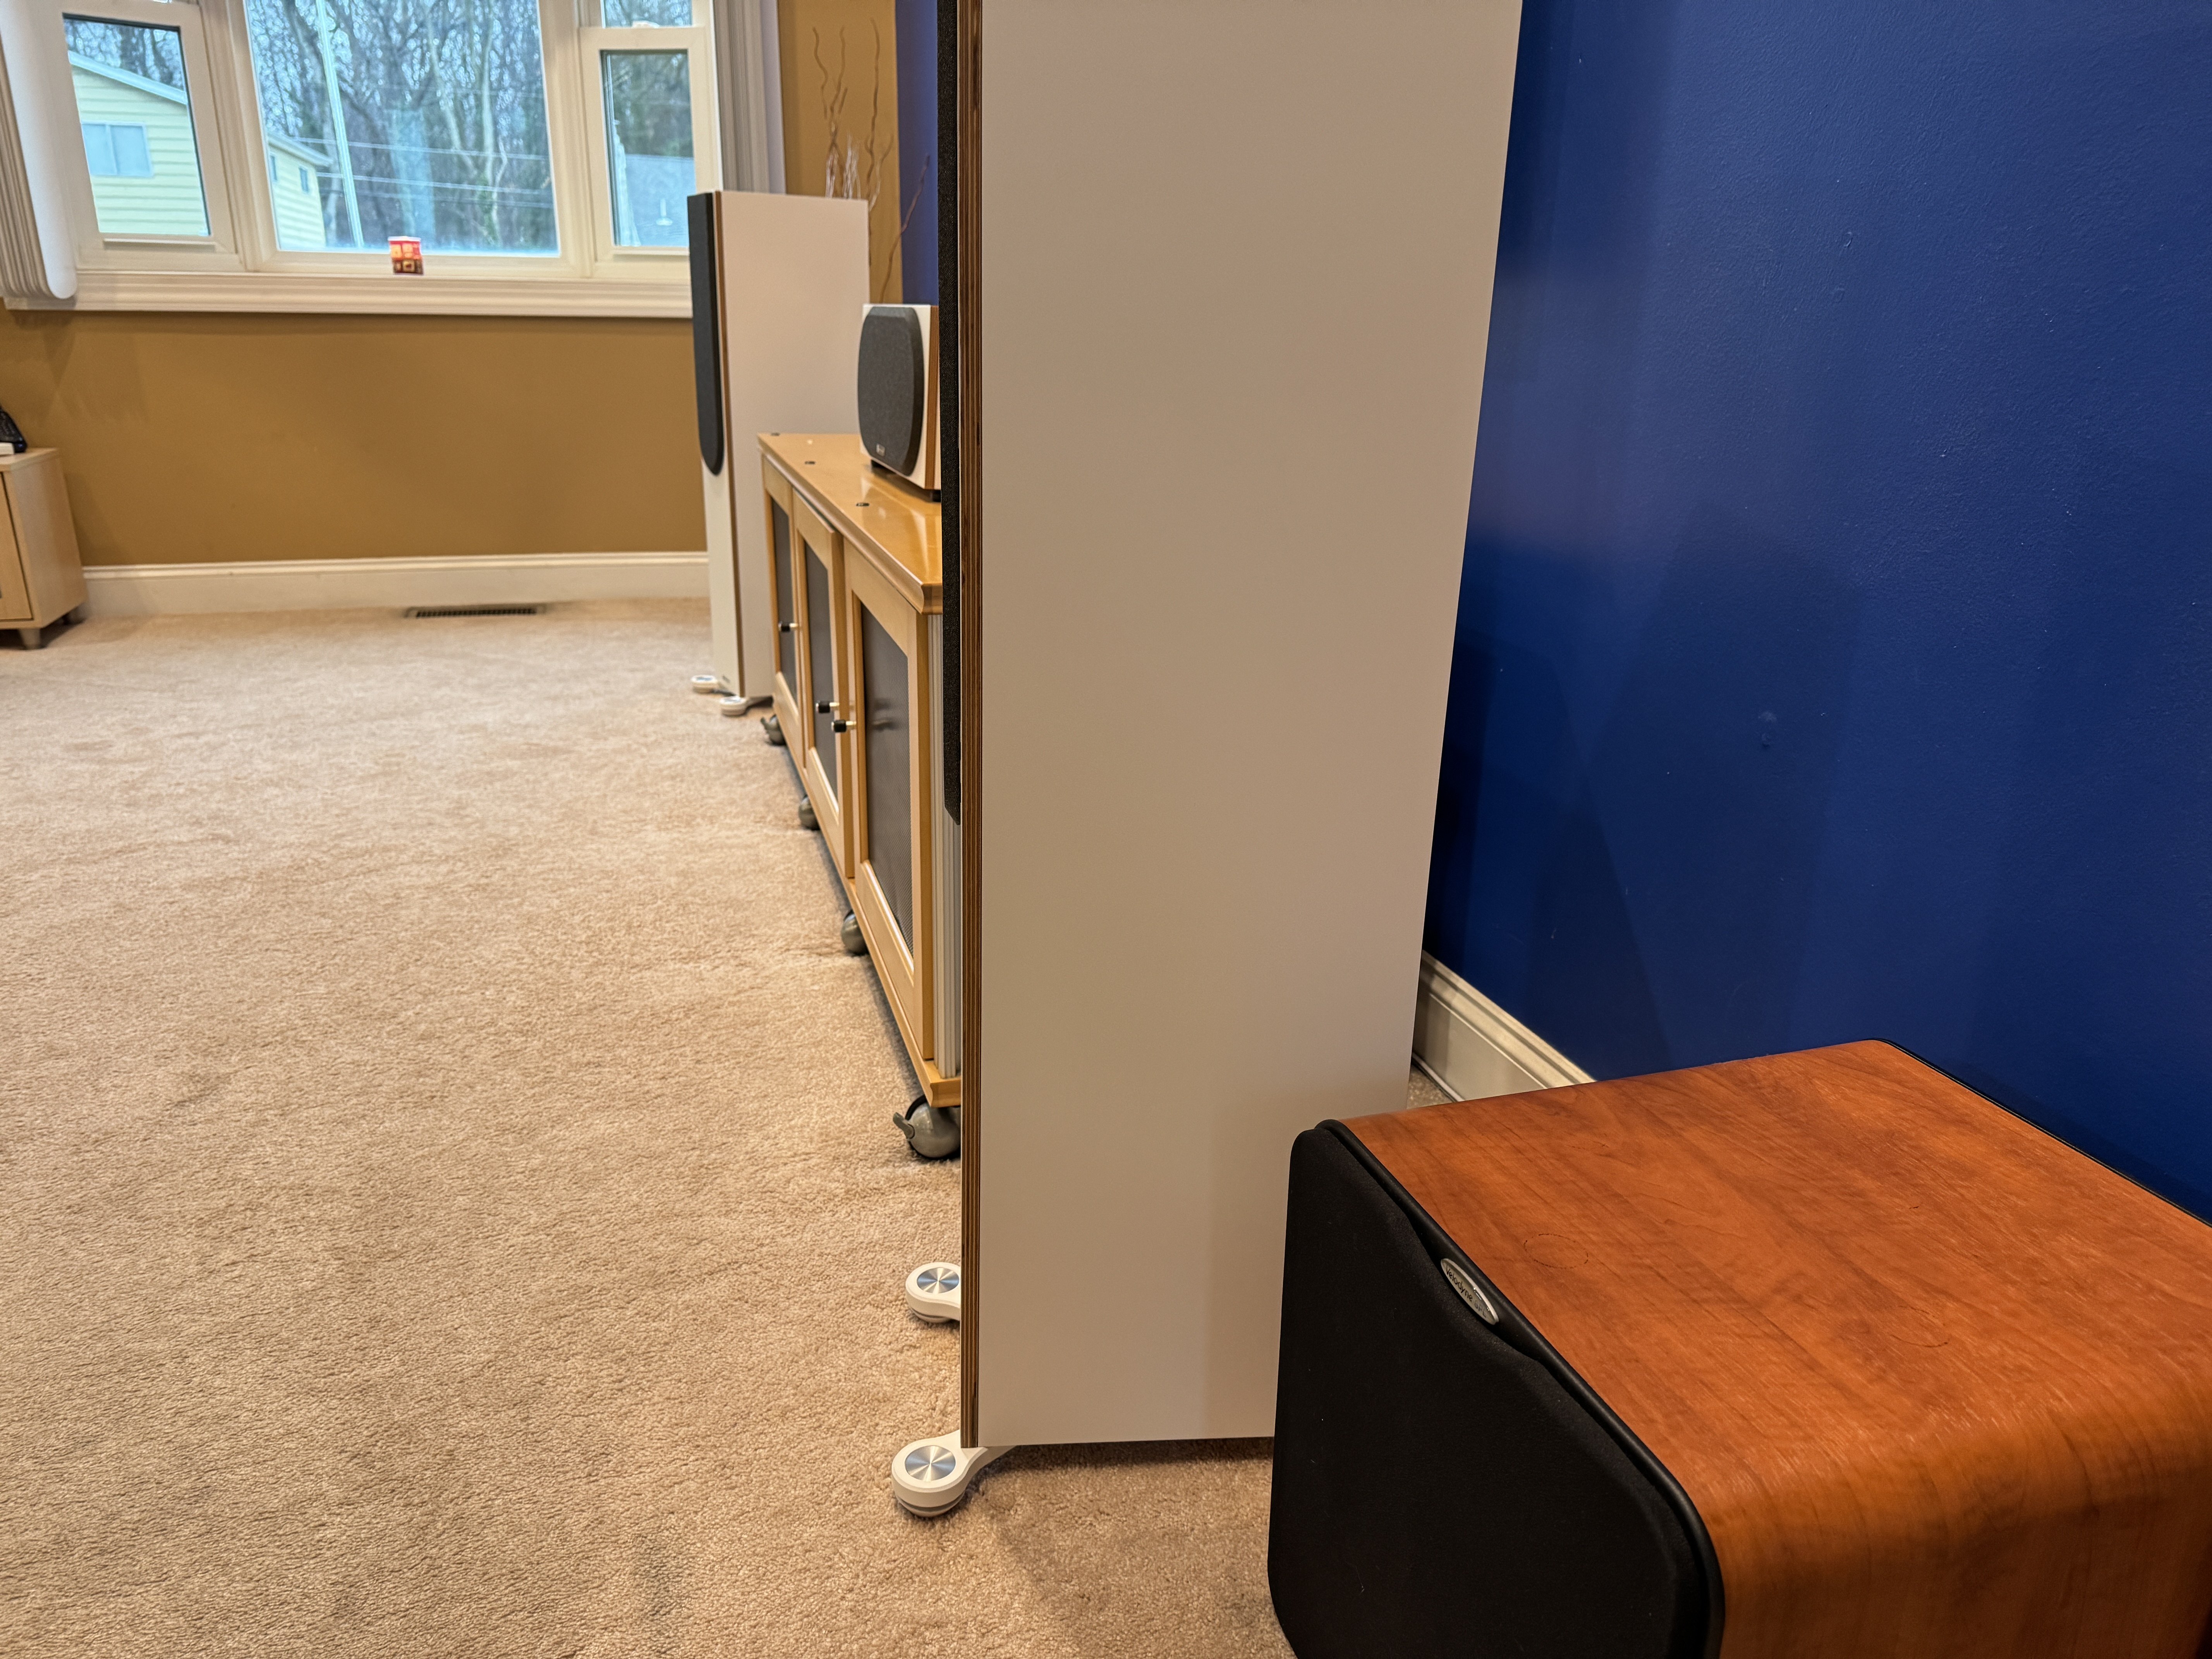
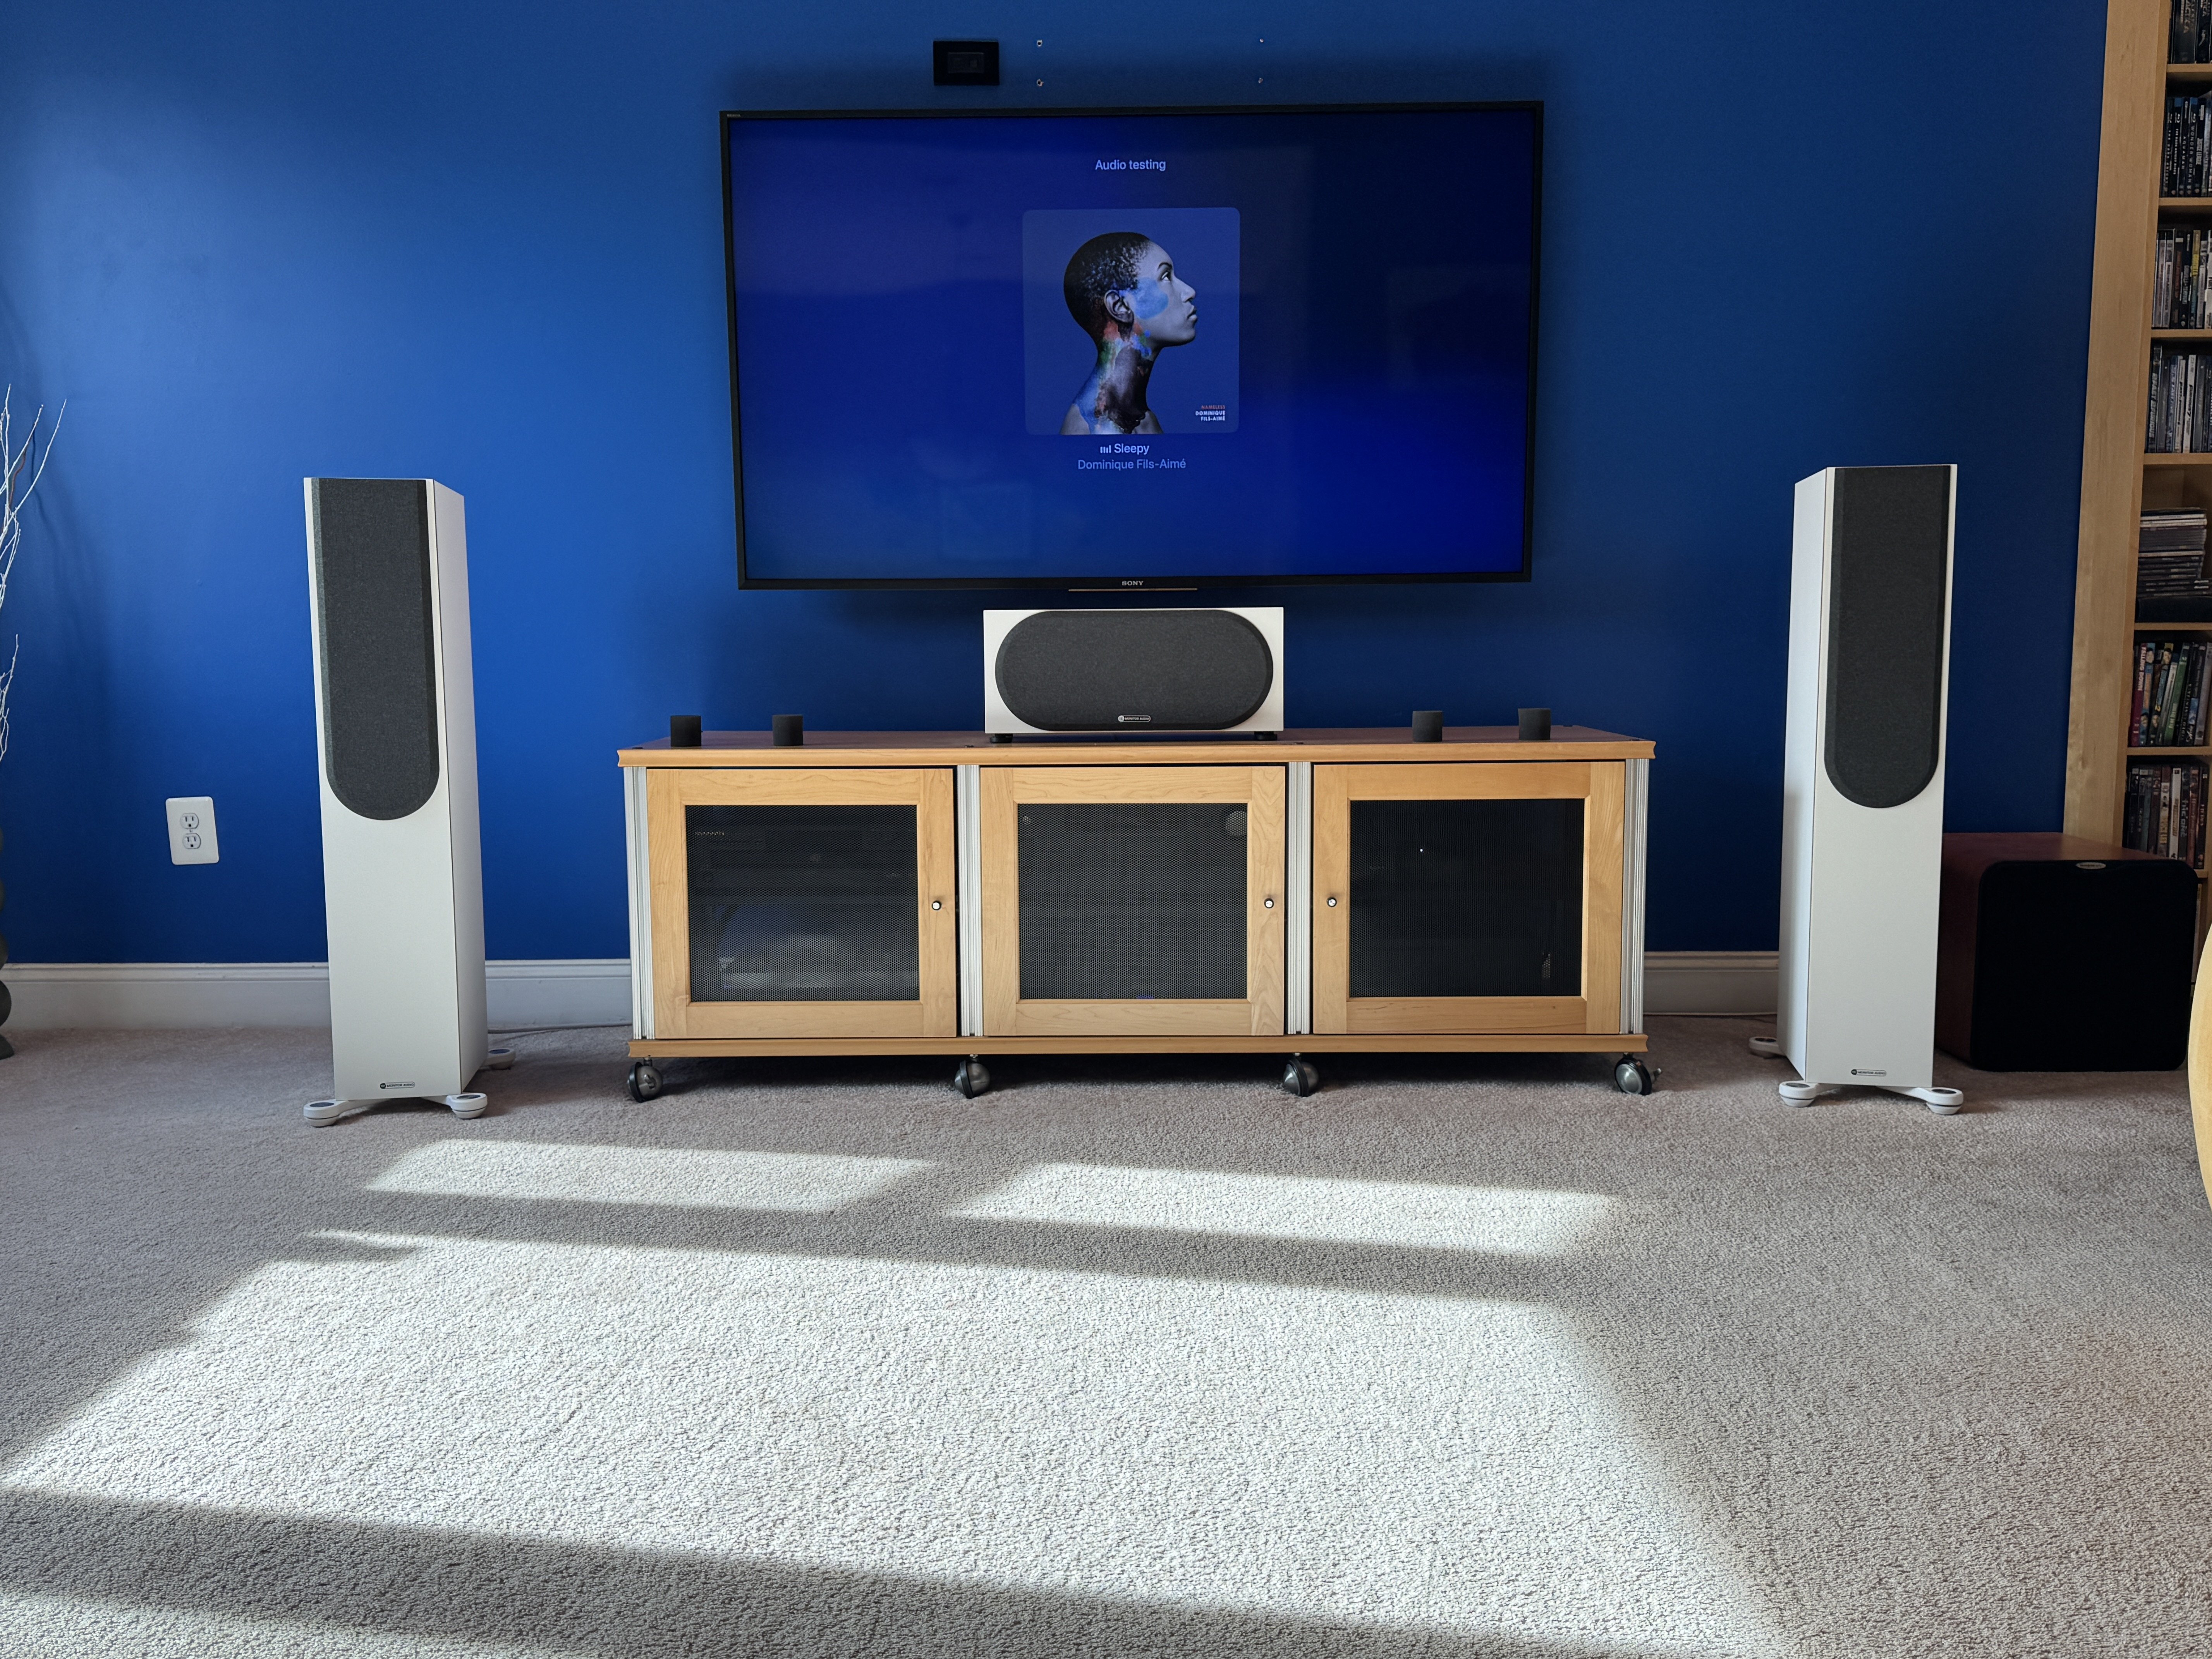
So by looking at my family room setup, you can see the 2 tower speakers and their relationship with the center channel. The center channel appears to sit back just a bit more than the left and right speakers do. This is the soft curve.
Now we are not done. with the soft curve in place , we have to decide on toe in to complete our curve. We have to actually curve our speaker position. Laser pointers really help here but you don't have to run out and buy one. But if you have one, great. You want to place the laser on top of your speaker let's say the left and point it at your KING seat Left ear of someone sitting there. This most likely will NOT be the final position but it's a good starting point. You will also do this with the right channel speaker to the Right ear of a person sitting in the KING seat. This brings the Triangle back into play with angles and curves. What I want you to do once you develop the angle of your speakers in this position is to now listen again. Same song and just experience the sound, how you hear it, what it makes you feel like, loosen the belt people and experince this. Feel the notes, bring them into your core and feel how it makes you feel now. Is this IT or maybe just maybe there is more. Which there is I'll fill you in now. We just scratched the surface of setting up main channel speakers.
Now that you know how the speakers perform them pointed "TOE'D" right into your ear holes, we are going to go even further. Now I want you to set something up 2 to 4 feet behind you. As long as it's not a wall, which we can work with that limitation if need be but let's say you have a few feet behind your seating. What I want you to do now is soften the curve. I want you to place a pole a chair with a pillow on it high enough to point a laser from the speaker pointed coming together 2-4 feet behind you now so the beams will pass your head the speakers will be toed out little to achieve this. So Imagine the triangle extending 2 to 4 feet behind you . Lets make is easy, go 2 feet being you. Now your pointing your speakers so they fire past you instead of hitting your ears , they hit to make the triangle point 2 feet behind you.
Once you get this setup done, I want you to sit down and listen again. Did the sound get better? Is the center image still there or did it fall apart? Is the music soundstage bigger? Does it make more space between instruments and sounds so if you wanted to focus on one thing like a symbol or guitar can you? This is where the Art of setup comes in, this is where you really learn how your speakers like to be setup. This helps you really dial them in to perfection to hear what they were built for, why we all go after sonic perfection. I'm telling you it's not always about the better amp, the cables and all that other stuff at this point. This is the point where you "Tune" your system and man does this process really gets you intimate with your system.
So once this is done, you figure out what the best distance behind you makes the best out of your sound, your done now right? WRONG. There is still 1 more step I'm gonna have you take that MOST people have no clue about. Some of you know this and know it's a level of sonic perfection and why your system sound so damn good. Enter the Mantis Lean. This is one thing I do that most audio guys Installers , even manufactures don't practice. It's what separates me from so many other calibrators.
On to the next post.
Dan
My personal quest is to save to world of bad audio, one thread at a time. -
Thanks for taking to write this up!
I would check out Wilson audios zones of neutrality method as it works extremely well for two channel- Not Tom ::::::: Any system can play Diana Krall. Only the best can play Limp Bizkit. -
MANTIS LEAN
This got cut off and I had to re do this.
The mantis lean is now we are going to measure the height of your ears in your kind seat. Have someone measure the distance from your center of your ears to the floor. Now measure the speakers center of tweeter to the floor and make note of these 2 measurements.
They are usually 2 different measurements and we are now going to tilt the speaker back to achieve another level of sonic perfection.
First your going to level the speaker left to right both of them of course. Make sure they are level.
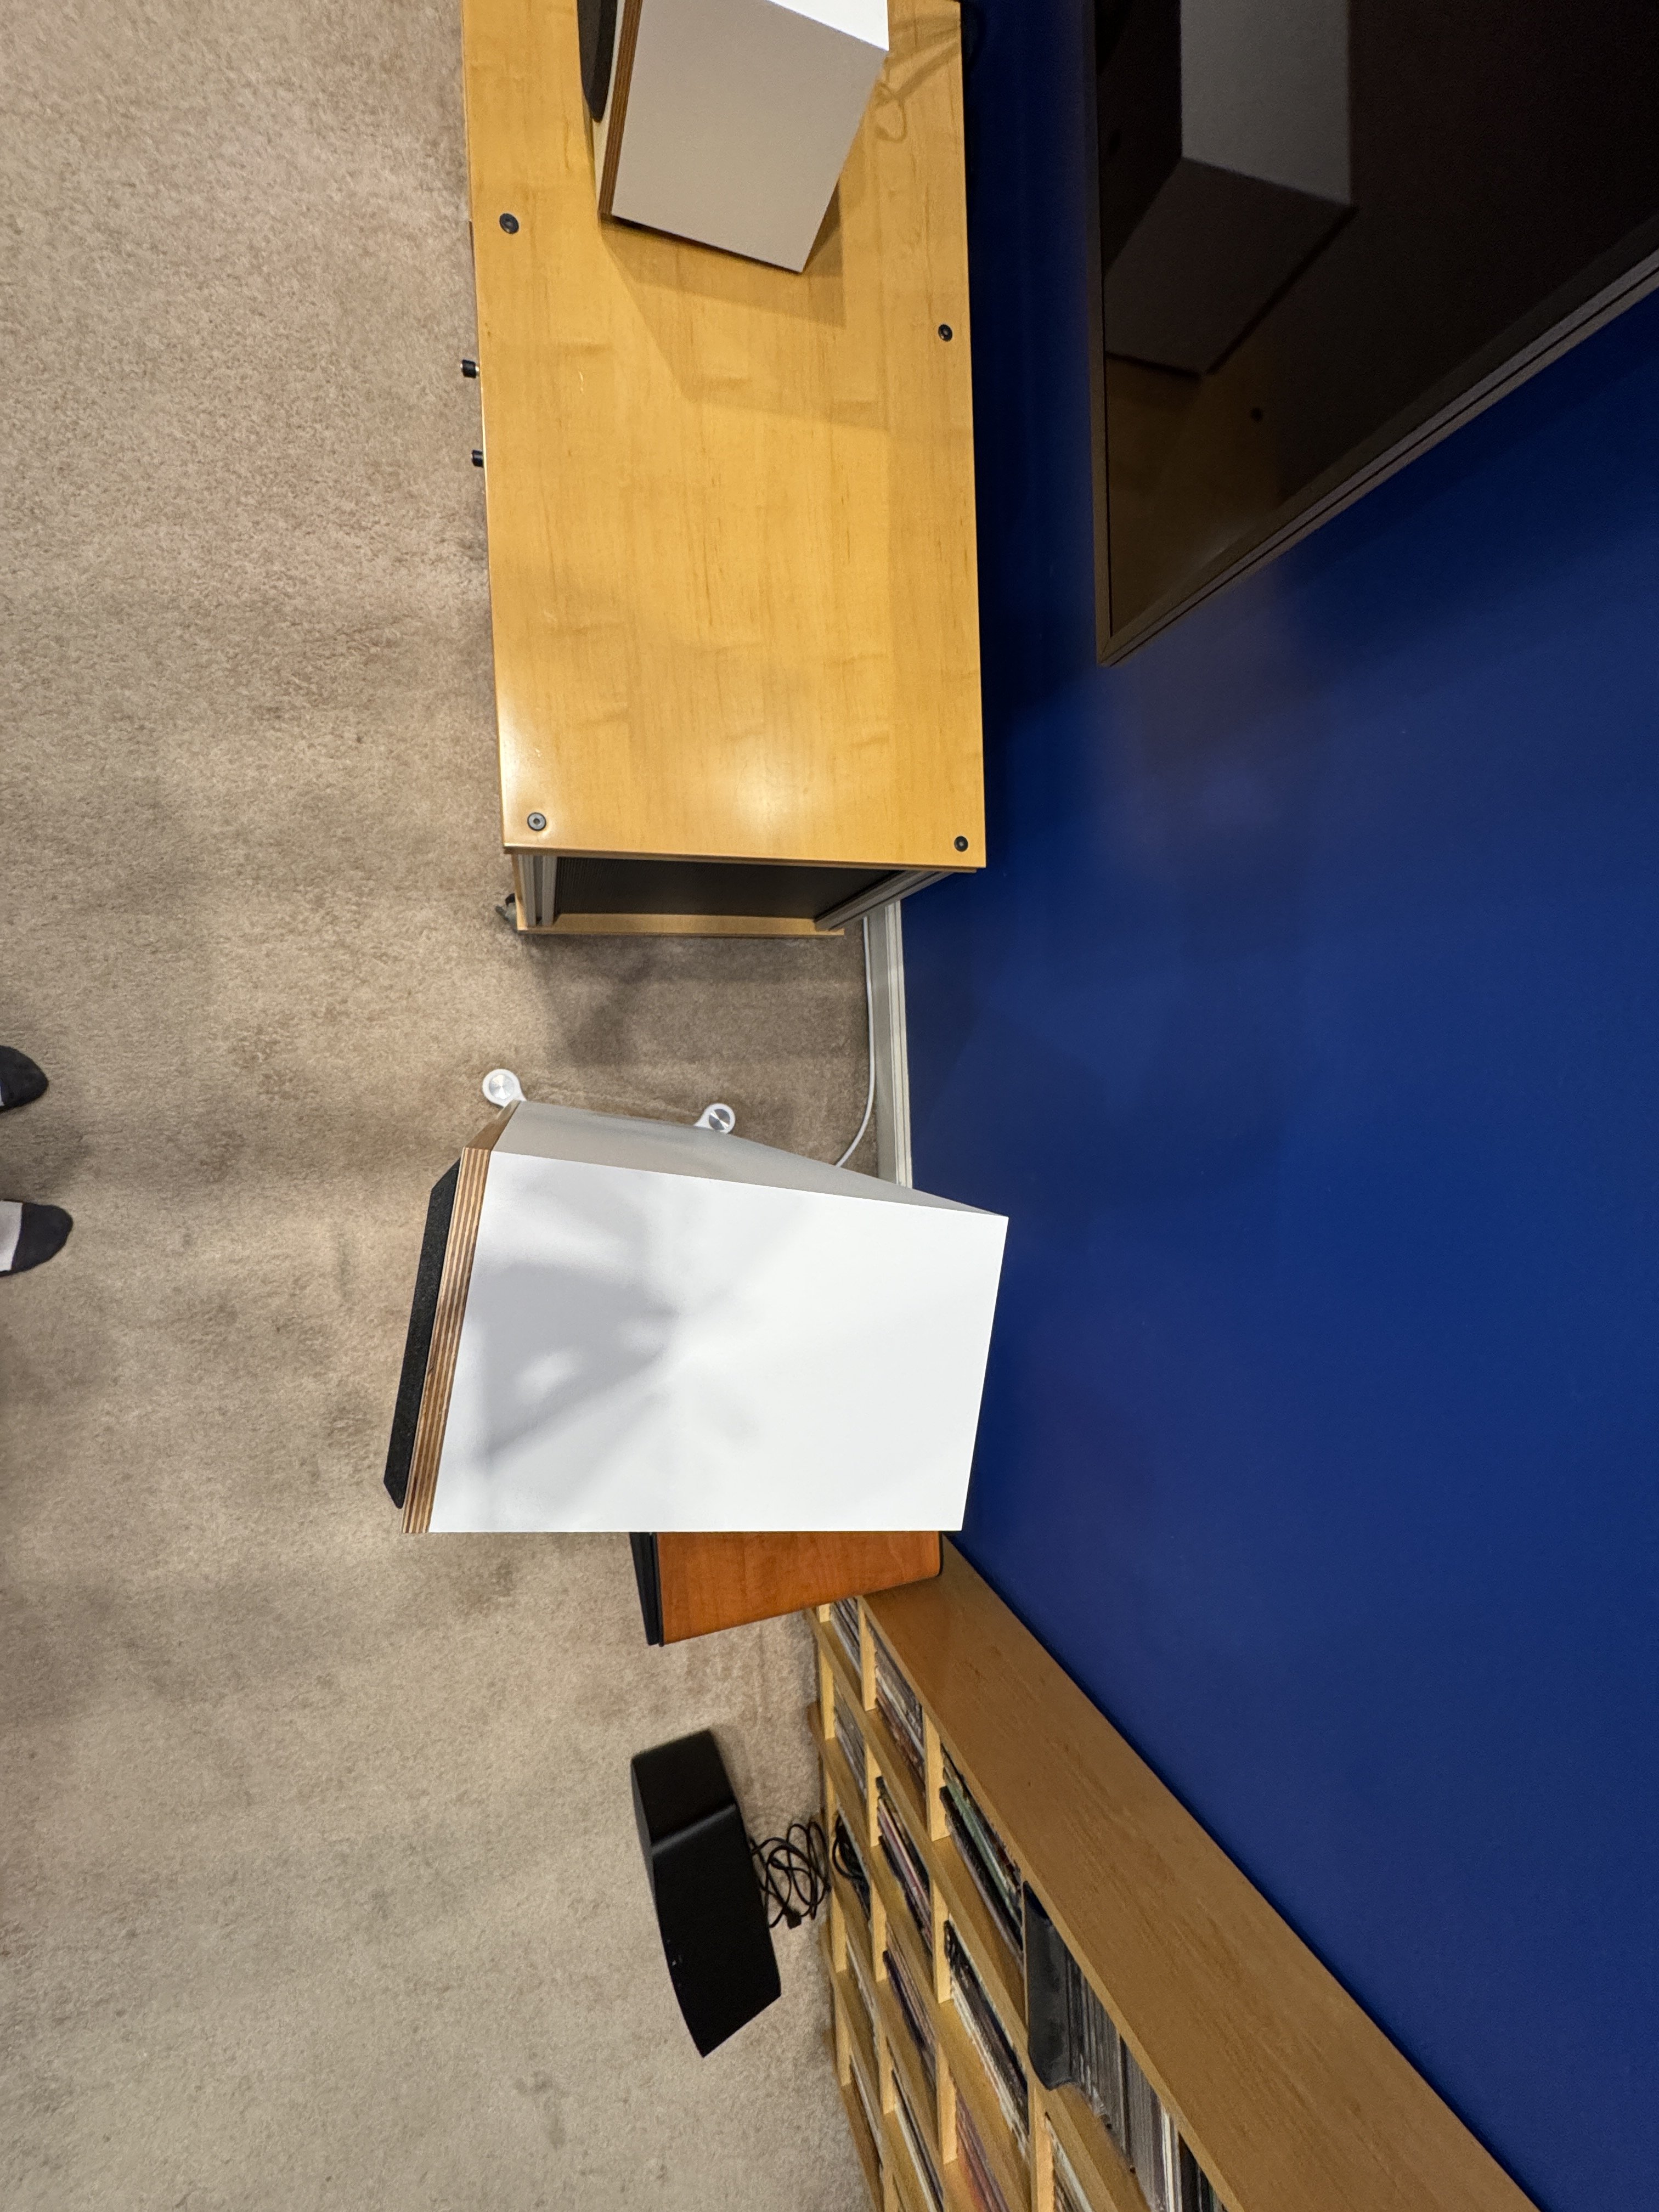
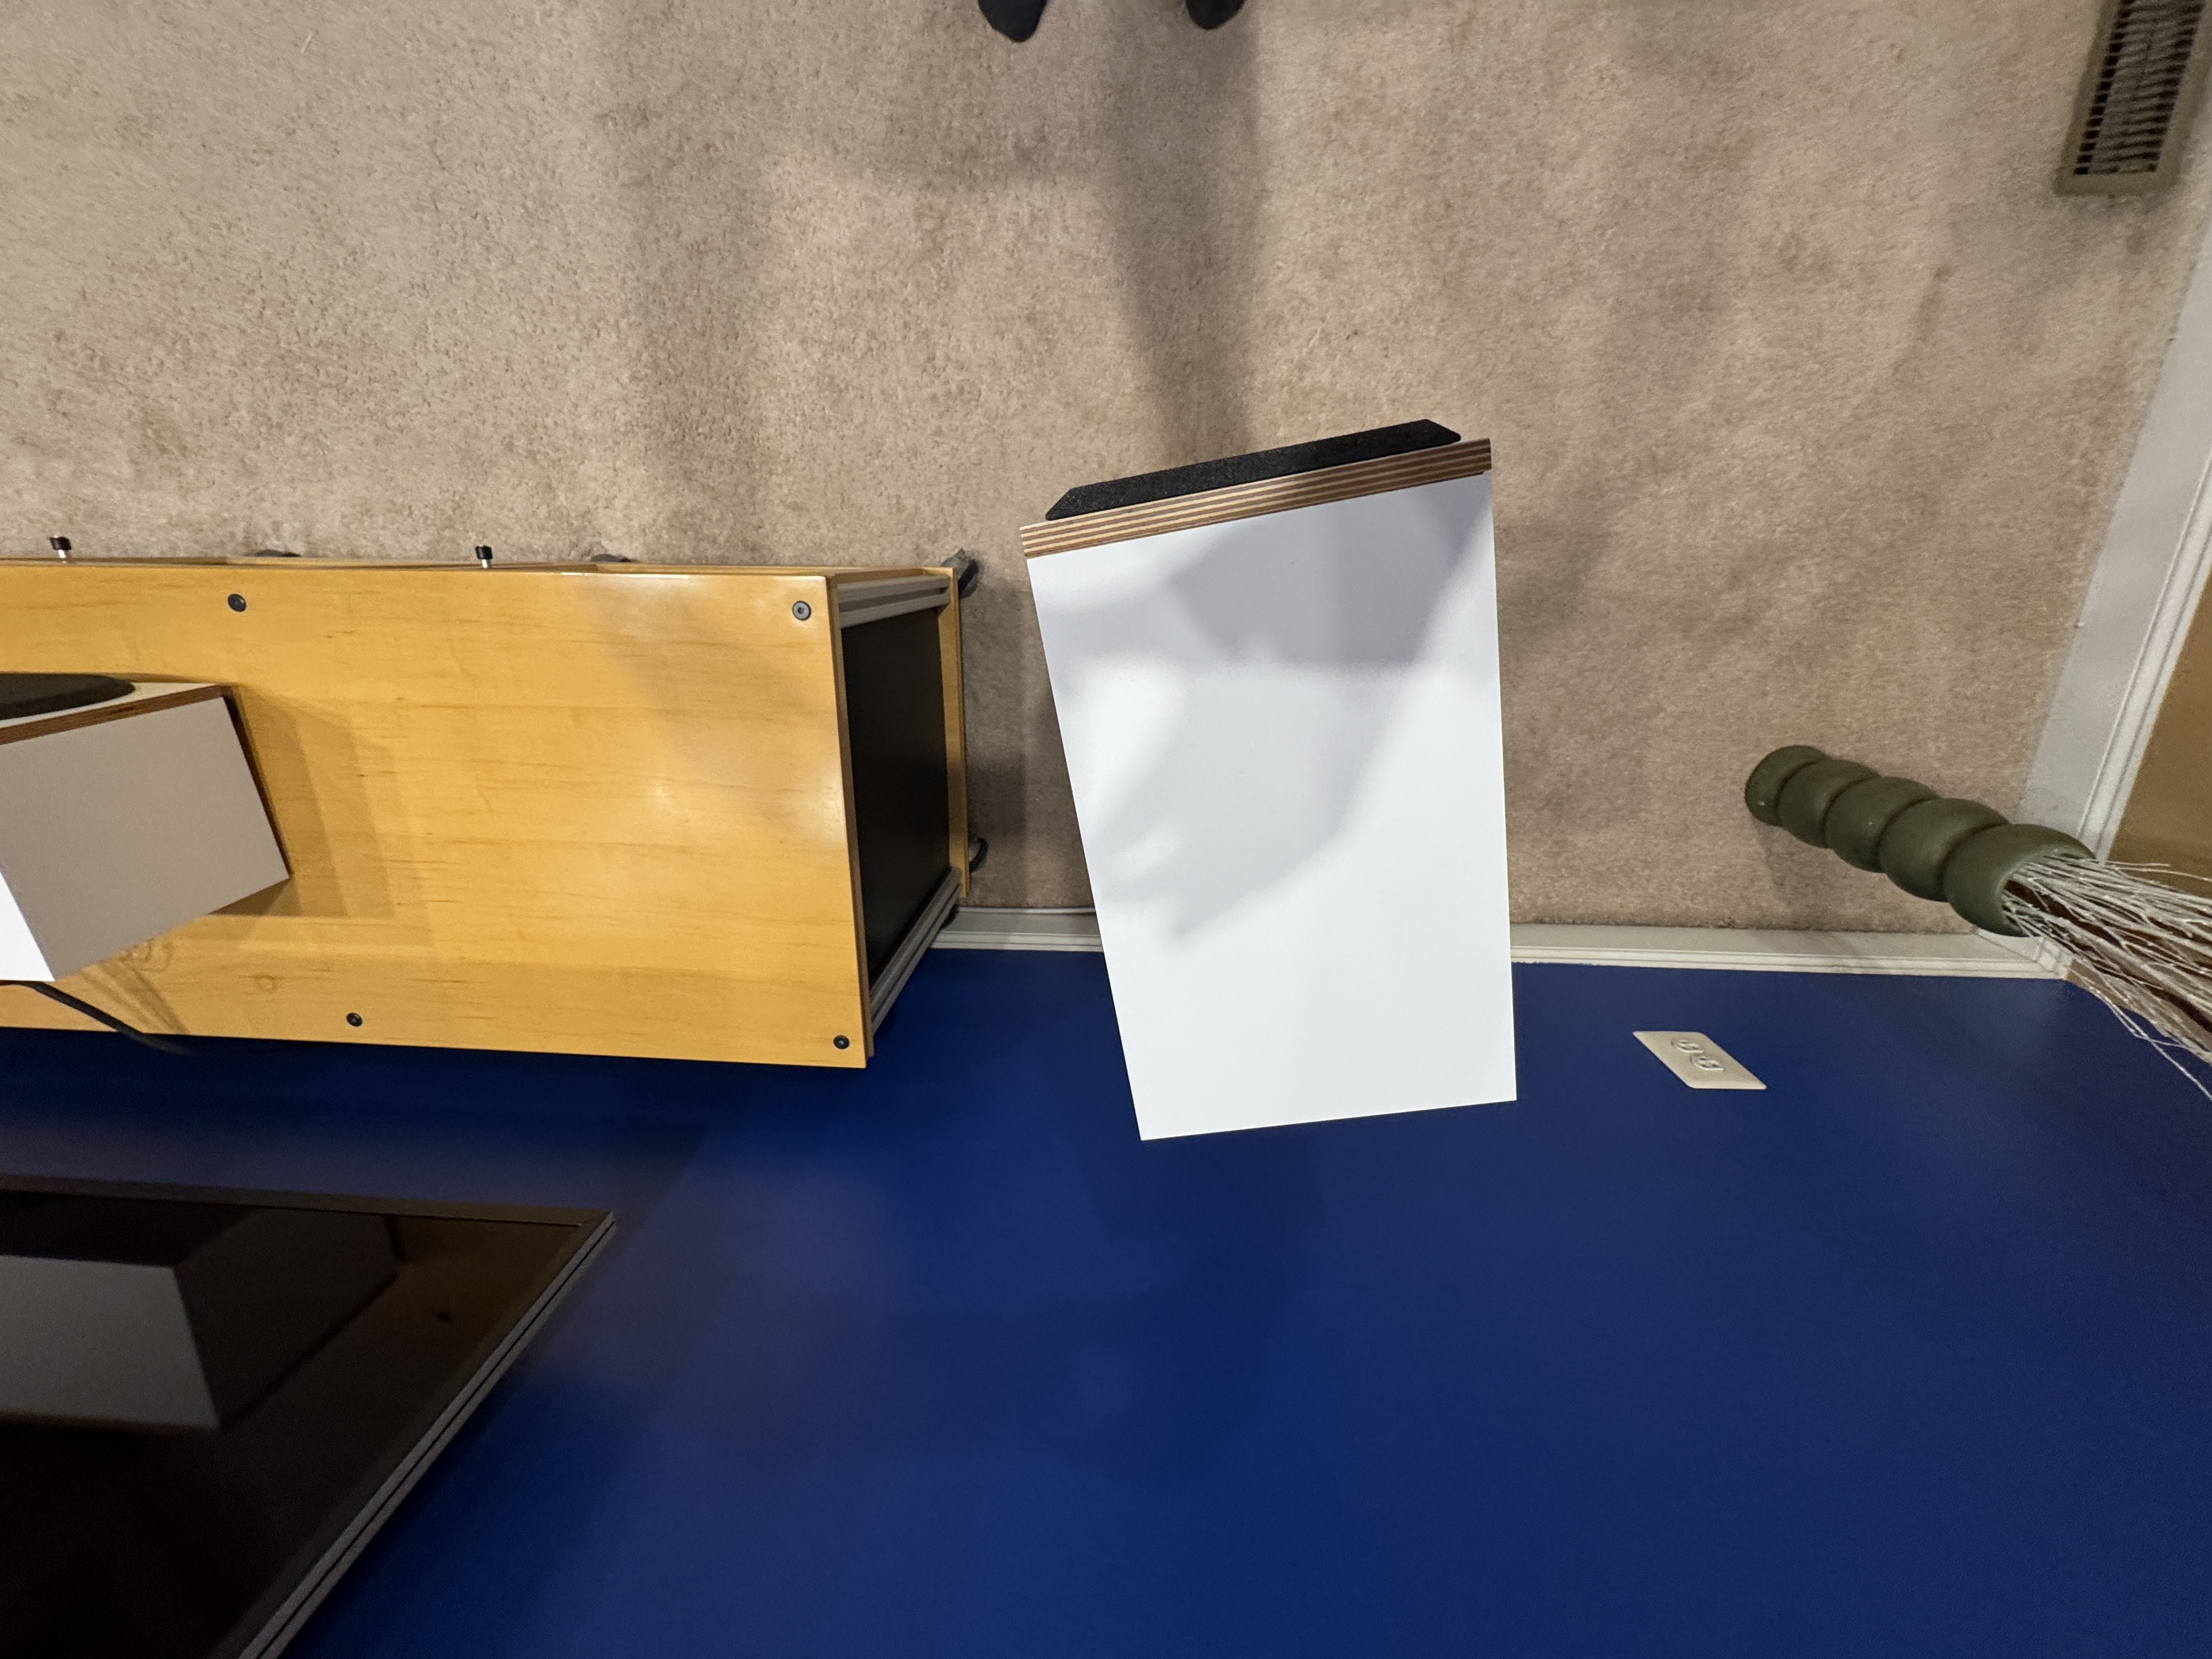
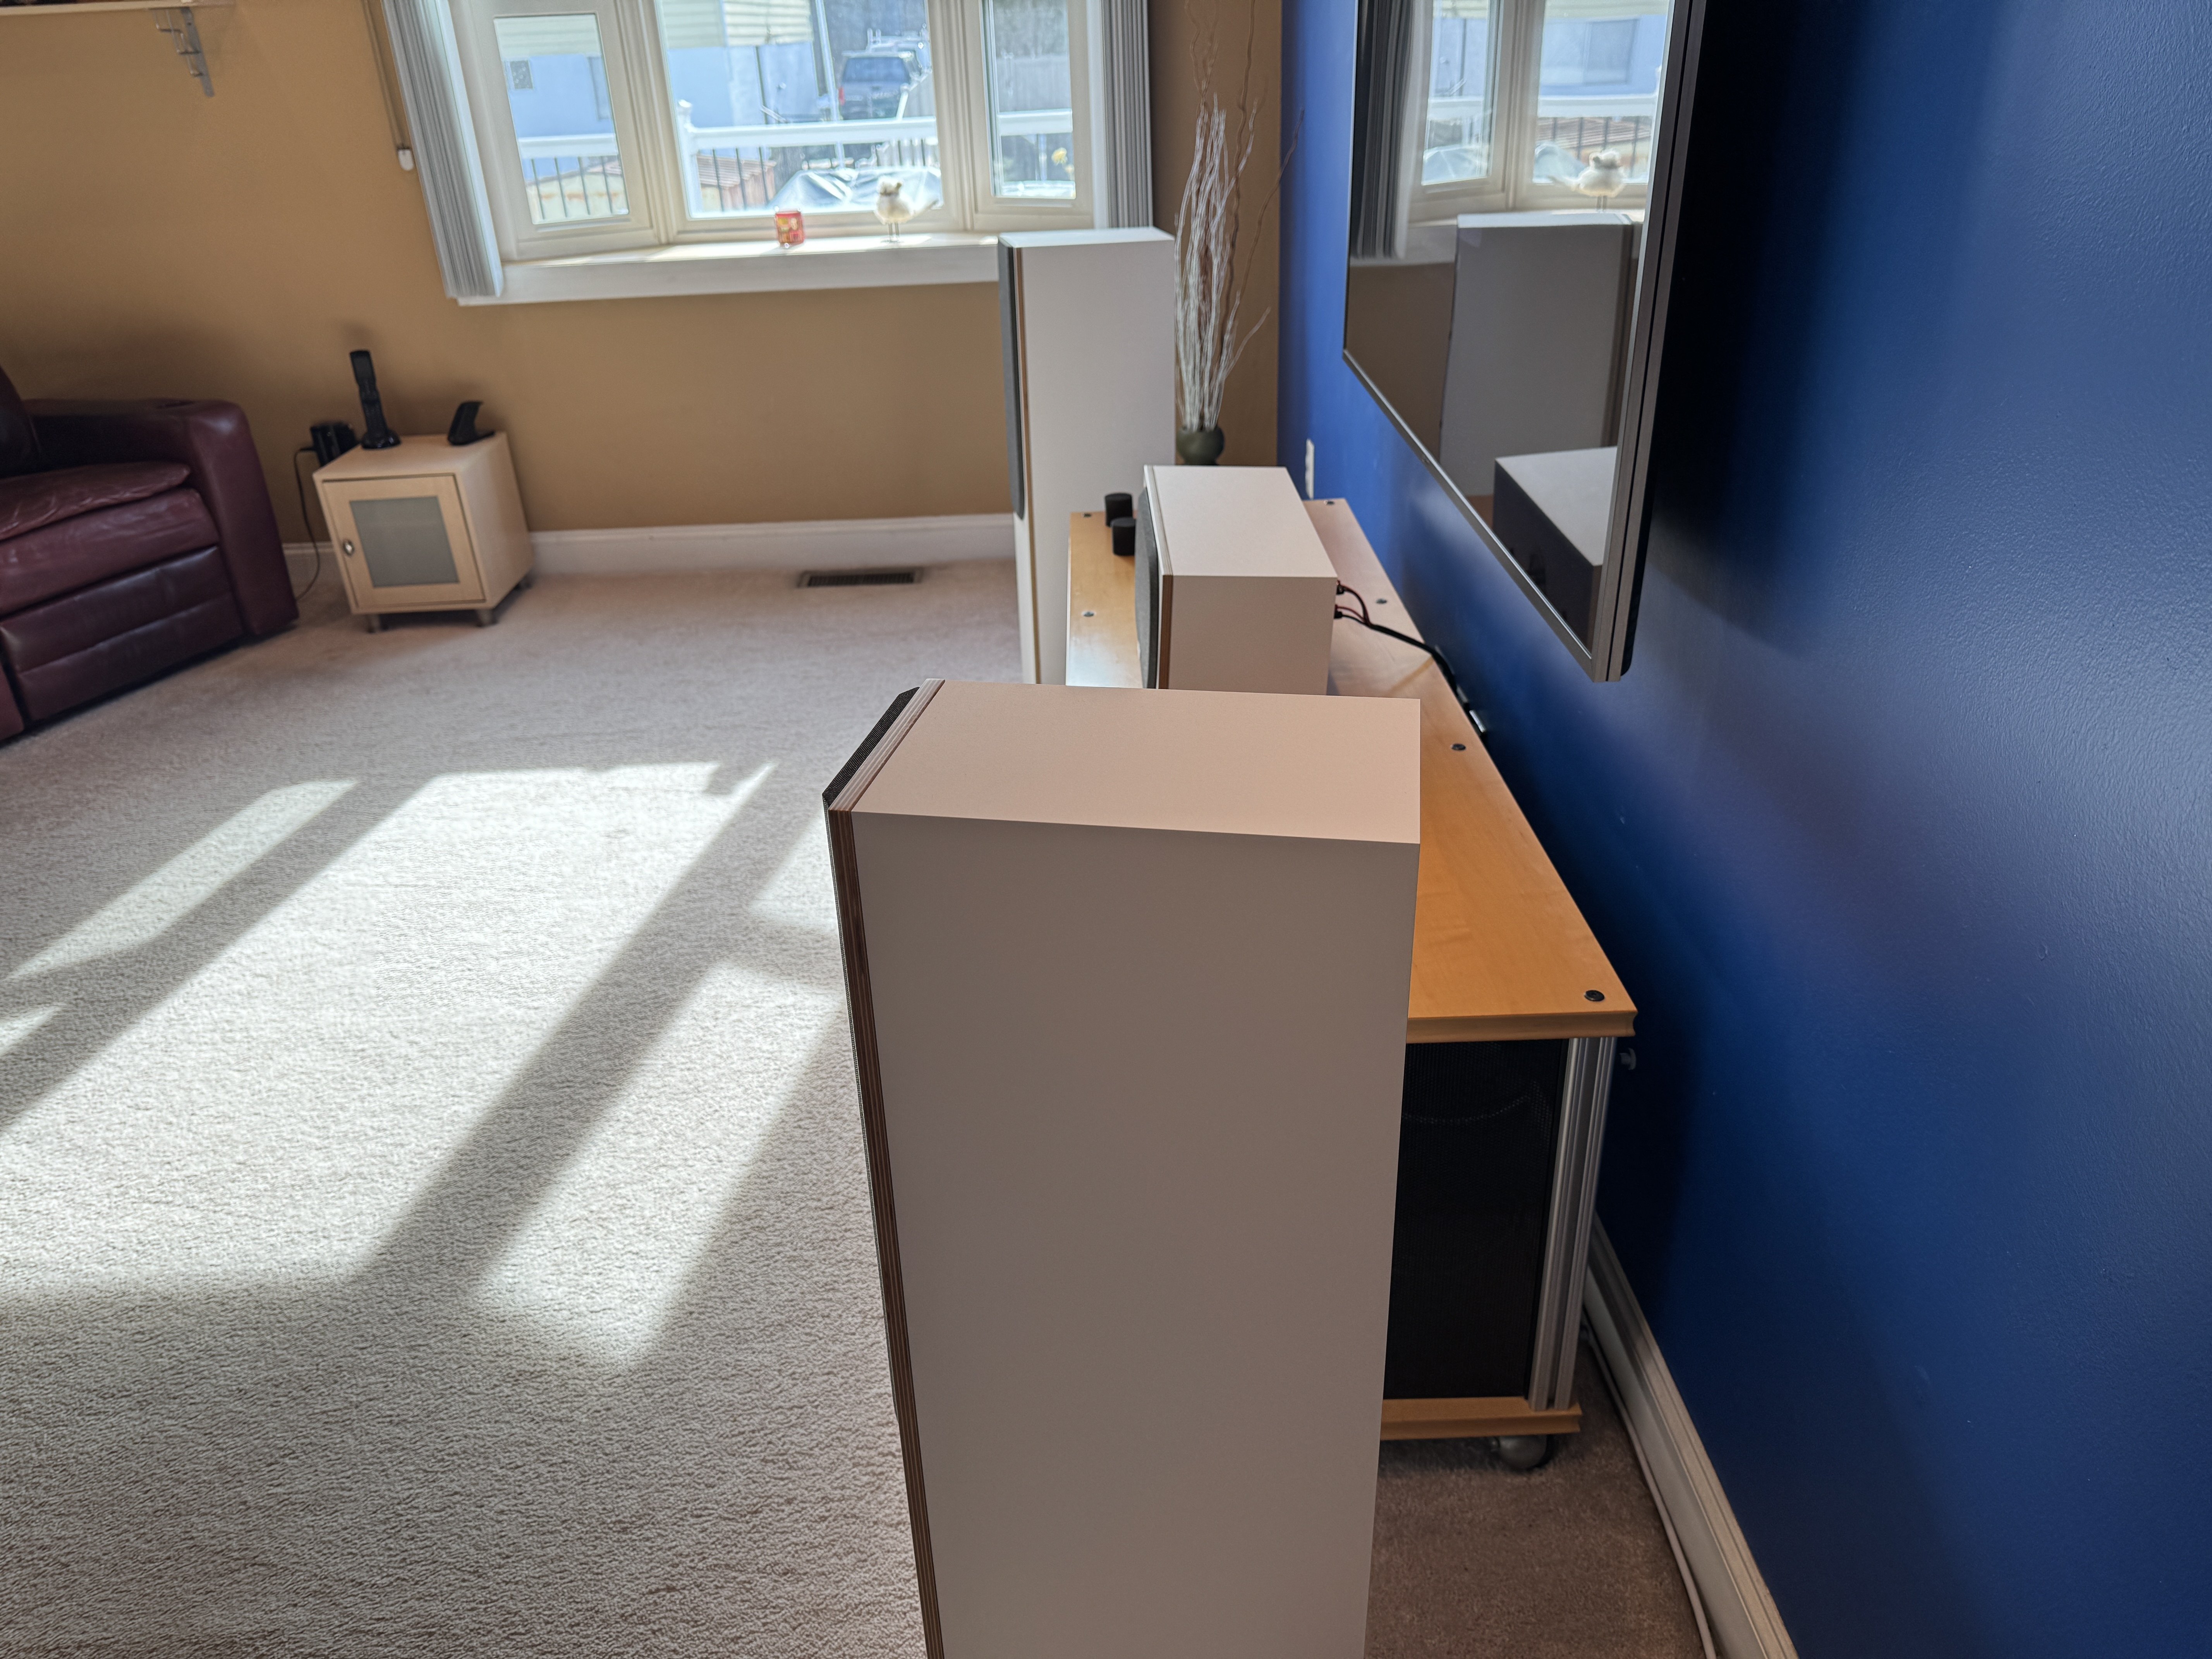
Here is a pic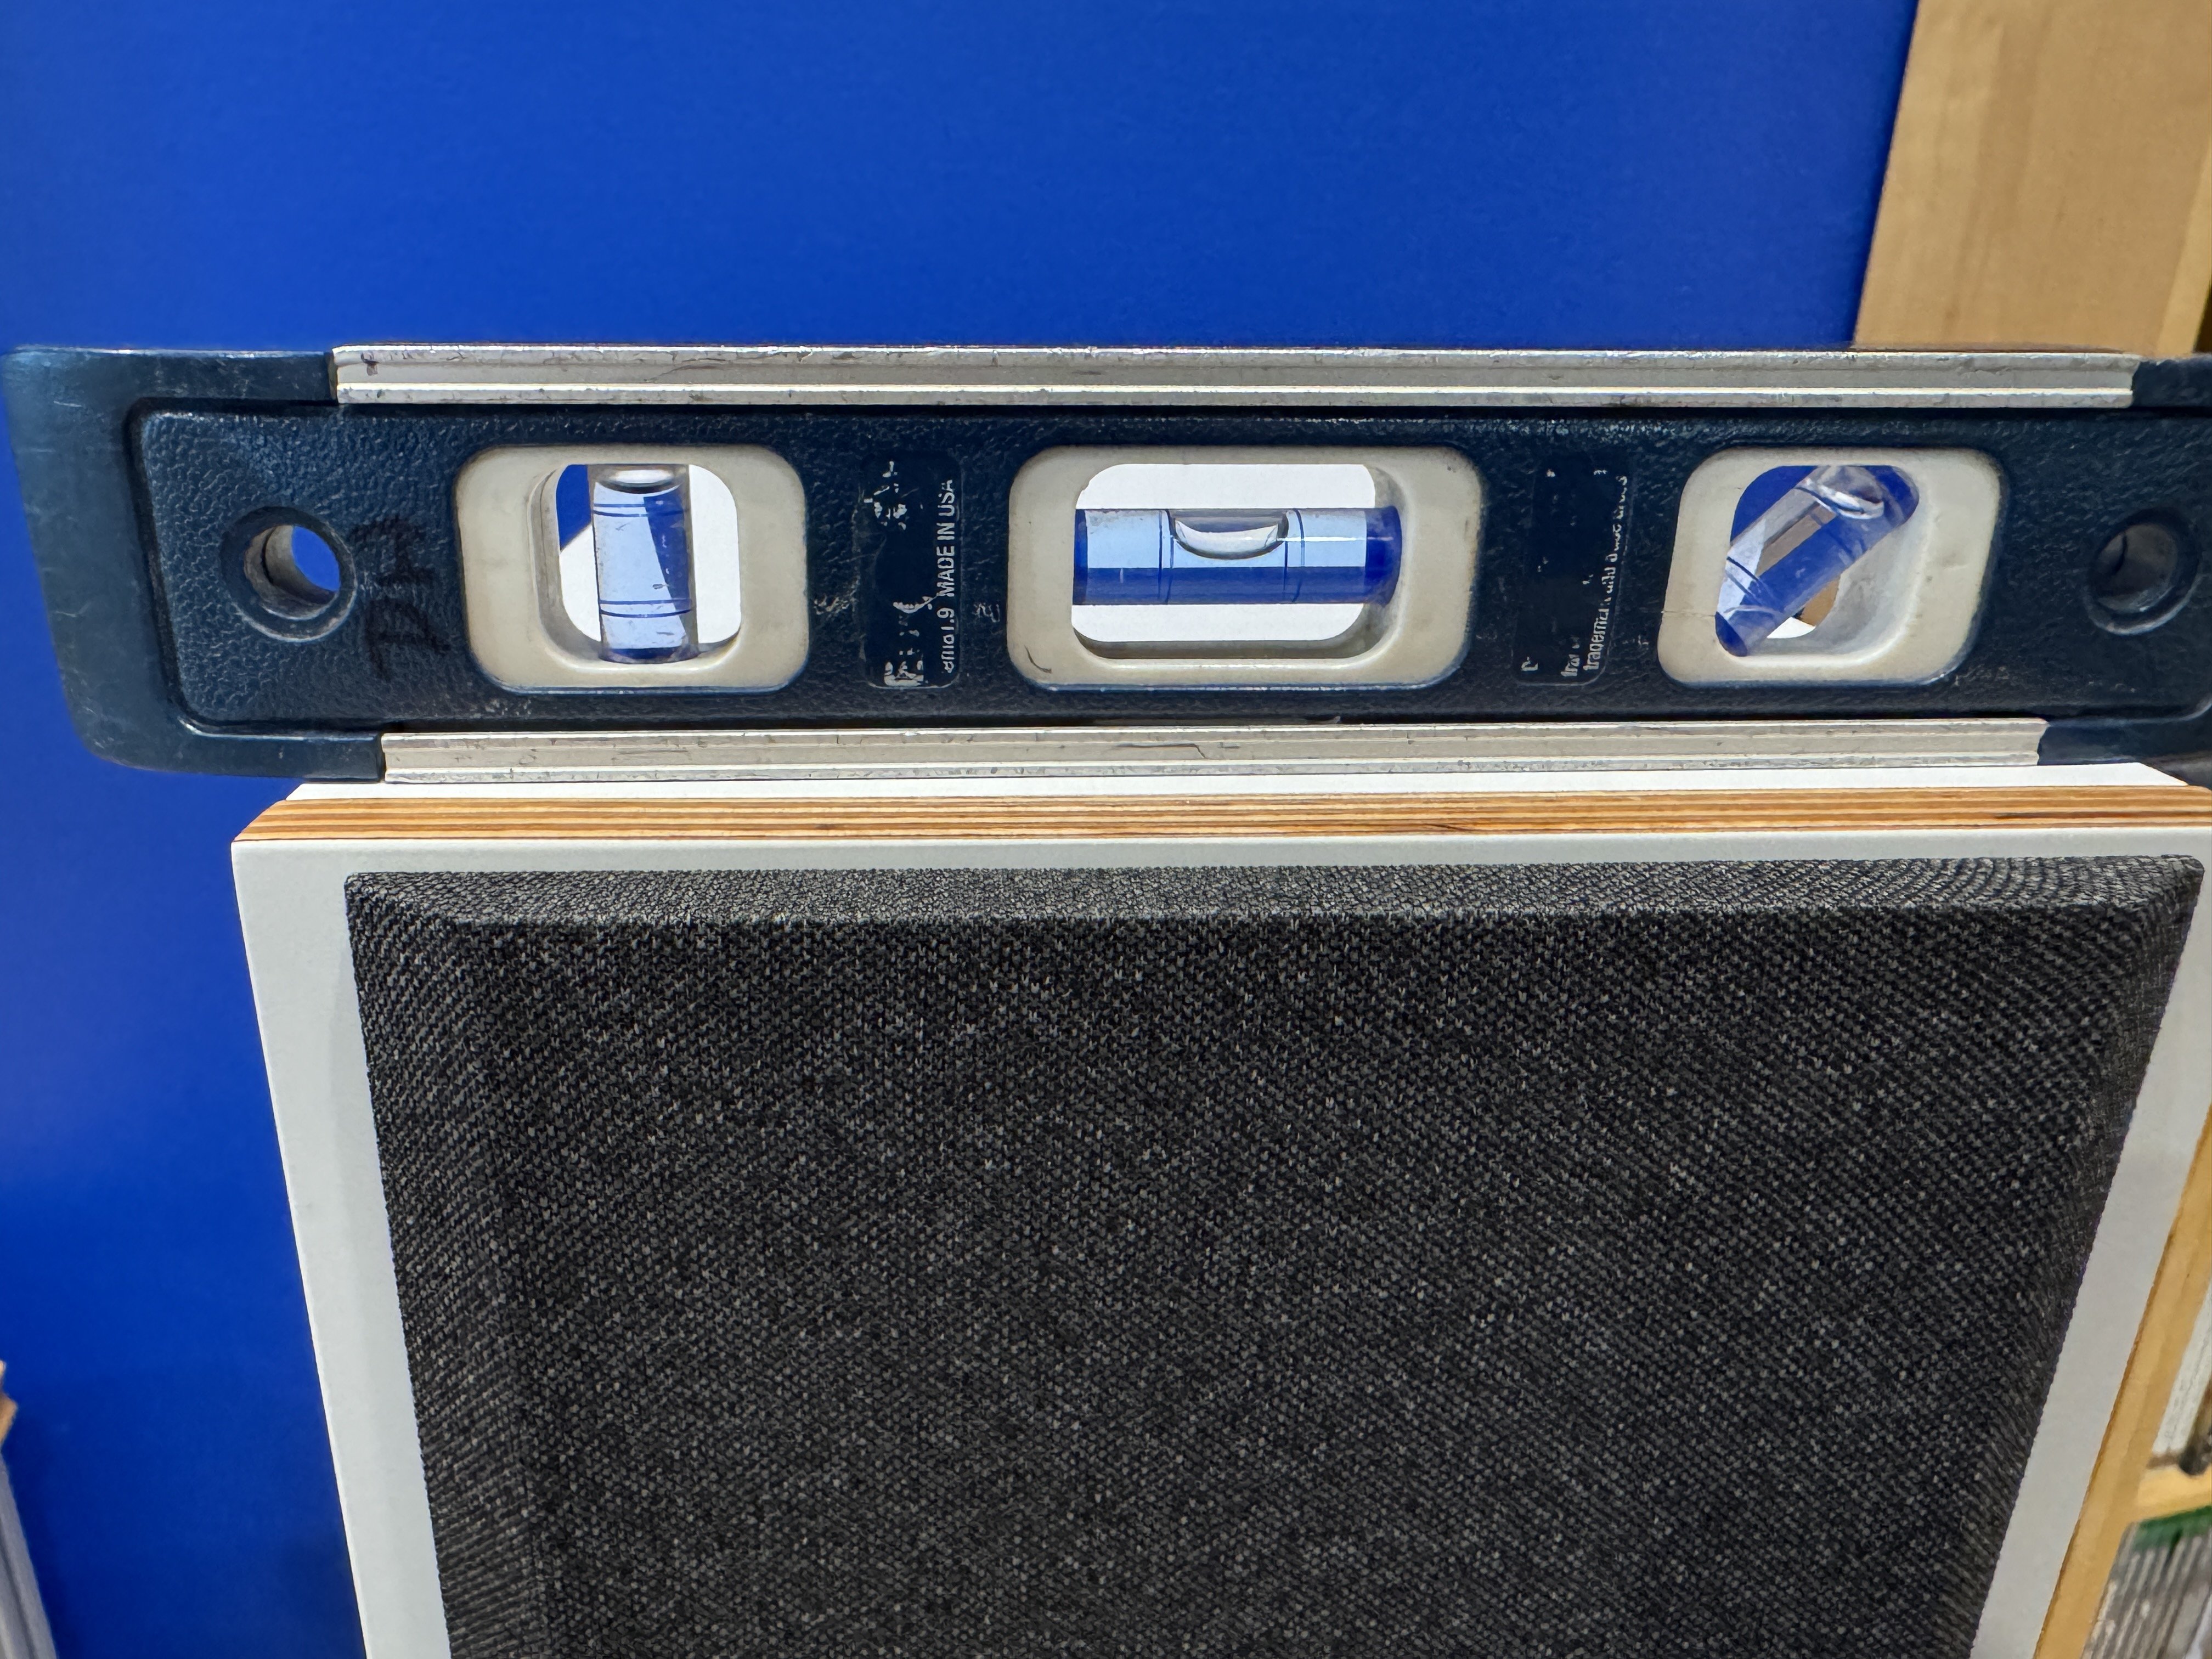
Now that they are level, start adjusting the tilt backward to un level the speakers front to back, not not a lot. Just enough move the bubble so they are slightly tilted back. This will re aim the tweeter upwards and change again the way they sound usually a lot.
You can beam the to reach your ear height over the distance from the speakers to your ears to dead center, Yes this can be perfection but sometimes they need just a tad more. What you're going to do is get them to ear height , then listen again. Does the center image sound better or did you ruin it? Does the soundstage sound fuller wider and more open? Can you hear things that create the song you are listening like a guitar clearly or did it smear?
What's happening here is your deepening your connection with your speakers. Your learning how the tweeter projects, I could care less about spec's and what they are supposed to do, I care way more about the experience you are having before and after these technics with your music. Play with the height, go until they don't sound quite right and then back off to where it sounds the best. Usually and this is generally speaking, a slight elevation above ear height seems to work the best for just about all speakers. Some might not and when that doesnt' work for you, you back them down until everything comes together and you are at a point where you never heard your speakers sound this good never.
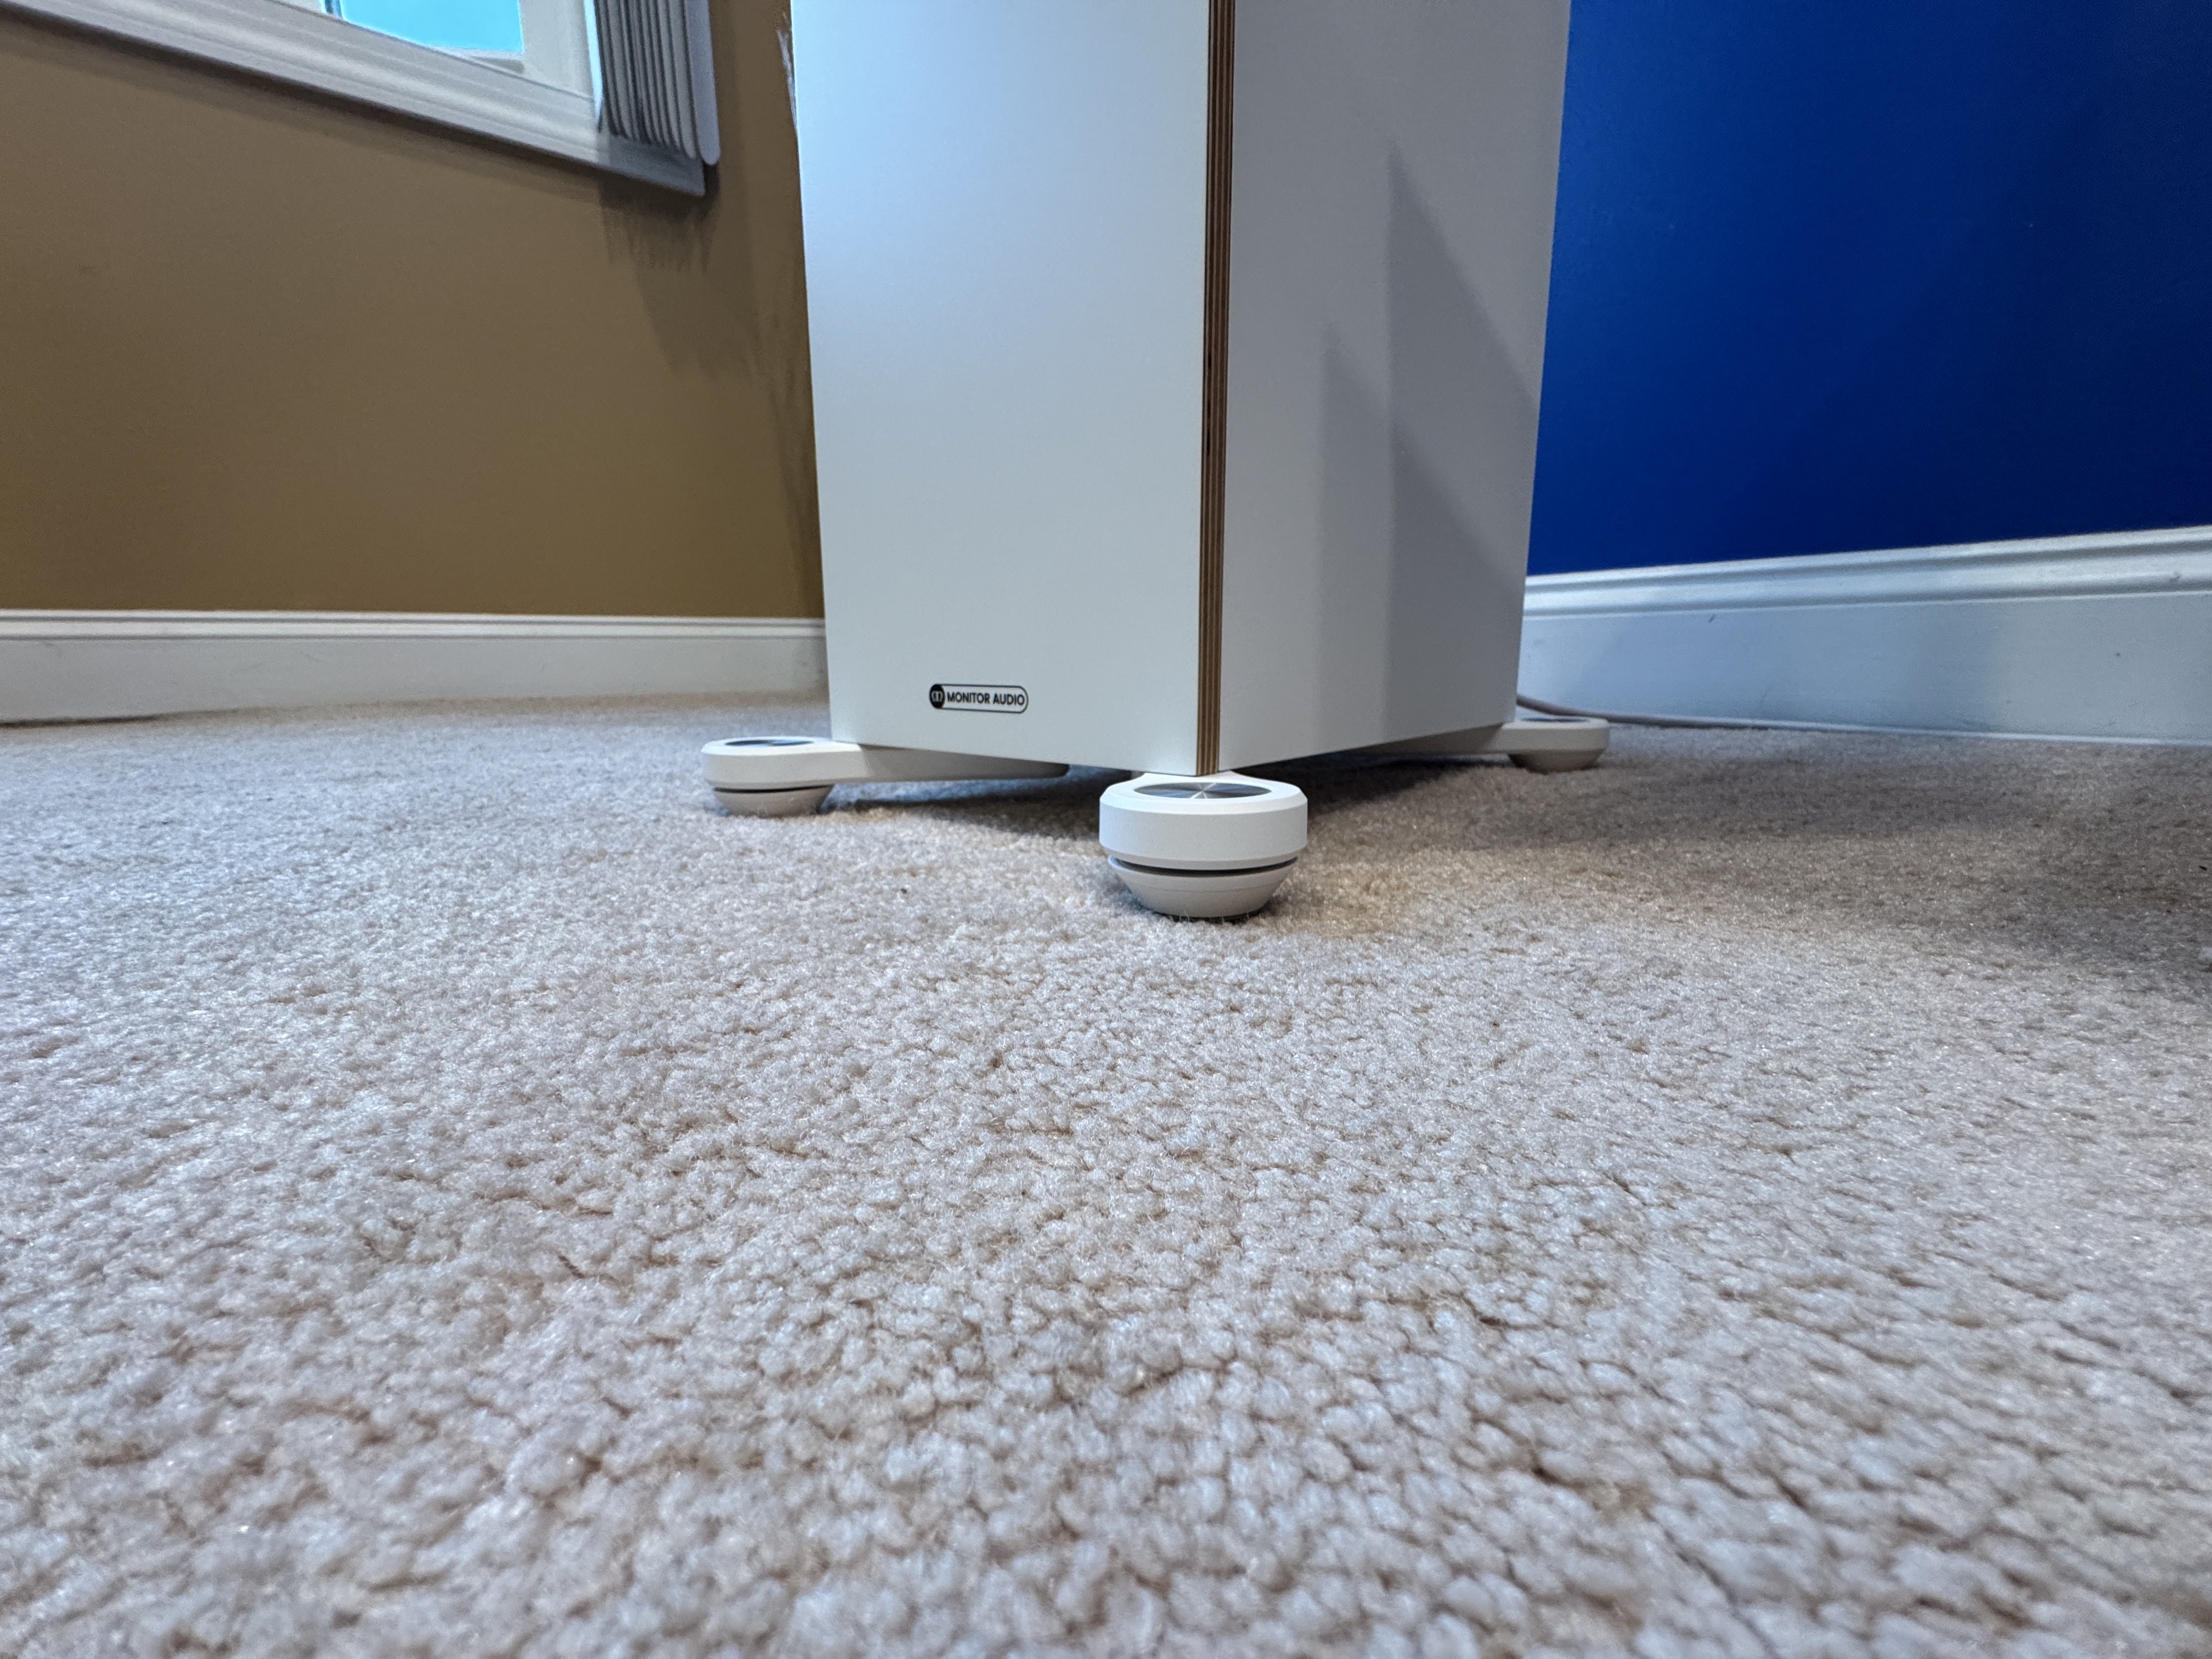
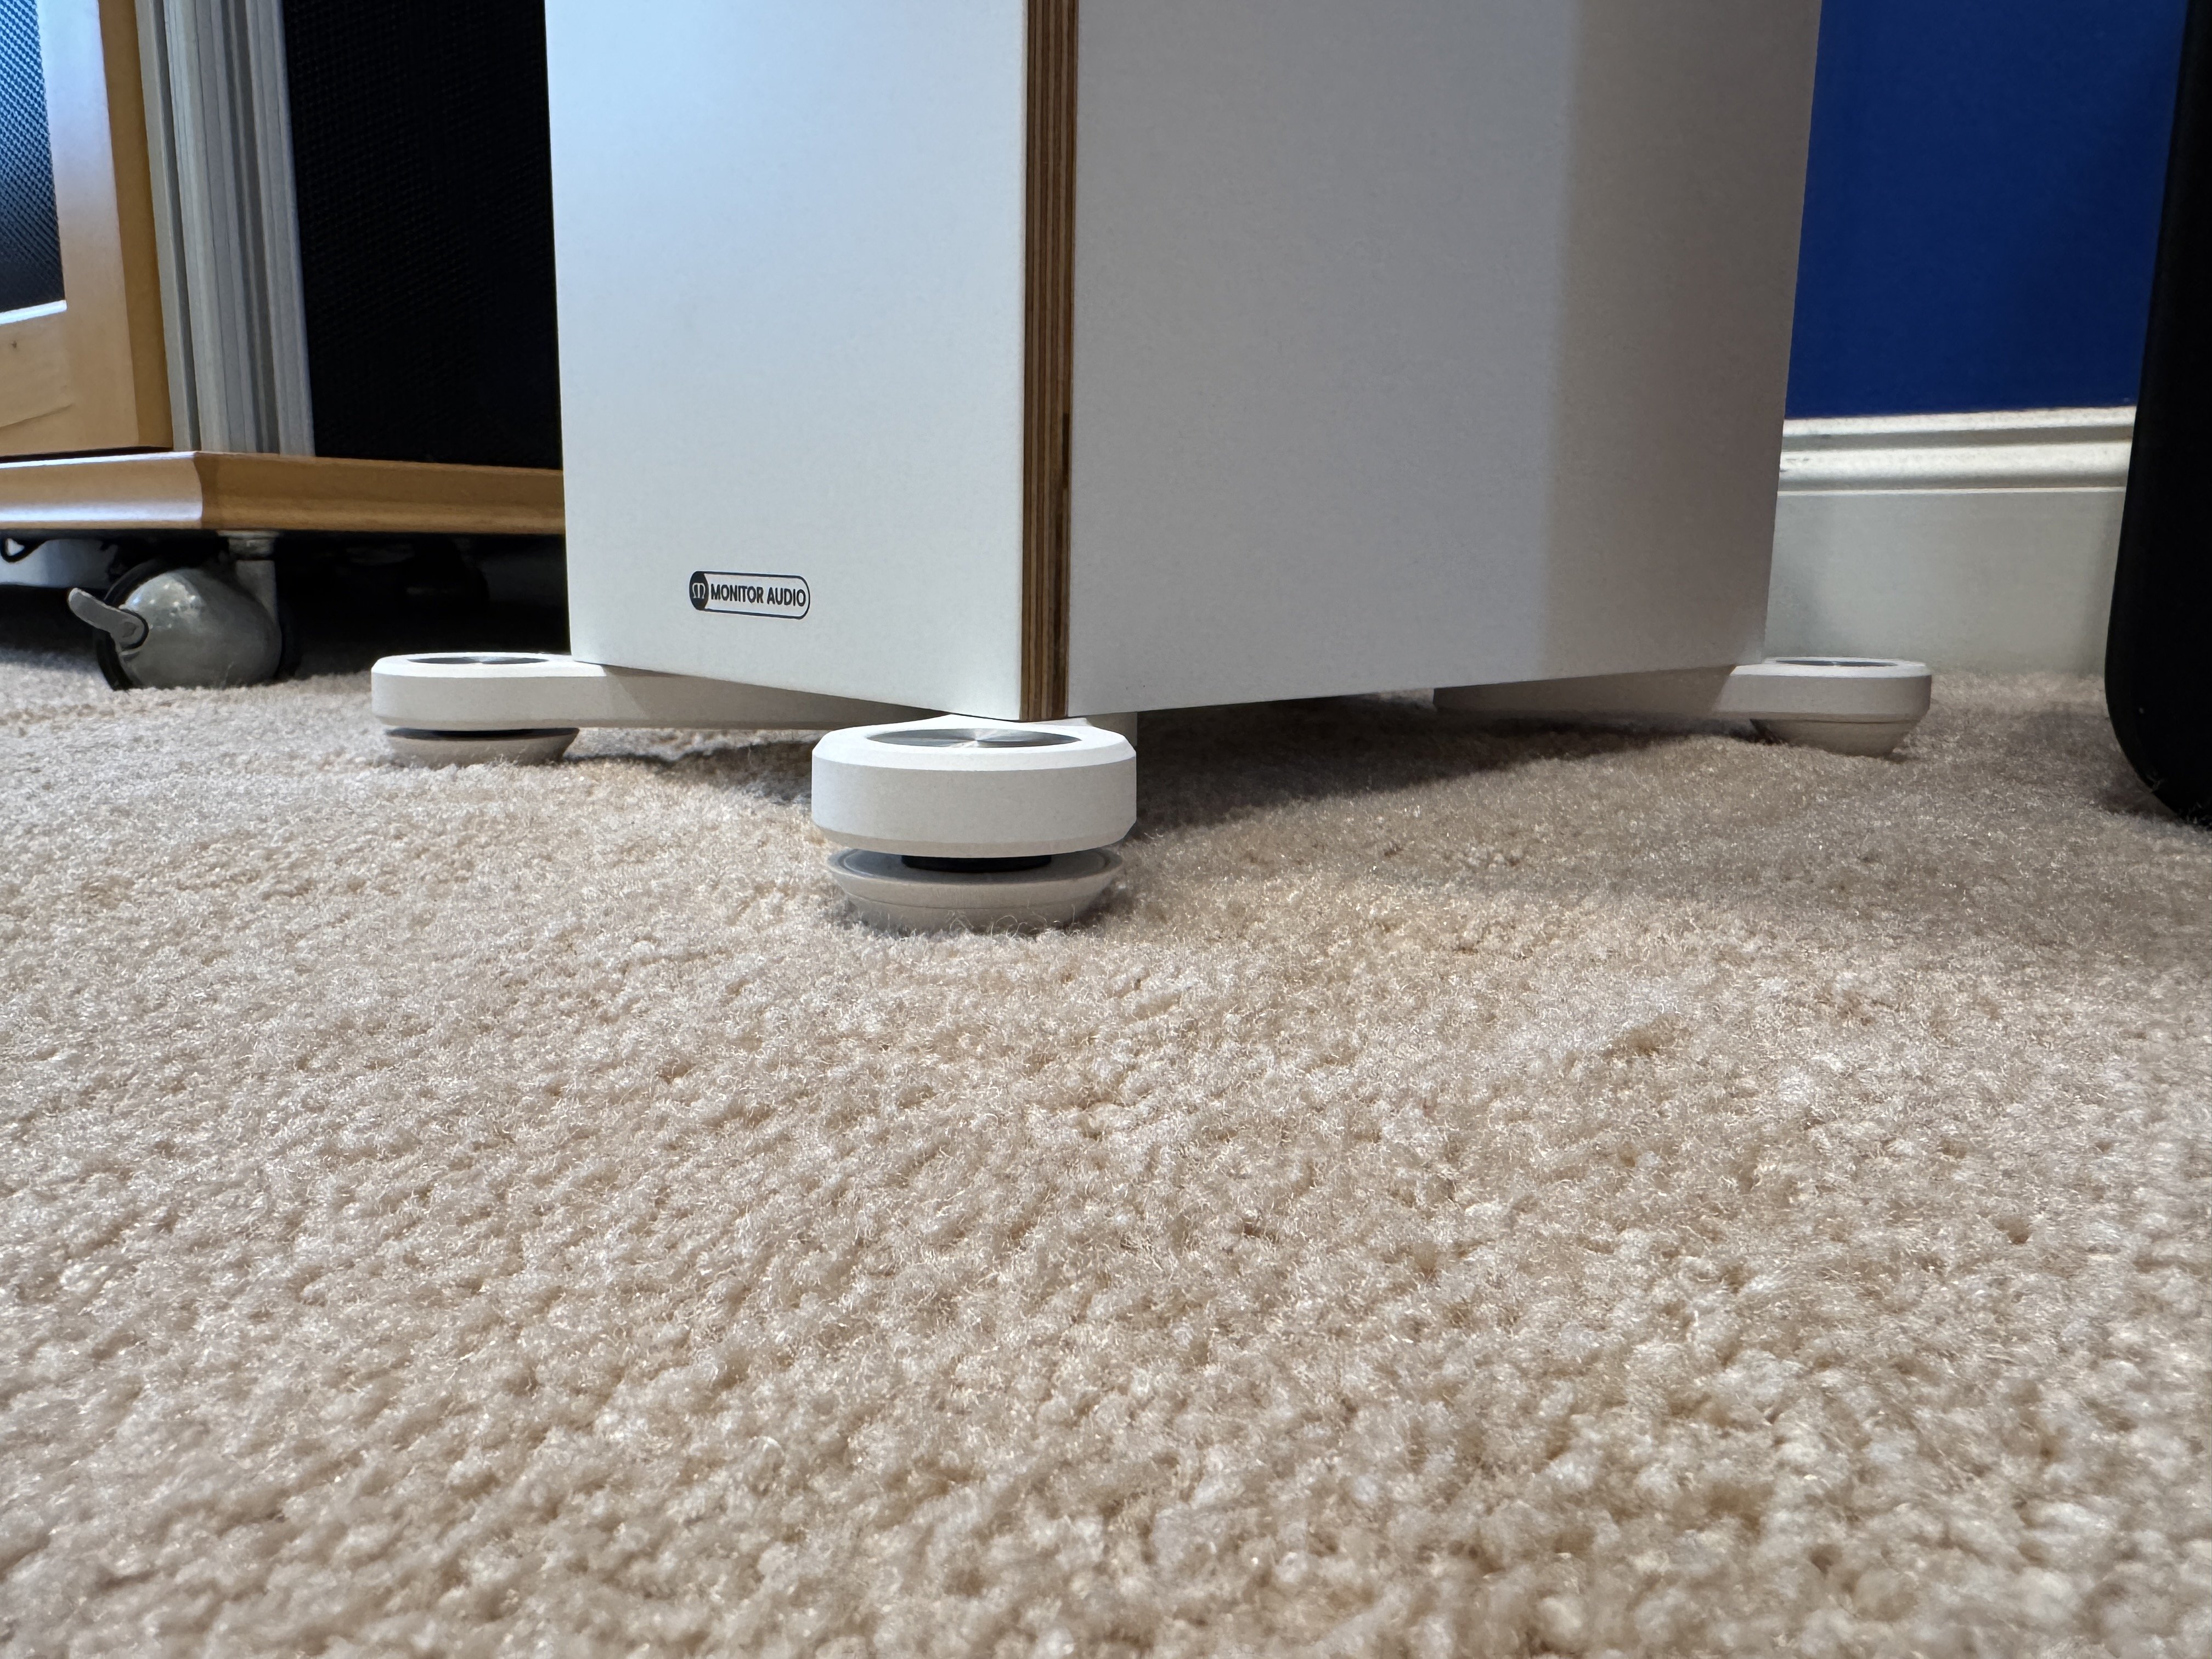
Pic's of my lean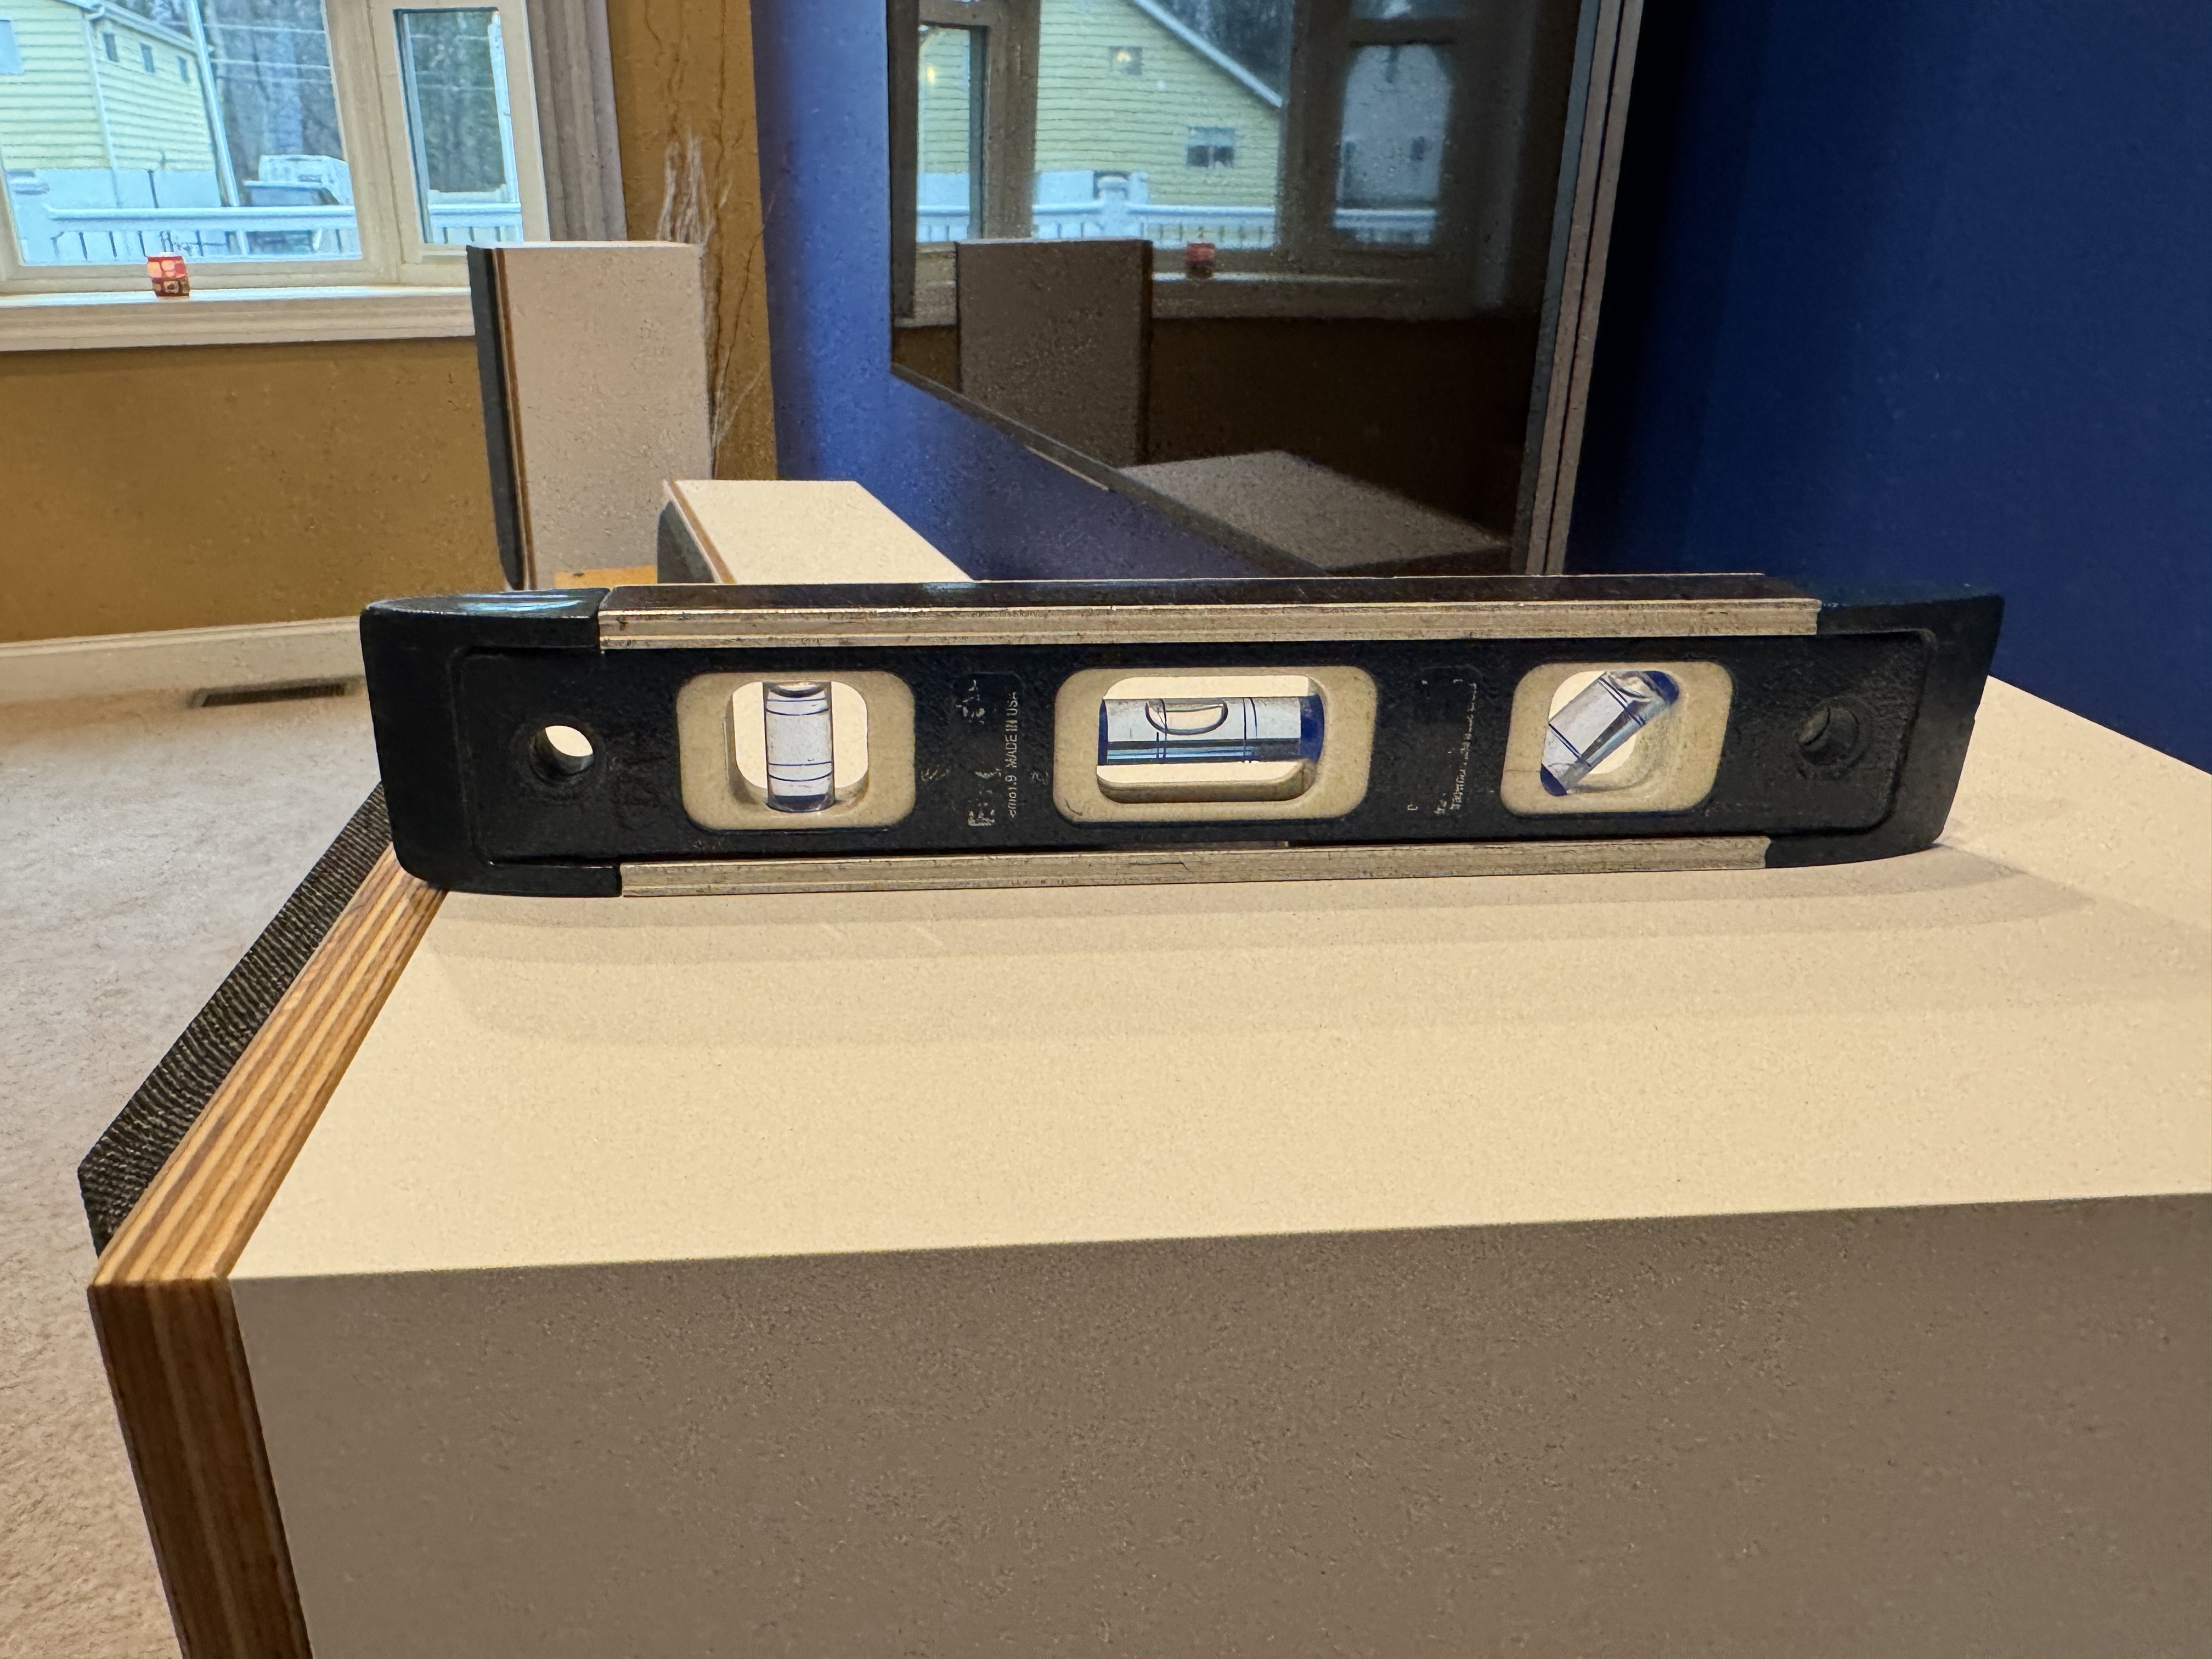
Dan
My personal quest is to save to world of bad audio, one thread at a time. -
Thanks for taking to write this up!
I would check out Wilson audios zones of neutrality method as it works extremely well for two channel
There is more underneath, the leanDan
My personal quest is to save to world of bad audio, one thread at a time. -
Thanks for taking to write this up!
I would check out Wilson audios zones of neutrality method as it works extremely well for two channel
I learned a lot working with Wilson audio. I had to learn how to adjust the cubes on the Grand Slam or whatever they were called back in the early 2000's when I worked with them daily. I did a lot of the older Watt puppies but they had way less adjustments to work with . The flagship models of then has these cubes with speakers in them you can adjust for the room . It was painful and hard at times not to mention I kinda hated working with them as they were so damn heavy and very hard to move into place.
I much more enjoyed working with Dynaudio evidence Tempations and B&W N801's , yeah they were still heavy as hell but so much easier to setup.
Egglestones were also heavy as hell but they dialed in pretty easy. Martin Logan were tricky at times depending on the room. Most panel style speakers you kinda had to sit in one spot or they didn't perform to their best.Dan
My personal quest is to save to world of bad audio, one thread at a time. -
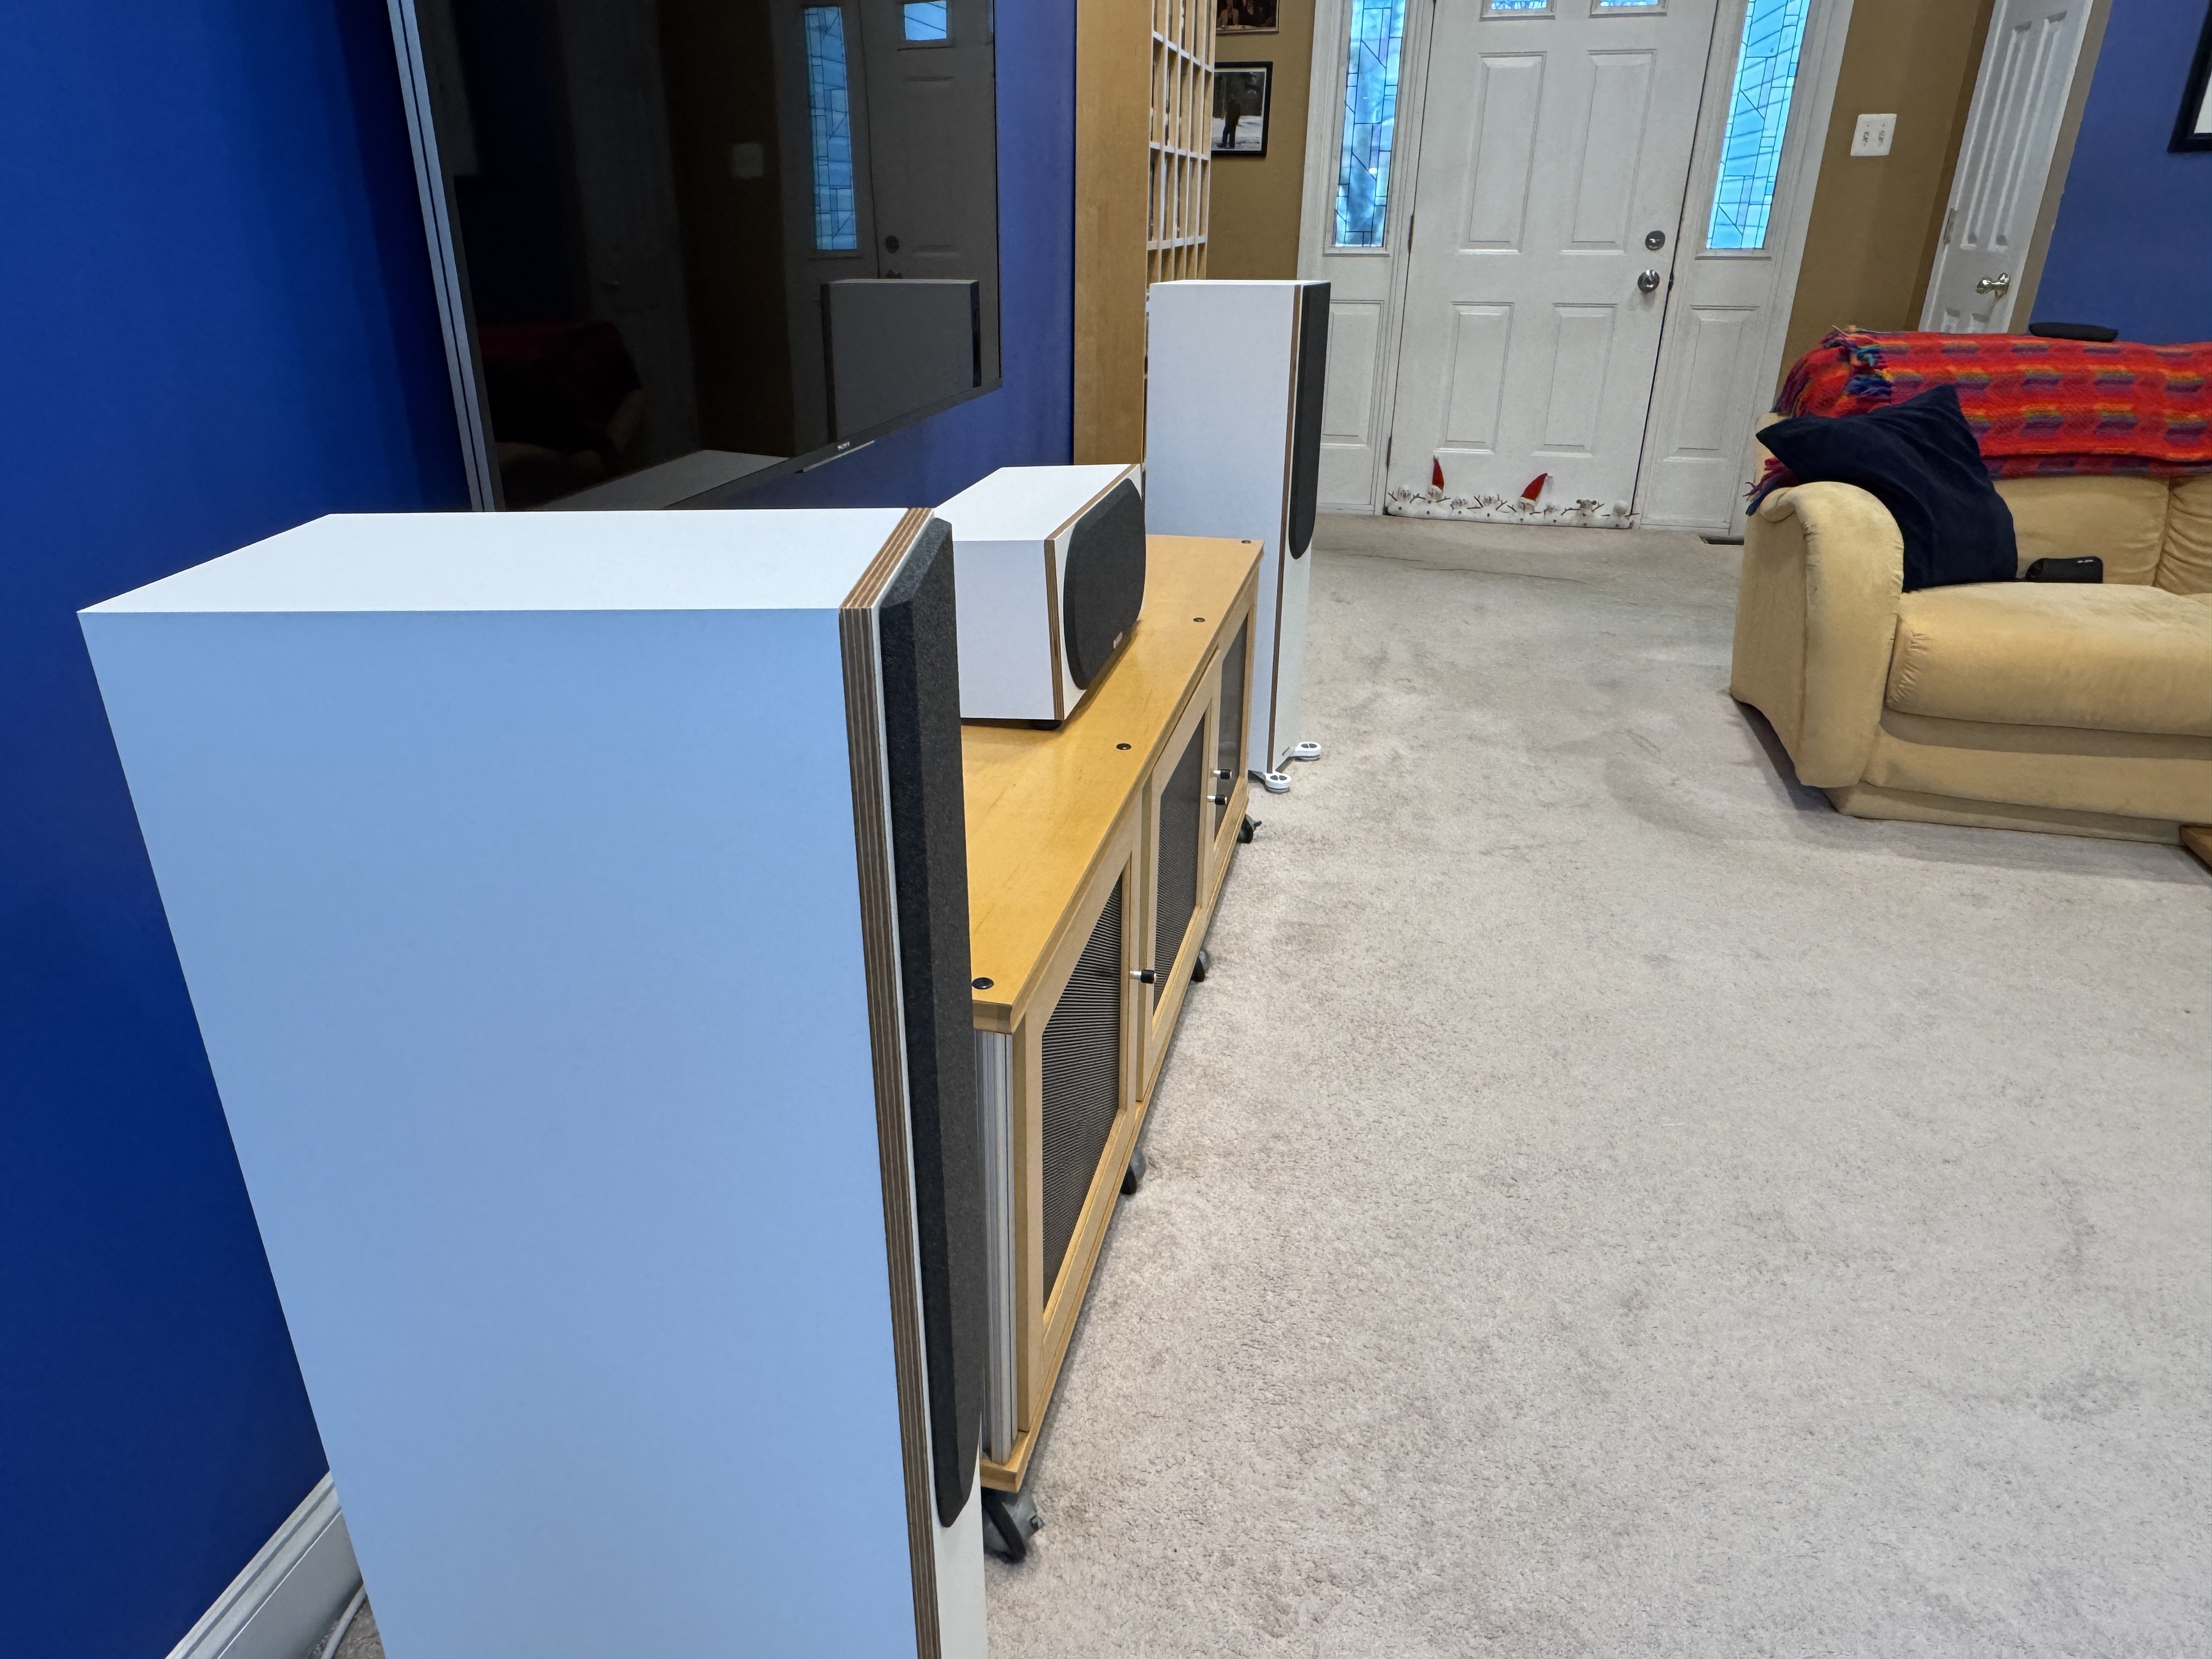
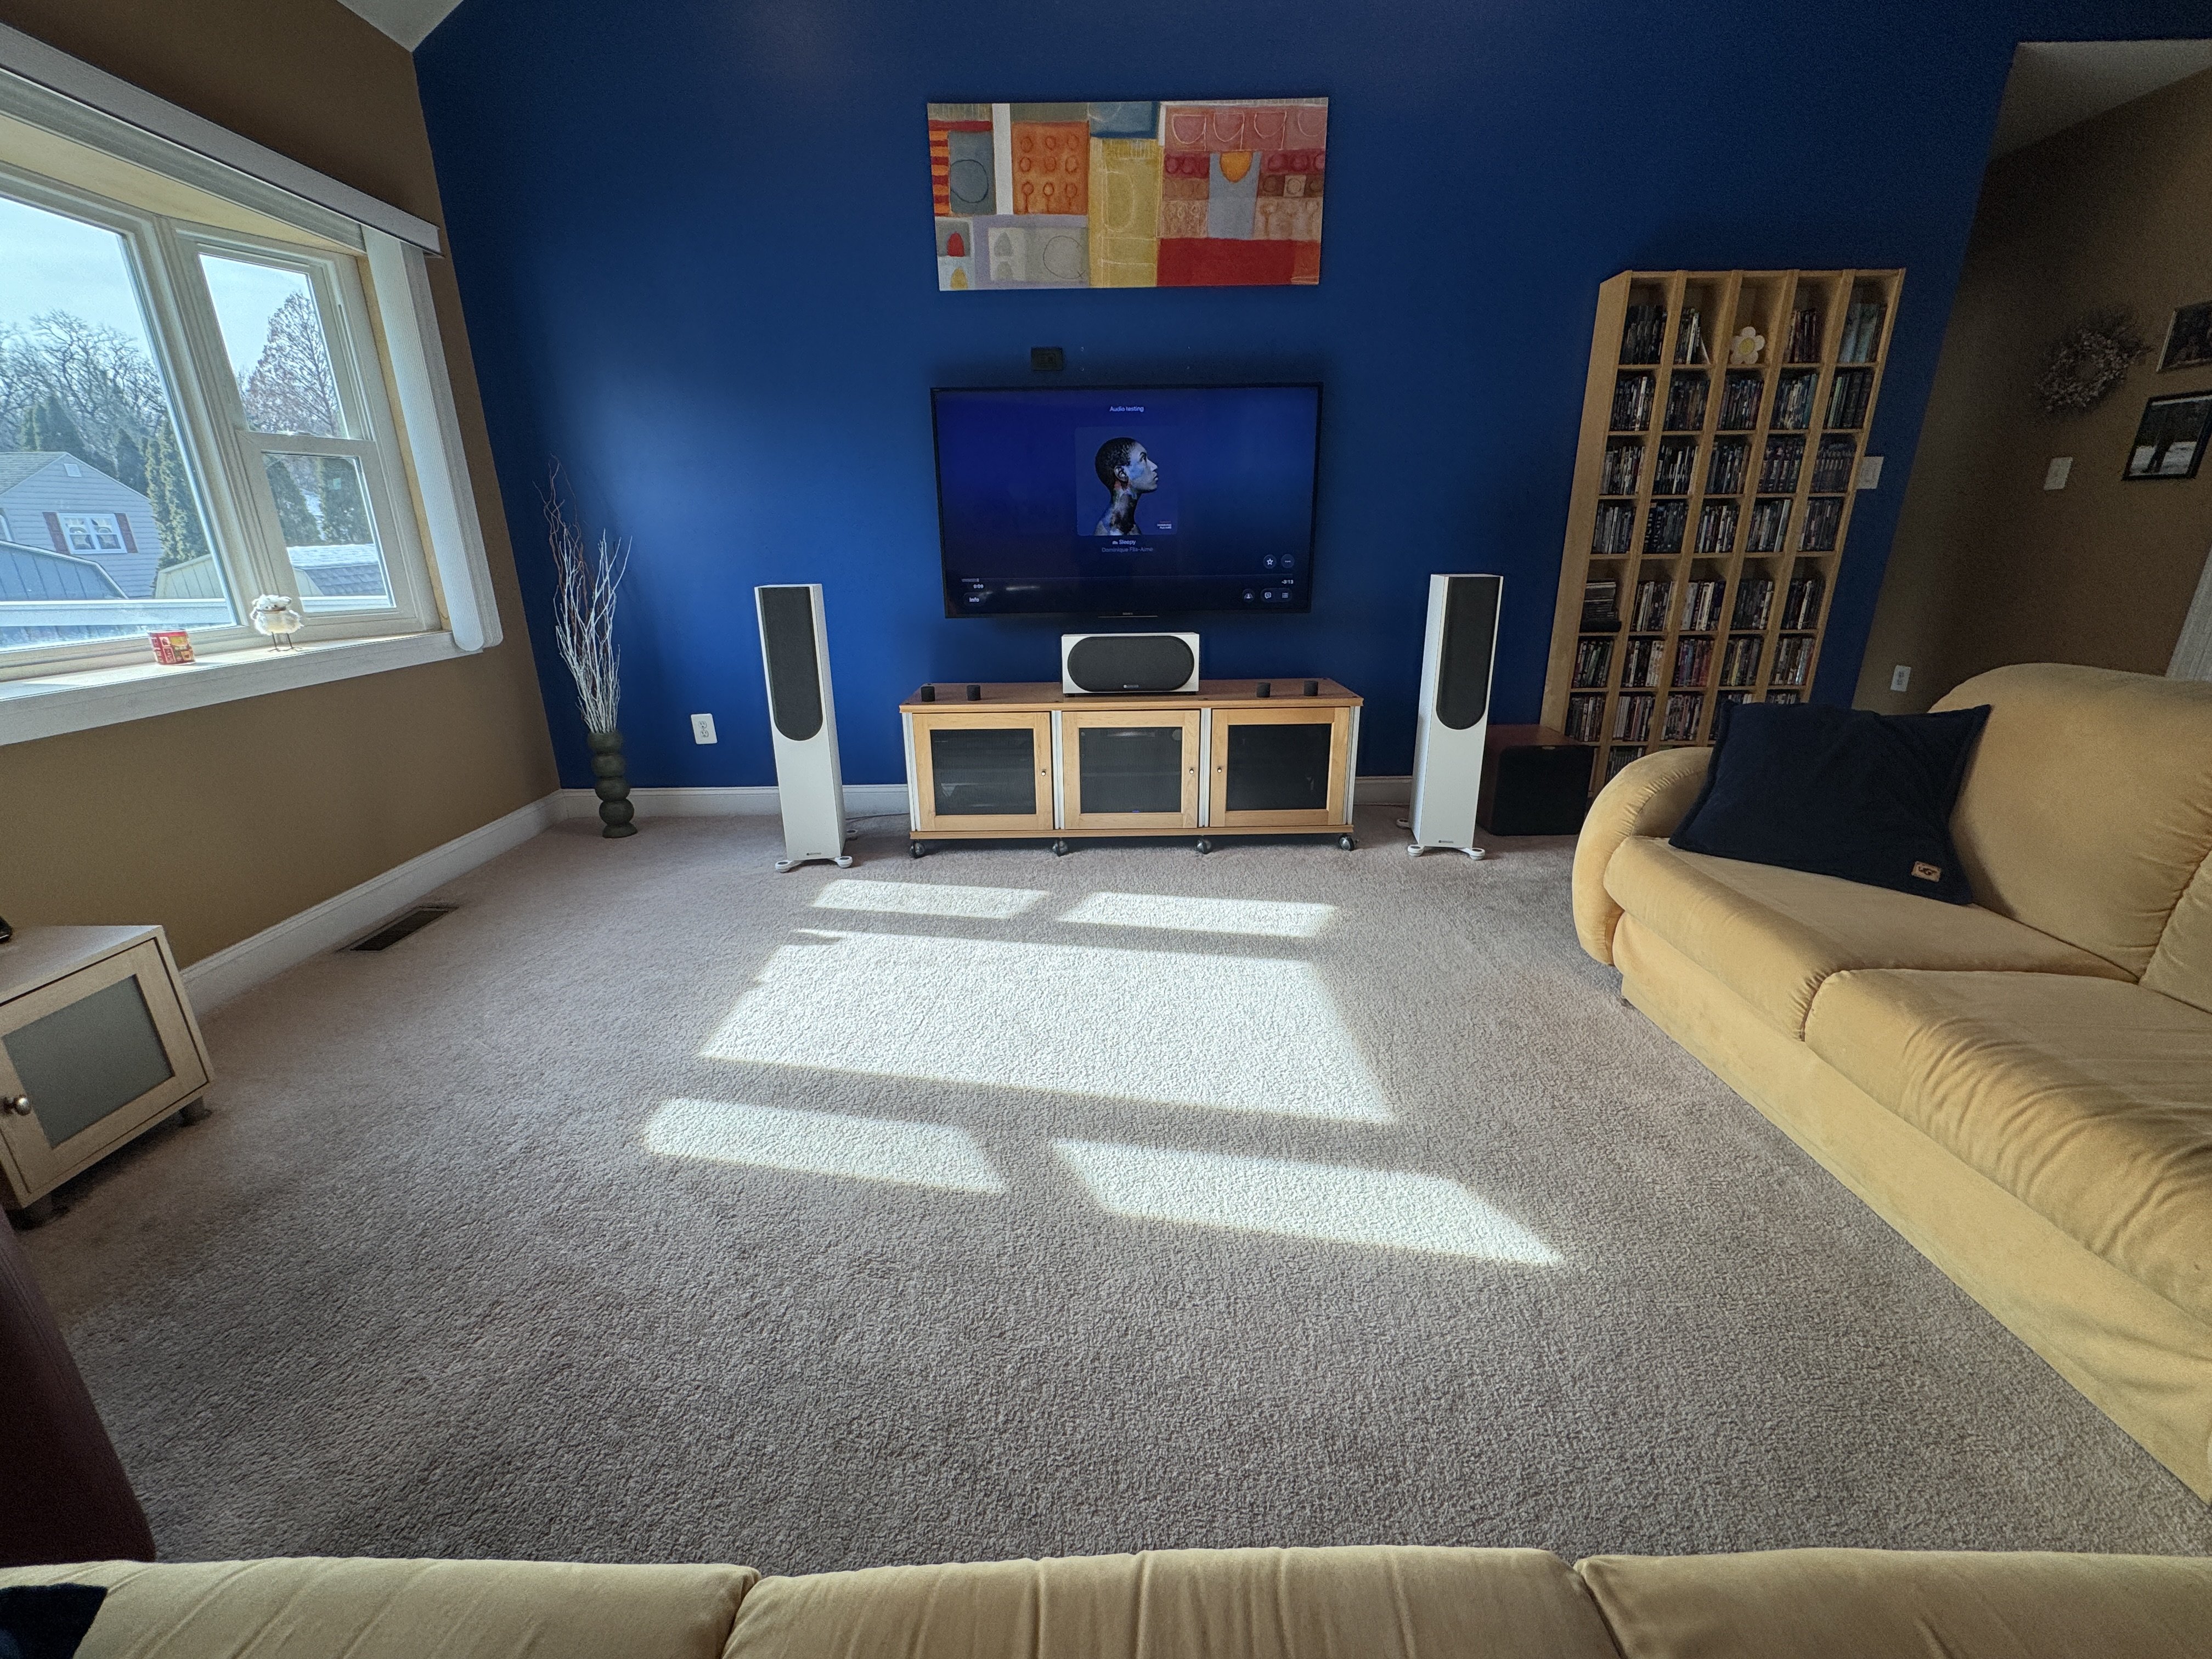
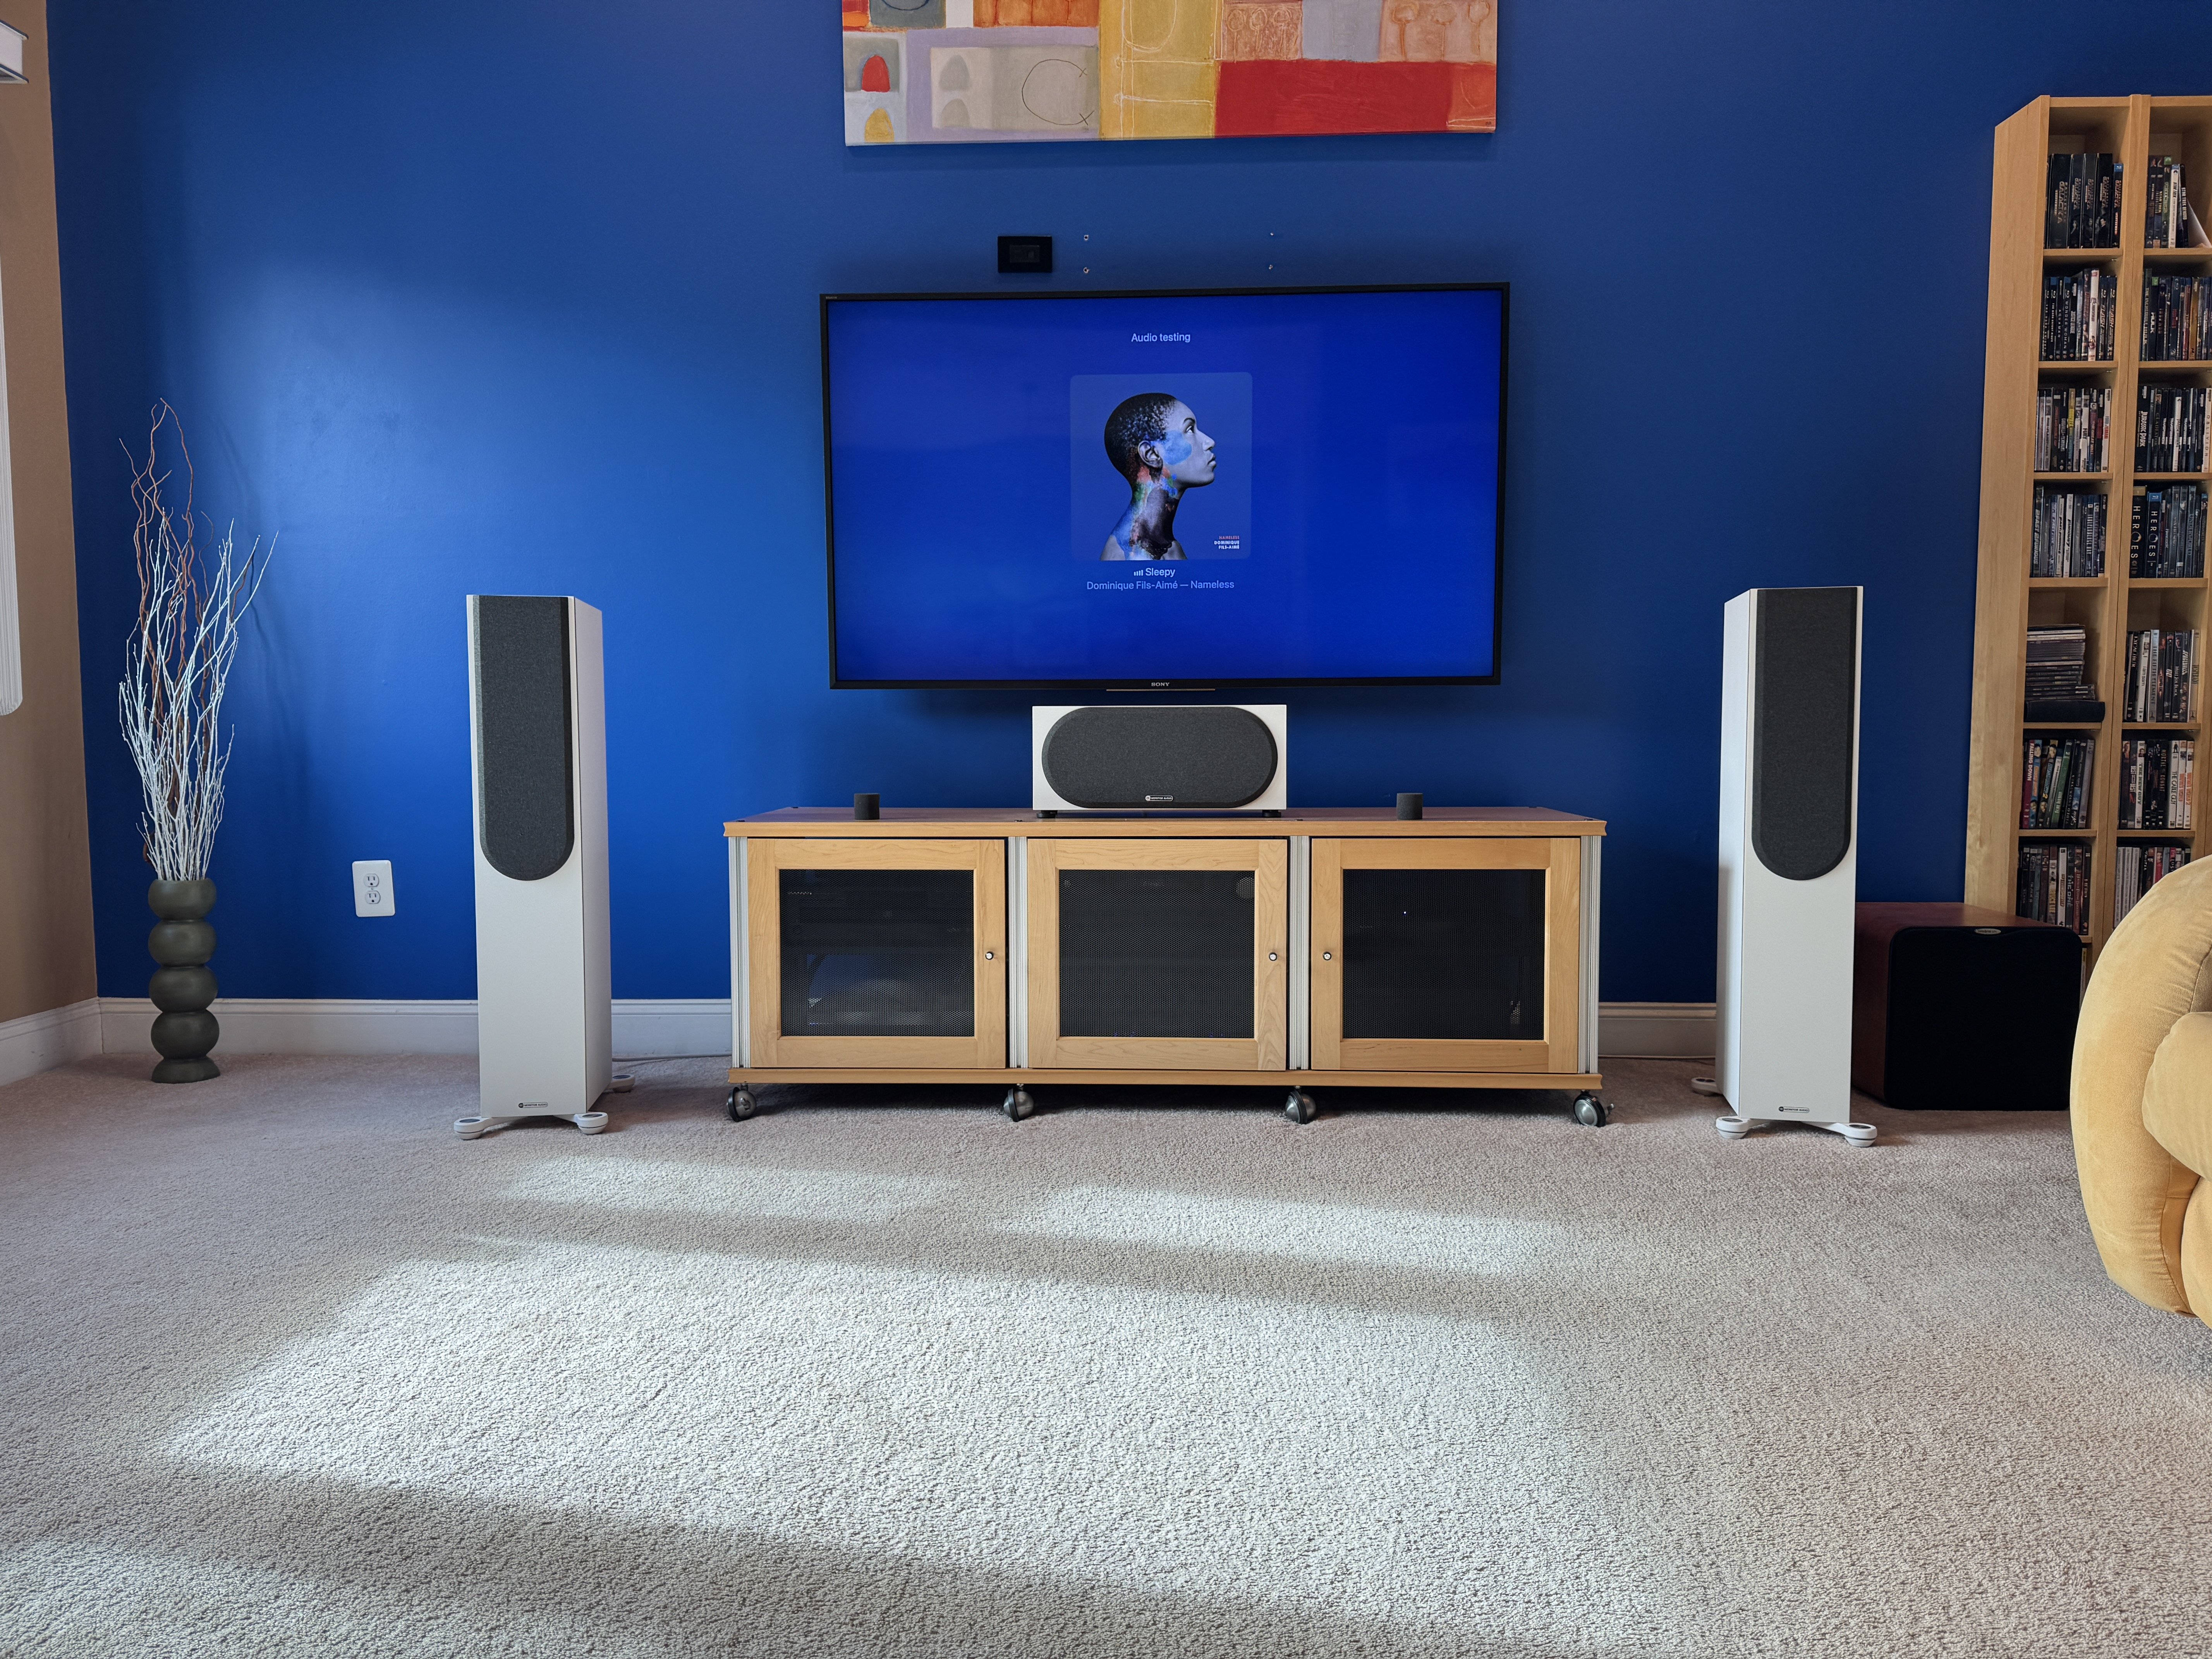
Here is some more examples of the curve so you get a good understanding of what I'm talking about.

Dan
My personal quest is to save to world of bad audio, one thread at a time. -
A slight lean forward might work well with the SDA SRS's as their tweeter height is a little high for when seated & listening.
-
skipshot12 wrote: »A slight lean forward might work well with the SDA SRS's as their tweeter height is a little high for when seated & listening.
That is possible but I'd listen to them both ways and see what sounds better. I never pointed speakers downwards except when they are very high in a bookshelf or above a TV on a shelf.Dan
My personal quest is to save to world of bad audio, one thread at a time. -
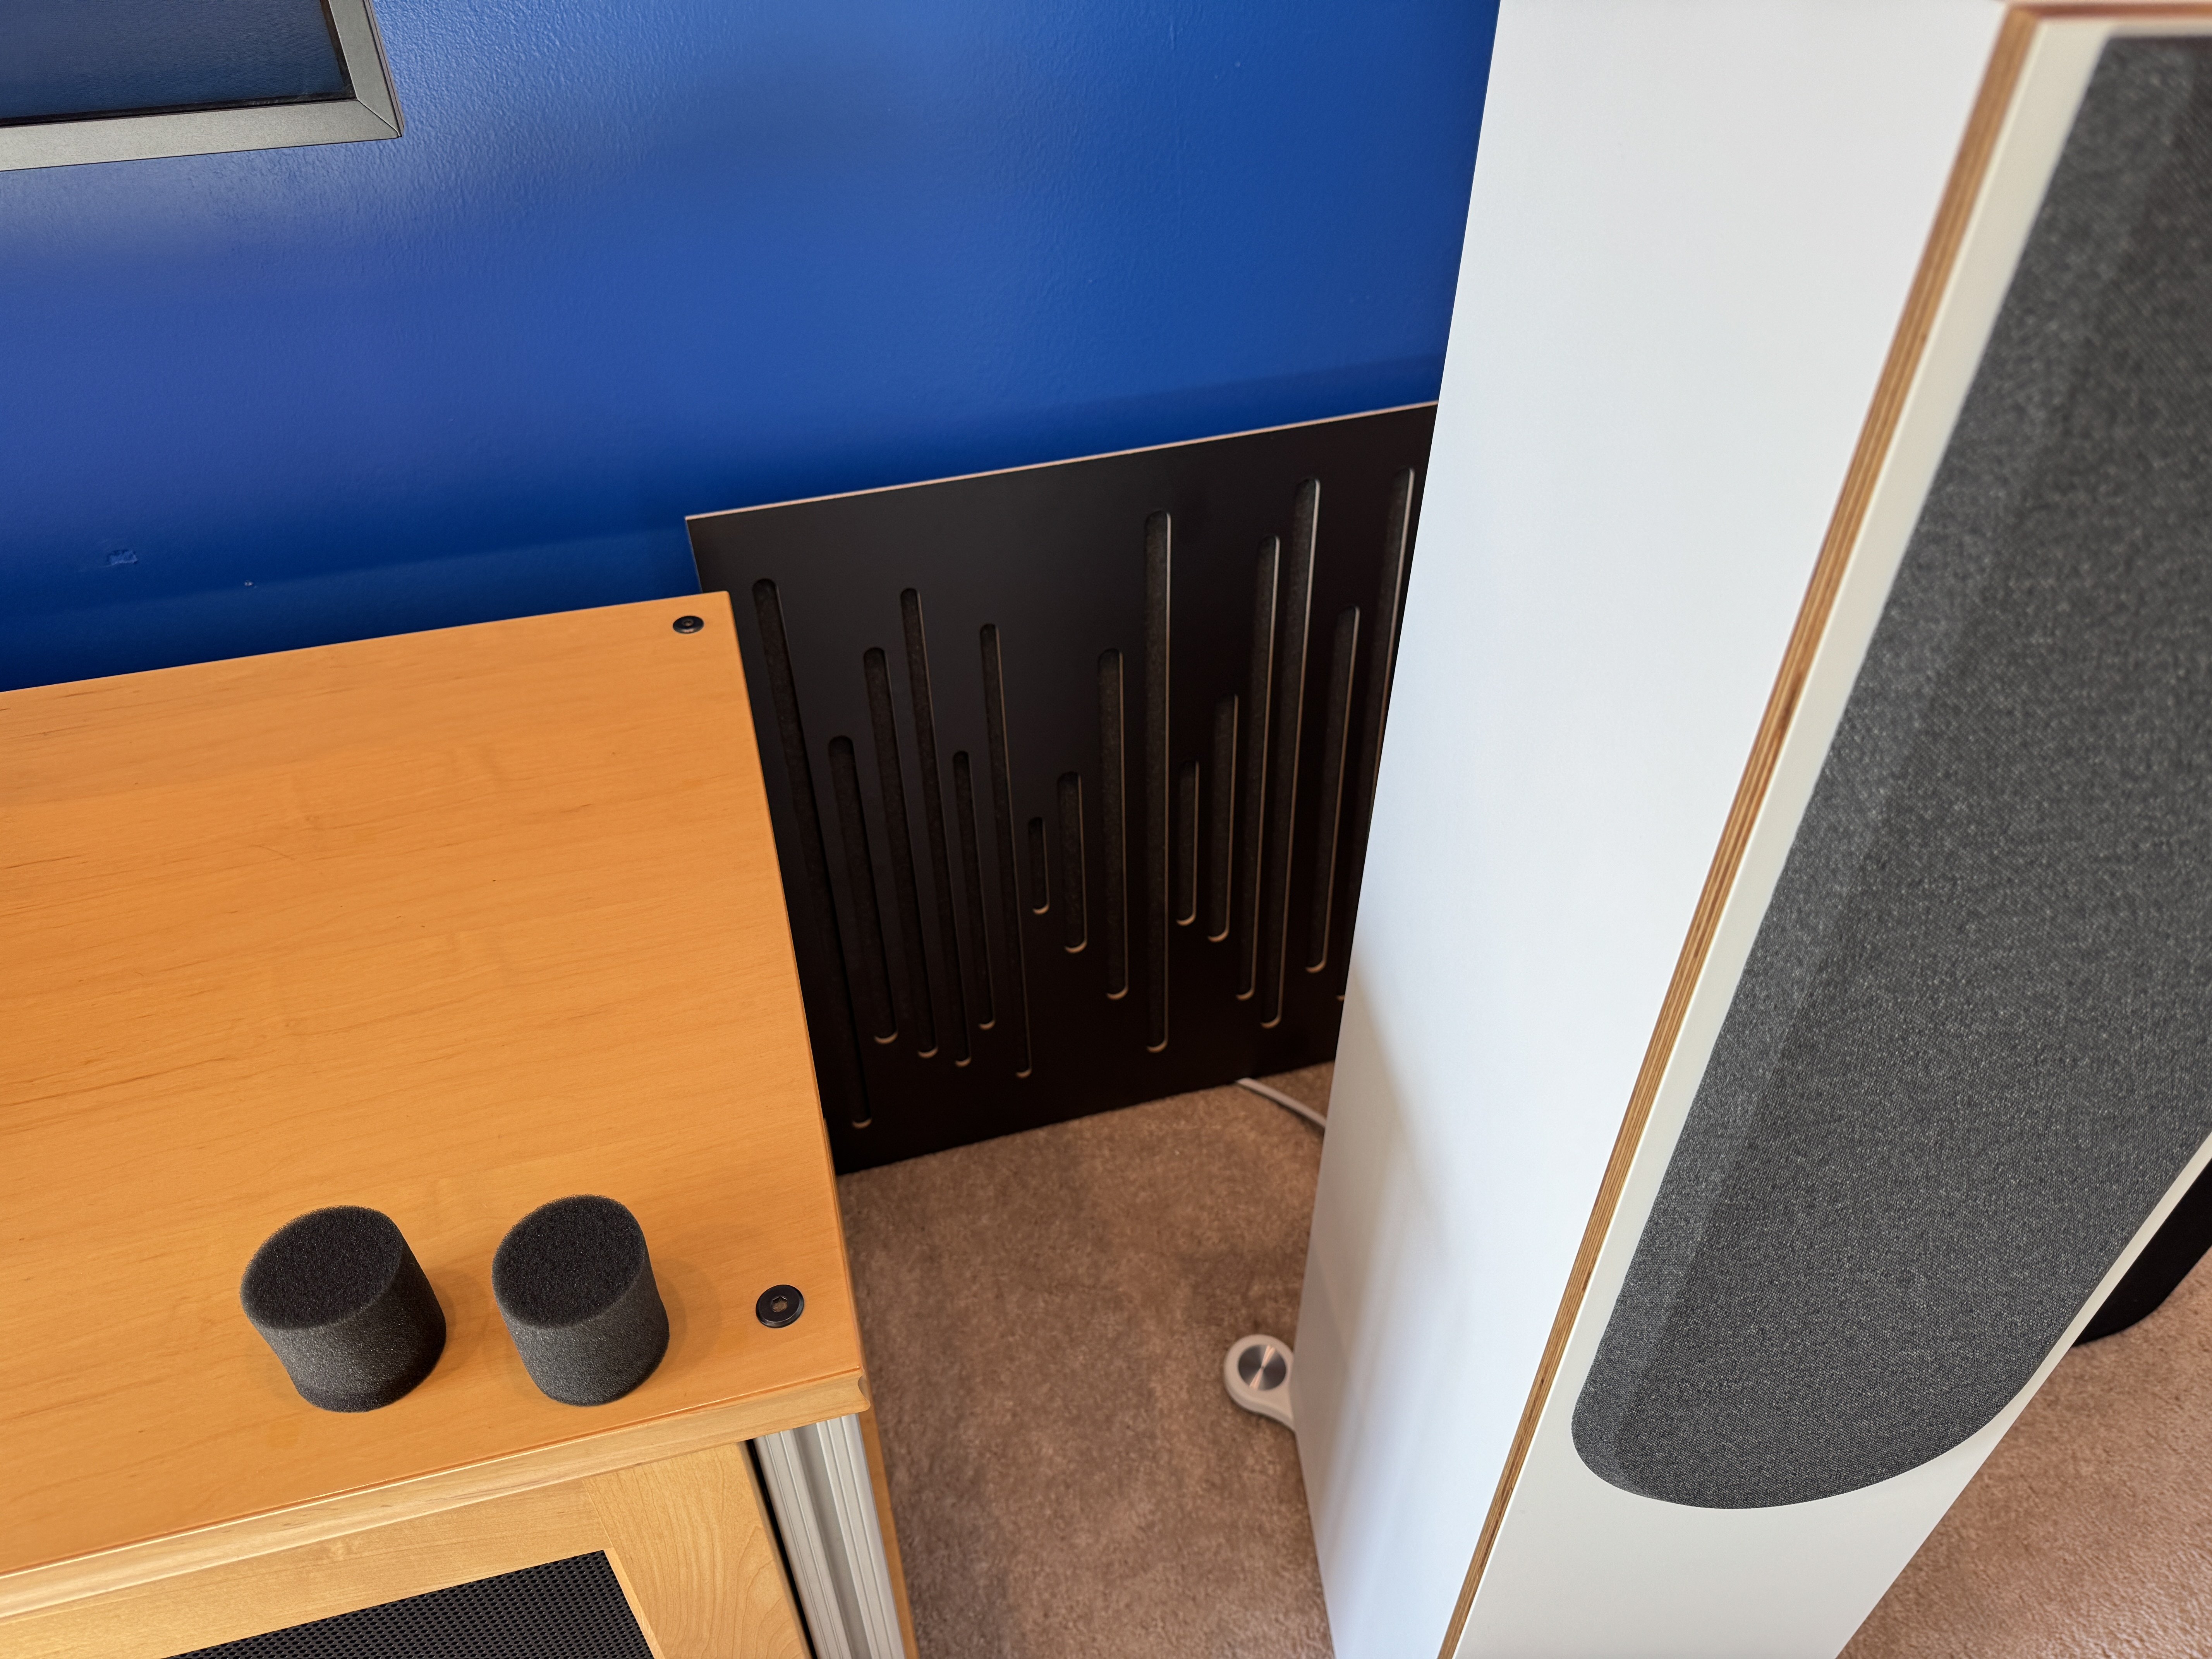
So to continue our discussion about speaker placement, I decided to play around with distance off the front wall since I currently do not have it treated which is going to change in the next few months but for now lets talk about if you have to keep your speakers closer to the wall than wanted and no treatments.
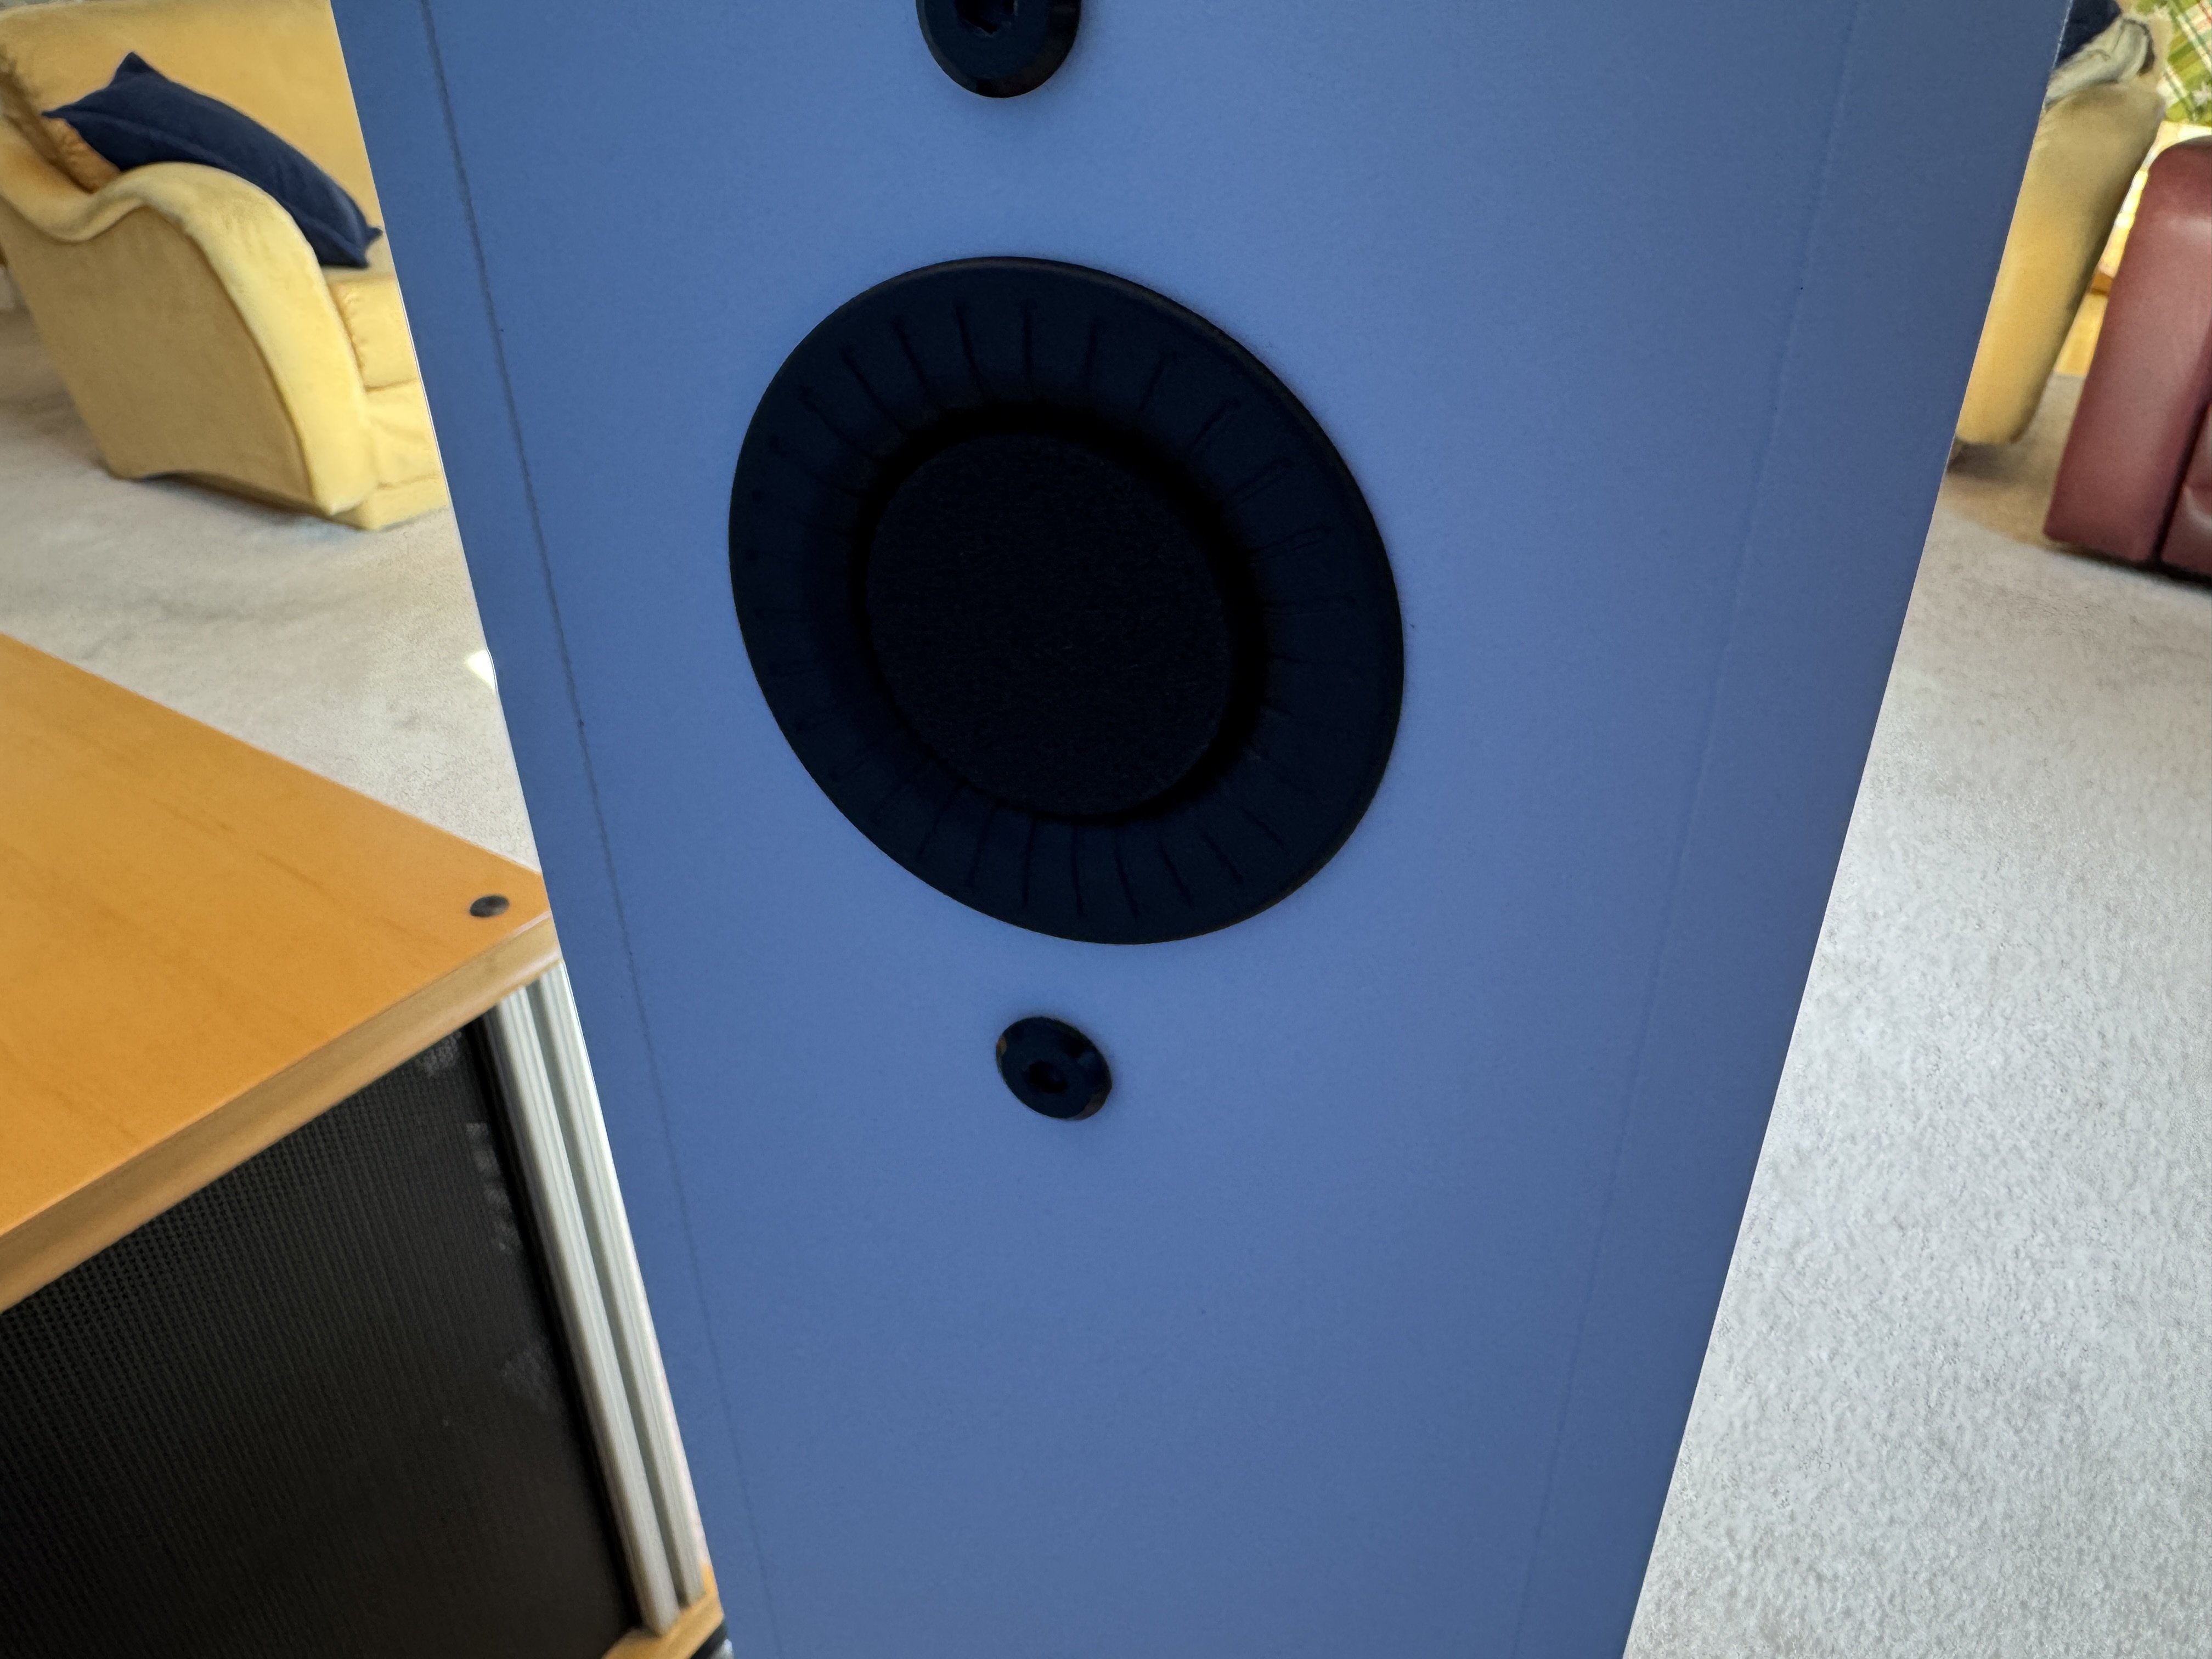
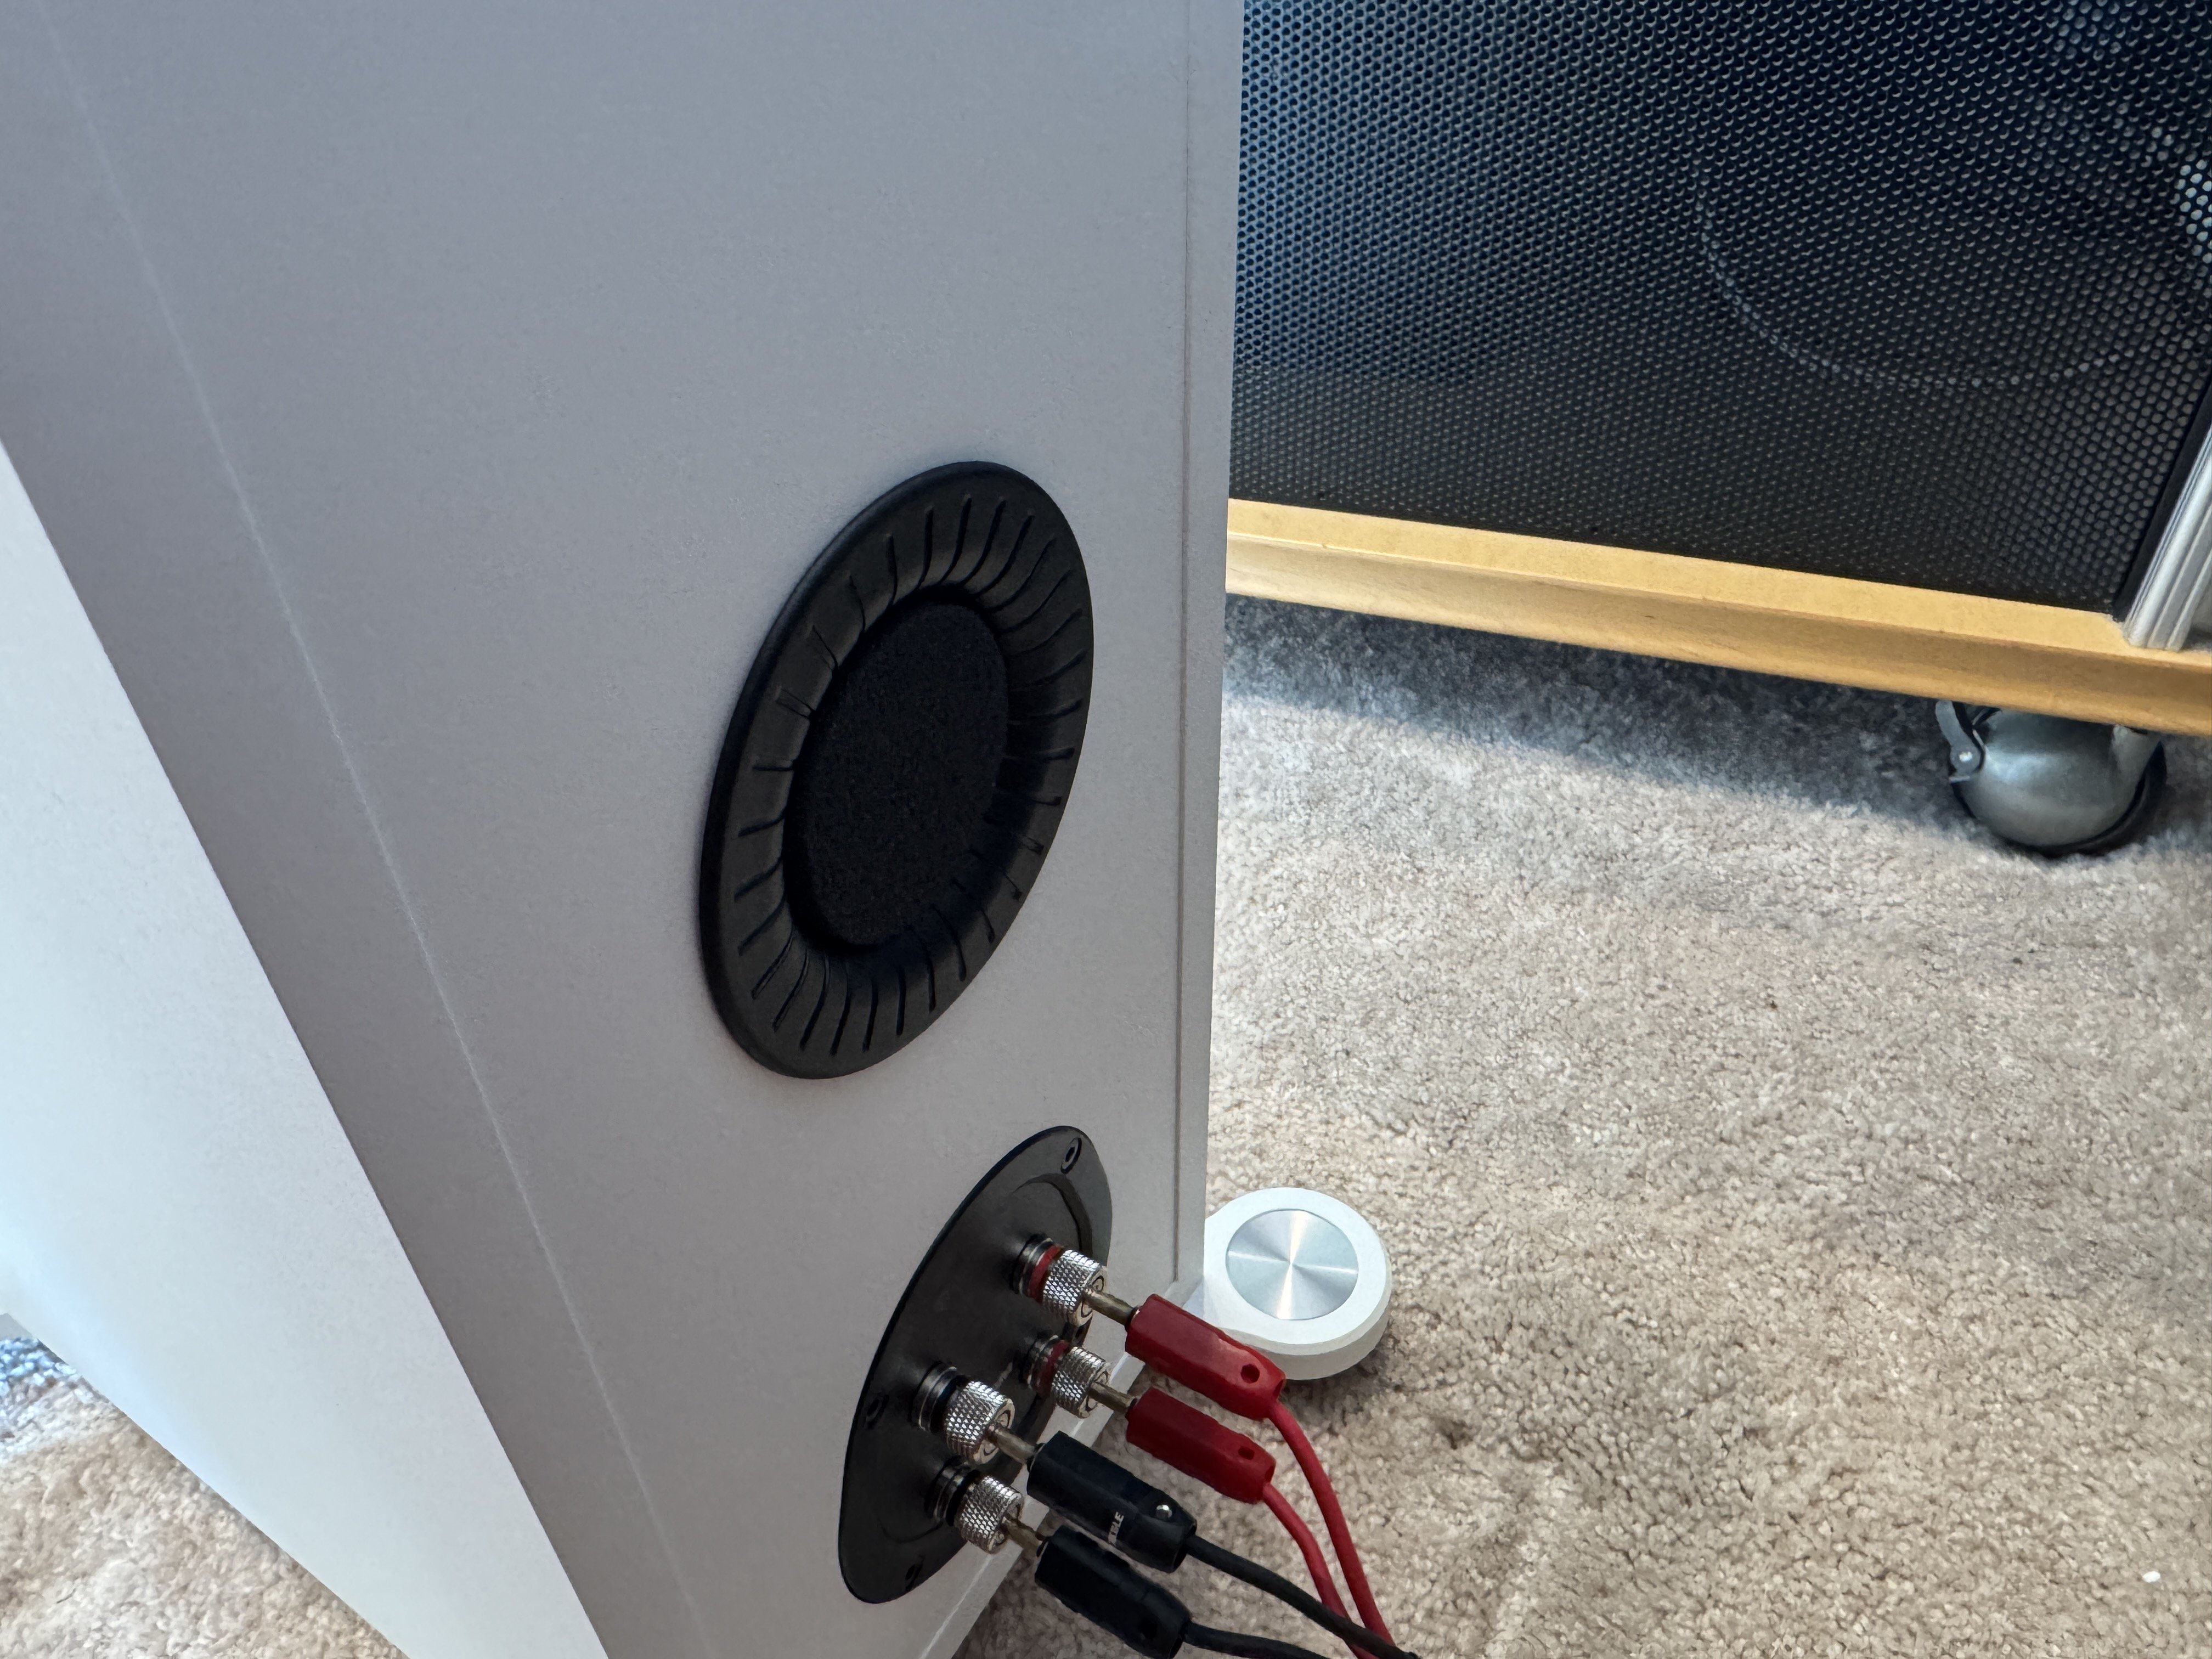
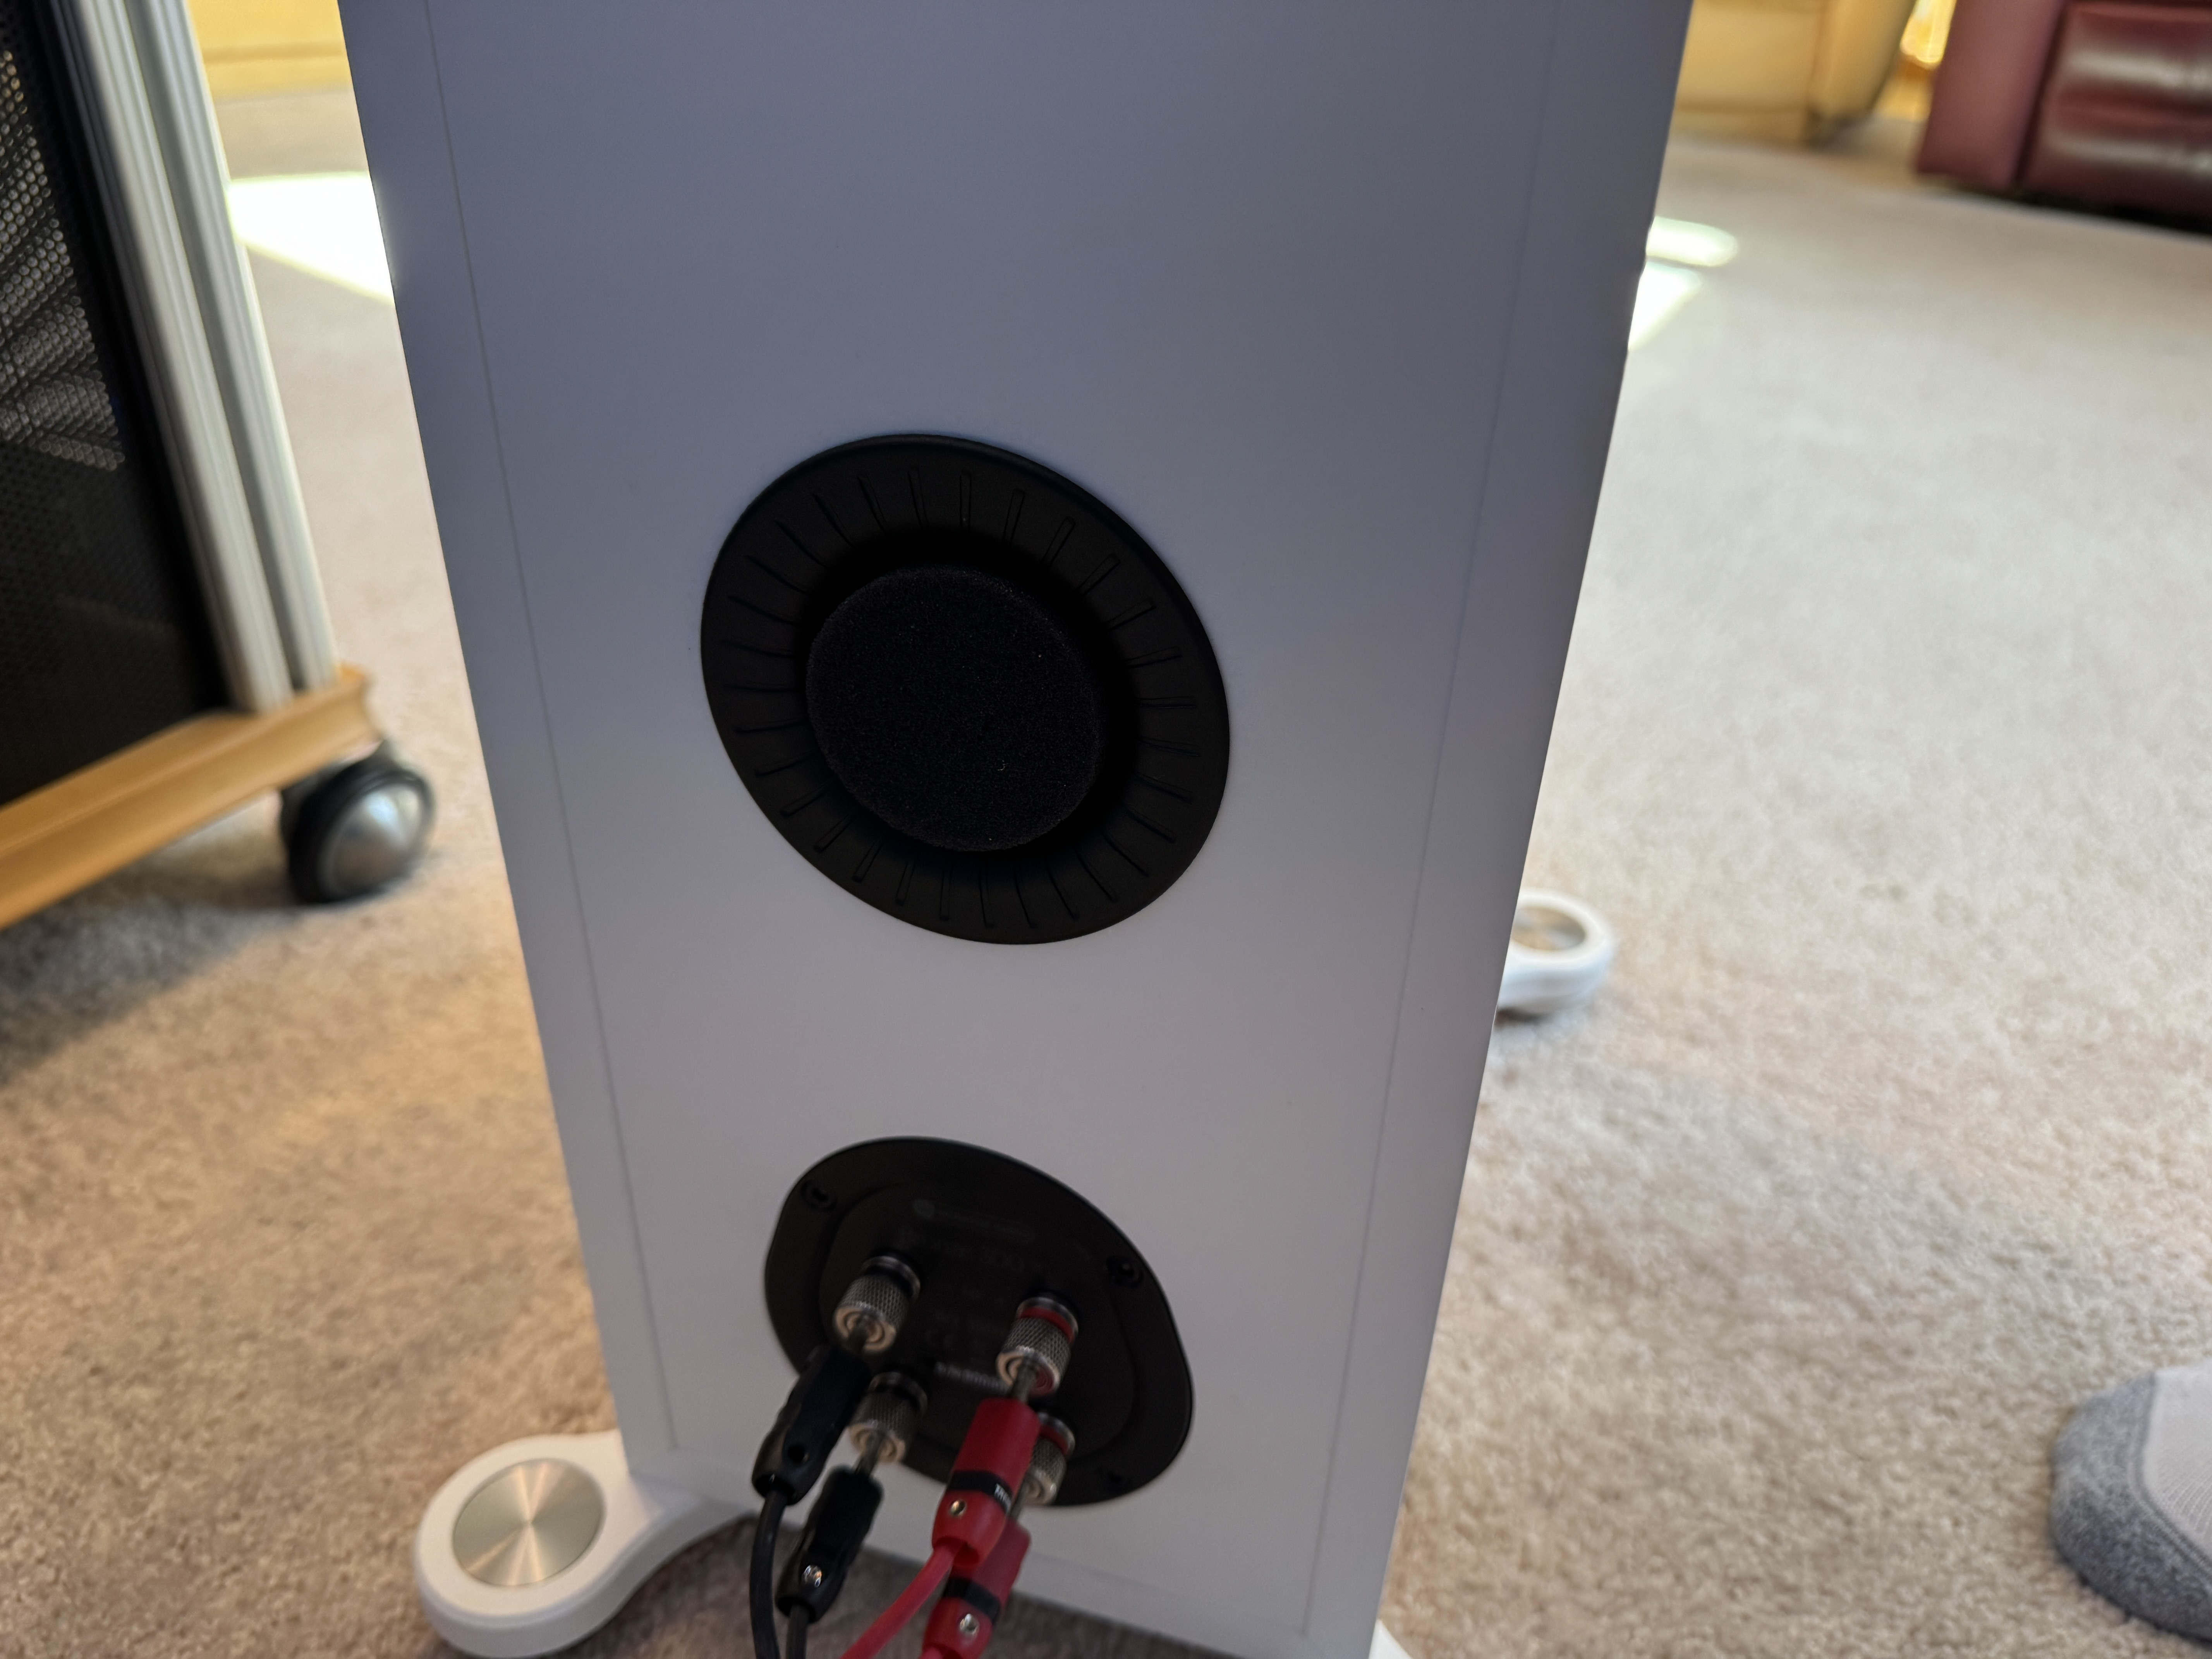
My speakers have 2 ports on the back, one behind the tweeter location just below it and one lower on the cabinet where no drivers are installed. They come with port plugs made of black foam like material. I had mine out since I got them but today I plan on playing around with placement a bit more, if I can get them out just a tad more without my wife complaining they are out into the room to much, I'm gonna try to improve on the 13 inches away from center back of the speakers to maybe 14-15 inches and then start messing around with the port plugs.
So just some basic rules of speakers placement, the closer your speakers are to the front wall, the more bass enhancements you will get but at a sacrifice of soundstage detail and clarity. What can happen on most speakers with some exceptions , is the lower frequencies will get boundary help to basically up the volume of the lower octaves and then smear , cloud or muddy up the entire speakers overall sound.
For me I have always found all speakers in this room sound much more detailed setup in small usually 80hz crossover. I have tried so many different crossover points and I always seem to send back up at 80hz and allowing my Subwoofers do the rest. I pay very close attention to getting the in room SPL match correctly as I can't stand boomy bass reproduction. I much prefer to hear all the sound instead of getting shadowed by powerful chest pounding bass notes.
Now you might think your speakers sound great, as I do now I think they sound crazy detailed wide sound stage very detailed with a lot of air around each sound or instrument they reproduce. I'm wondering which since they do have those 2 ports on the back, if I move them out just a tad more, start fooling around with the plugs maybe 1 at a time, and then both ports plugged and really see if any sonic clarity can be achieved.
So I'll be straight with you guys, this room sucks for sound recreation due to its open design and overall height of the room. I have a Dining room being 1/2 of the back wall, really the room doesn't have a back wall, very small amount of one anyway, a hallway open to the Kitchen which is also behind where the back wall should be, a hallway to the right that goes from the kitchen to the front door then down to the bedrooms and hall bathroom. On the left side , there is a bay window right smack where the first order reflection is. If I crank any speaker and I have had a ton of them in this room, I get an annoying reflection and makes the left speakers almost sound out of phase.
So my redesign of this room , I'm gonna address some of it's issues with treatments as it doesn't matter if I have a nice pair of KLH bookshelf speakers like I had years ago, Polk LSI's, LSIM's, RT's, Def Techs , Dynaudio , Monitor Audio , Totems , Focal's etc, they all fall victim to the room. Not so much the Mythos ST towers, they seem to do the best in this room maybe due to their height, they are the tallest speaker I had in the room, they are hard to make sound bad.
Anyway my wife and daughter are going to my son's soon to be wife's Bridal shower today and I will have a few hours to really mess around without annoying anyone with my constant replay of the exact same songs at the exact same 30 seconds to a minute or 2 evaluation. They think I'm absolutely nuts as they think all my speakers I have had sounded great before I did all this tweaking. We know why we do this nutty stuff LOL.
Anyway in the meantime, if you have a room you can't place your speakers out into the room as where they would sound the best, what technics do you do to try and help them sound better?Dan
My personal quest is to save to world of bad audio, one thread at a time. -
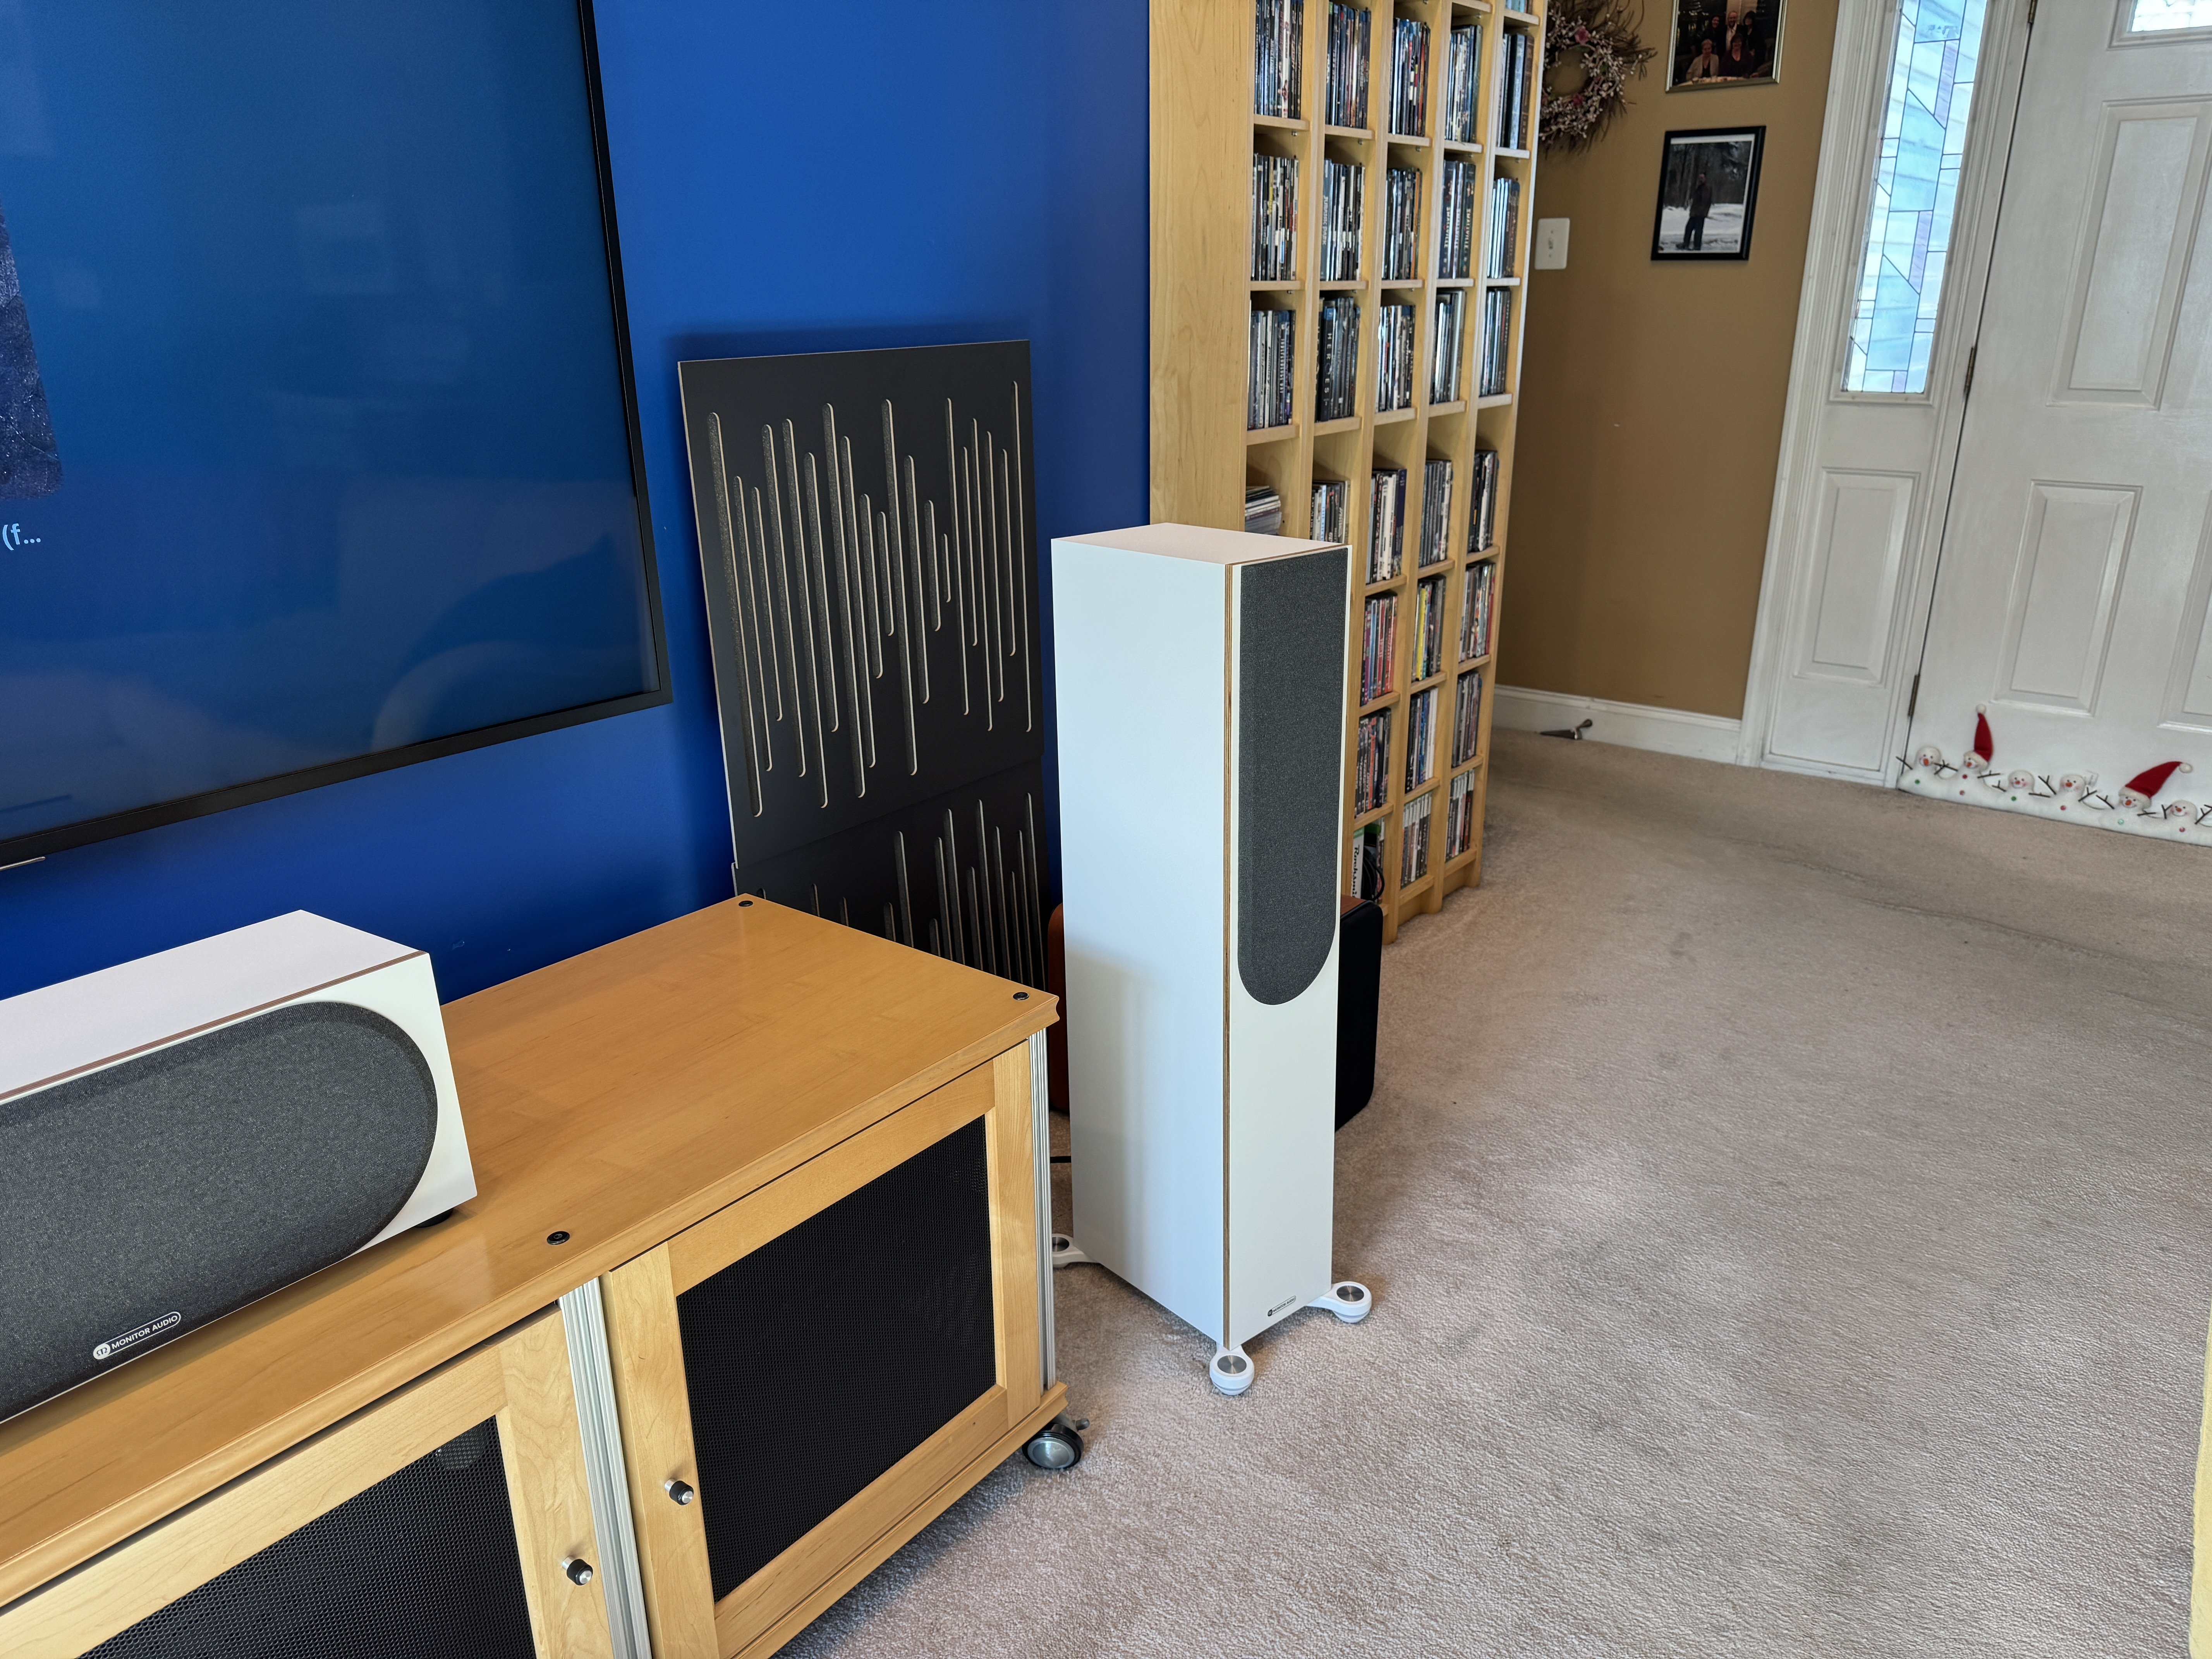
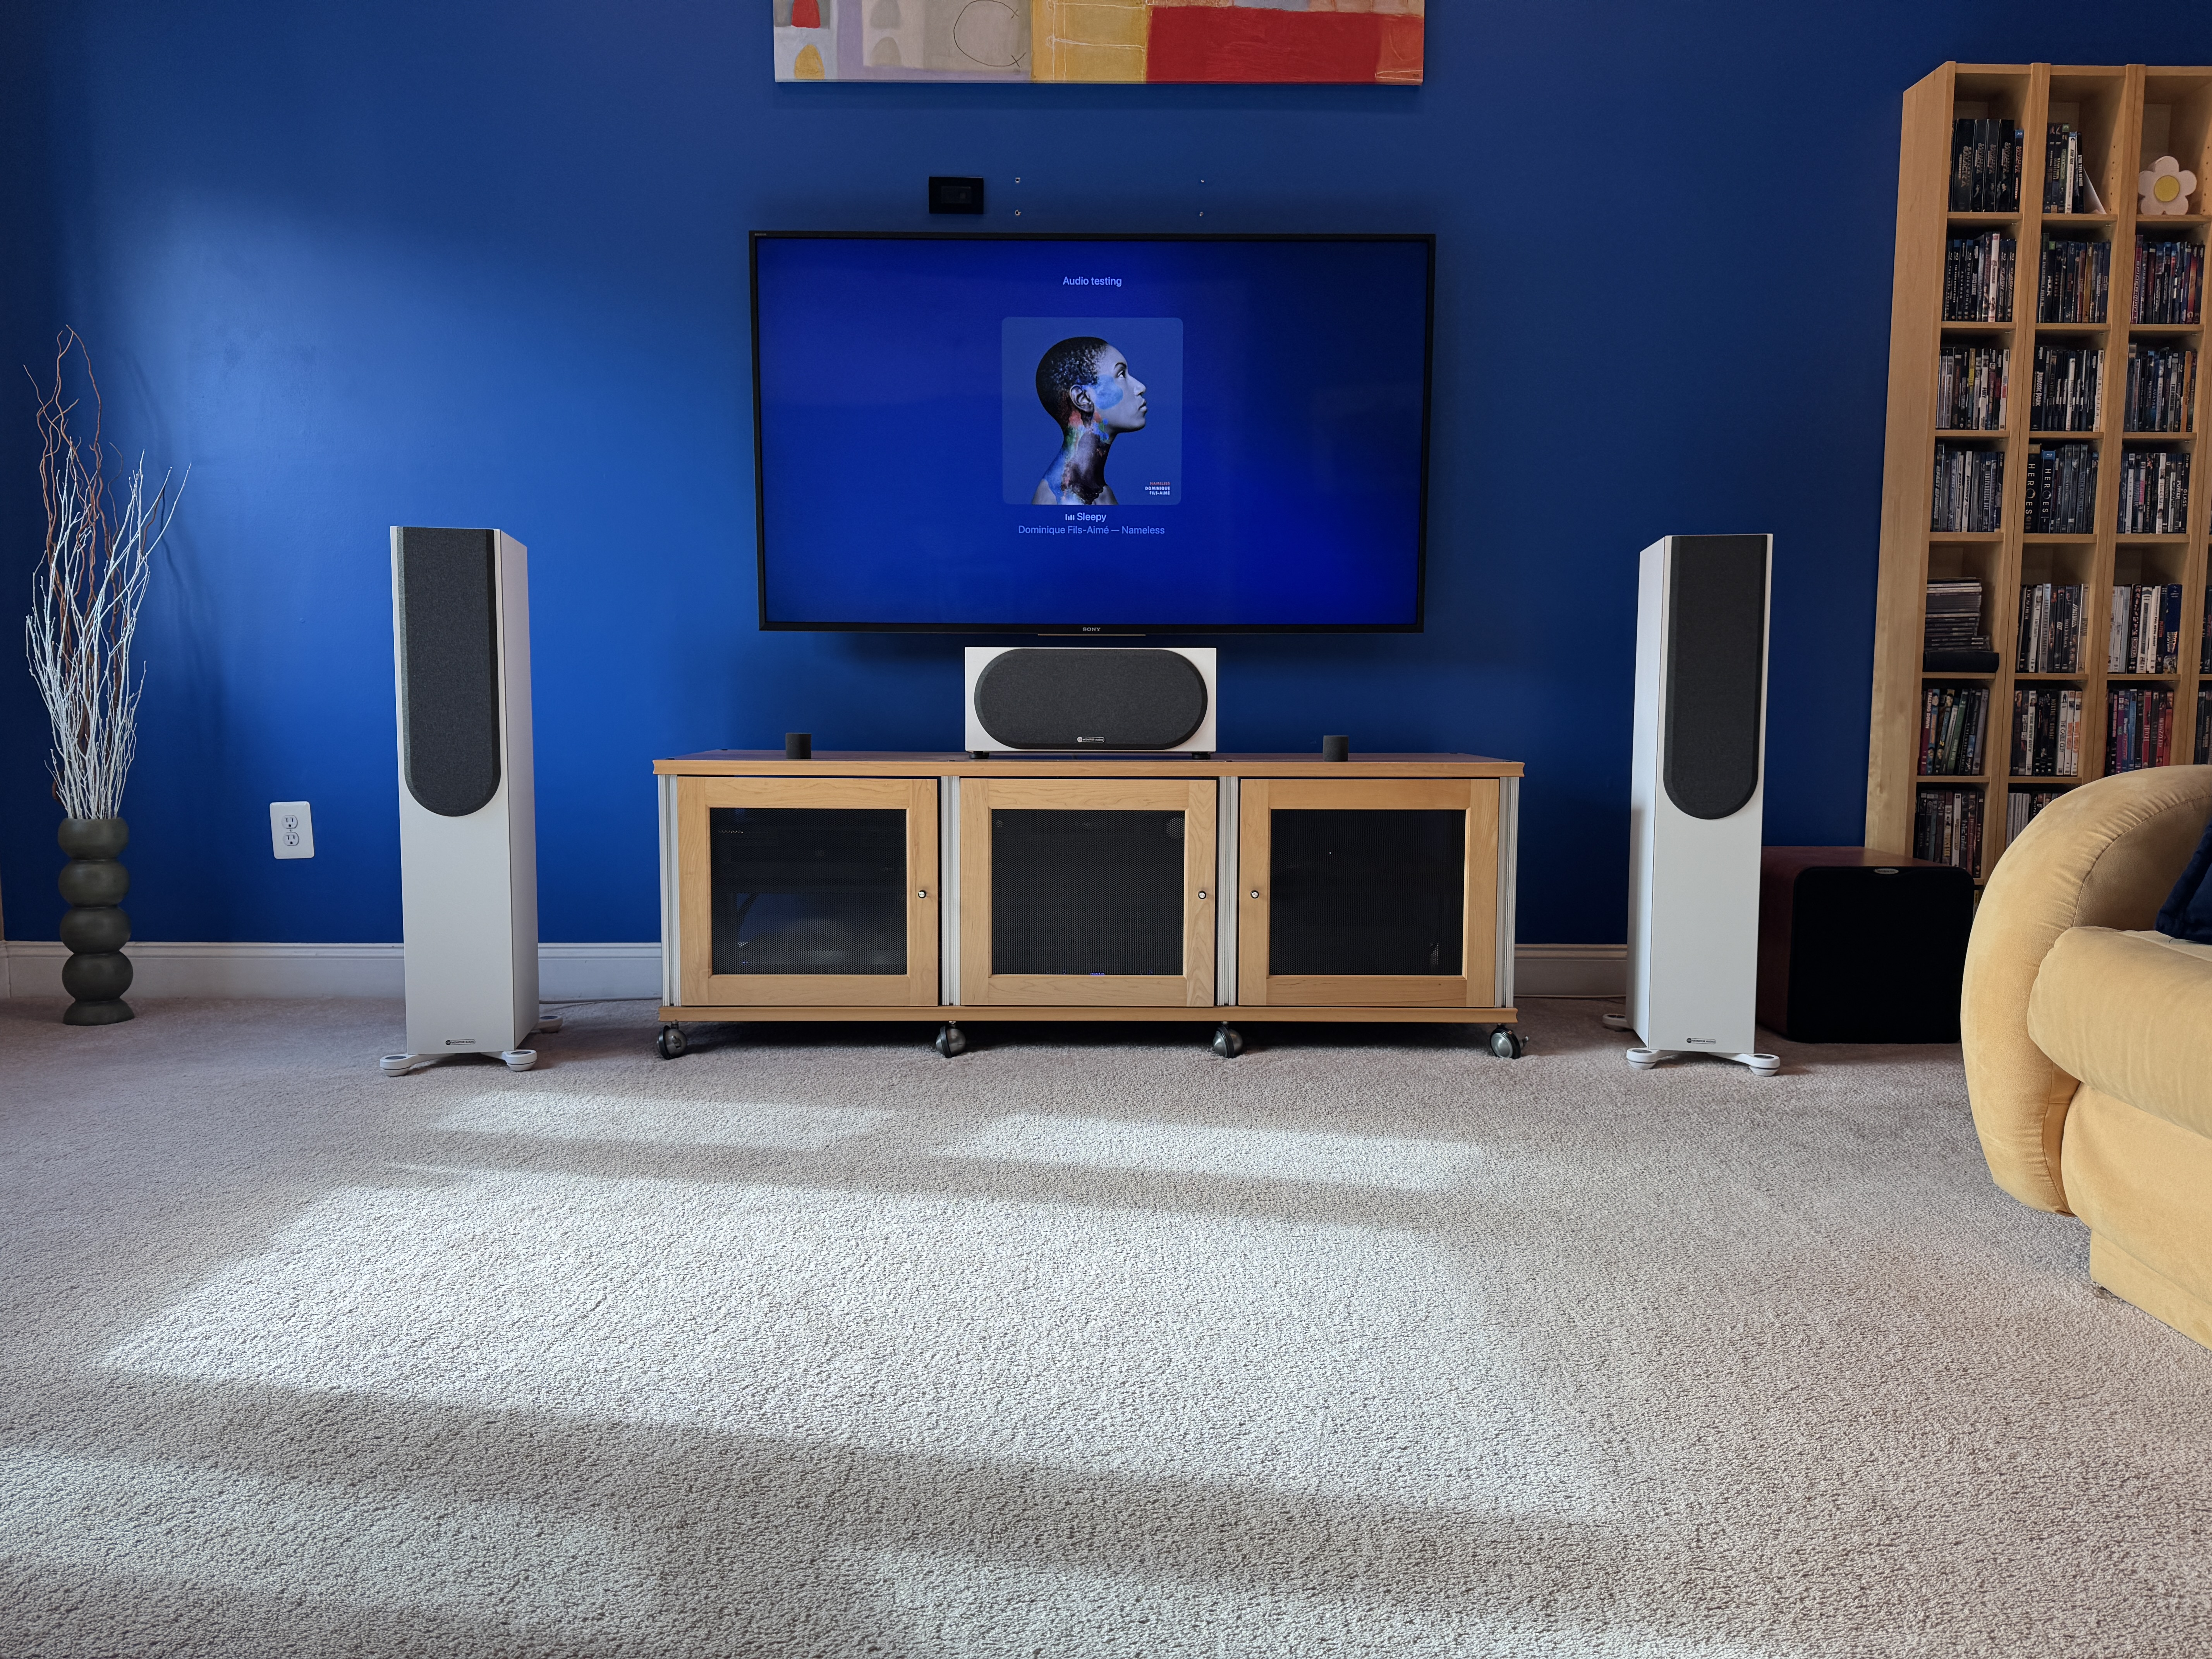
This position ( pic was taken the day I got them the Focals are back in the basement) is where they really open up and start to really sound a whole differnet level.

This is the more realistic position I'm gonna mess with and push the boundaries of my wife's tolerance of my obsession. As you can also see , our couch is a huge L design which is also going away with the new design, but it can limit that side walk way with the speakers to far into the room.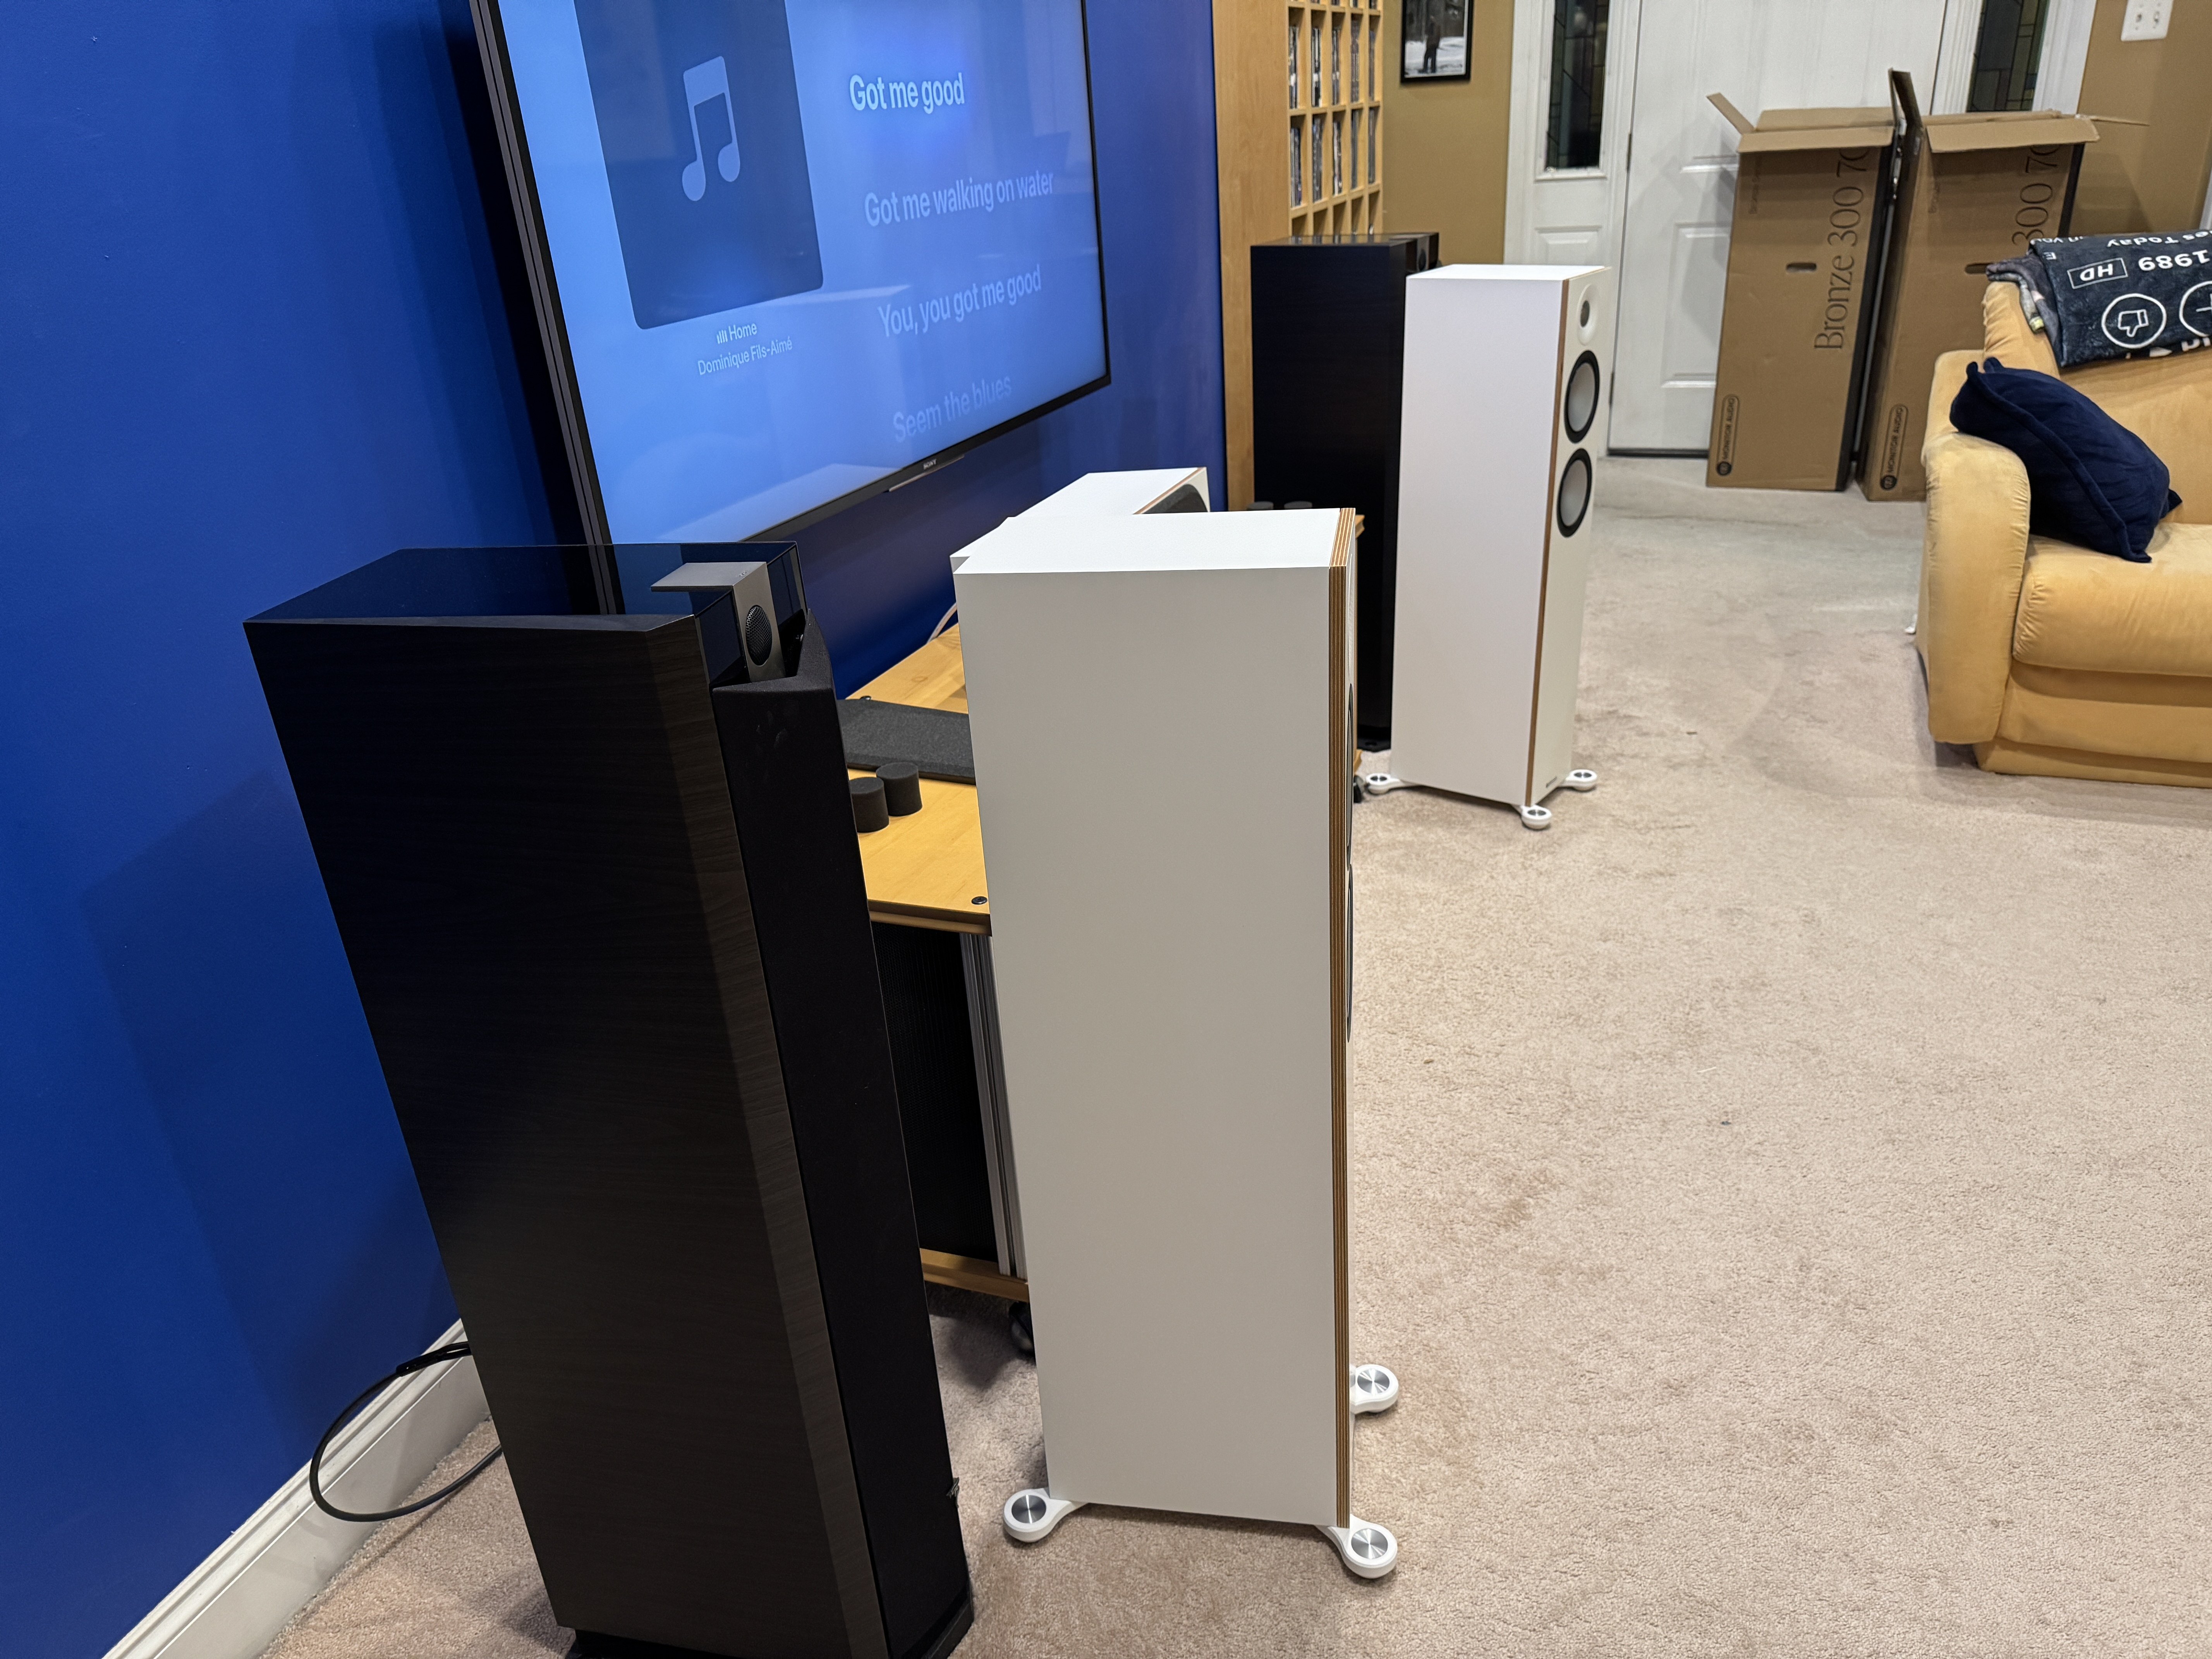
Today will be a game of inches and I think I can squeak out a few inches and with the help of the port plugs in some configuration of 1 on top or bottom or simply plug both holes ( inches and plugging holes sound dirty LOL) I'm hoping to get as close to them sounding as good as pulled out into the room.
Dan
My personal quest is to save to world of bad audio, one thread at a time. -
Great post, Dan. I experience the same thing. Speakers sound best with a bit of room to breath like that but then they can quickly become "socially unacceptable" in a family living space.
")
This is why I thought the Polk SDA speakers like the 1C were a good design. Not too big, the cabinets weren't very deep, and they were made to be close to the wall to sound their best. The L800s also benefit from more breathing room.
And room acoustics are really challenging in most homes unless a room can be dedicated to audio or home theater. -
Great post, Dan. I experience the same thing. Speakers sound best with a bit of room to breath like that but then they can quickly become "socially unacceptable" in a family living space.
This is why I thought the Polk SDA speakers like the 1C were a good design. Not too big, the cabinets weren't very deep, and they were made to be close to the wall to sound their best. The L800s also benefit from more breathing room.
And room acoustics are really challenging in most homes unless a room can be dedicated to audio or home theater.
Thanks,
They make this cool wood wall slots with acoustic material behind it to help reduce higher frequencies, does nothing for bass BUT it will reduce echo in the room. I'm going to Treat the front wall 9 feet up, the wall is 14 feet high unfortunately. So I'm hoping this also helps . I have other acoustic treatments I'm hoping with the new decor , I can place them in places that look like design but help reduce room issues.
Dan
My personal quest is to save to world of bad audio, one thread at a time. -
Over the years I have found out that for best performance 5-6' out front the front wall works best for both monitors & floorstanders. Better room filling sound & easier sub/subs integration.
-
It took me a long time to figure that out since the marketing for mainstream speakers usually shows them pushed right up against a wall like they should be embarrassed to be in the room. Usually with a big screen TV in between mounted too high up on the wall.
-
It's when your in a living inviroment is when distance issues arise.
Dan
My personal quest is to save to world of bad audio, one thread at a time. -
ANYWAY had some fun today, not really over yet but I'll post some pics and thoughts about room treatments , port plugs and distance away from the wall that makes giant differences. This isn't even you Gotta focus and listen to the slightest detail like you would if you where evaluating cables or amps or stuff like that. Room acoustics play the biggest role in your sound bare none.
I'm now 15 1/4 inches away from the back wall center measurement. This still give me from the front facing foot on the right speaker in the walkway into the family room 36 full inches to walk past the speaker, not trip on the foot which 36 inch is a standard door way measurement.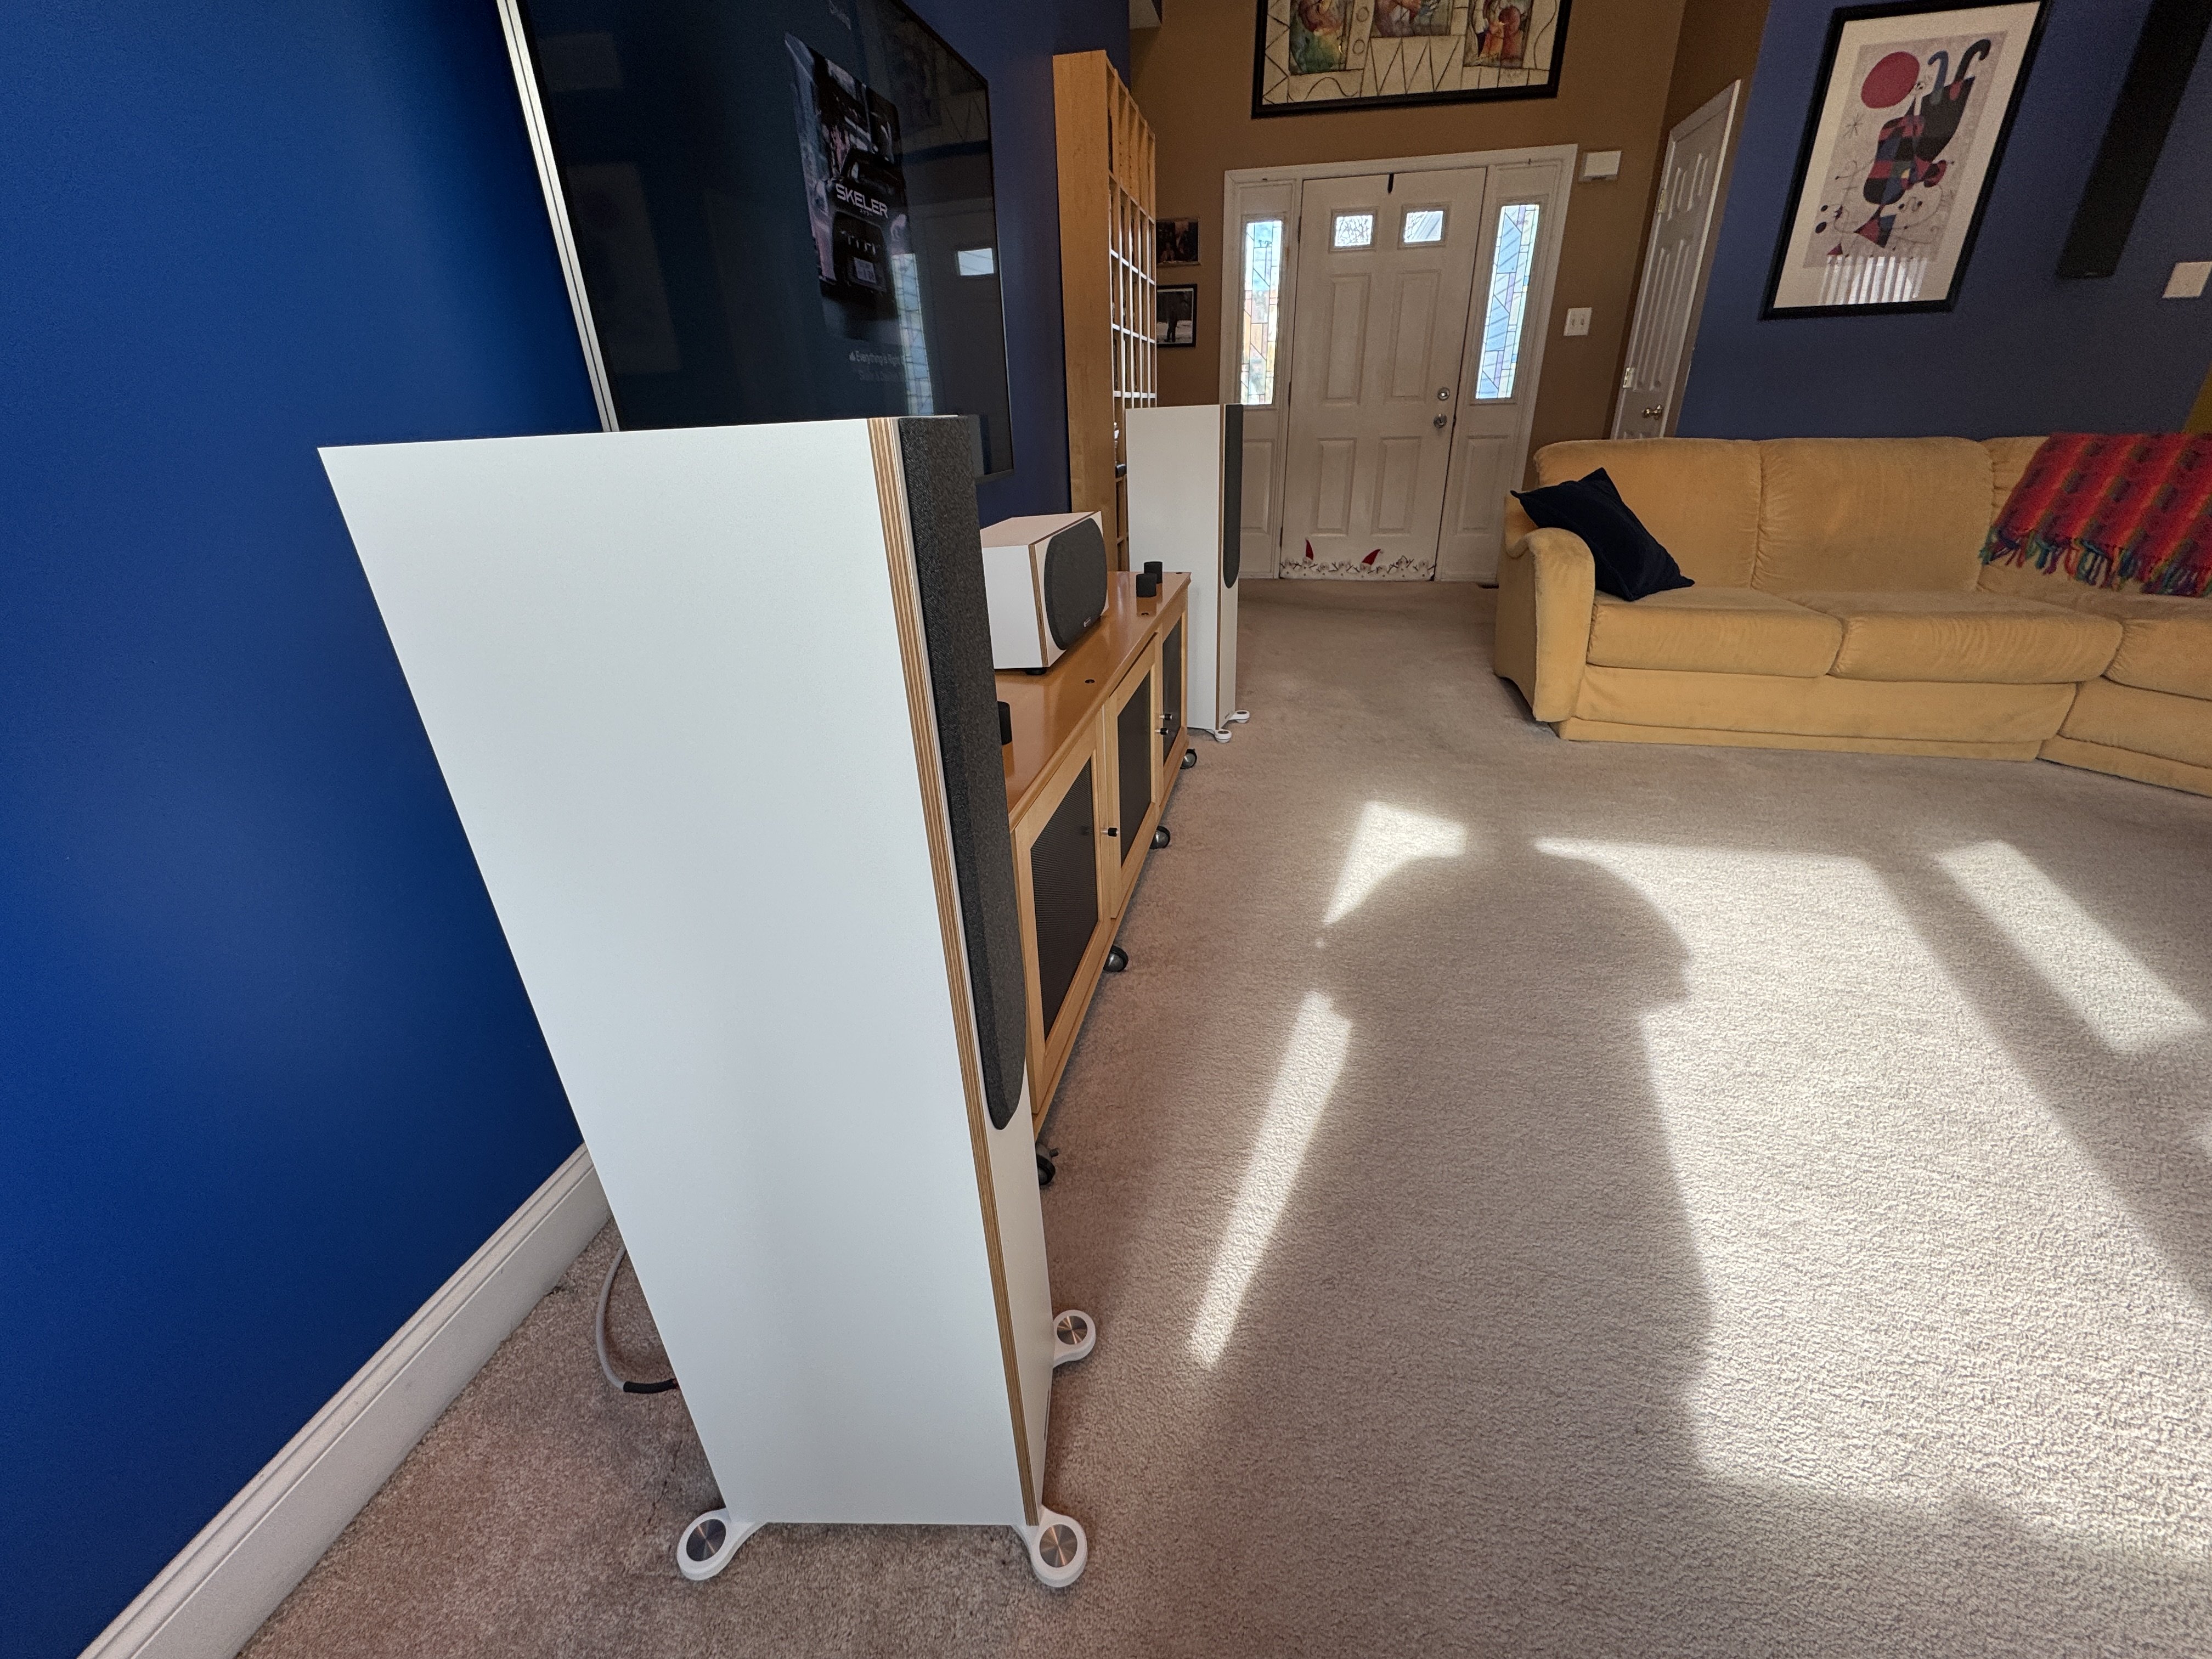
Dan
My personal quest is to save to world of bad audio, one thread at a time. -
This may sound strange but I sometimes leave enough room to fit a Dyson V15 vacuum cleaner between the speakers and cabinet. Just means a slight bit more toe in for the speakers. Audio equipment draws in the dust!
-
Now what I have done today is a few things. 1 try the port plugs , one in on the bottom on each speakers , then just one in on the top port, then both ports plugged and no ports plugged and I sat and listened to the same few songs over and over to hear if it makes any difference since pulling them away from the wall just a little more make a nice improvement.
The plugs work, they really tighten up the sound when you have boundry reflection. By putting in the plugs one at a time on each speaker, you get to hear the sound change. I'm running the speakers in Direct so no Subwoofers are on and I can only hear the speakers reproducing all the frequencies in the songs. They do a fantastic job even before I started tweaking.
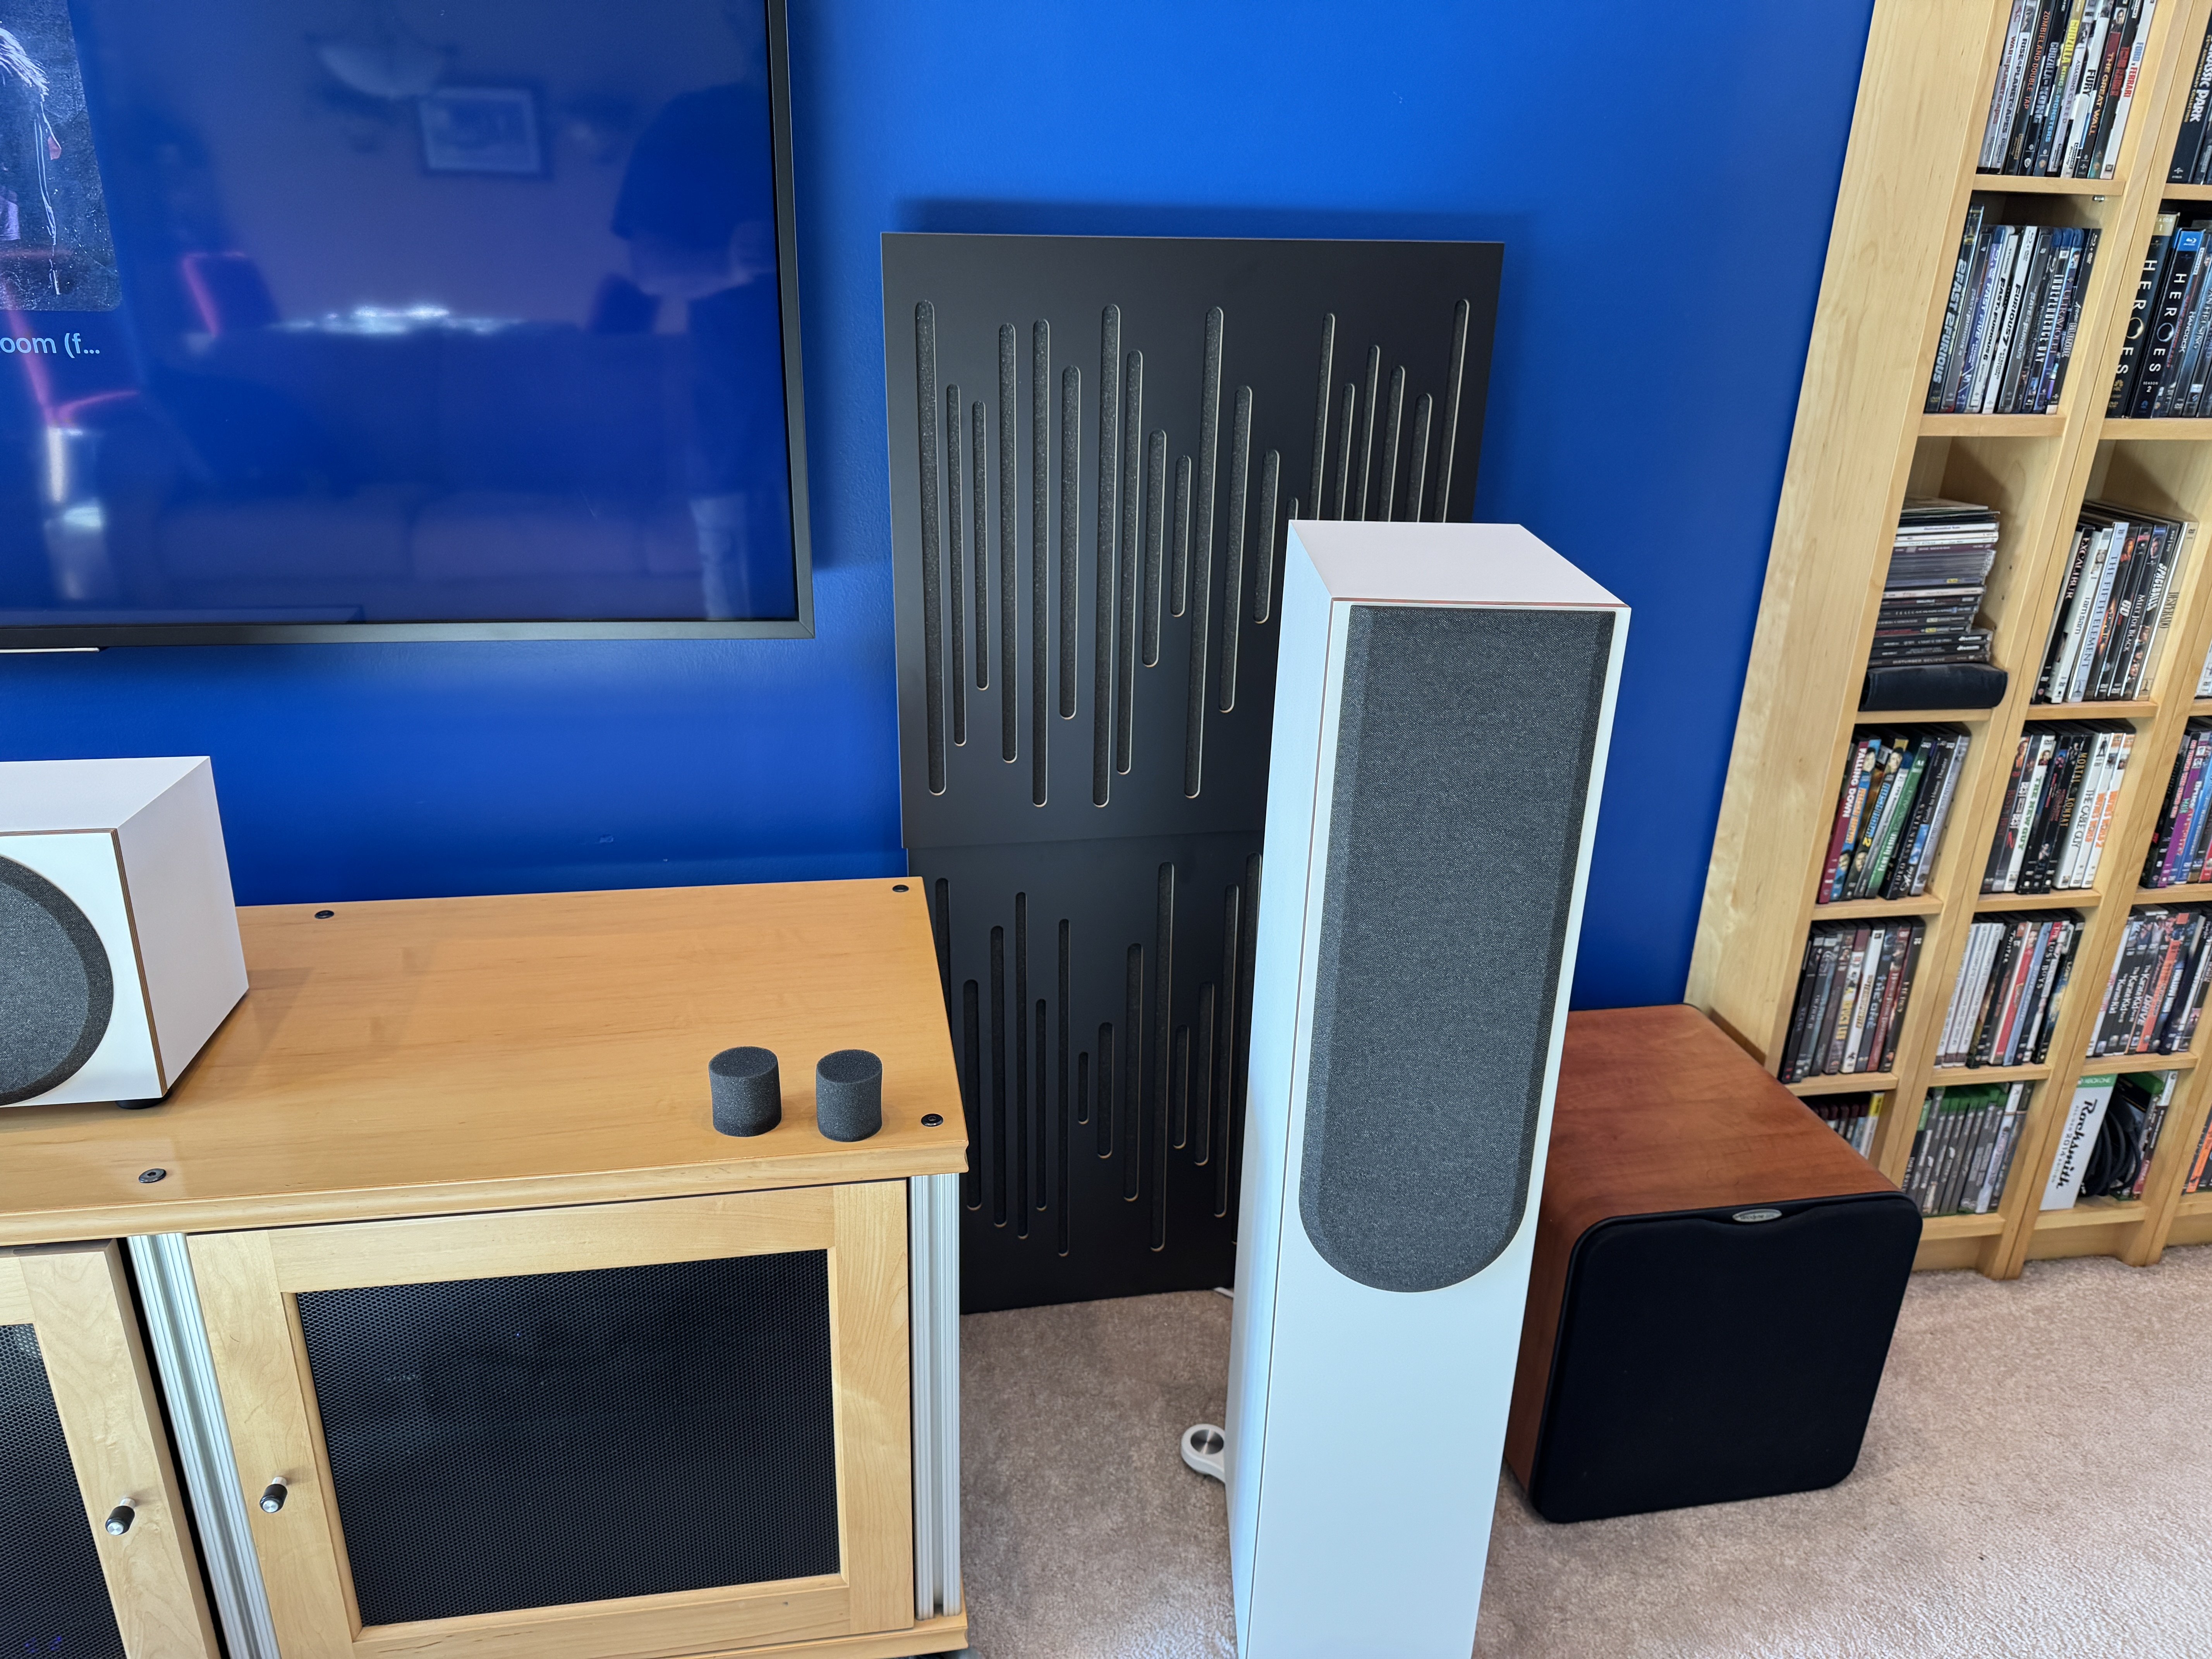
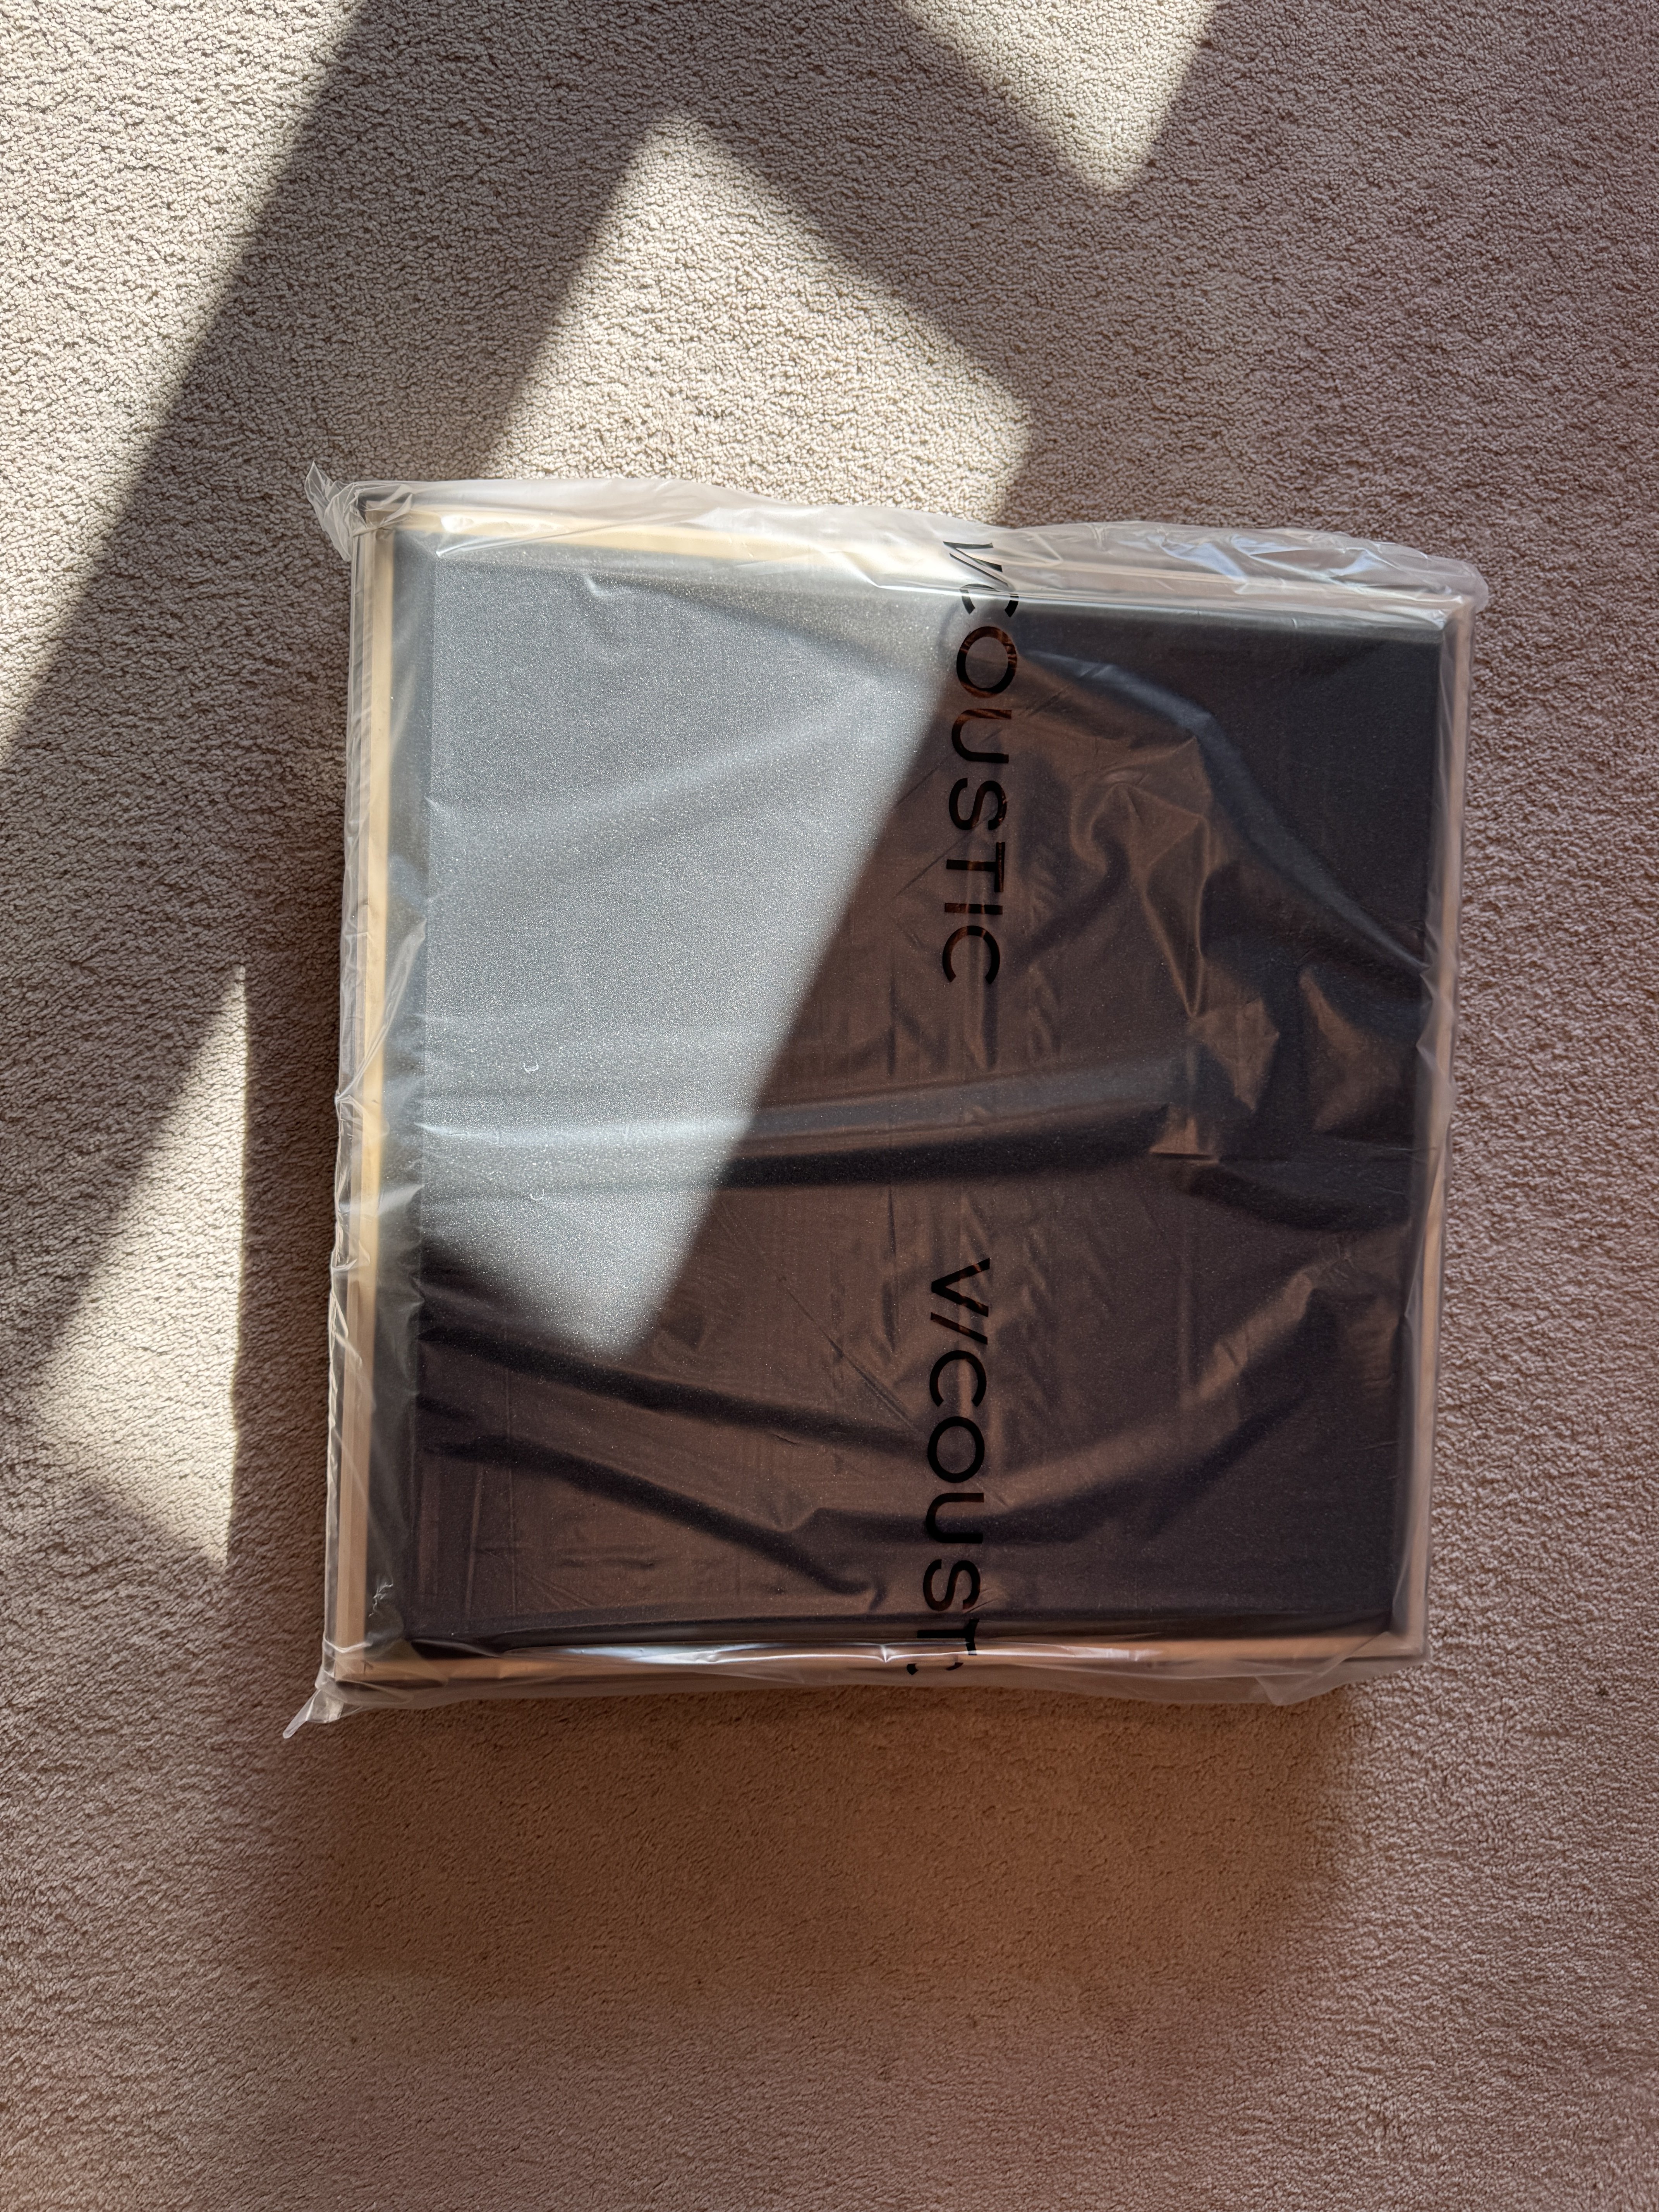
Now the last thing I did was grab 4 of my VIC ACOUSTIC panels and just place them behind each speaker. I removed the plugs , listened to the speakers with just the panels, then back to 1 plug then both and each time the sound changed for the better as more and more dampening was applied.
Now at the end of this demo, I re engaged the subwoofer , put the speakers back in STEREO which activates Small setting 80 hz crossover and man, let me tell you the level of detail I now have is a pretty big step up.
If you get the chance to perform tests like this I encourage you to try as you might not want to get rid of your speakers if you where on the fence about them. You can unlock so much more quality of sound with room acoustics , port plugs and proper placement , well the best you can anyway.
Some pics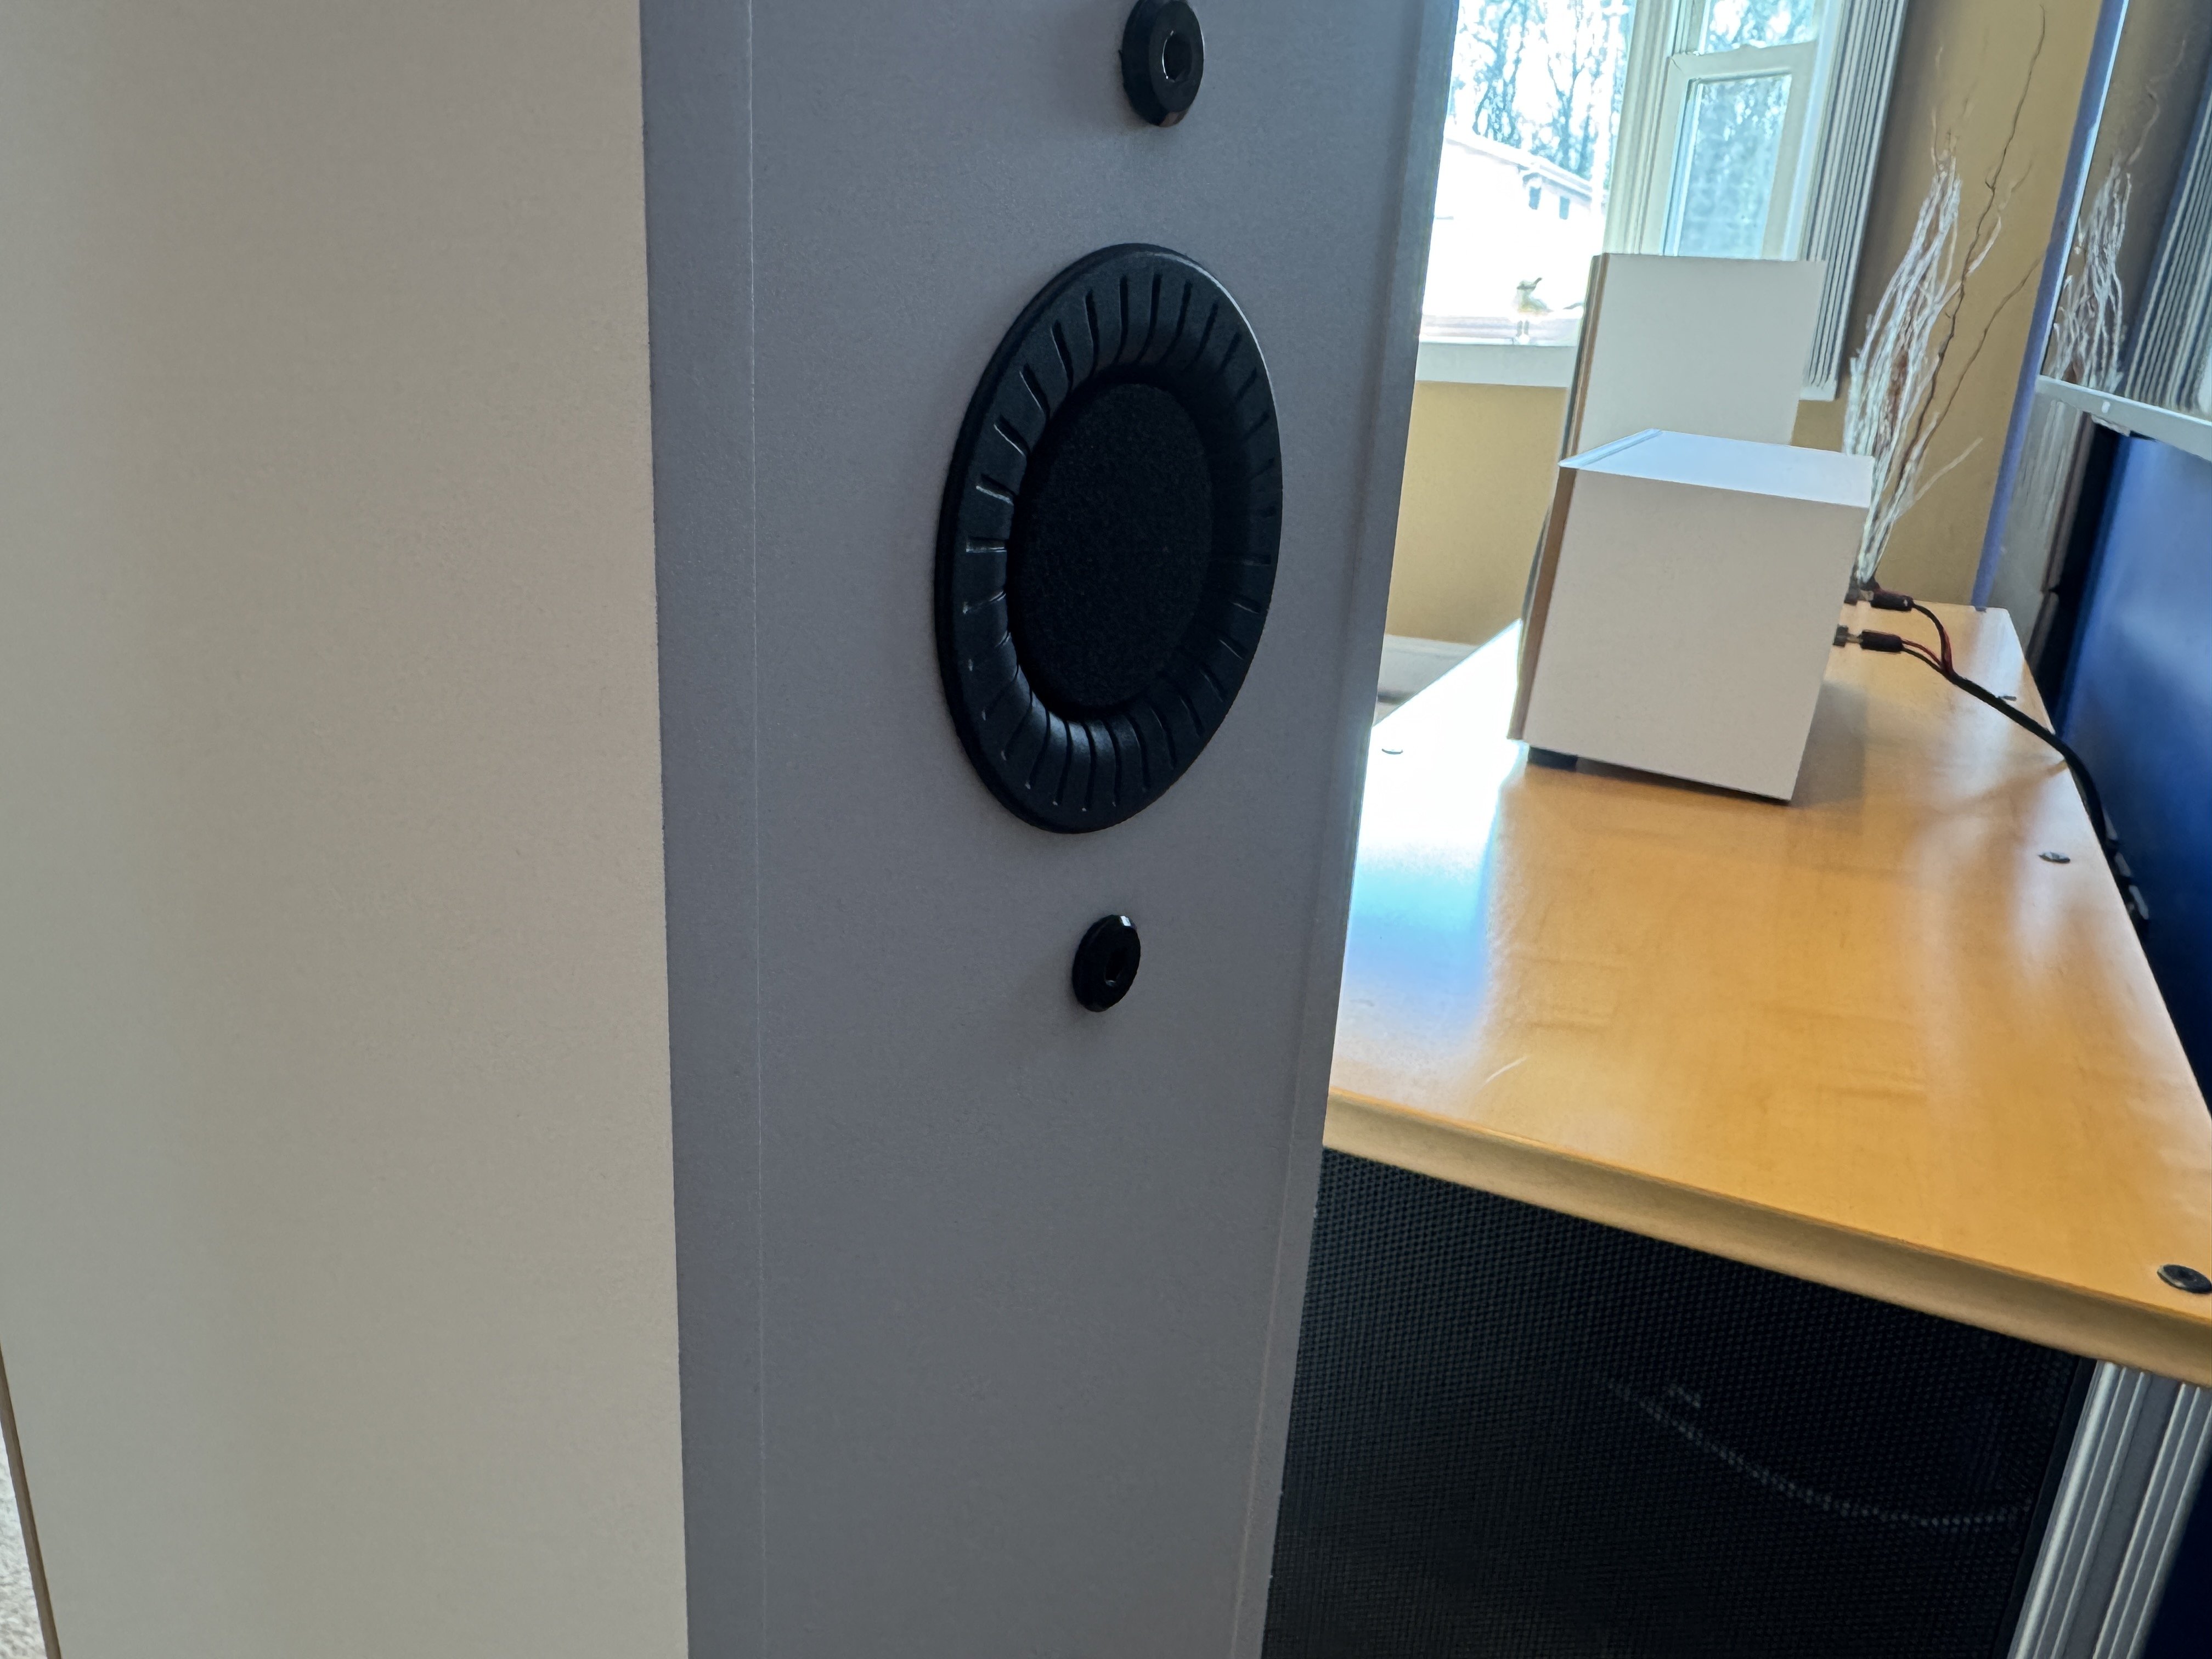

Dan
My personal quest is to save to world of bad audio, one thread at a time. -
That's a nice touch for them to include port plugs. Thoughtful design work.
-
That's a nice touch for them to include port plugs. Thoughtful design work.
I'm so blown away on a set of speakers that cost less than $2000 can perform as good as these do. I also like the foam plugs as they are solutions to issues many may not know they have. When I pull them way out into the room, the plugs are not necessary as I don't lose any clarity. But when you get them closer to the back wall, the mid to low bass starts to increase and then smears the speakers clarity.
Dan
My personal quest is to save to world of bad audio, one thread at a time. -
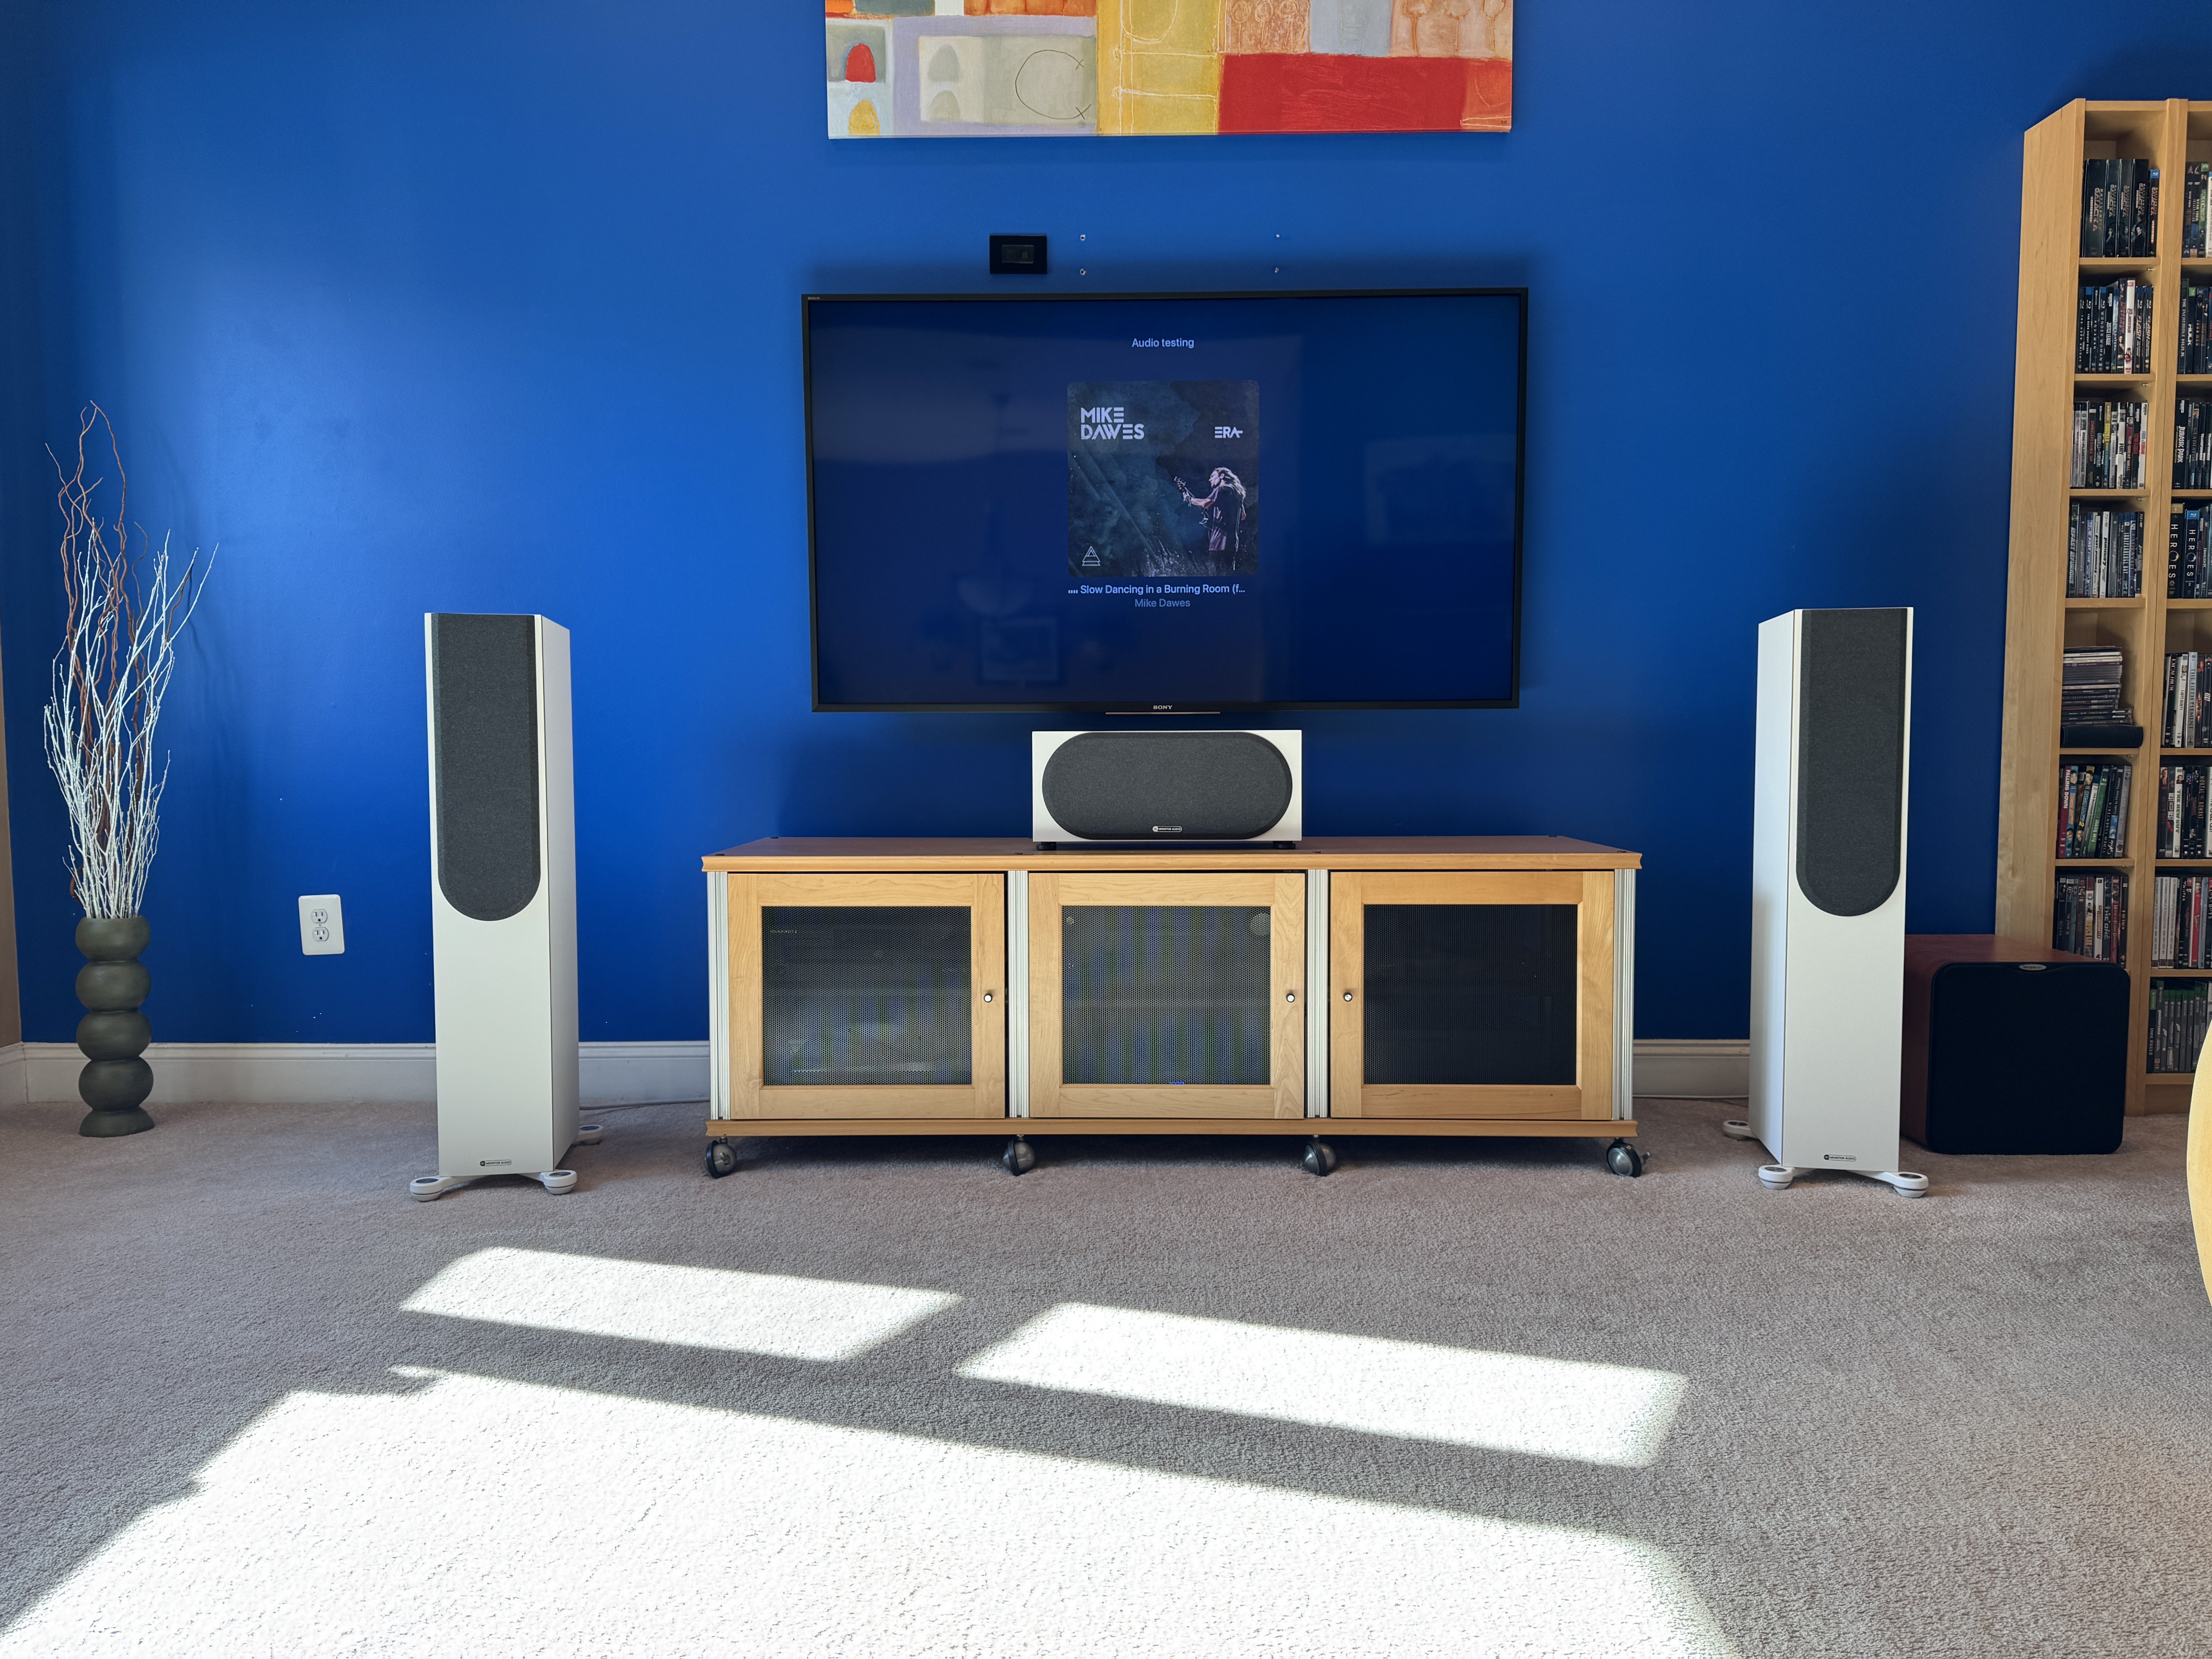
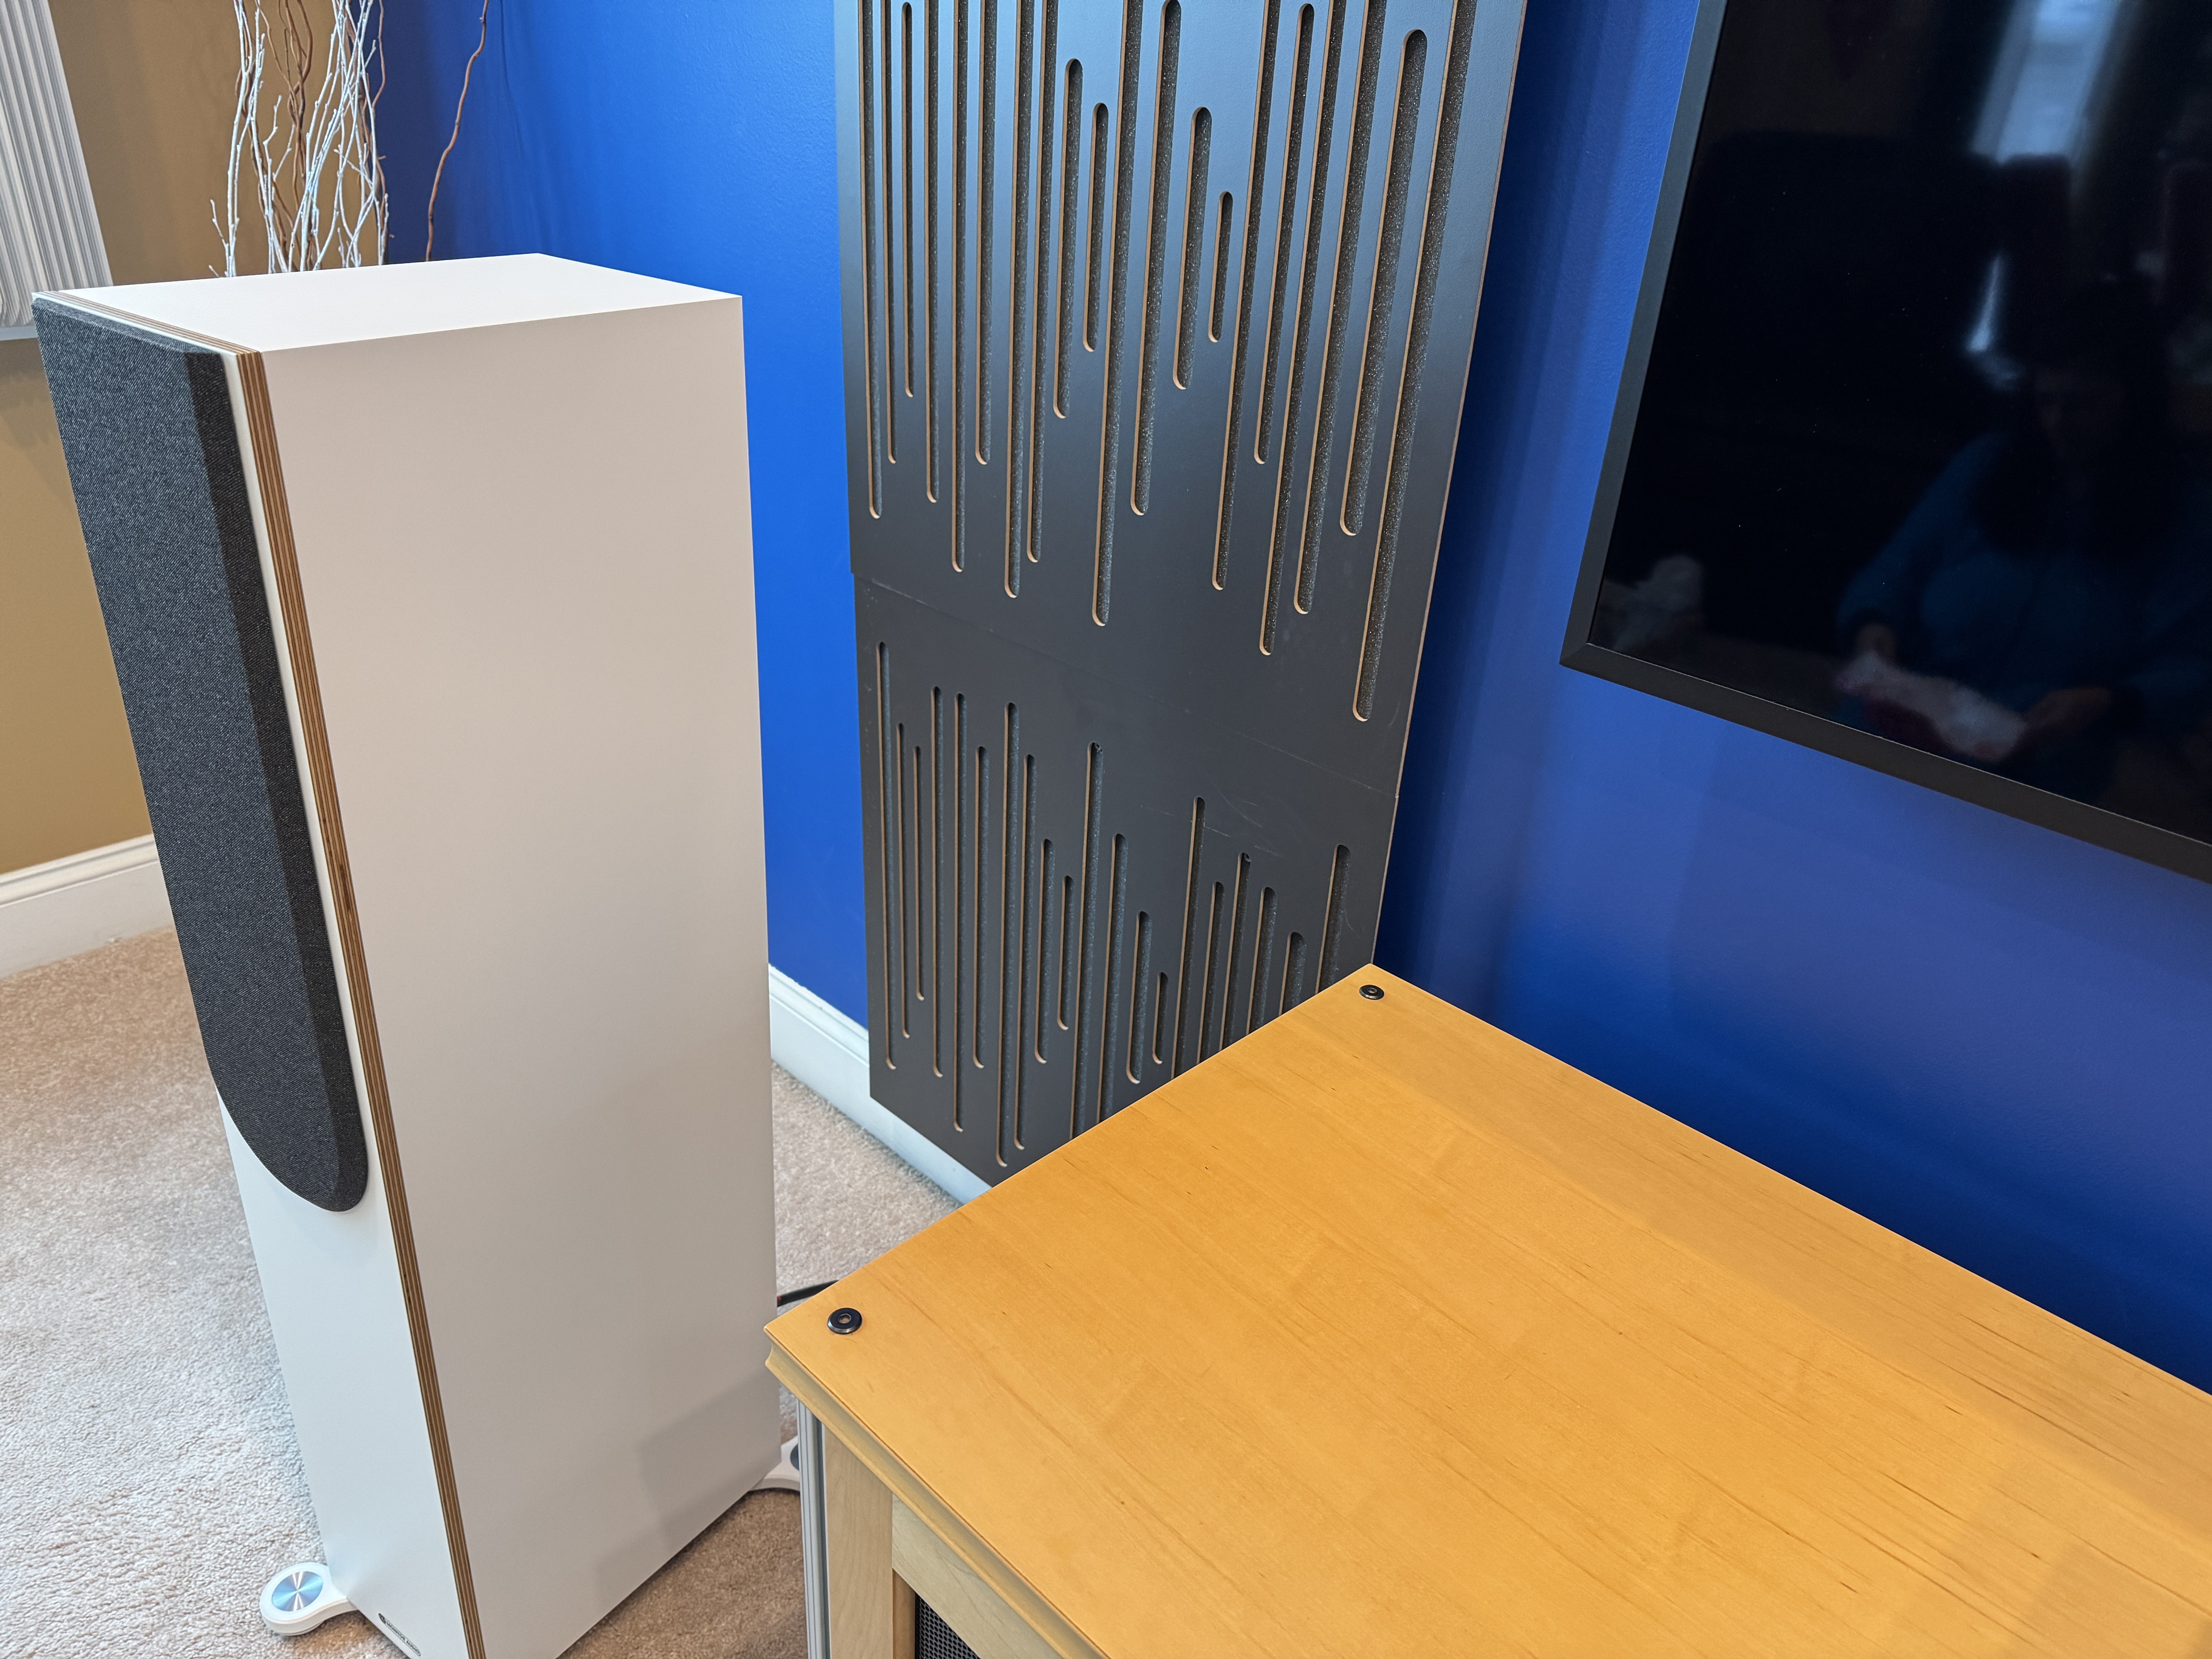
SO the wife allowed me to install the ugly stain black panels on the wall. She doesn't care for them but it's a temp setup so she is cool with it.
I also got to sneak in just a little wider setup, not much I'm now at 7 feet 11 inches apart from center to center of the speakers. Not a huge tweak but just enough to ever so slightly widen the soundstage.
It's snowing outside, now freezing rain, I'm completely sick of shoveling and I did it all by myself, I'd rather make up stuff to mess with then be back out there.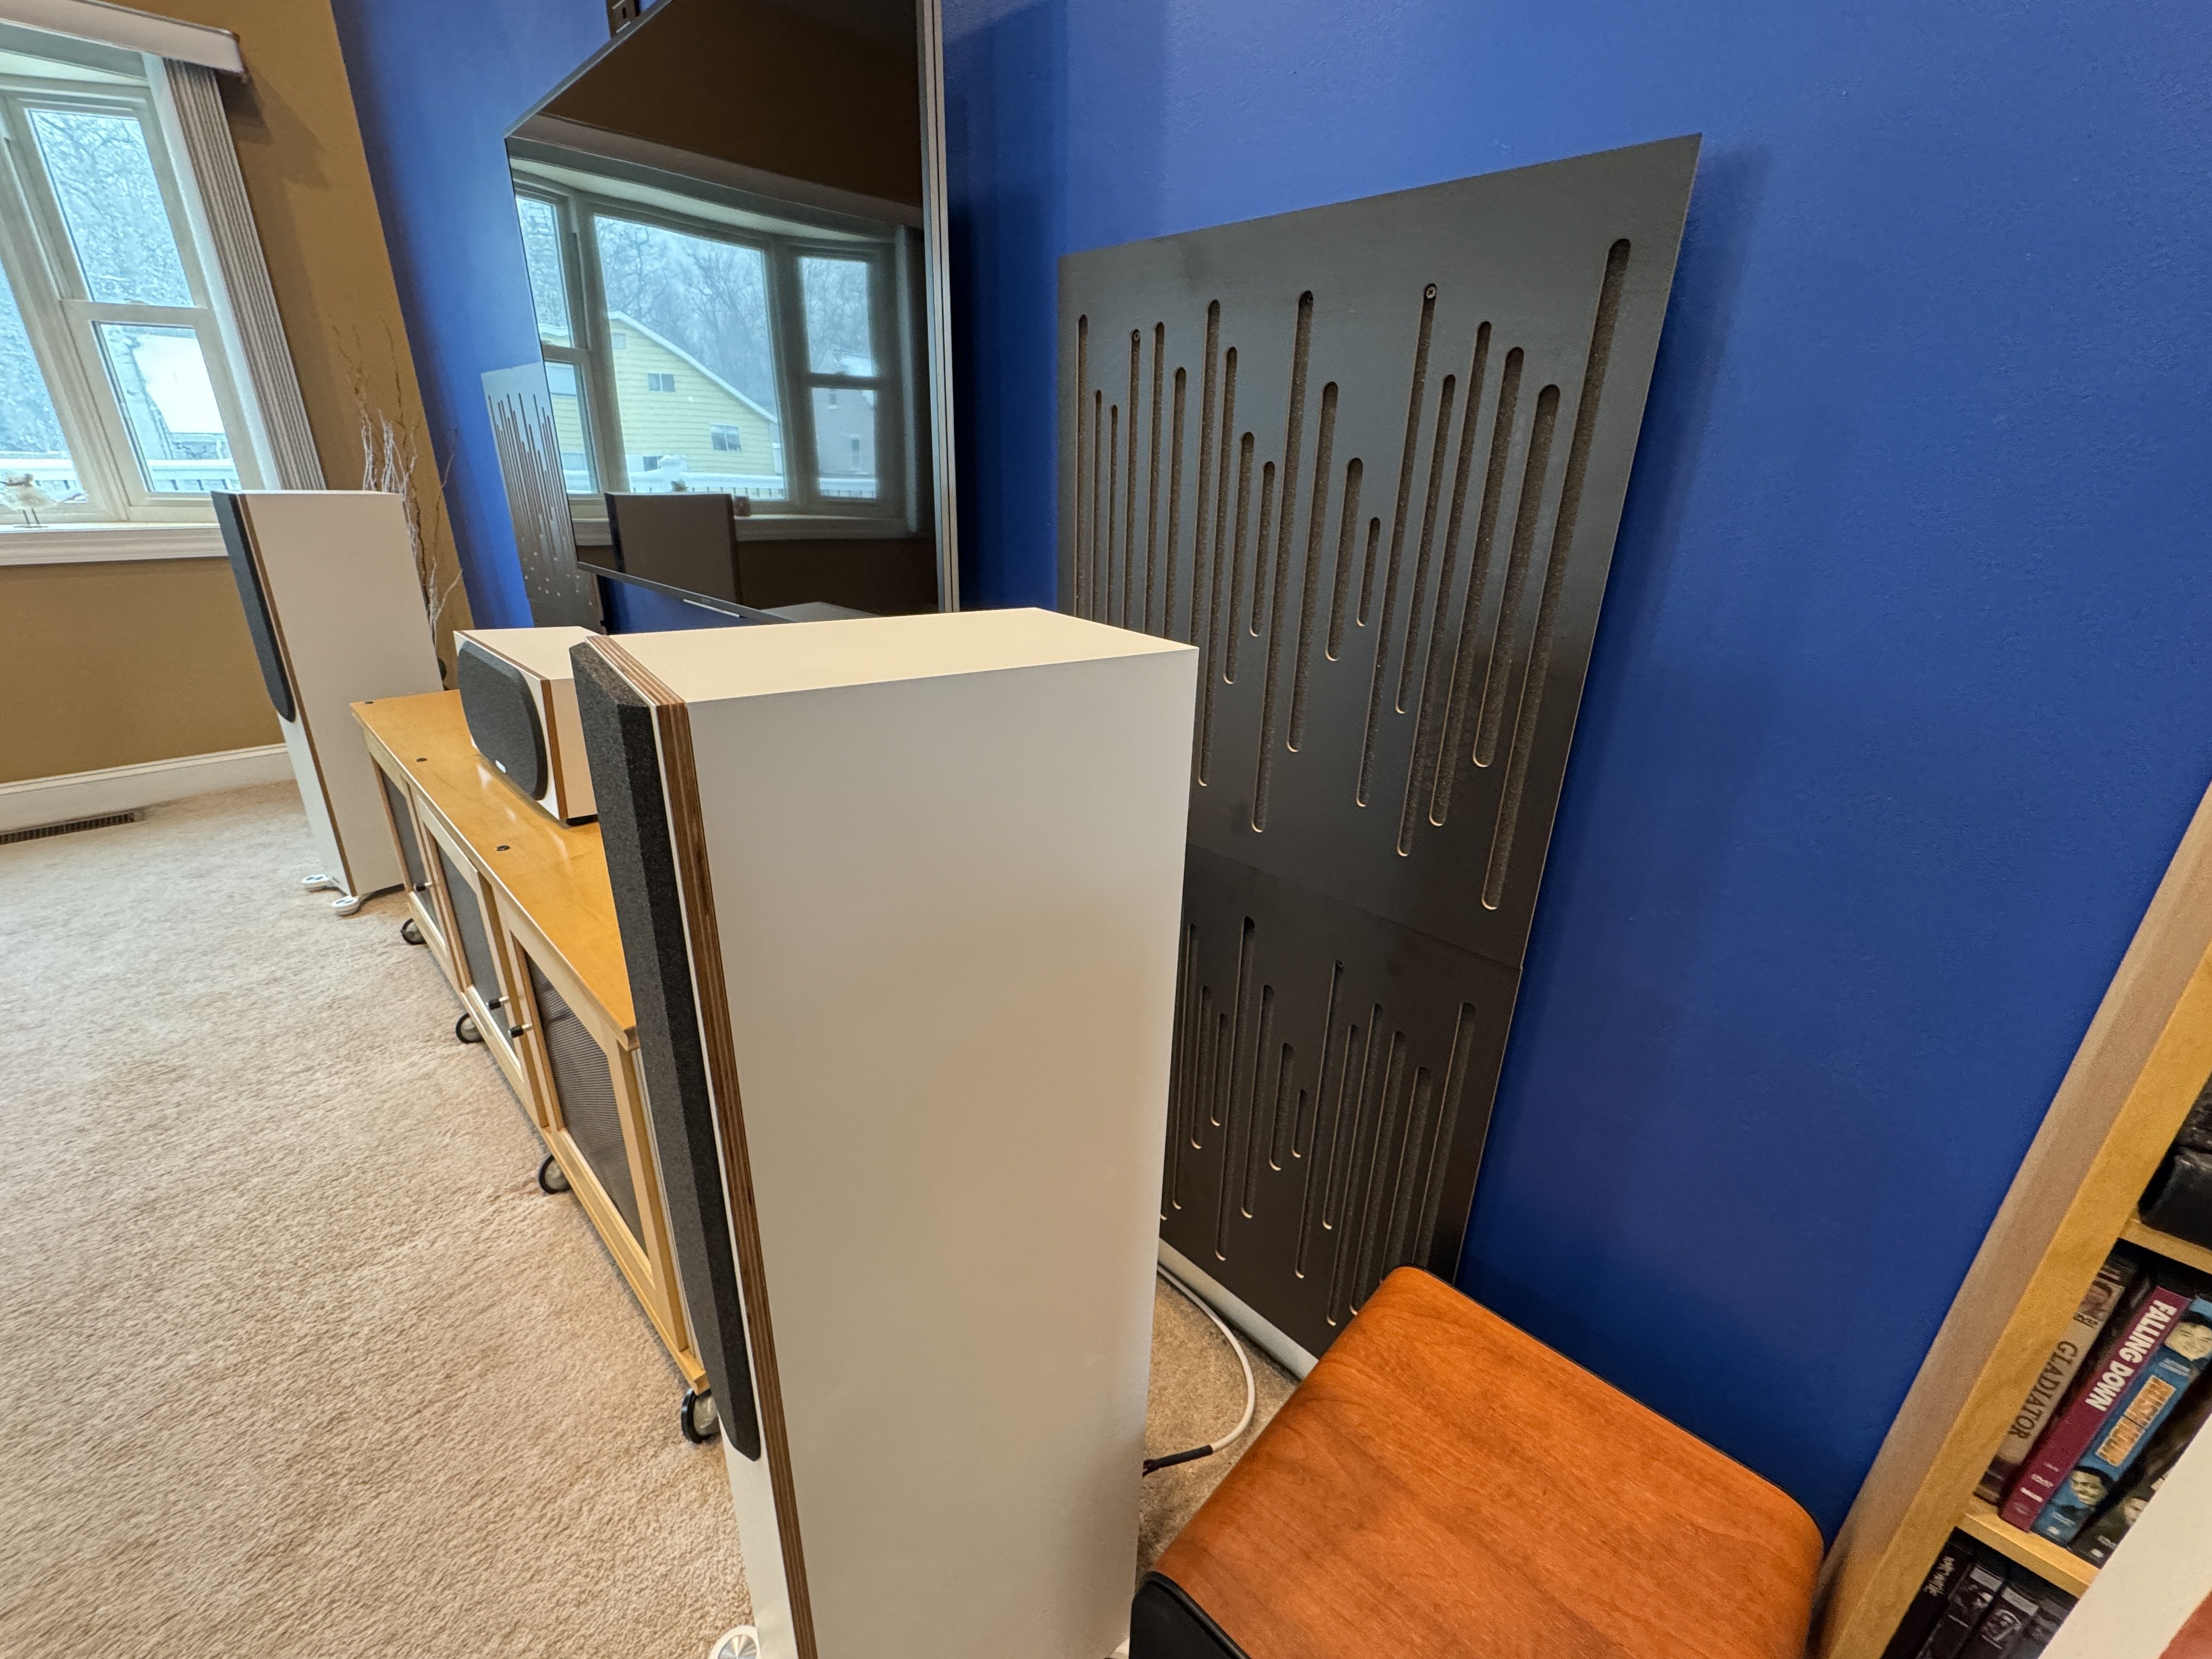

Dan
My personal quest is to save to world of bad audio, one thread at a time. -
Here is a link to Vicacoustic if anyone wants to look into room treatments. The Back panel stat wood is what I will be doing on the back wall 9 feet up and across the whole wall in the spring or so.
https://vicoustic.com/Dan
My personal quest is to save to world of bad audio, one thread at a time.


