My 2024 Polk SDA 2b Modification Progress Thread (Drop1)
Comments
-
So flashing tape comes in bitumen and butyl versions.
Dynamat is also privately owned so hard to find connections
Either way dynamat is a great product
I can actually tell the difference between the two types of flashing tape, the butyl tape still sticks a little in cold weather, the bitumen does not. -
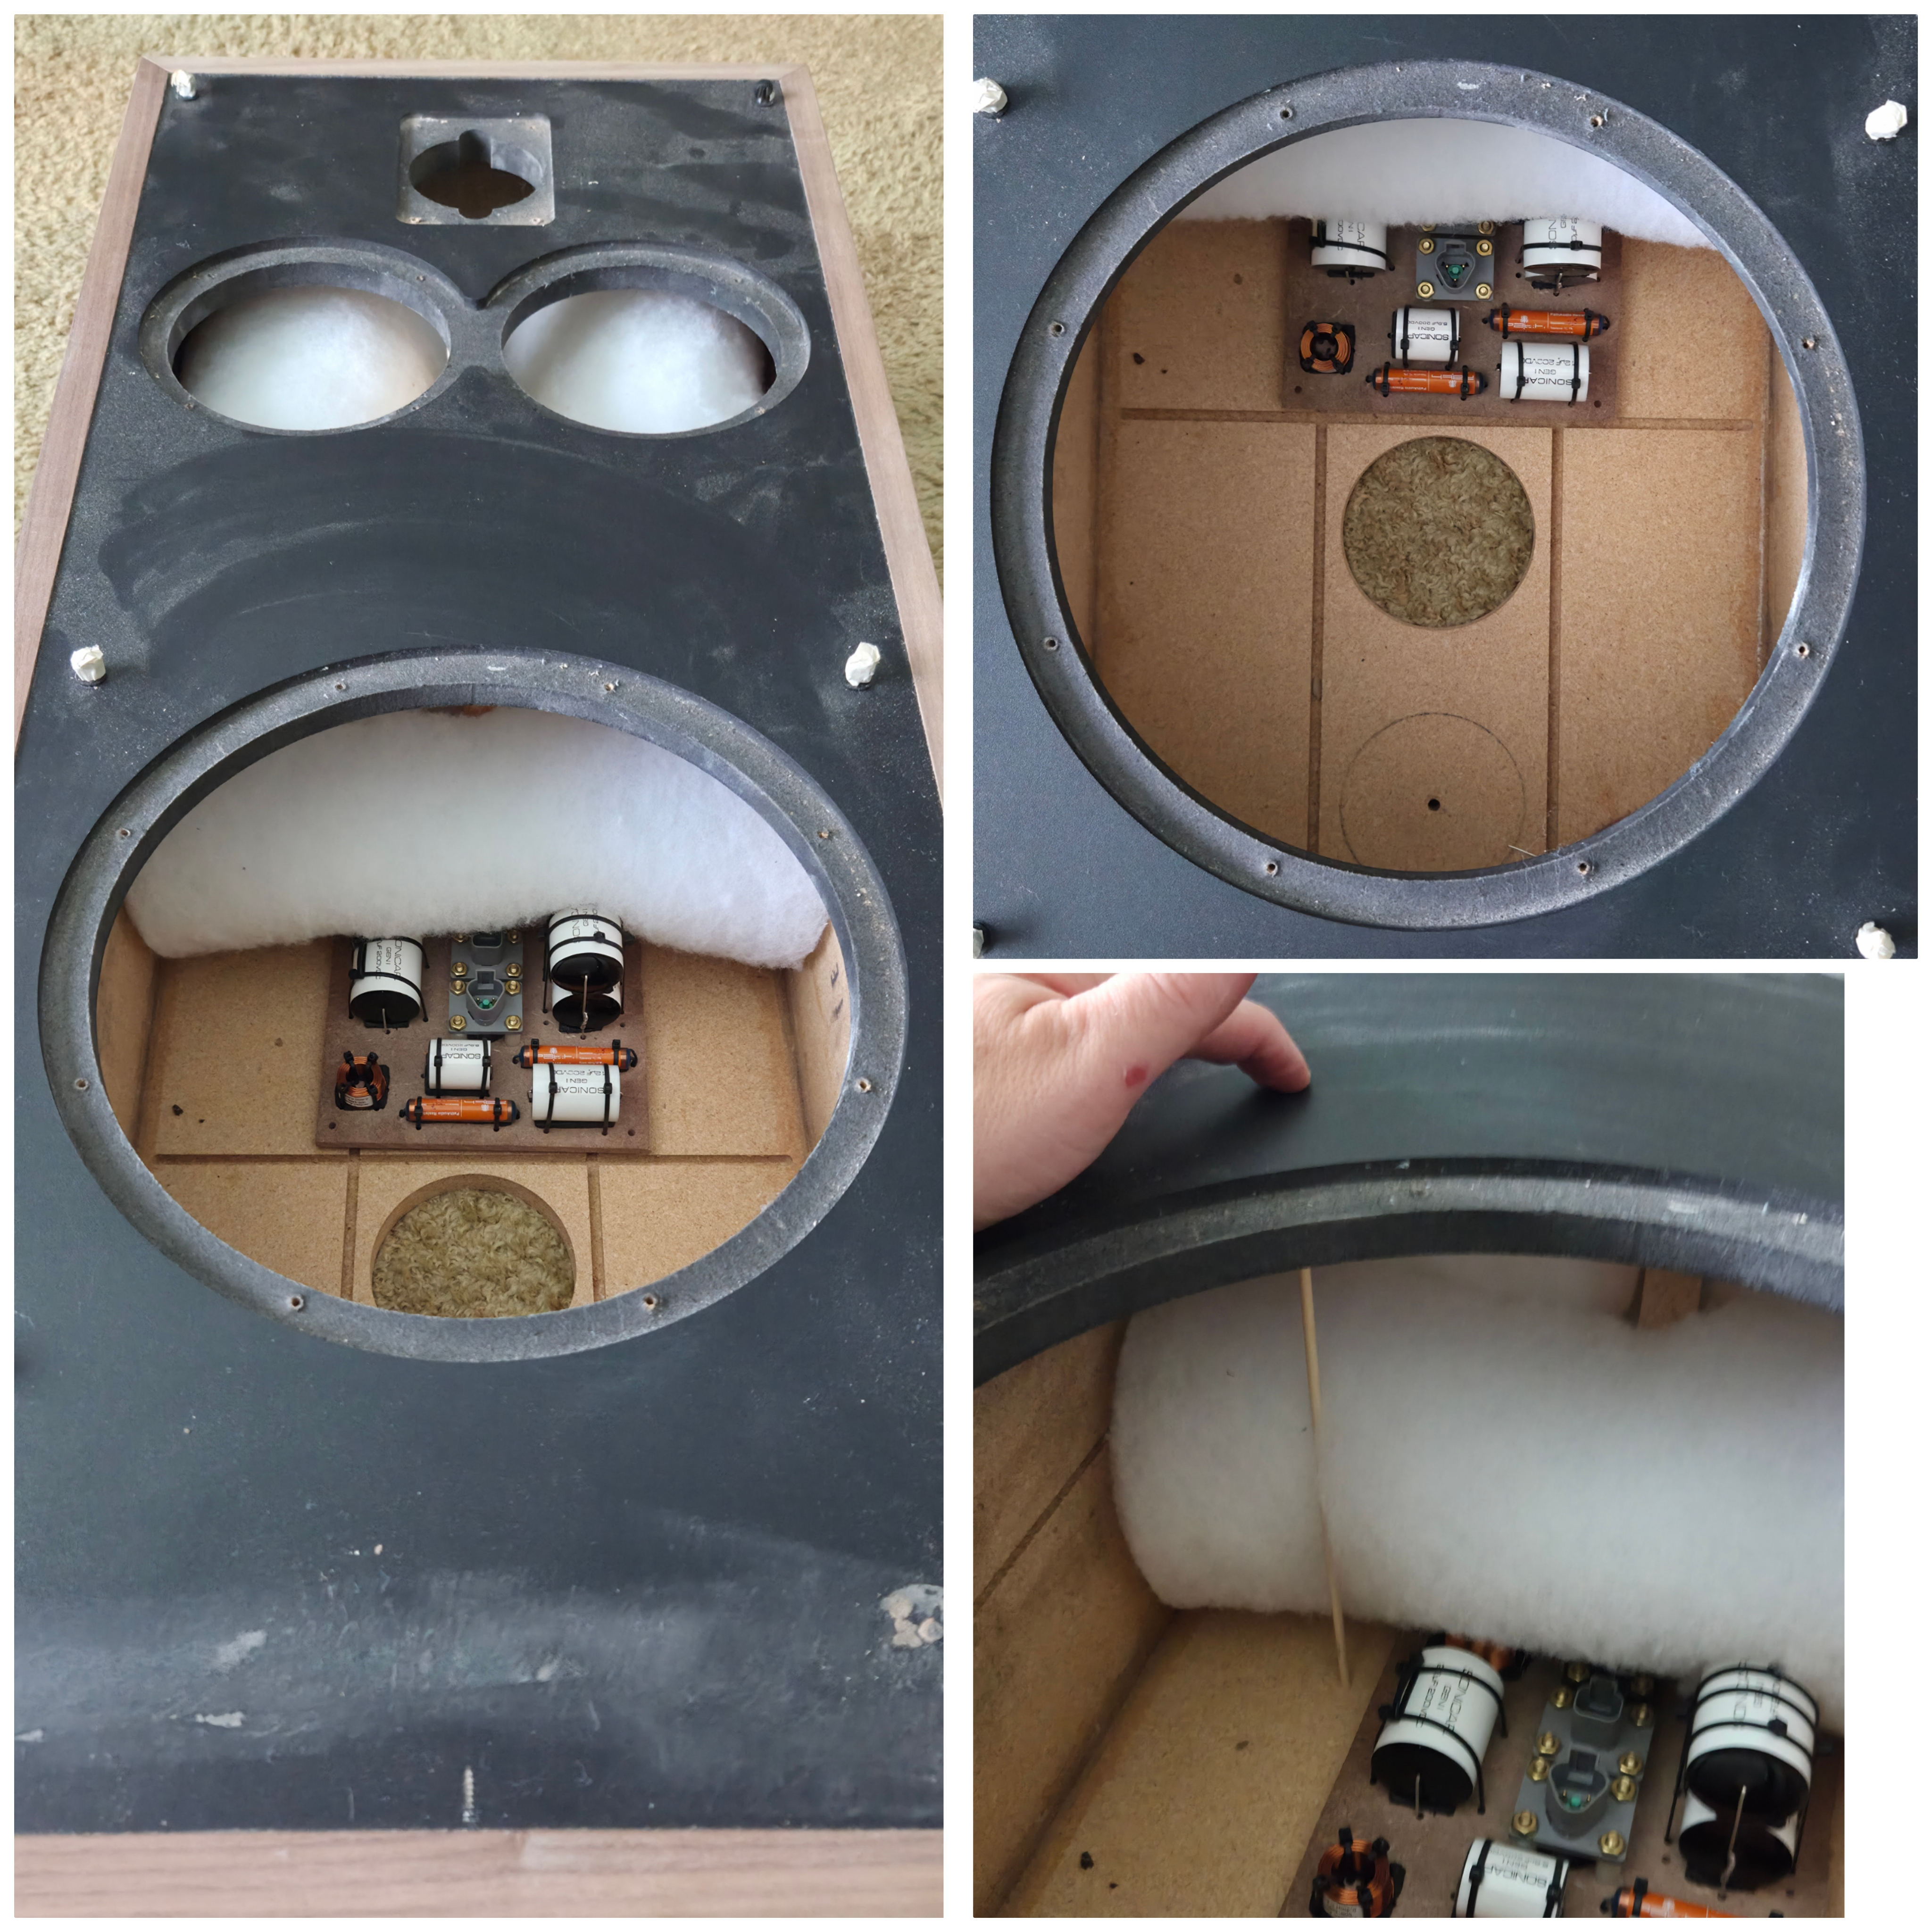
Obligatory post:
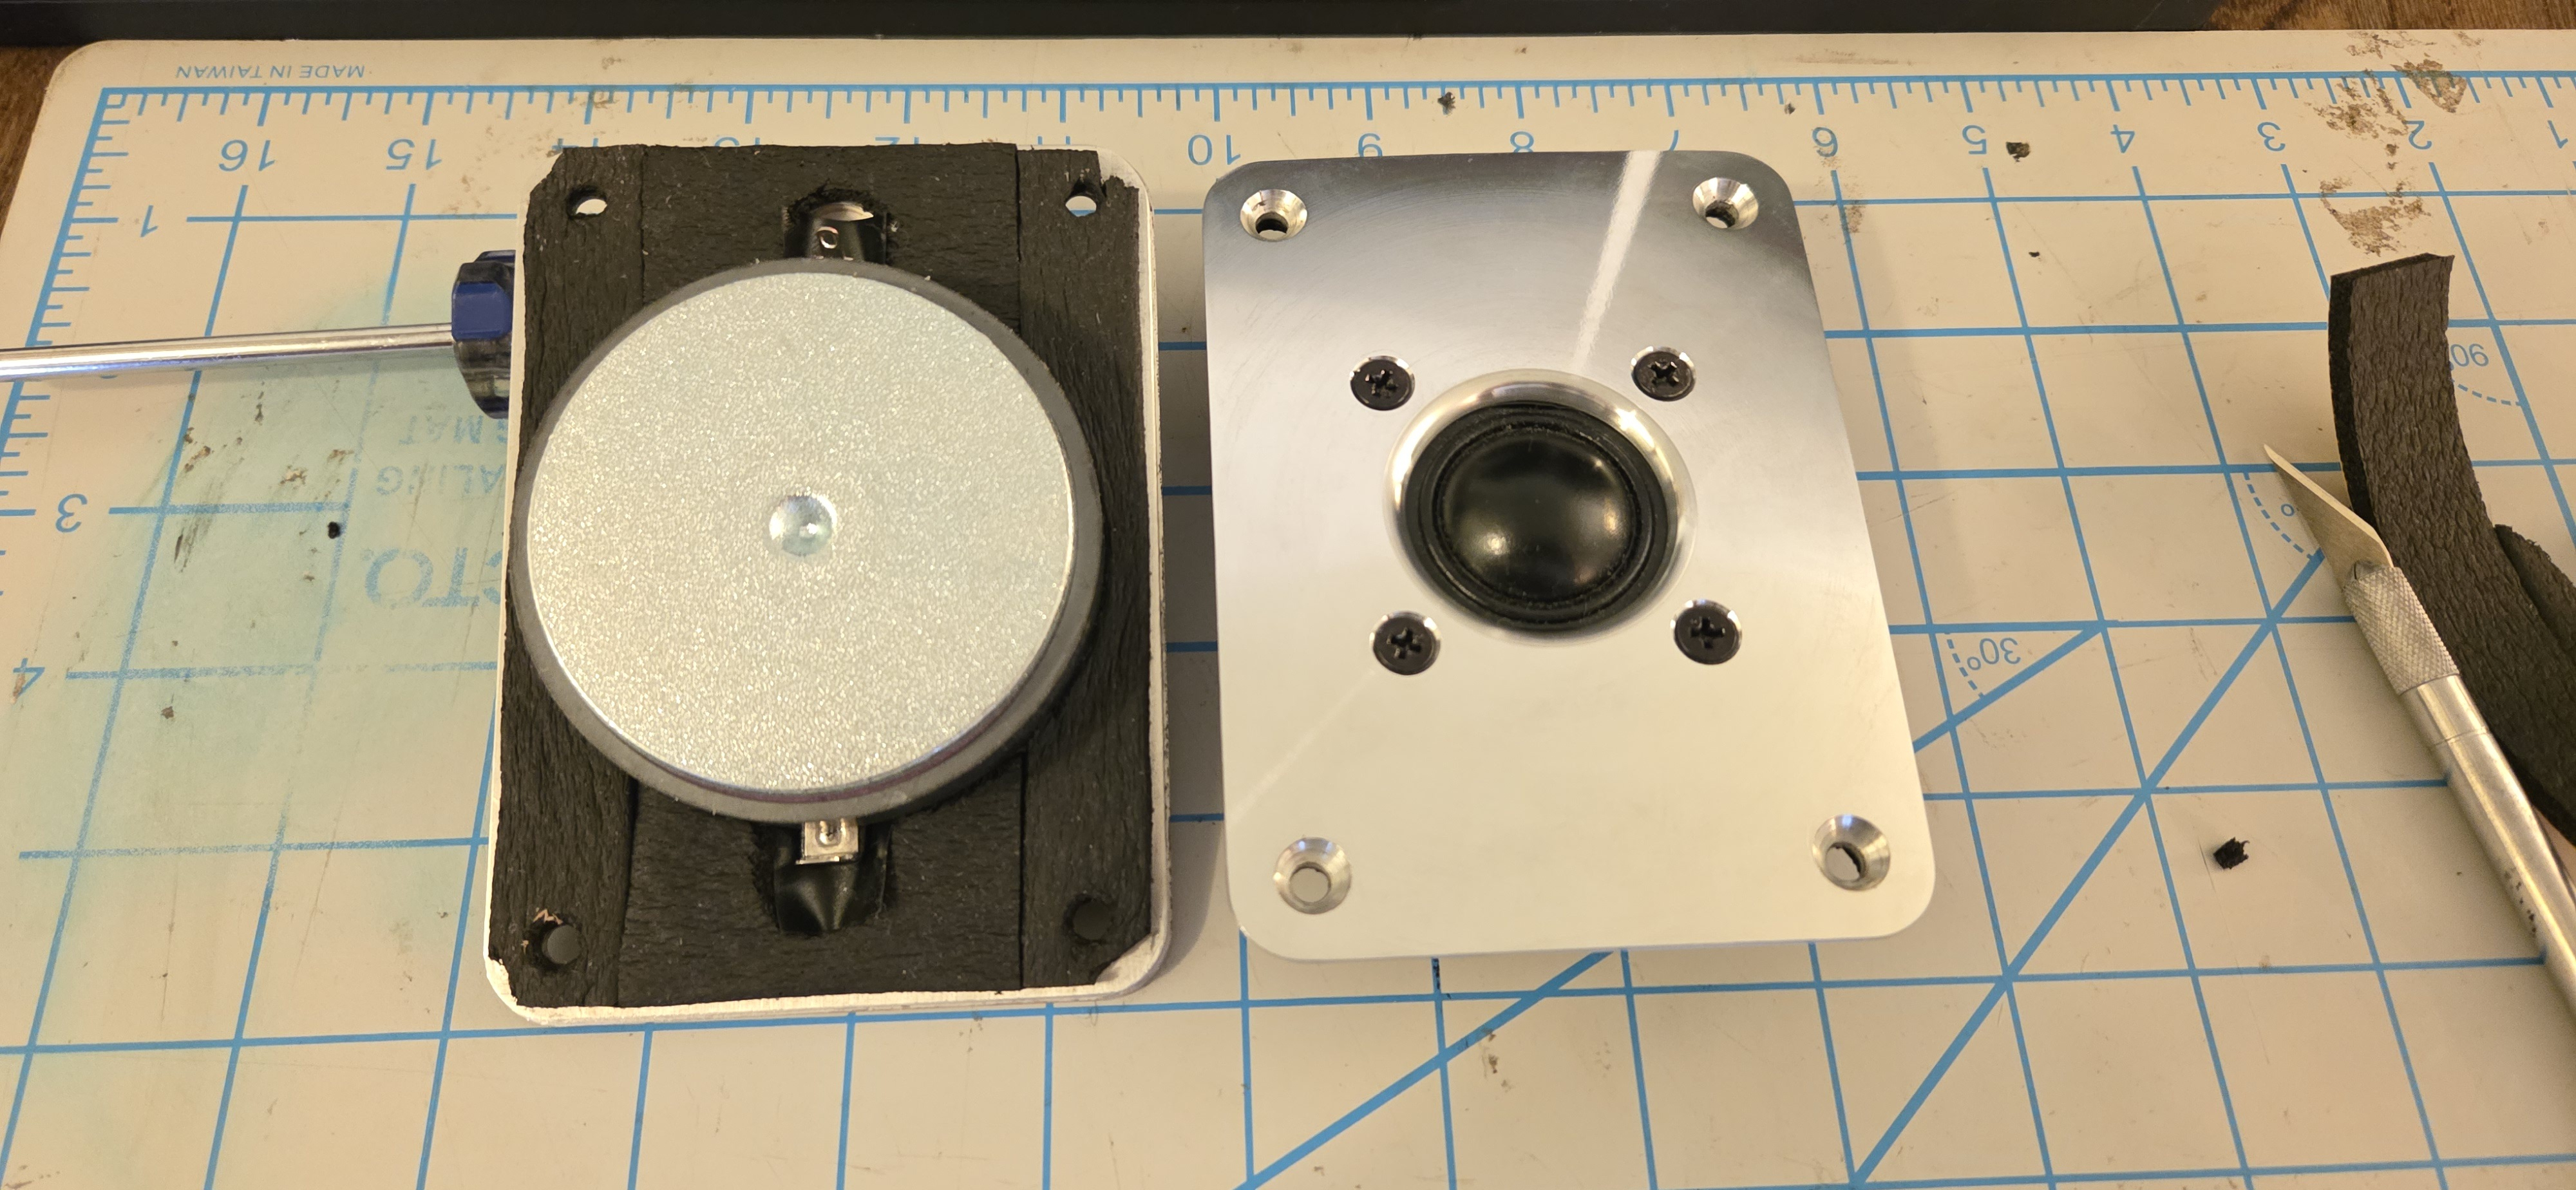
Glued the driver magnets with JB Weld. Dynamat Xtreme to the woofer baskets. inb4 a little goes a long way.


-
Re-sealed the cabinet seams with Loctite Power Grab Ultimate. Used up nearly an entire 9oz cartridge.
-
To anyone who's re-veneered their Polk speakers - does anyone know how this trim piece on the front of my 2b is secured?

A brief update. I was able to remove the aforementioned piece of trim. Hopefully this makes my veneer job a bit easier and I can finally get on with the project.
I removed it by applying some heat via an electric hot pad. I let that sit for a few hours with the intent of softening the glue. I was able to pry it off fairly easily. Notice the old glue and 2 staples which secured it on.
-
For reference, here is about how much glue came out of one SDA 2b cabinet. The glue softens up with heat and I was able to scrape it out with small plastic scraper tool. I don't regret doing it as a matter of being thorough however I don't know that it was entirely necessary. Certain spots within the cabinet were overly difficult to reach.

I like your attention to detail 👍
I actually thought about trying to remove the original joint sealer but found it to be a herculean effort.
Wish I’d known about the heat thing making that possible.
I have anal-retentive tendencies and it sucks, a friggin curse.
Carry on mit your bad self….
-

I'm getting there... But this crossover thing is not as easy as it may appear. -
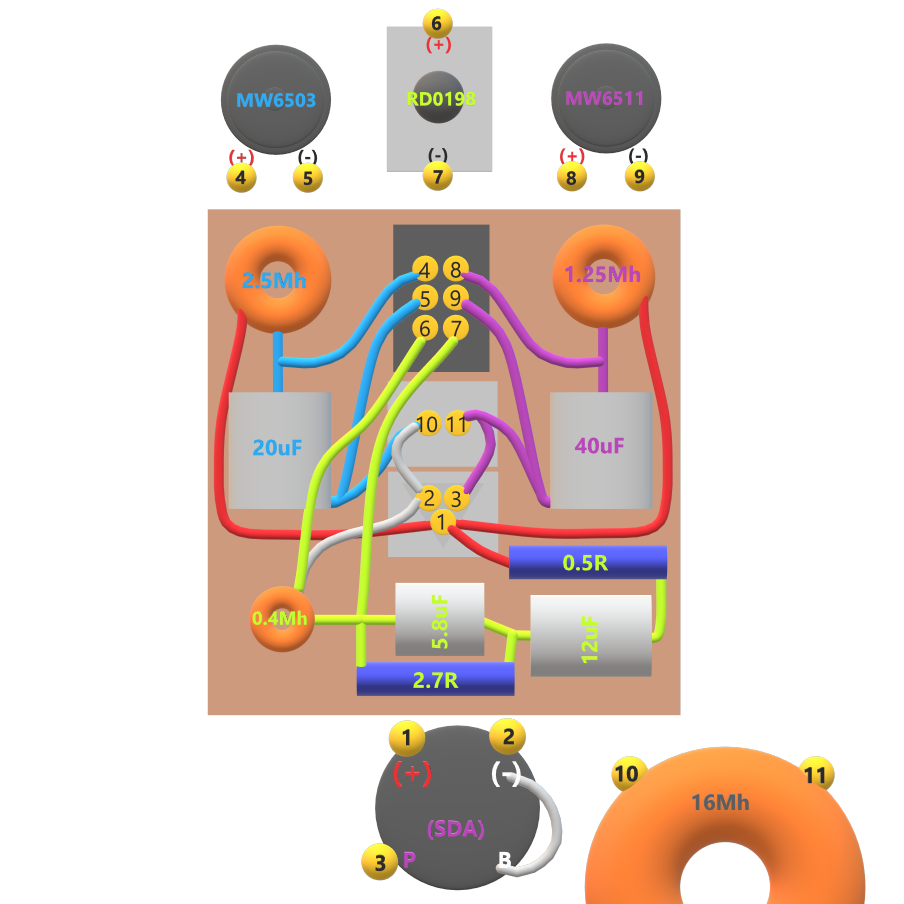
15 configurations later and I think I've settled on this -
For posterity's sake, #6 and #7 are switched in my diagram above.
And... the most difficult part of this project is done.


-
Parts list:
Gen I Sonicap 20 uF 200VDC (x6)
Gen I Sonicap 12 uF 200VDC (x2)
Gen I Sonicap 5.8 uF 200VDC (x2)
Path Audio Resistor 0R5 (0.5R) Ohm 10W Thick Film ± 1% (x2)
Path Audio Resistor 2R7 (2.7R) Ohm 10W Thick Film ± 1% (x2)
0.4mH Jantzen Air Core Wire Coil AWG22, 0.63mm diameter wire (000-1489) (x2)
1.25mH Jantzen Air Core Wire Coil AWG20, 0.8mm diameter wire (000-1137) (x2)
2.5mH Jantzen Air Core Wire coil AWG20, 0.8mm diameter wire (000-1695) (x2)
Jantzen Audio 16mH 14 AWG C-Coil Toroidal Inductor (000-6577) (x2)
The connectors are Deutsch DT Series Connectors . I'm using Neotech Solid UPOCC Copper in PVC 16 AWG Yellow for wiring.
-
Your Mar 19th post is awesome!
That goes a very long way to help others follow in your footsteps while avoiding re-“invention of the wheel!” Don’t be surprised if others use something similar for other models😊Samsung 60" QN65Q7FAMFXZA QLED, Outlaw Audio 976 Pre/Pro, Samsung BDP, Amazon Firestick, Phillips CD Changer
Canare 14 ga - LCR tweeters inside*; Ctr Ch outside
BJC 10 ga - LCR mids “Foamed” & “Plugged**”, inside* & out
8 ga Powerline: LR woofers, inside* & out
*soldered **Rob the Man (Xschop)
LR: Tri-amped RTi A7 w/Rotels*. Woofers - 980BX; Tweets & Mids - RB981*
Ctr Ch: Rotel RB981* -> Bi-amped CSi A6
Surrounds: Rotel 981* -> AR 12 ga -> RTi A3
*all connected w/Premiere ICs
5 Subs: Sunfire True SW Signature -> LFE & Ctr Ch; 4 Audio Pro Evidence @ the “Corners”
Power Conditioning & Distribution:
4 dedicated 20A feeds; APC H15; 5 Furman Miniport 20s -
That was simply my way of plotting out the circuit to make it easier for me to follow. I've swapped caps in a number of speakers before but this was my first full XO assembly. And I was only able to confidently do-so following in the footsteps of many forum posters here. I do not want to take any undue credit. Although I now understand why some people prefer to contract this out to others. It took a fairly substantial amount of time in planning and assembly.Your Mar 19th post is awesome!Post edited by drop1 on -
Looking good!- Not Tom ::::::: Any system can play Diana Krall. Only the best can play Limp Bizkit.
-
-
Did these get put back together? If so how are they sounding?2ch rig: Speakers: Magnepan LRS w/Magna Riser stands Preamplifier: Parasound P5 Amplifier: Parasound A23 CDP: Pioneer DV-563A Cables: Wireworld Equinox 7 XLR ICs, Wireworld Ultraviolet 7 USB, AudioQuest Q2s, AudioQuest NRG X(preamp)
Standby: LSi9s with VR3's Fortress mods -
No and it's a damn shame. Spring/summer projects has put this on hold. I want to get the veneer done before anything else but that's a bigger task than I've been willing to take-on lately.
-
Well put those bad bears back together and enjoy some sweet tunes while working on the summer projects (Unless its too much labor).
Note- These are way better than just "back ground" music speakers. We will be expecting you to finish the project when time allows.") 2ch rig: Speakers: Magnepan LRS w/Magna Riser stands Preamplifier: Parasound P5 Amplifier: Parasound A23 CDP: Pioneer DV-563A Cables: Wireworld Equinox 7 XLR ICs, Wireworld Ultraviolet 7 USB, AudioQuest Q2s, AudioQuest NRG X(preamp)
2ch rig: Speakers: Magnepan LRS w/Magna Riser stands Preamplifier: Parasound P5 Amplifier: Parasound A23 CDP: Pioneer DV-563A Cables: Wireworld Equinox 7 XLR ICs, Wireworld Ultraviolet 7 USB, AudioQuest Q2s, AudioQuest NRG X(preamp)
Standby: LSi9s with VR3's Fortress mods -
I think I will. Veneer might have to come later. It won't take too much work to finish assembly. It hurts to let those XOs sit after all the work I put into them.
-
That's the spirit! 2ch rig: Speakers: Magnepan LRS w/Magna Riser stands Preamplifier: Parasound P5 Amplifier: Parasound A23 CDP: Pioneer DV-563A Cables: Wireworld Equinox 7 XLR ICs, Wireworld Ultraviolet 7 USB, AudioQuest Q2s, AudioQuest NRG X(preamp)
Standby: LSi9s with VR3's Fortress mods -
I think I will. Veneer might have to come later. It won't take too much work to finish assembly. It hurts to let those XOs sit after all the work I put into them.
What is wrong with the laminate on the speakers, it looks like it's in good shape? I had a friend of mine just paint over the laminate about 10 years ago and they still look fantastic. -
The project commenceth.
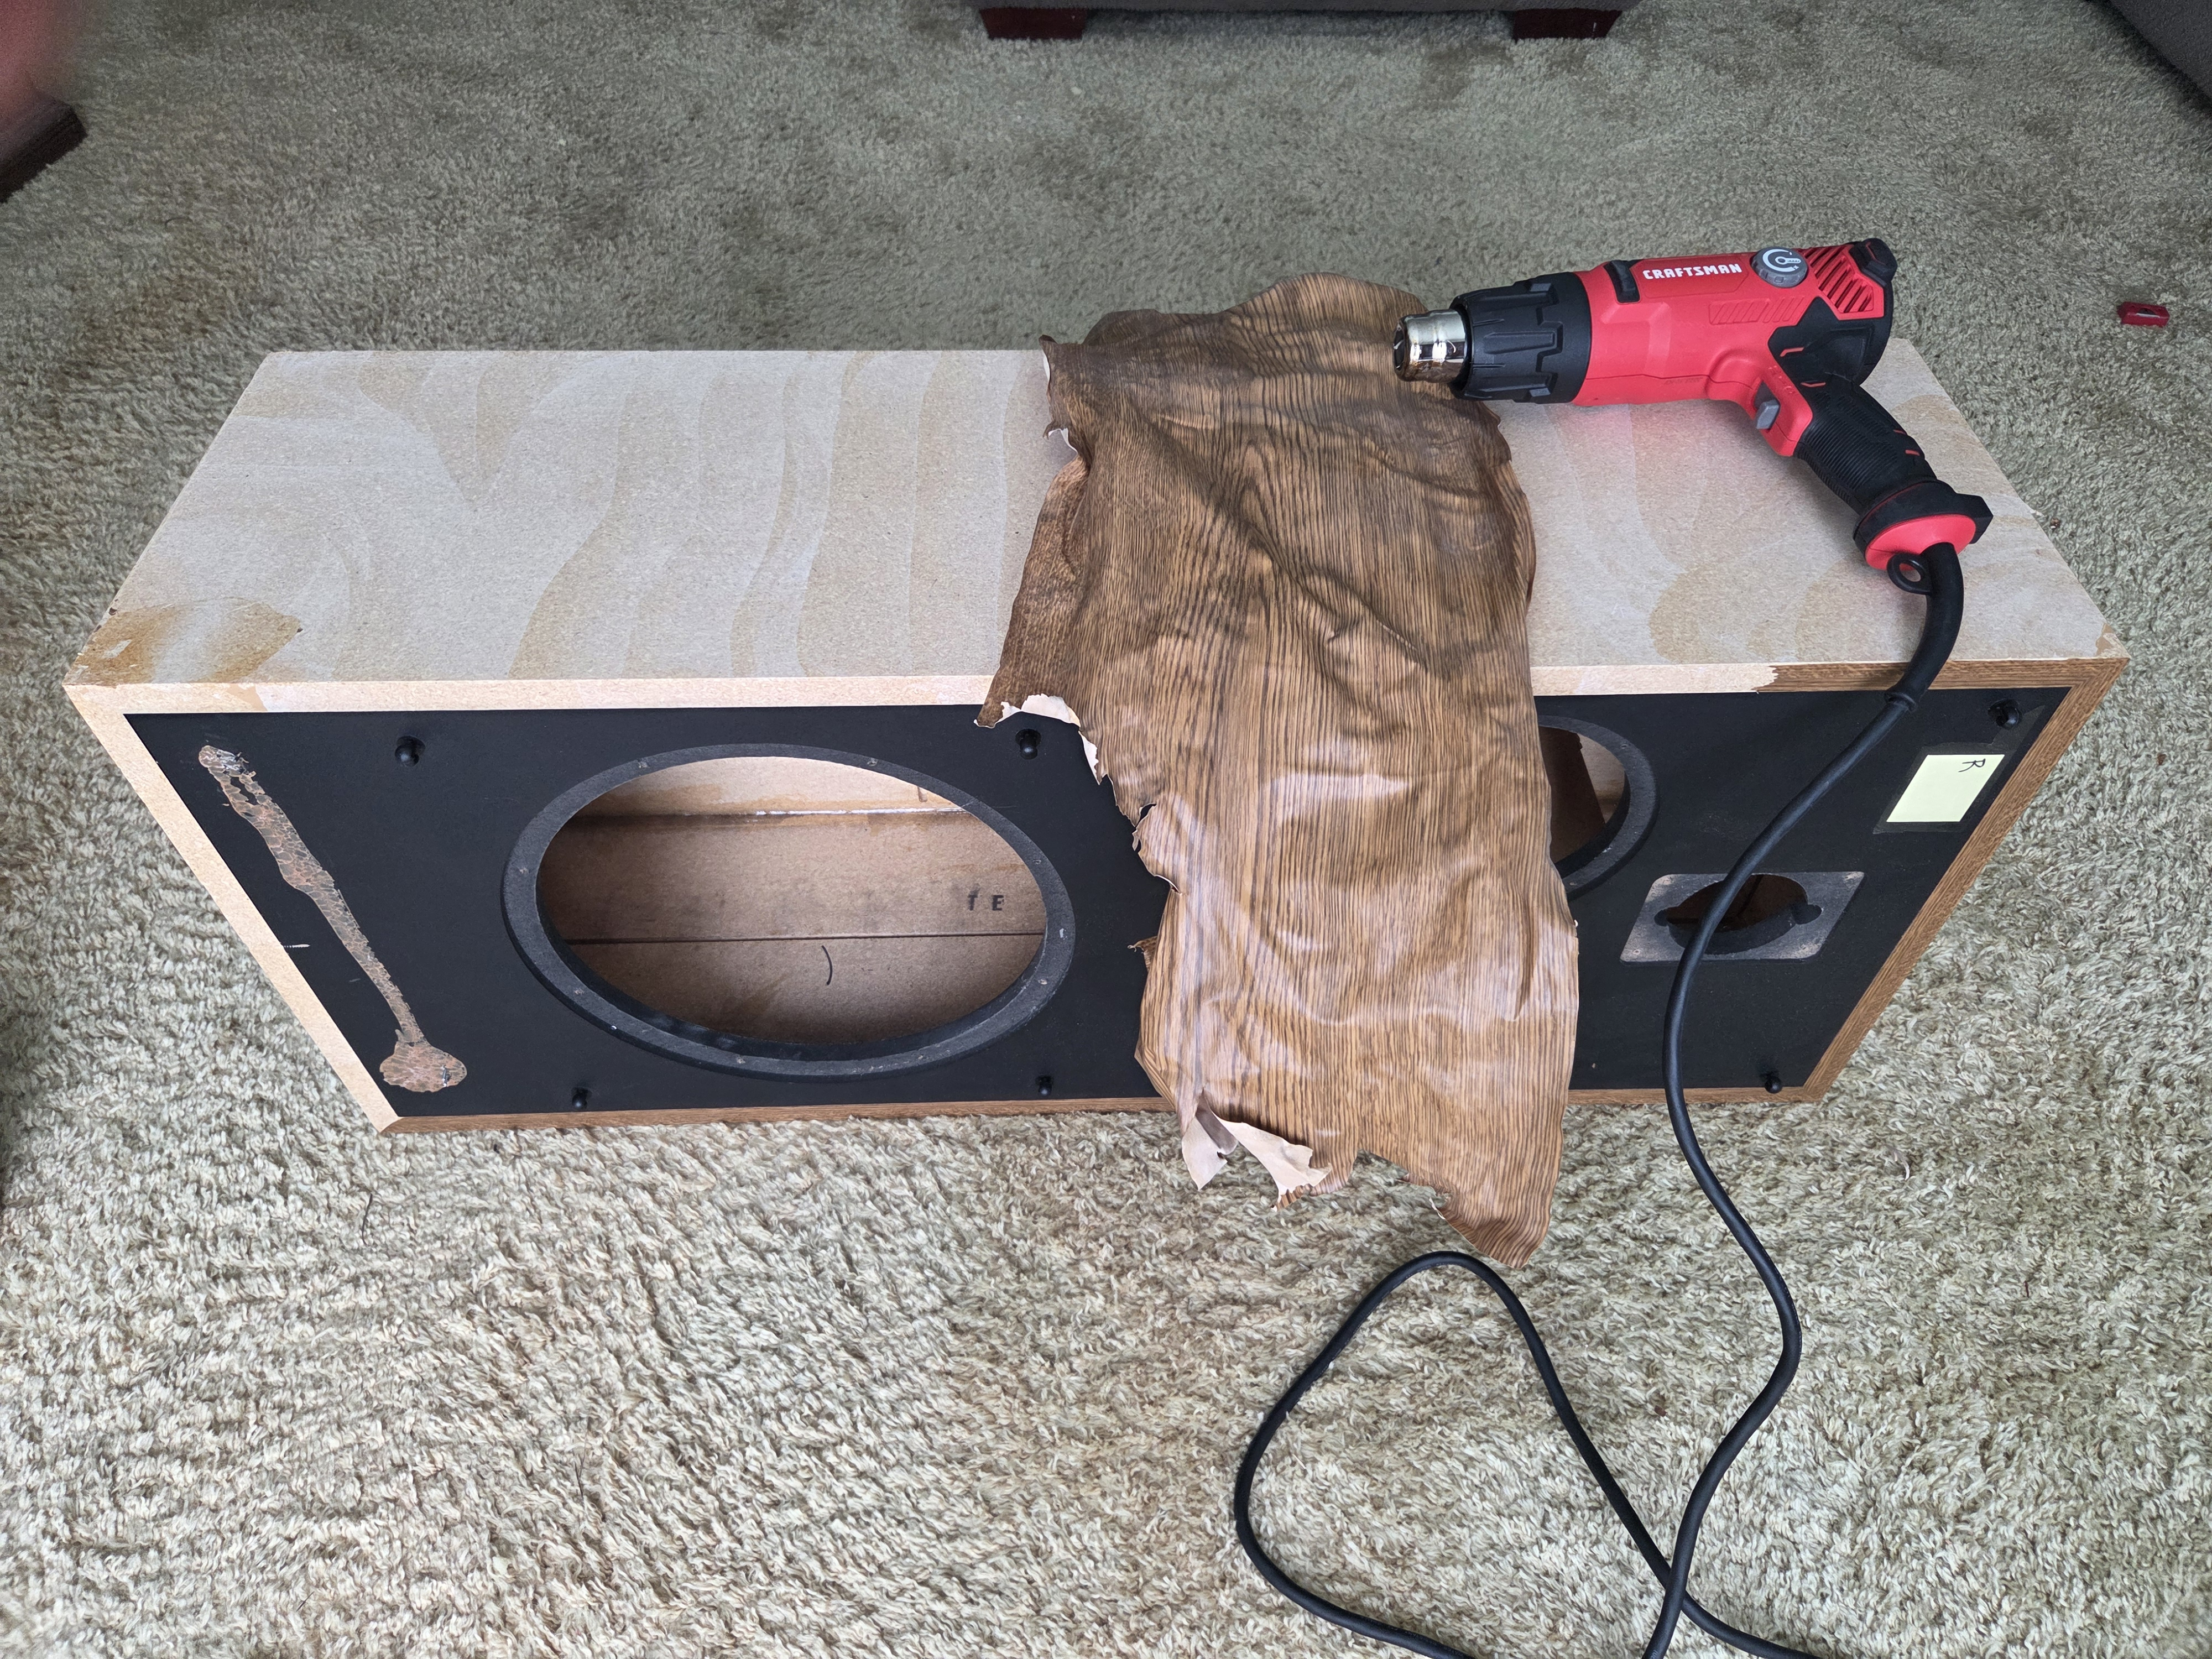
Vinyl wrap removal. I had quite a bit of trouble at first. I'm finding that the method described by a comment I found from @F1nut in 2010 is probably the best way to go about it. I thought this was going to take me *forever* but once I found a rhythm I was able to get it done with relative ease. Still quite time consuming.A heat gun.
Heat up a corner by waving the gun back and forth. Do not get the gun too close. In short order the vinyl will soften, then get a grip and pull it back with your fingers. Heat a little more, pull it back, repeat until done. Use caution as the vinyl will be hot. I recommend gloves. I don't like to use a putty knife as it can tear the vinyl and also scuff/gouge the particleboard.
-
It's a PITA any way you look at it.Political Correctness'.........defined
"A doctrine fostered by a delusional, illogical minority and rabidly promoted by an unscrupulous mainstream media, which holds forth the proposition that it is entirely possible to pick up a t-u-r-d by the clean end."
President of Club Polk -
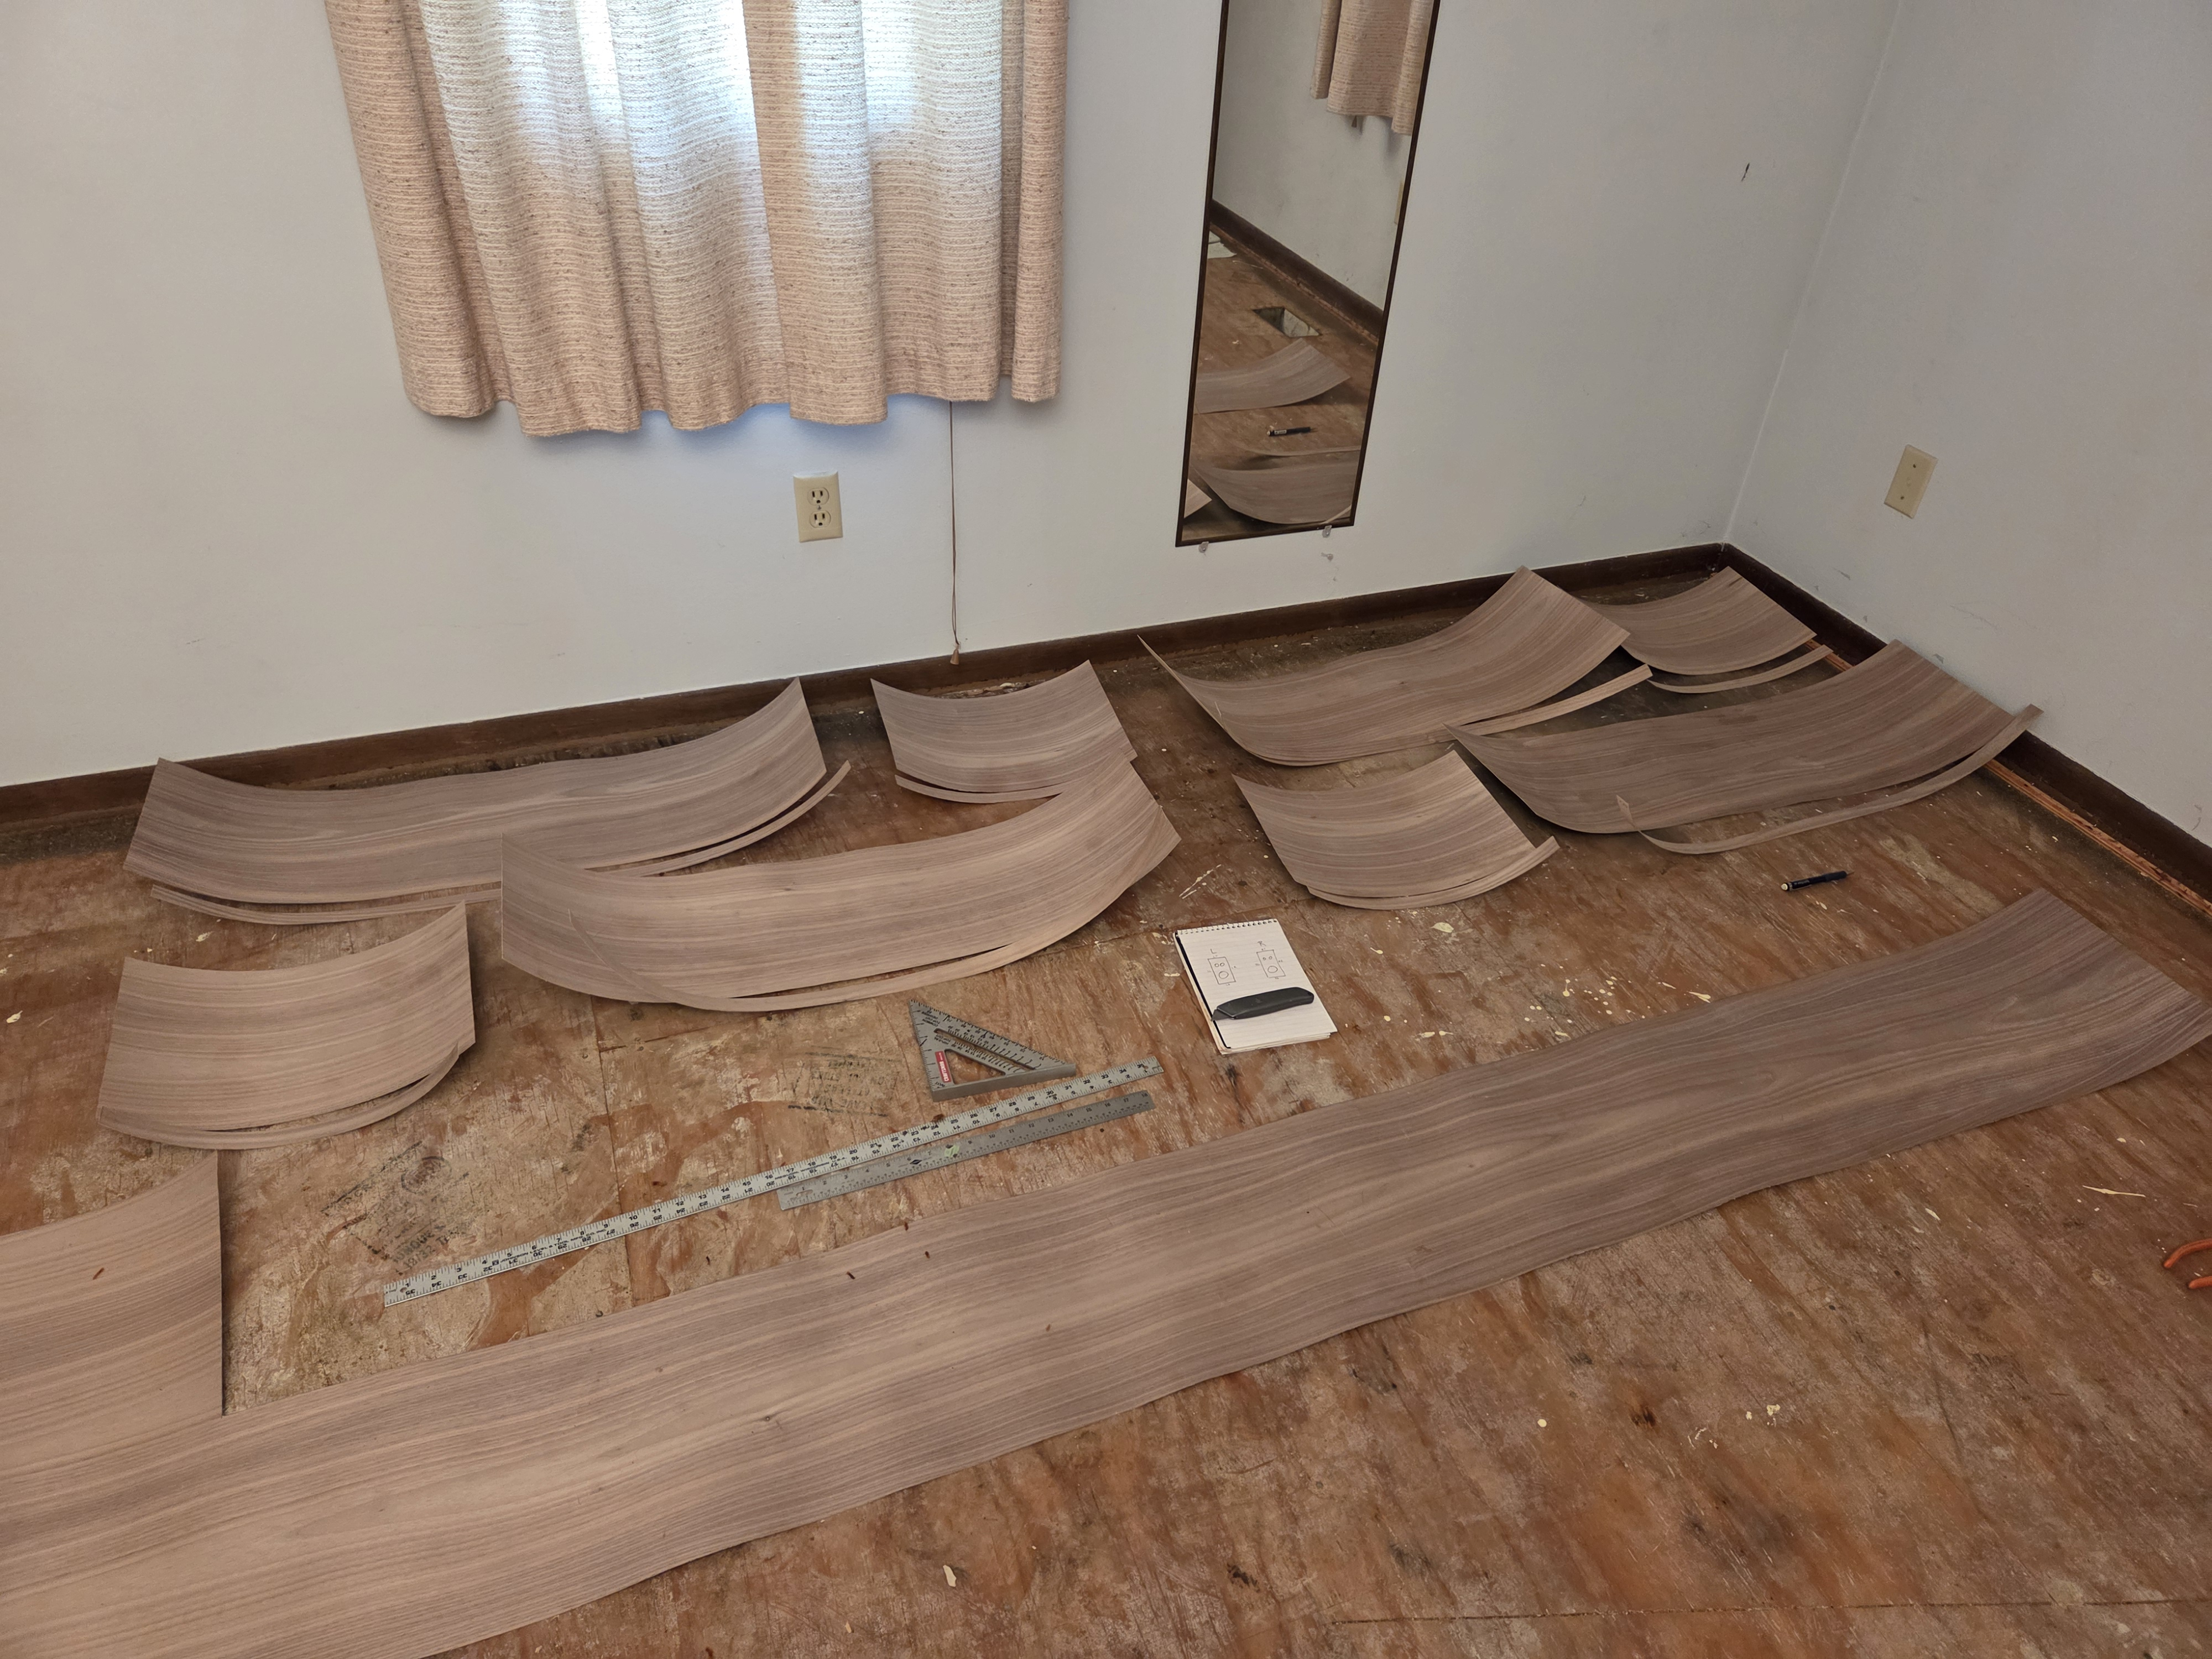
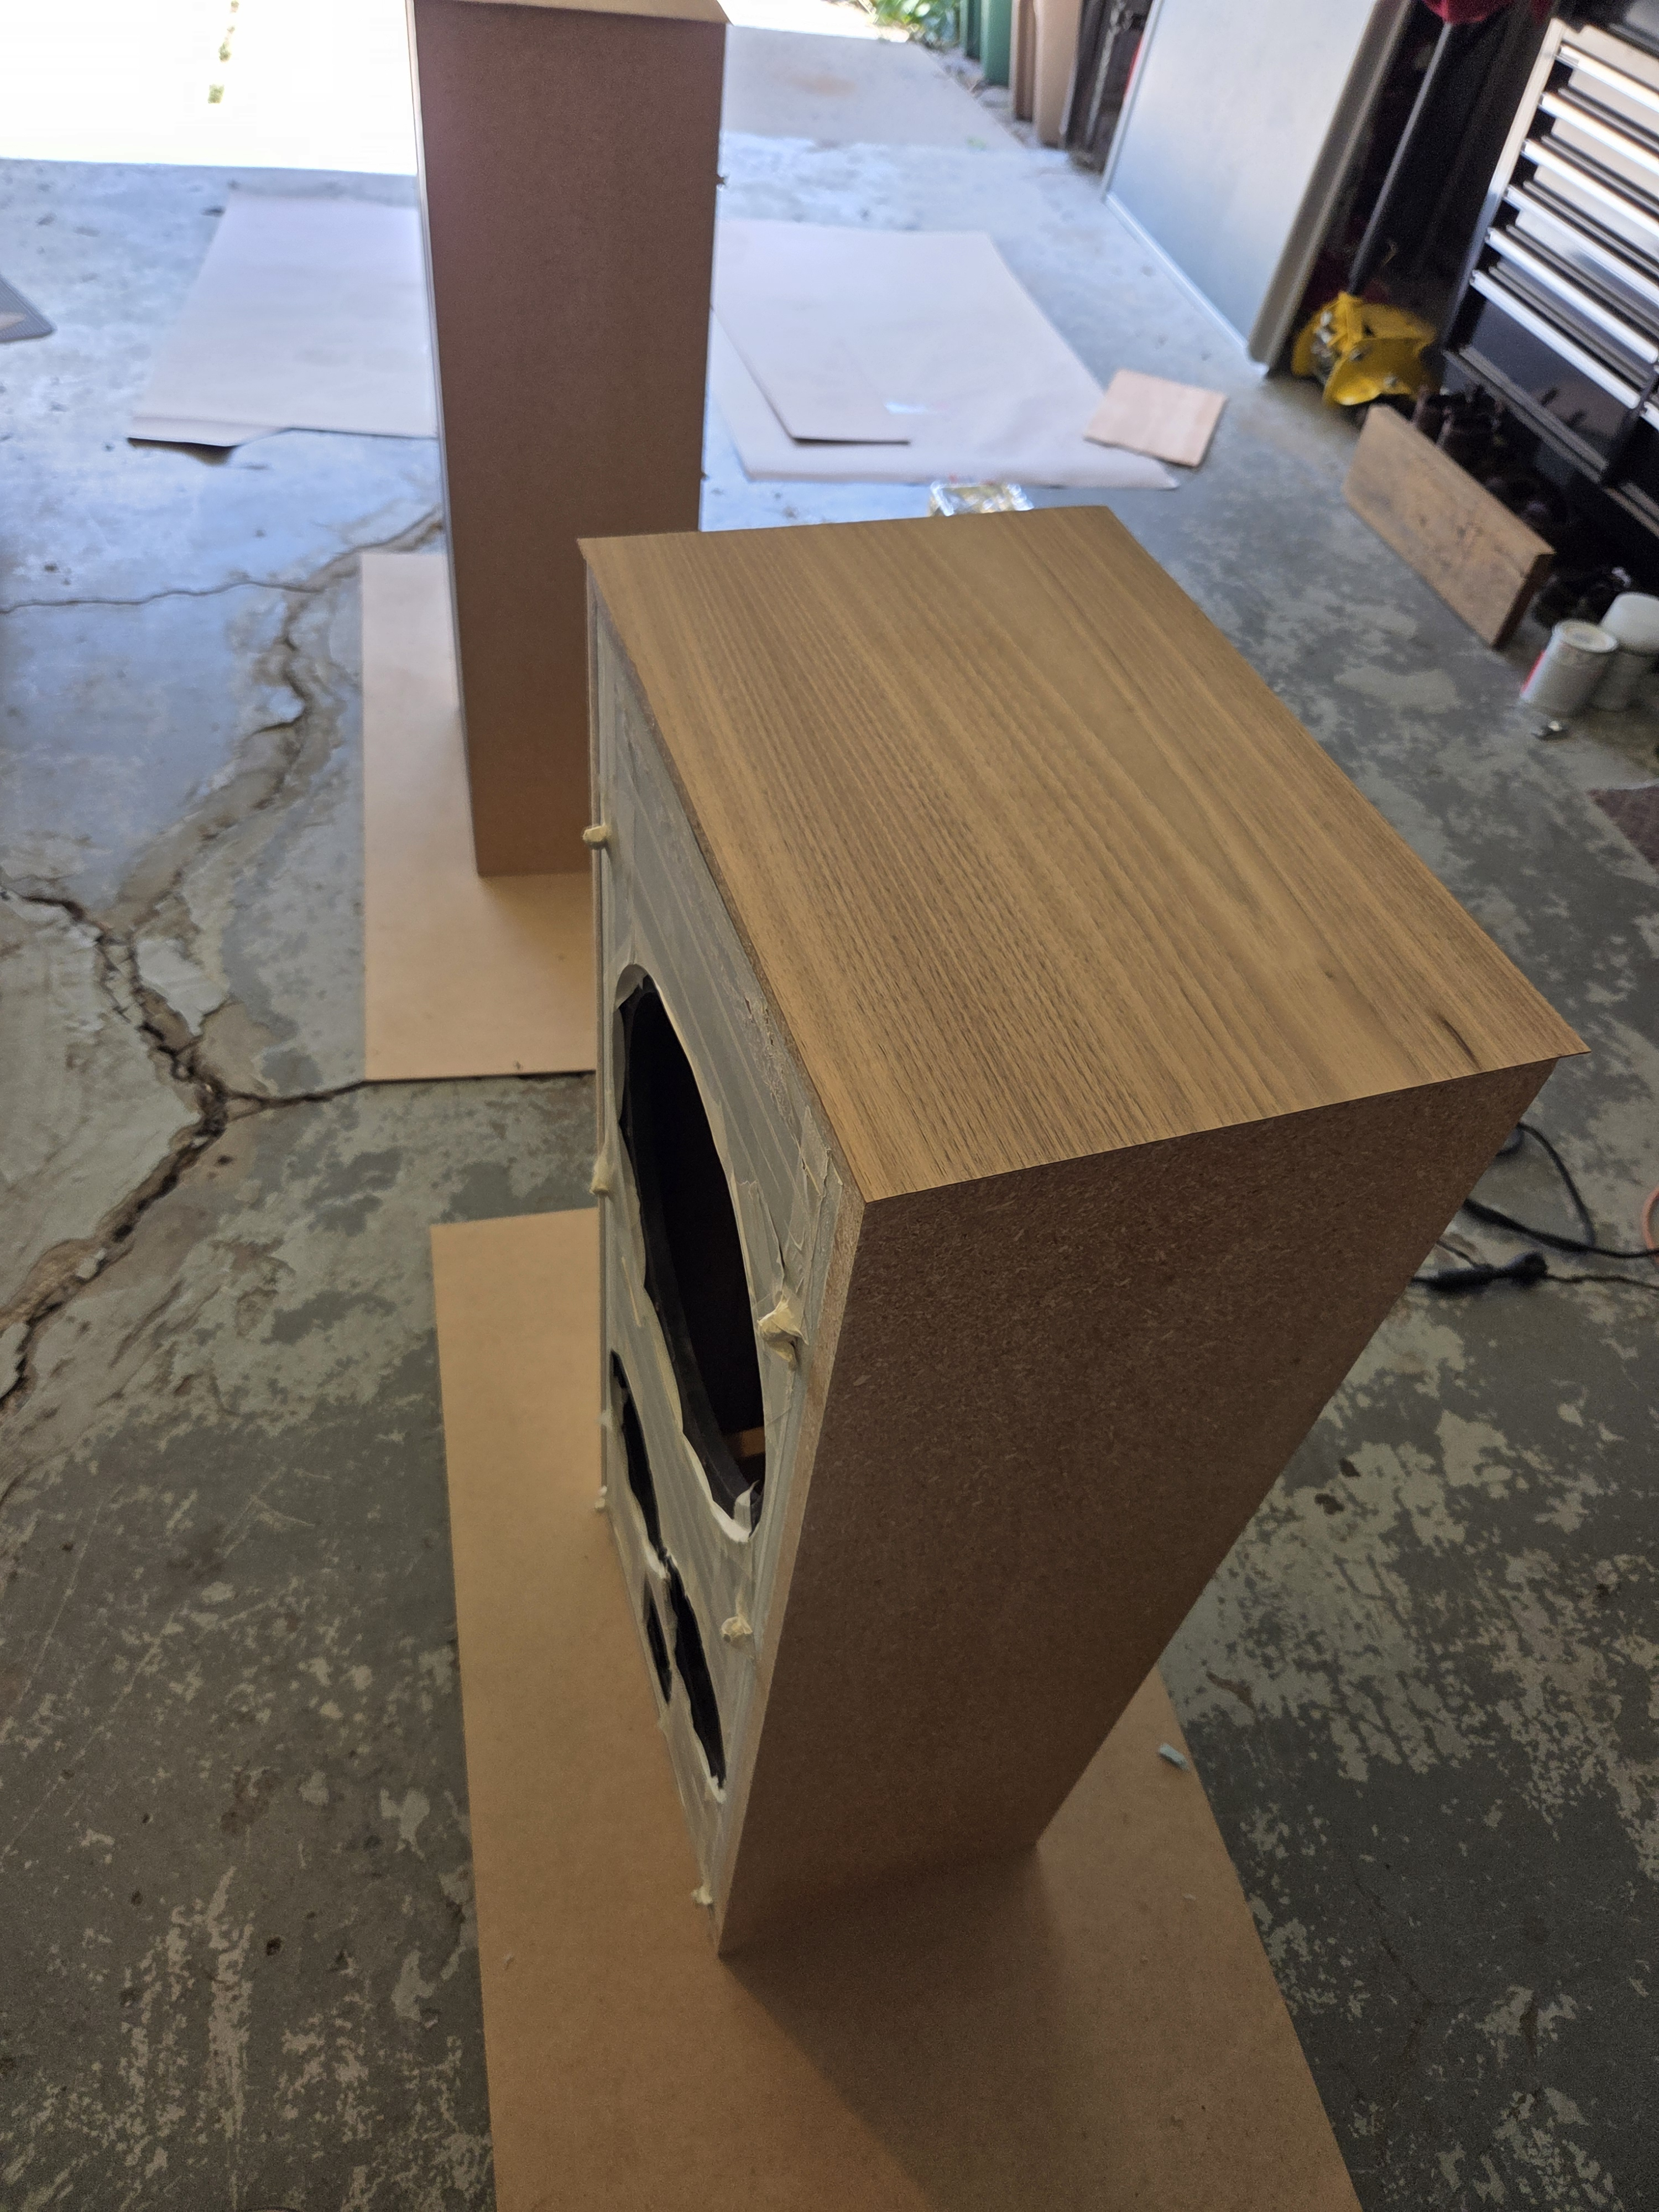
Veneering commenceth
-
Folks, I'm starting to think again about next steps on this project. I'd like to get some opinions if possible. What do you all think about adding some extra internal bracing to my 2b cabinets?
I purchased some 1-1/8" dowels a while back. My idea would be to position them front-to-back at the red dots indicated in the below photo. In my mind, this would add some extra stability around the passive radiator. I also think that two dowels around the top edge of the passive radiator would help keep the polyfill in it's place.
Thoughts?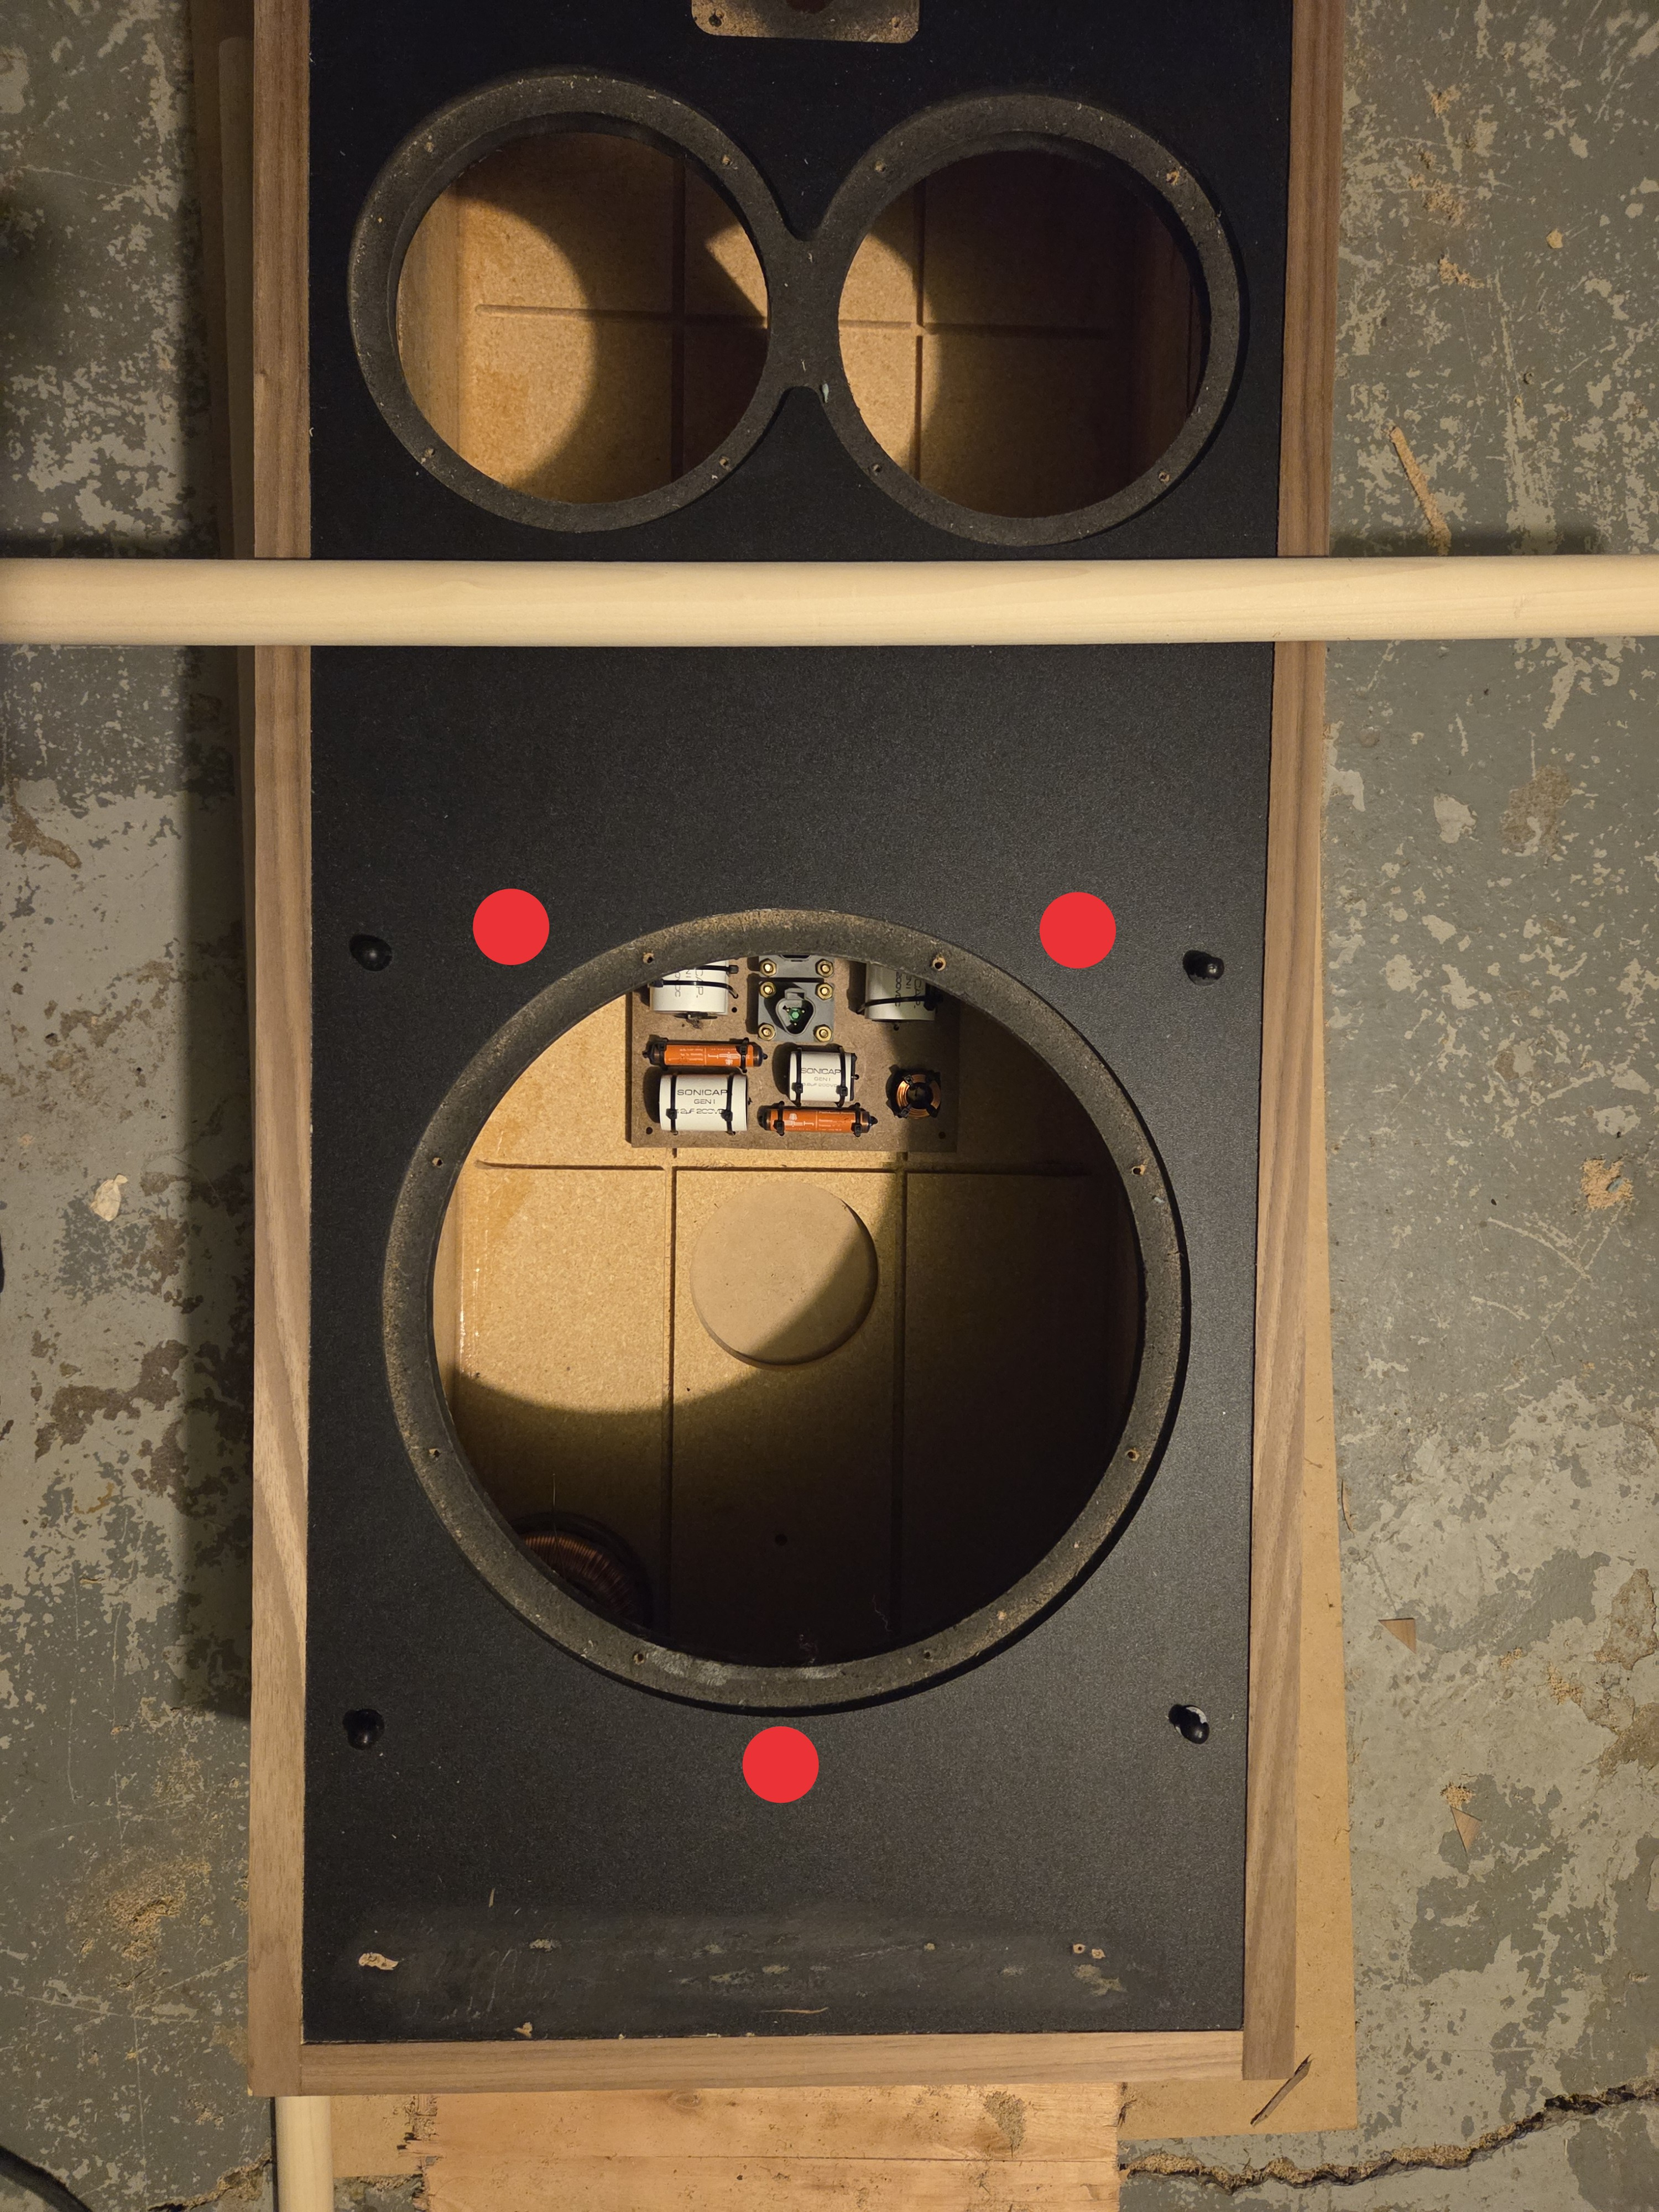
-
Staples will keep the poly in place.Political Correctness'.........defined
"A doctrine fostered by a delusional, illogical minority and rabidly promoted by an unscrupulous mainstream media, which holds forth the proposition that it is entirely possible to pick up a t-u-r-d by the clean end."
President of Club Polk -
2 likes and an agree. I'll prob go ahead.
-
What if you moved the upper dowel rods to the midpoint between the mid-woofer and the passive?
-
Are there not factory braces between the mids? If not, I'd suggest placing one there as well, in addition to what you propose. Great build/work here.Don't take experimental gene therapies from known eugenicists.
-
Factory braces are still in-place. So here's a pic with the polyfill in the cabinet. It fills the space just under the center brace and folds over itself to stay out of the way of the passive radiator. It's already getting pretty tight behind the MWs and I haven't even added the BH5 yet. Current plan is to add the dowels at just the point where the polyfill ends.
Hurricane nuts trimmed. I clamped 'em in a bench vice and used my Dremel with a metal cutting bit. Short work.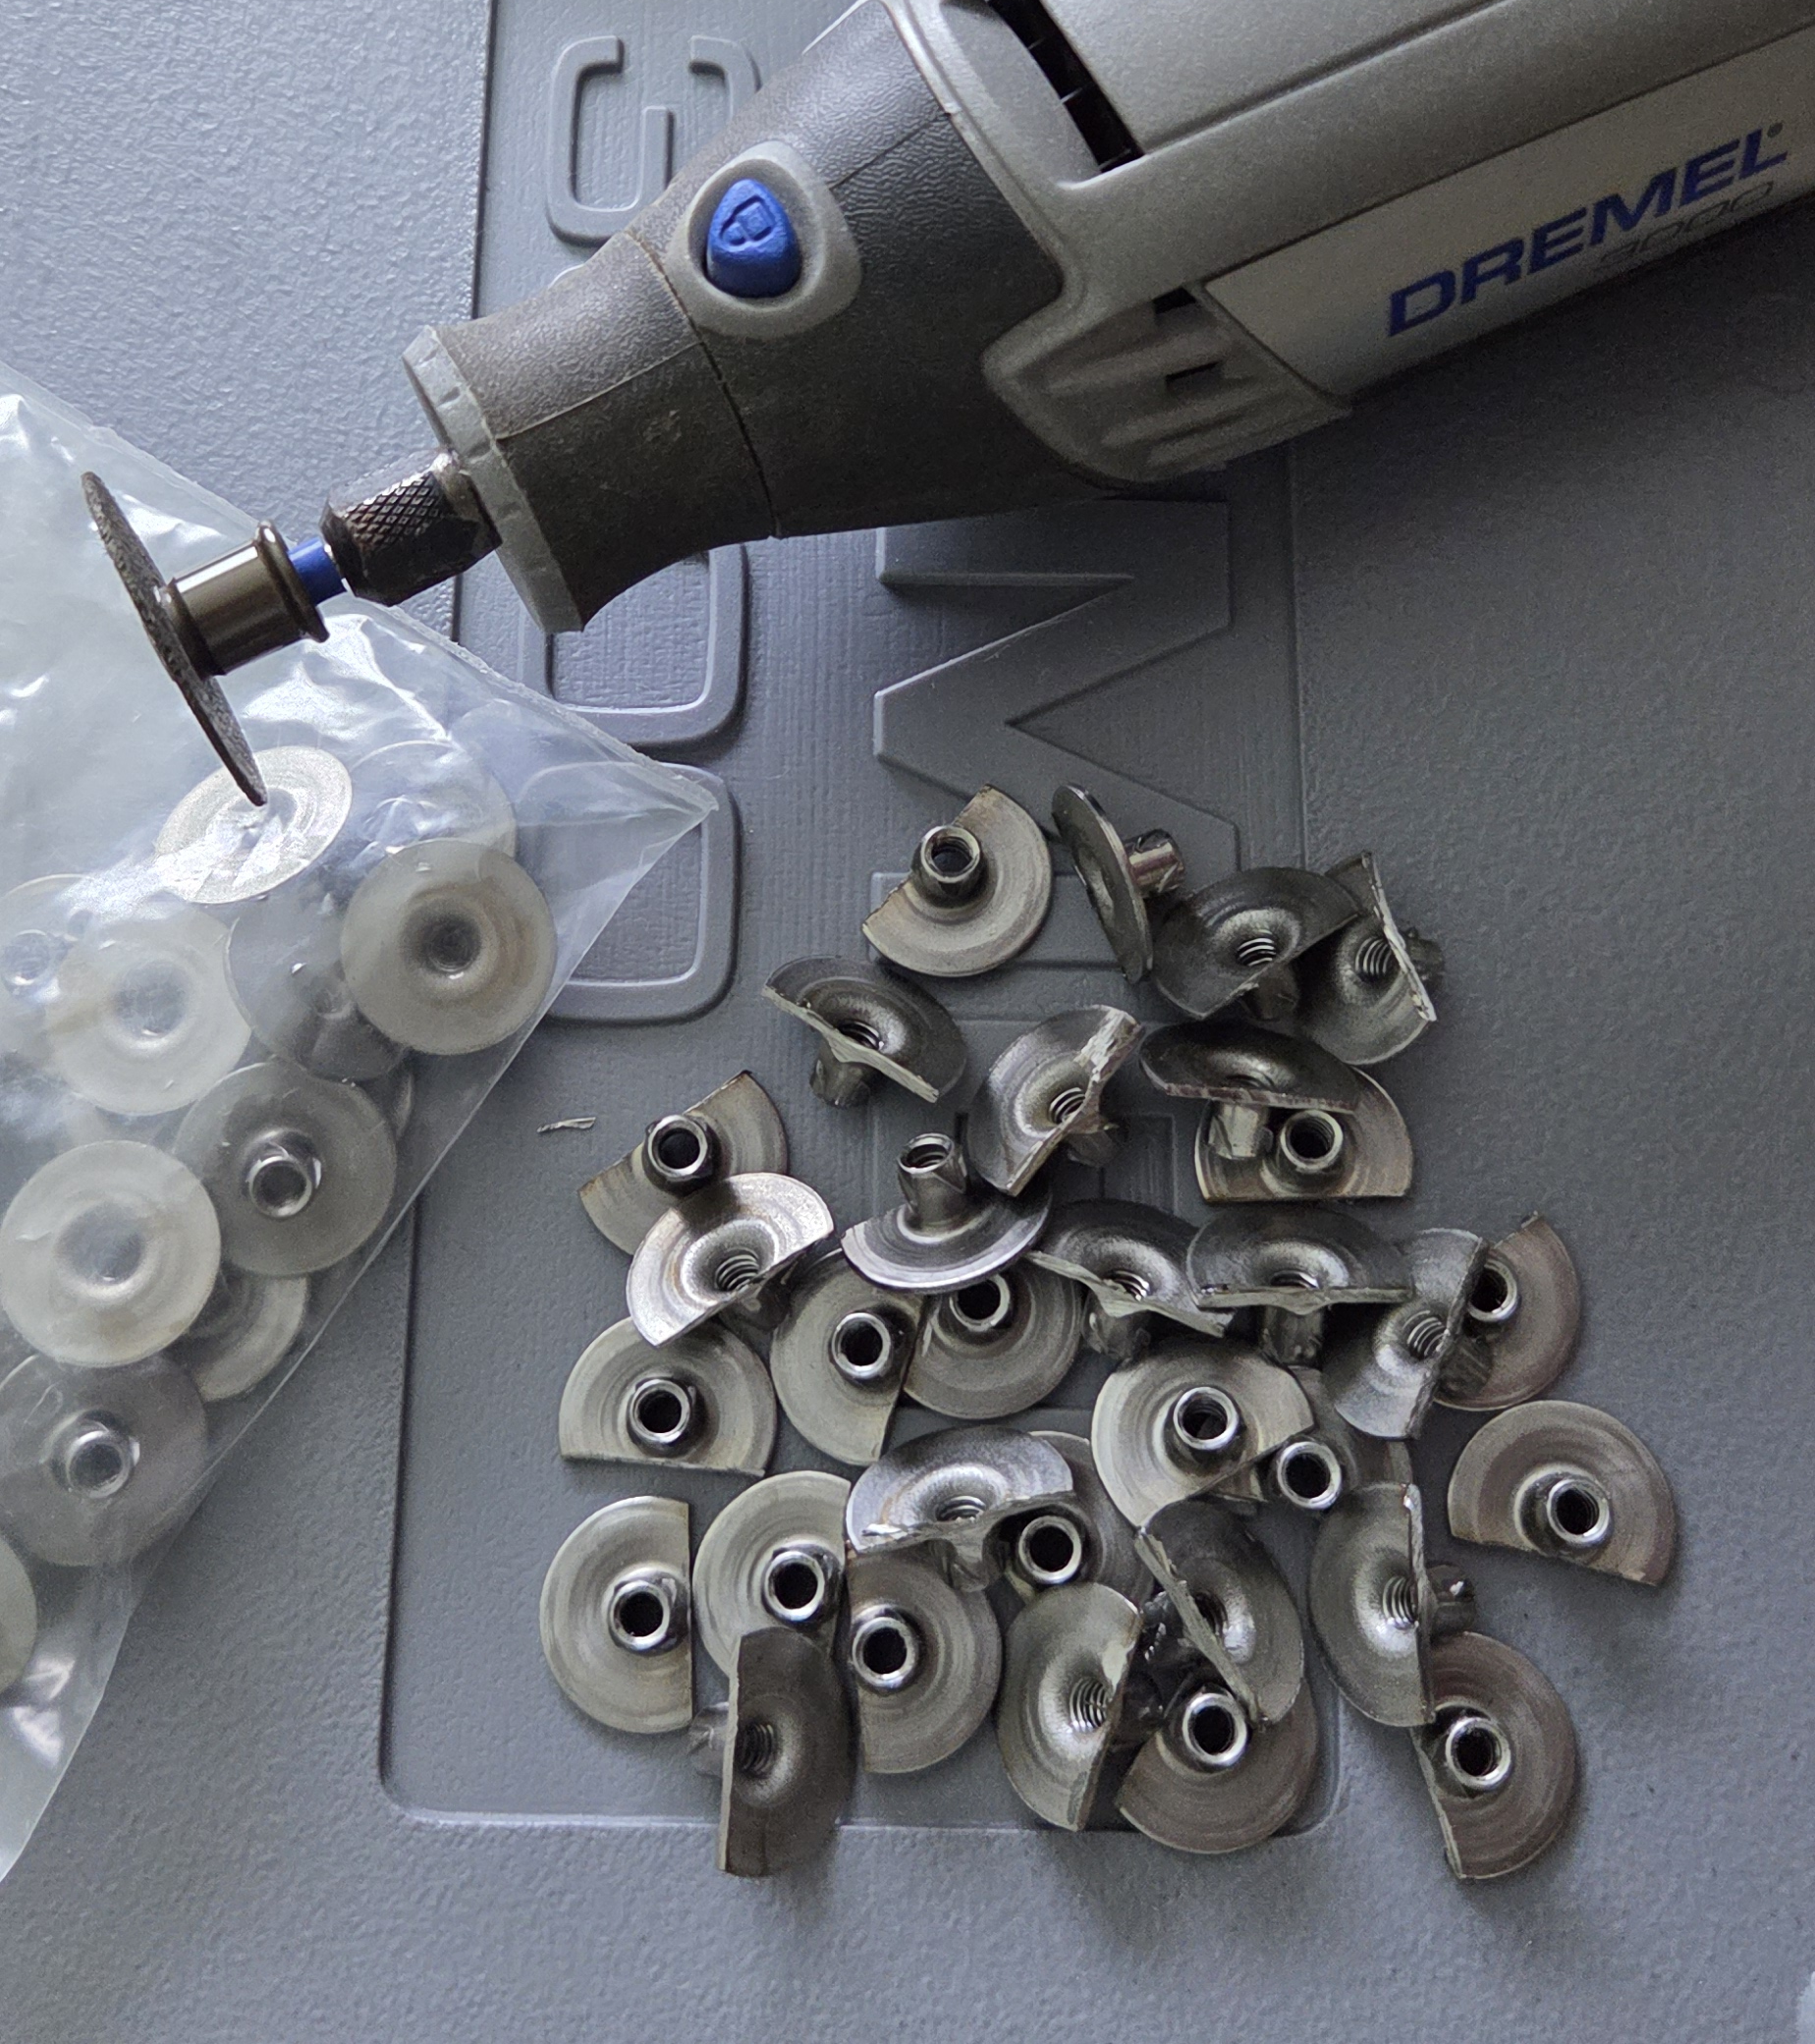
-
I finished up the hurricane nut installation last night. I followed the advice of past forum posters. I drilled the cabinet screw holes out starting with a small bit and stepping up once and finishing with a 13/64" bit. I used a toothpick to distribute a small amount of Locktite Power Grab around the base of the nut. The nuts were installed by mating the bolt screw (w/ a small washer) through the cavity and to the nut and engaging the threads. I drilled slowly as the nut entered the cabinet. I stopped drilling when I could see it was tight and was careful not to overtighten.
I started on the back. The first few came out a bit sideways. I fixed this by positioning the nut about 25% counterclockwise from where I wanted it to end up. As the nut enters the cabinet it will turn clockwise in the direction of the blades that lock it into the cabinet. The rest came out perfect.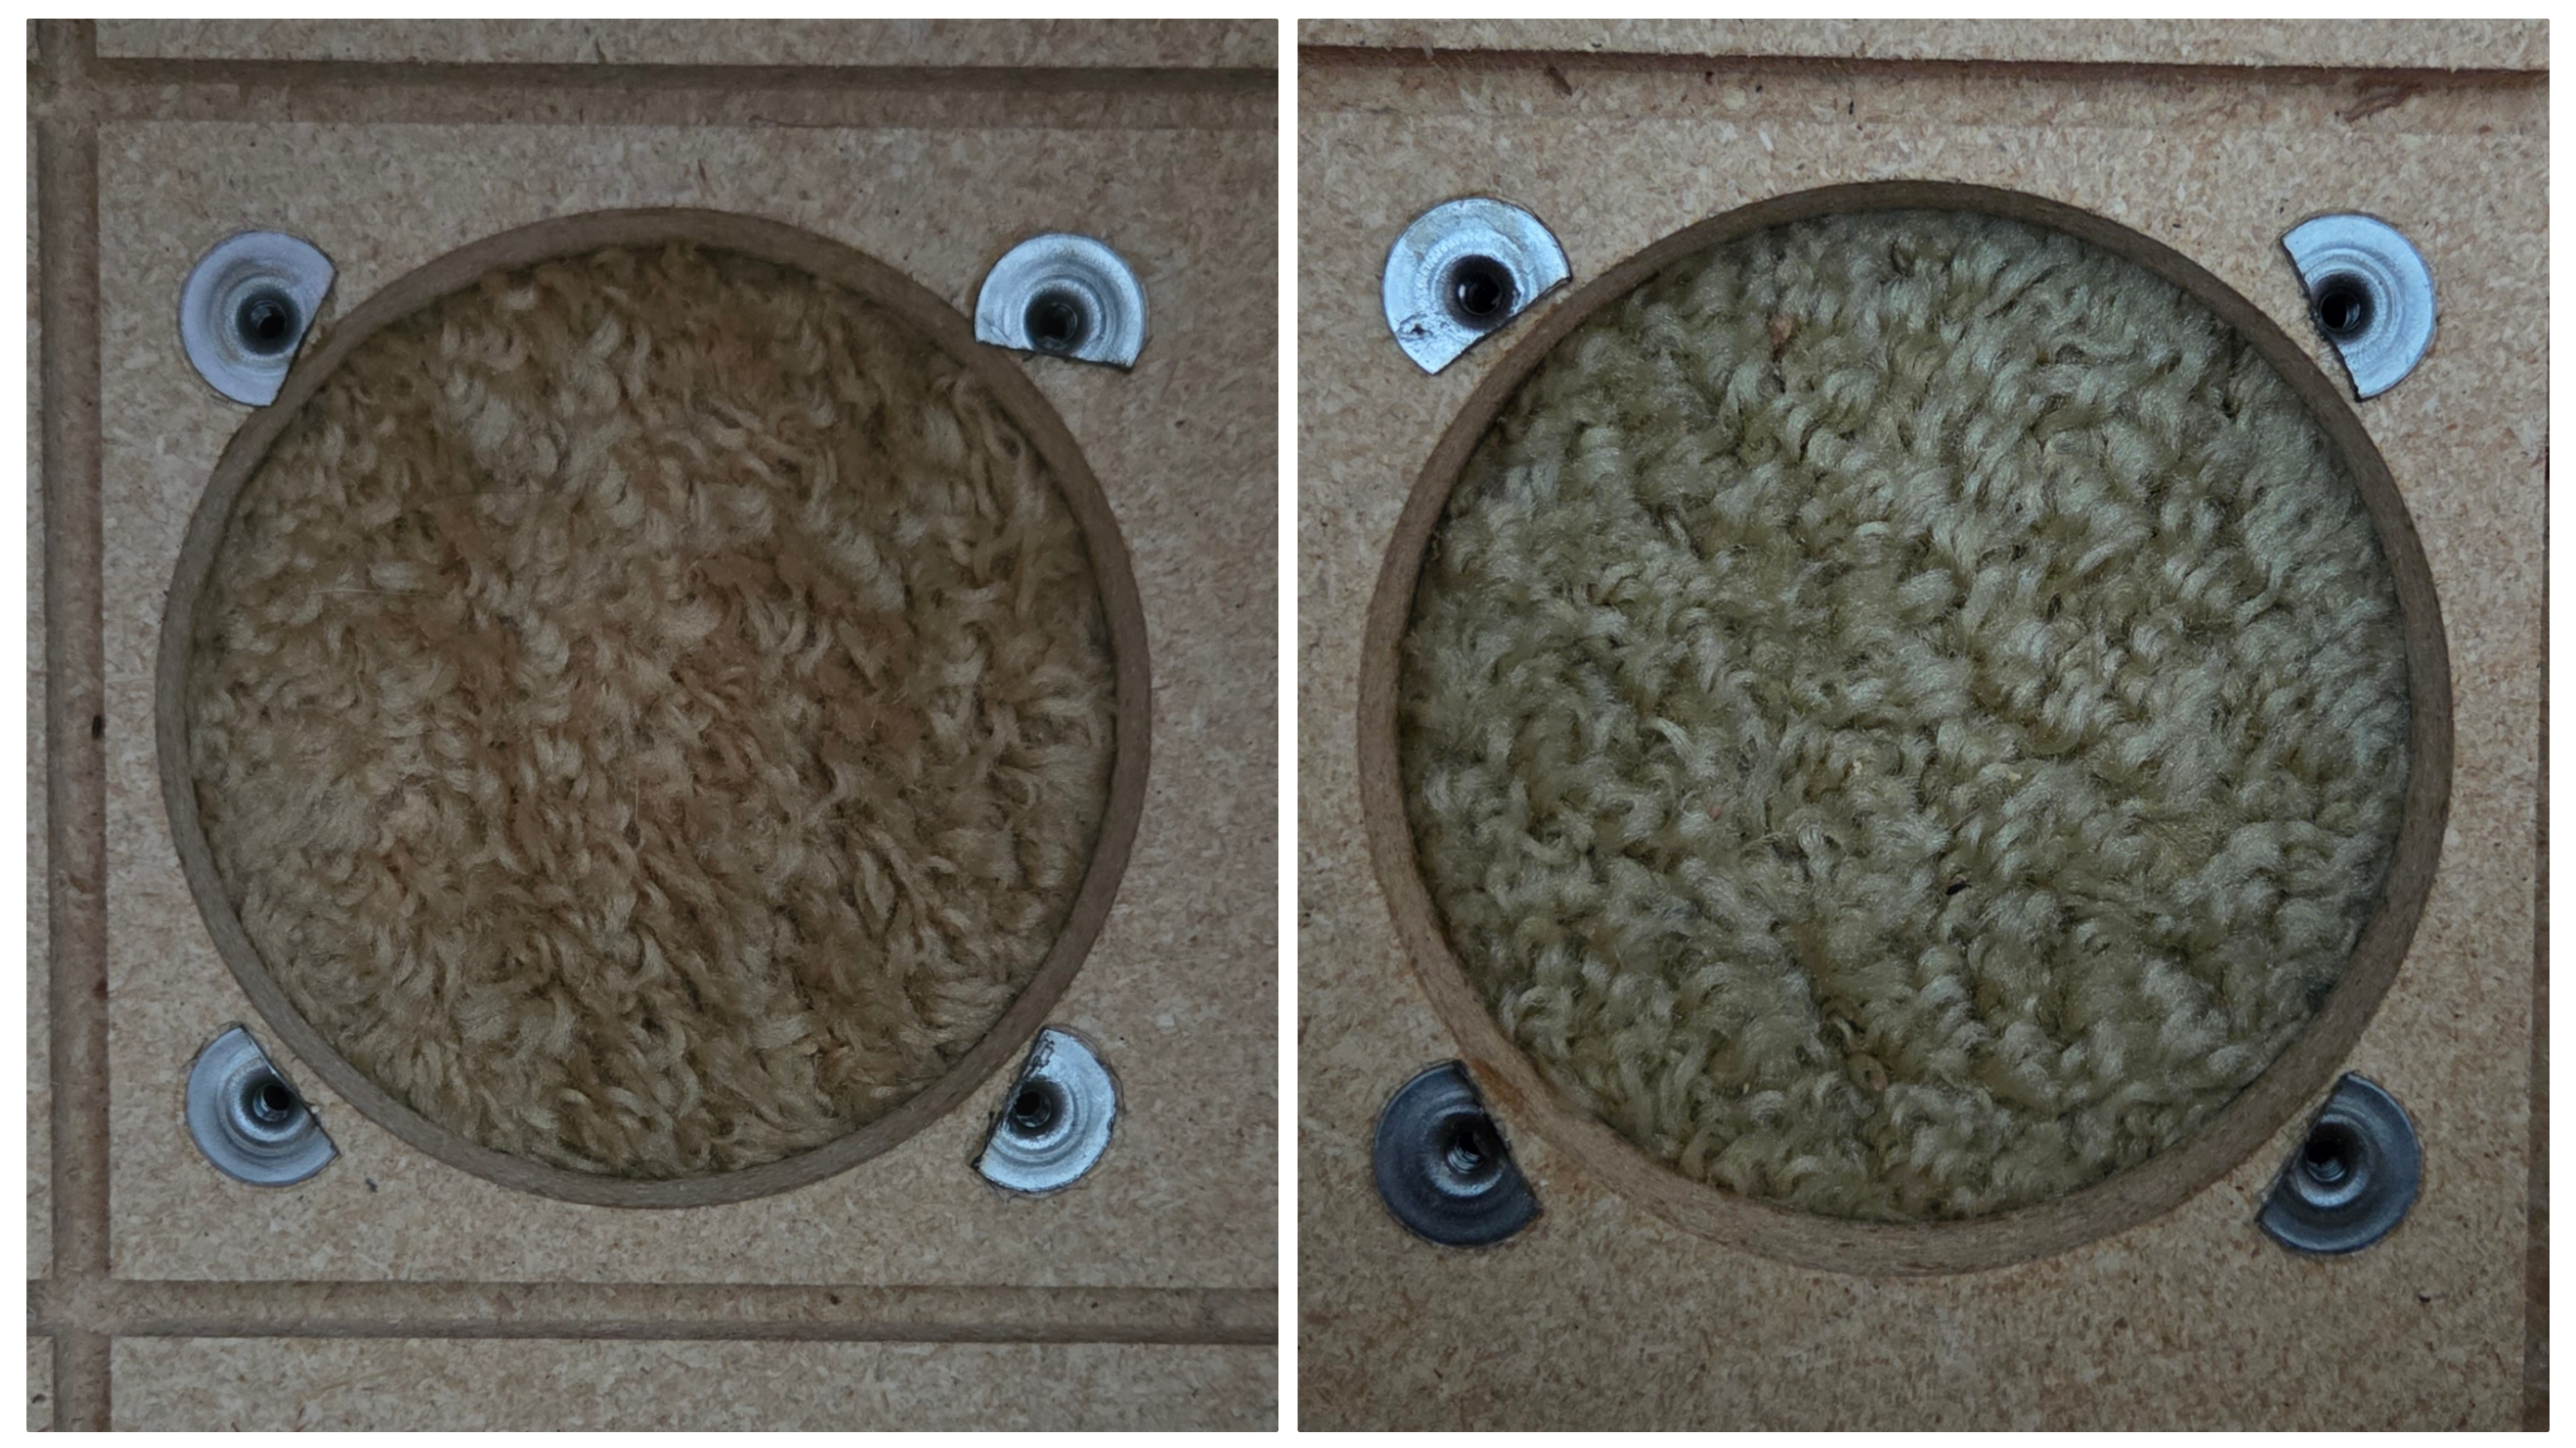
-
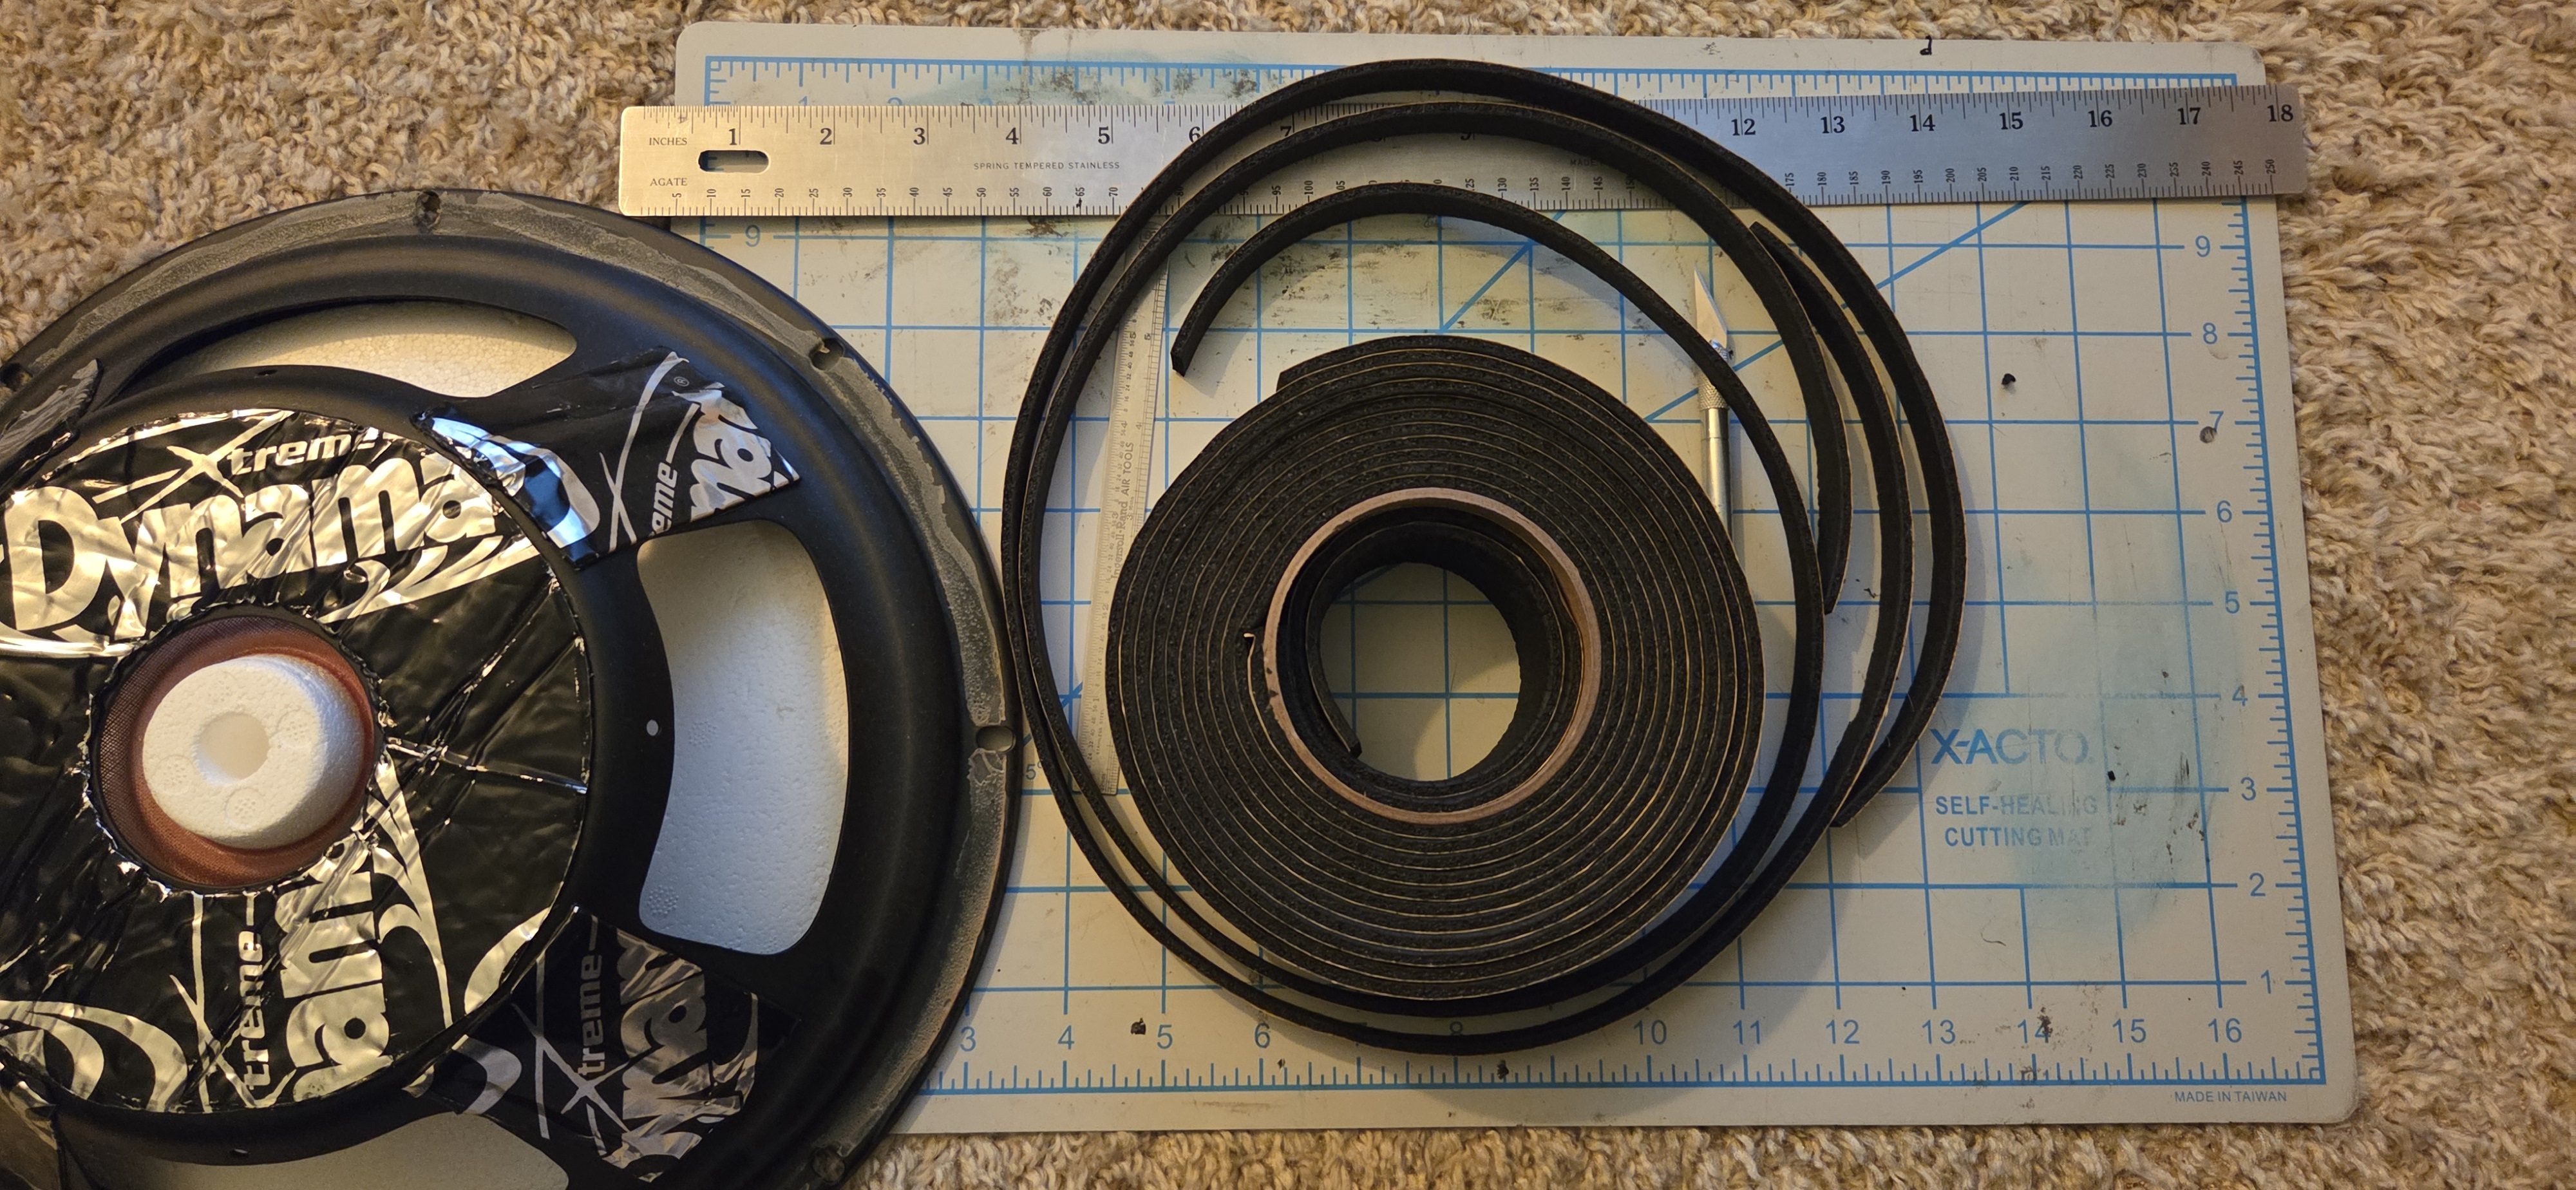
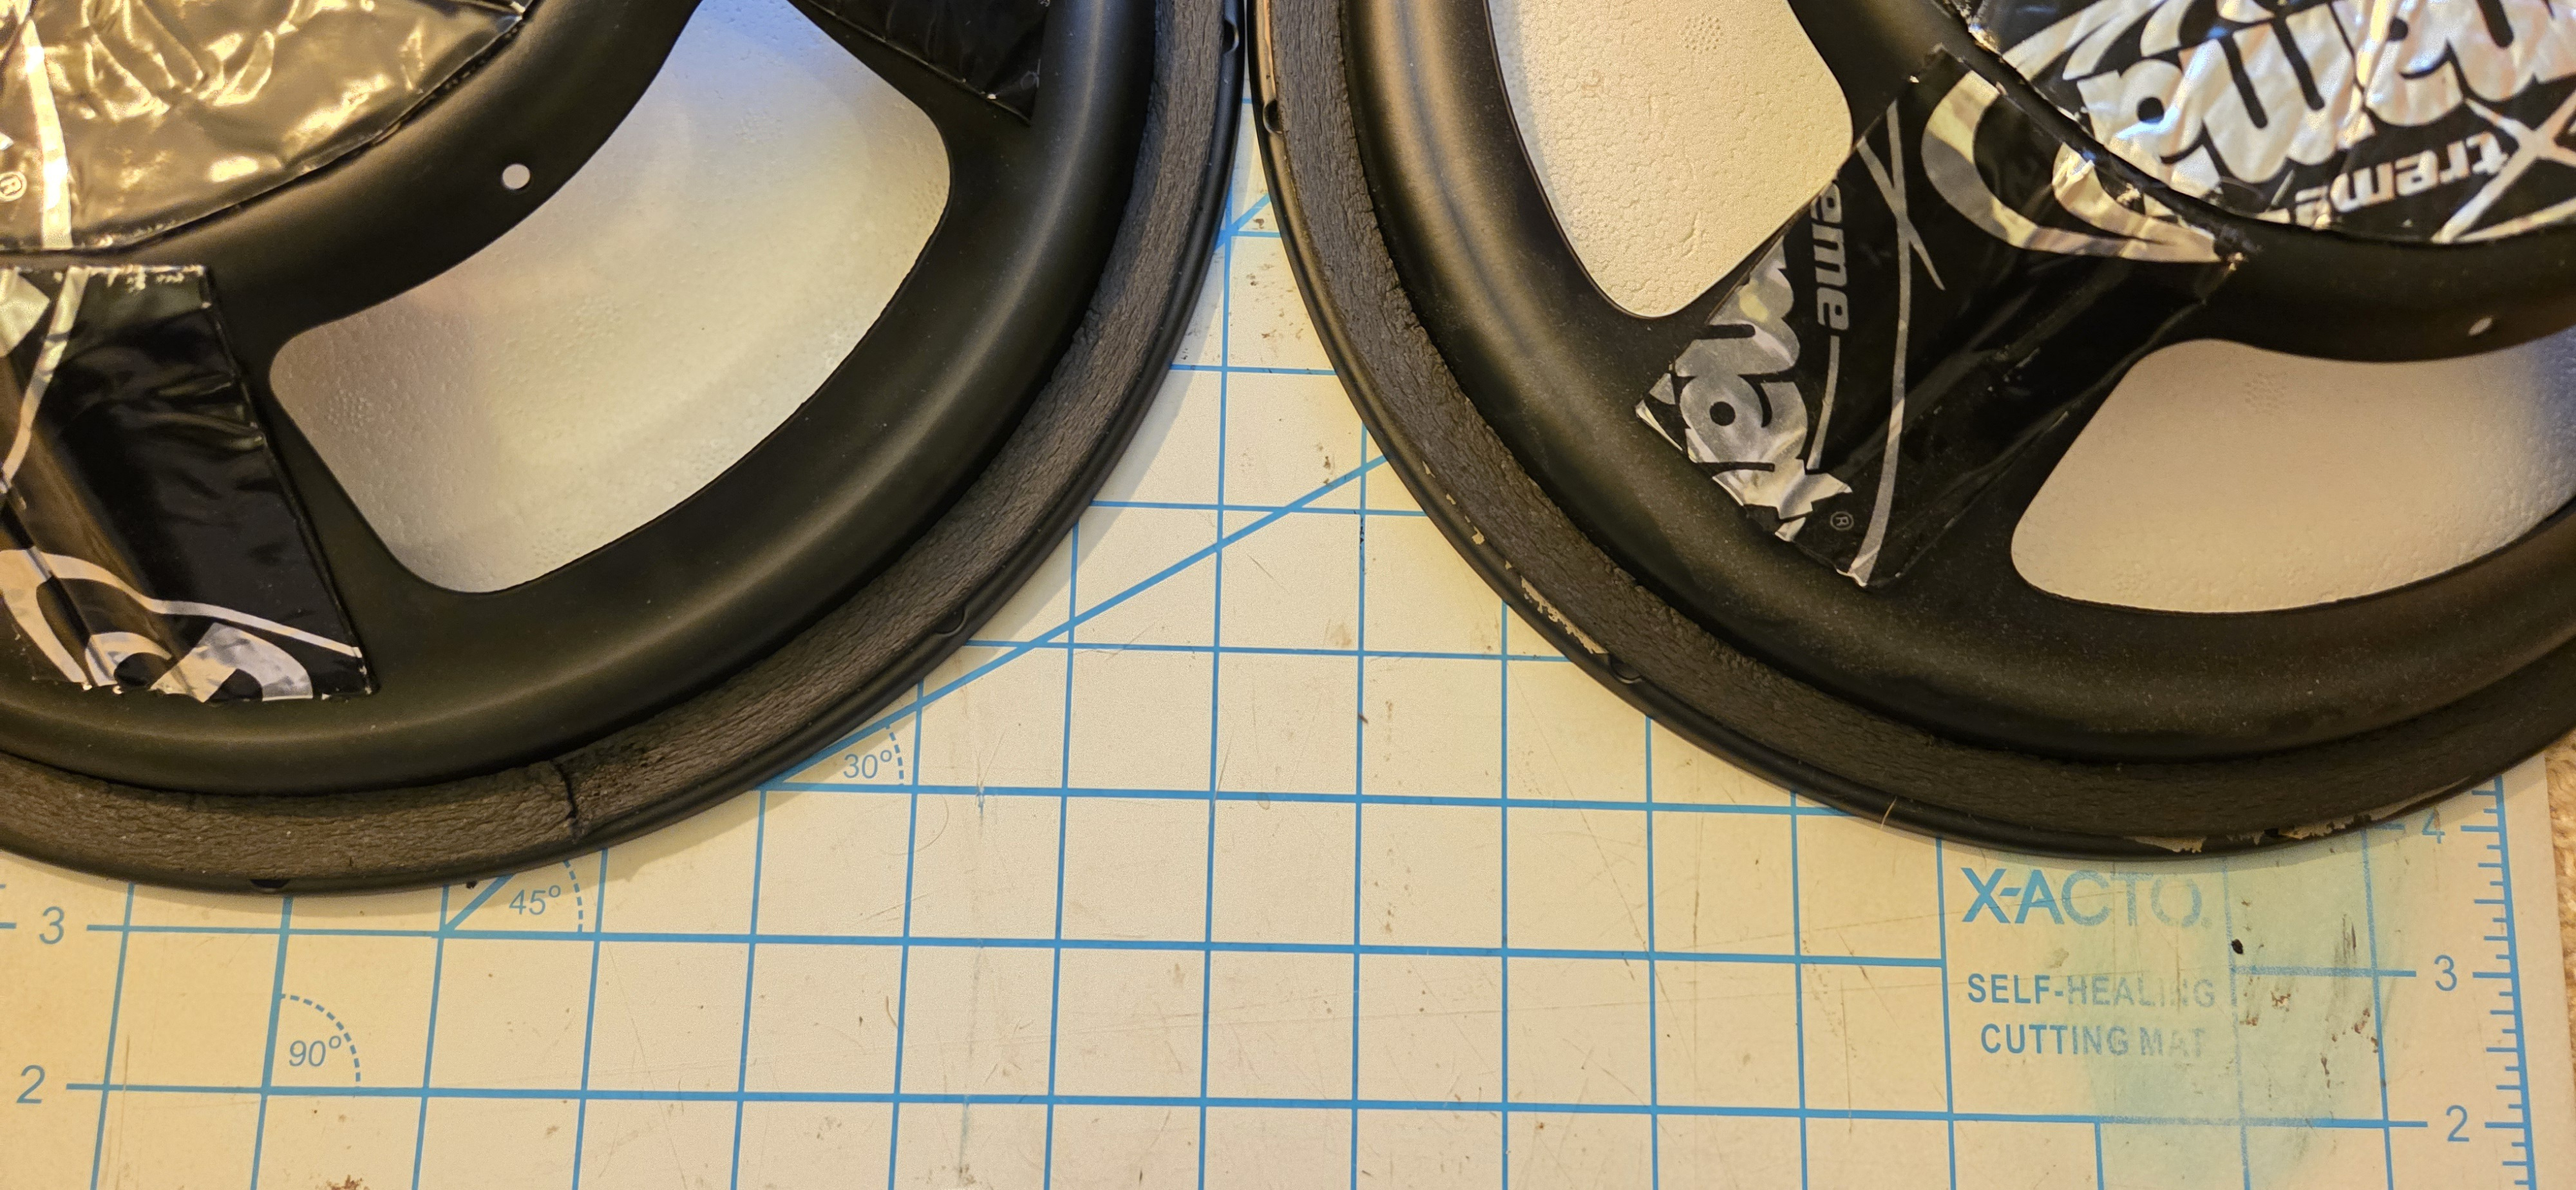
Cutting Armacell Armaflex TAP18230 insulation tape
Monotonous tedium!!