To get Monitor 40's or not?
Hi everyone, I just got a quick question, I am debating whether or not to get a pair of monitor 40 and some bt77 brackets for surround backs, I currently have monitor 70's for both my fronts and side surrounds with a csi40 center and sv sub. My question is I have an Onkyo 805 which pushes 130 watts per channel and see the monitor 40's are rated for 125 watts, will i damage them hooking them up to this receiver or will it be safe? I am replacing some old r50's which I am currently using for surround backs, and know the monitor 40's will do a much better job. My other option is to of course get one more pair of 70's but i think wall mounting in this room will work better. Thank you for your time, been running polk's for over 10 years and this is my first post here.
Home Theater:
Processor: Emotiva UMC-1
Amps: Emotiva XPA-3, Emotiva UPA-5
Center: Polk Audio CSi A6
Fronts: Polk Audio RTi A7
Surrounds: Polk Audio FXI A4
Surround Rears: Polk Audio RTI A3
Subwoofer: SVS 2039 PCi (upgraded woofer)
Power Conditioner: Monster HTS 5100 Signature Series
2 Channel: (work in progress)
Speakers: Polk Audio Monitor 40
Post edited by ScudDawg on
Comments
-
Don't worry about the power ratings, you will be fine.
-
only thing about m40s no slot to wall mount, you can mount m30s.
-
I'm assuming that's why he talked about the BT77 brackets in his original post.
-
ok going to order them I thinkHome Theater:
Processor: Emotiva UMC-1
Amps: Emotiva XPA-3, Emotiva UPA-5
Center: Polk Audio CSi A6
Fronts: Polk Audio RTi A7
Surrounds: Polk Audio FXI A4
Surround Rears: Polk Audio RTI A3
Subwoofer: SVS 2039 PCi (upgraded woofer)
Power Conditioner: Monster HTS 5100 Signature Series
2 Channel: (work in progress)
Speakers: Polk Audio Monitor 40 -
right you are.I'm assuming that's why he talked about the BT77 brackets in his original post. -
looks like the speakers are coming tomorrow, will get some pics once the mounts get here.Home Theater:
Processor: Emotiva UMC-1
Amps: Emotiva XPA-3, Emotiva UPA-5
Center: Polk Audio CSi A6
Fronts: Polk Audio RTi A7
Surrounds: Polk Audio FXI A4
Surround Rears: Polk Audio RTI A3
Subwoofer: SVS 2039 PCi (upgraded woofer)
Power Conditioner: Monster HTS 5100 Signature Series
2 Channel: (work in progress)
Speakers: Polk Audio Monitor 40 -
I'd like to see how well the mounts work with the Monitor 40's since they don't have them built in.Home:
Onkyo TX-6500MKII/Polk LSI 9's (A)Polk TSi 100(B)/Polk PSW 10/Onkyo C-S5VL/Technics SL-QD33
Home 2 (Playback):
Dynaudio BM5A MKII/Dynaudio SUB 250MC/Audigy 2 ZS
College:
JBL LSR 2325P/JBL 2310SP/MOTU UltraLite MKIII -
Wise choice, I have the 40's for my surrounds and they are spectacular. Hell, I even got frisky one day and tried them as my fronts, I was very surprised, man those speakers are awesome. Post some pics of them mounted on the BT77's, I have mine on stands and would love to wall mount them.
-JeffHT Rig
Receiver- Onkyo TX-SR806
Mains- Polk Audio Monitor 70
Center- Polk Audio CS2
Surrounds- Polk Audio TSi 500's
Sub- Polk Audio PSW125
Retired- Polk Audio Monitor 40's
T.V.- 60" Sony SXRD KDS-60A2000 LCoS
Blu-Ray- 80 GB PS3
2 CH rig (in progress)
Polk Audio Monitor 10A's :cool:
It's not that I'm insensitive, I just don't care..
-
ok mounts will be here next week, will take some picsHome Theater:
Processor: Emotiva UMC-1
Amps: Emotiva XPA-3, Emotiva UPA-5
Center: Polk Audio CSi A6
Fronts: Polk Audio RTi A7
Surrounds: Polk Audio FXI A4
Surround Rears: Polk Audio RTI A3
Subwoofer: SVS 2039 PCi (upgraded woofer)
Power Conditioner: Monster HTS 5100 Signature Series
2 Channel: (work in progress)
Speakers: Polk Audio Monitor 40 -
I actually think I am going to move the 40's to surrounds on the mounts and place the monitor 70's in the back for the rears.Home Theater:
Processor: Emotiva UMC-1
Amps: Emotiva XPA-3, Emotiva UPA-5
Center: Polk Audio CSi A6
Fronts: Polk Audio RTi A7
Surrounds: Polk Audio FXI A4
Surround Rears: Polk Audio RTI A3
Subwoofer: SVS 2039 PCi (upgraded woofer)
Power Conditioner: Monster HTS 5100 Signature Series
2 Channel: (work in progress)
Speakers: Polk Audio Monitor 40 -
I just got in a pair of Monitor 40's (to be used for fronts and surrounds), and did not know they didn't have the keyhole for mounting (amazon page says they do, so I stopped asking), do you know of a place that is still selling the B-Tech 77 mounting brackets (they seem to be discontinued), or do you know of anyone that has used the Pinpoint AM40's and are they reliable and easy to aim with? Or does anyone know of a better solution? I have Omnimounts up now (forget the model but they have a 3-point swivel with a 'screw' for the keyhole), but they aren't doing me much good with the 40s. I'd rather not drill into the speakers if it can be avoided, but don't want them falling on my kids or pets either (this is for the living room). They will all be secured to wall studs....a pair of monitor 40 and some bt77 brackets for surround backs... -
Well, I found this link with google shopping for the BT77s:
http://www.aiconsol.com/bt77-b-b-tech.html
I don't know if it's a good website though, looks kinda low budget. -
Nice find, but ya, not sure about them. It says they are drop shipped from the manufacturer, and those are discontinued, so . . ....I don't know if it's a good website though, looks kinda low budget.
I actually just called Polk customer service, and they said that B-Tech is the same company as Pinpoint, and Polk uses Pinpoint mounts themselves in some of their packages, so I'll probably look for a good price on the Pinpoint AM40s. -
yes the pinpoint am40 are the same as the Btech-77, they just changed the name on them, you can find them for around $60 new right now. I ended up getting some Bello SP-200 stands instead as the wife said not to wall mount them after seeing how deep the monitor 40's were.Home Theater:
Processor: Emotiva UMC-1
Amps: Emotiva XPA-3, Emotiva UPA-5
Center: Polk Audio CSi A6
Fronts: Polk Audio RTi A7
Surrounds: Polk Audio FXI A4
Surround Rears: Polk Audio RTI A3
Subwoofer: SVS 2039 PCi (upgraded woofer)
Power Conditioner: Monster HTS 5100 Signature Series
2 Channel: (work in progress)
Speakers: Polk Audio Monitor 40 -
Ordered them from J&R Music and Computer World through Amazon for $59.99 a pair. I'll let you how installation goes.yes the pinpoint am40 are the same as the Btech-77... -
Installing the Monitor 40s with the PinPoint AM40 went fairly easily, but I did end up needing to use screws (bottom only) to secure them, the side clamps were not enough.
The manual does tell you to use the screws as well, actually, it tells you to use 5 screws (3 bottom 2 sides), then gives you 3 screws each (6 total).
It is very secure now, and I have no worries about the speakers staying up there, and in place.
If anyone is interested, I did take pictures of the whole process. -
Eric Preston wrote: »Installing the Monitor 40s.......
If anyone is interested, I did take pictures of the whole process.
yes, please post. -
yes, please post.
X2, I am very excited to see how this turned out since I have always wanted to wall mount my 40's, just never got around to it, lol.
-JeffHT Rig
Receiver- Onkyo TX-SR806
Mains- Polk Audio Monitor 70
Center- Polk Audio CS2
Surrounds- Polk Audio TSi 500's
Sub- Polk Audio PSW125
Retired- Polk Audio Monitor 40's
T.V.- 60" Sony SXRD KDS-60A2000 LCoS
Blu-Ray- 80 GB PS3
2 CH rig (in progress)
Polk Audio Monitor 10A's :cool:
It's not that I'm insensitive, I just don't care..
-
OK, here goes...
1st the old Panasonic HTiB rear surround on a 3-point mount (forget the name) compared to the new Polk Monitor 40 on PinPoint AM40.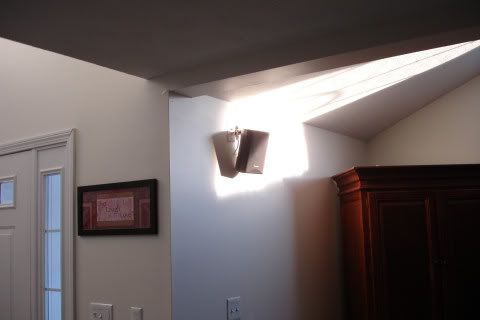
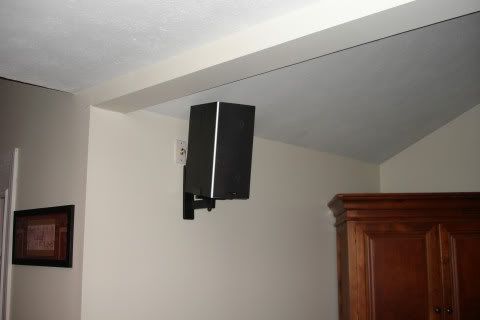
That is the rear vaulted area of a 15x25 room (last 7 are vaulted).
Before you start, you'll need to measure the clearance from the ceiling, as well as any walls or other things you may be near. Since the bottom of the mount is around 4'' lower than the speaker, you'll need to give the speaker's clearance, plus the mount, and then if the speaker will be on an angle, you'll need to factor that in too. Mine were about 21'' down from the top of ceiling. (I'll need to double check these measurements when I get home)
The tools used.
Fine point sharpie, 3/4 inch wrench, medium Philips head screwdriver, power drill (used 2 different sized bits for the different screws and a Philips head bit too), level, stud finder, a small tape measure, and for those who care about their vision, safety glasses.
Remove the old mount, cut deeper holes for the putty to take, and putty over the holes. You probably don't have to do this, but I took pictures so I'm using them.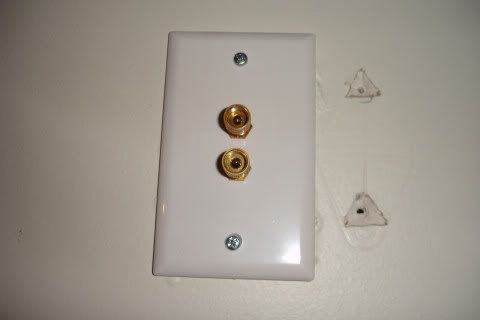
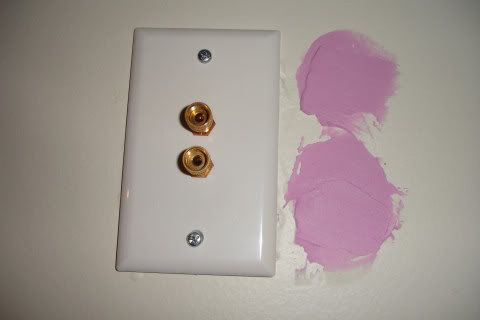
This is a damn heavy speaker, so you need to go into a stud. Find the stud and make sure the mount is as centered as you can get because the screw holes are staggered, and you'll need all of them to be in the stud.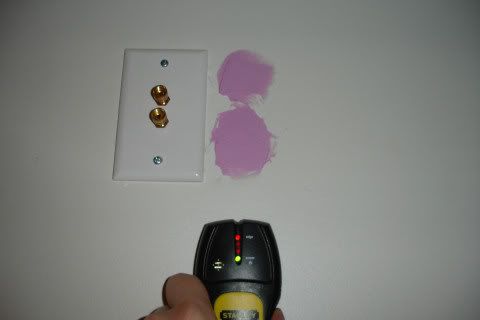
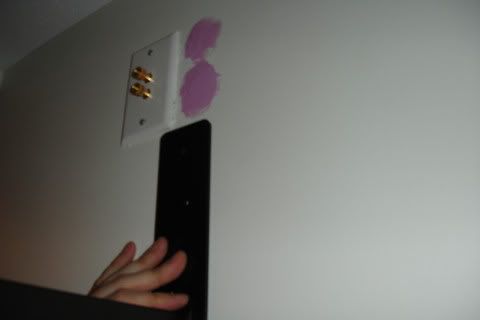
Make sure it's level, then mark the screw holes.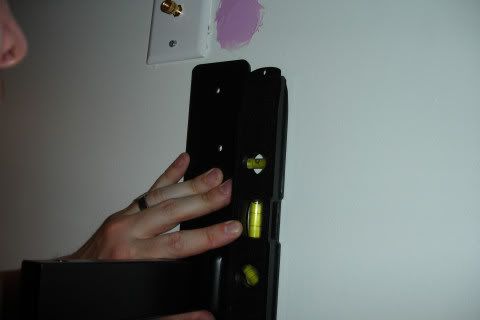
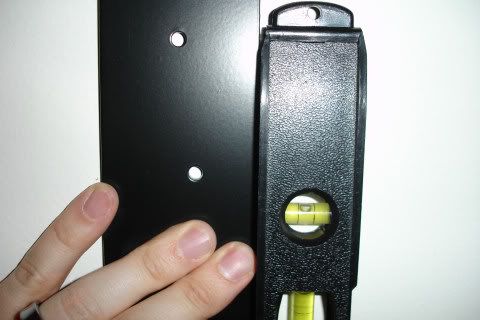
Drill in the lead holes as deep as you can, these are thick screws and don't go in easily. Place the mount back on the wall, lining up the screw holes, and secure it down, then put on the cover (this needs to be done before you put the rest together).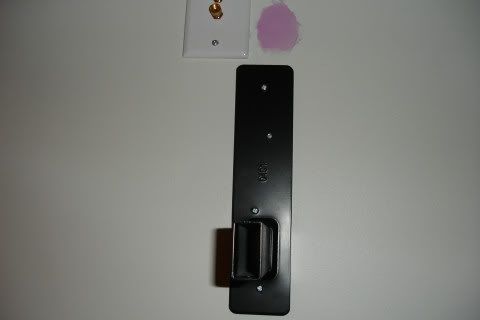
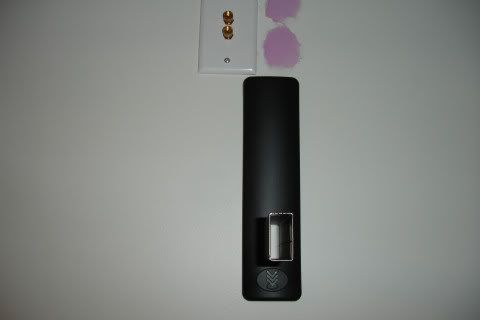
For the next part, the actual bracket that goes on the speaker, first you place the stickers on each side, be careful to match them up in the middle because anything hanging over isn't going to look good.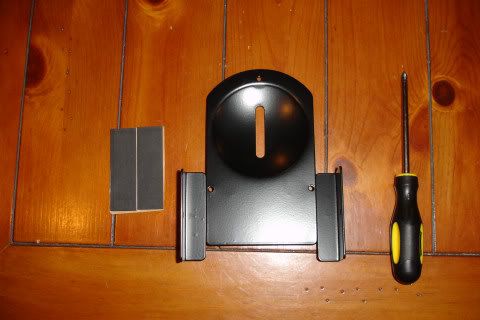
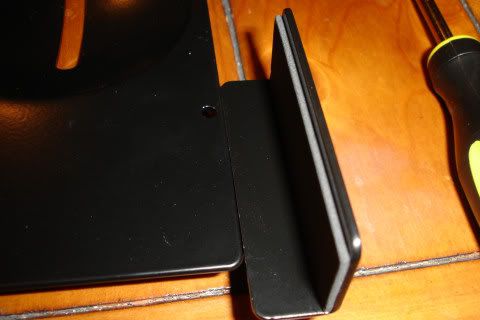
The Monitor 40s are 7'' across, so I unscrewed the brackets and measured out 7 1/2 so I could fit it back in easily, but not have to screw to much in while holding the speaker up. Also, you can tighten each side, but if you will not be able to get to one side after putting the speaker up, you may want to have that side set before putting it up, and the side that you will be **** in out more.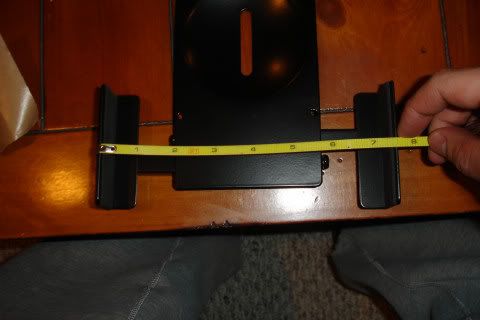
Then you place the plastic piece that the bracket lays on in place, lining up the hole for the bolt. Place the bracket over this, and then feed the bolt through the top till it comes out the bottom, push the washer up on the bottom, and screw in the nut (which has a rubber stopper ring). You want it to be fairly tight now, but not completely tight because this is what used to aim the speaker, so you'll need it to have a little play.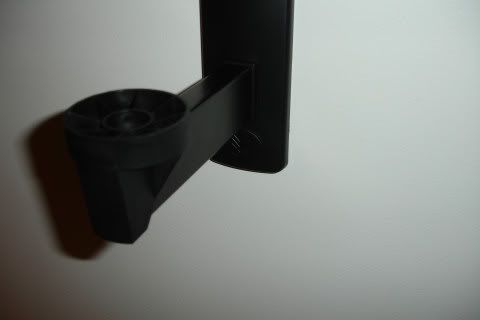
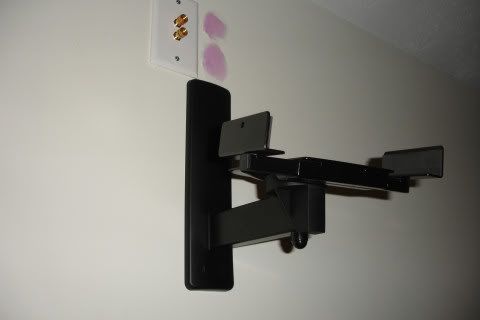
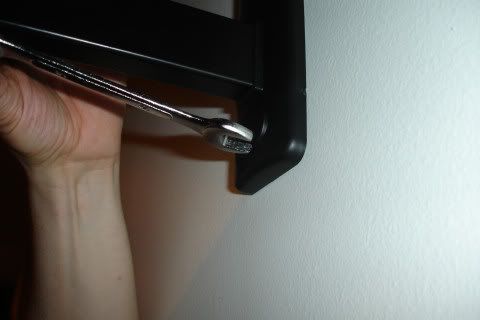
You may want to put the speaker wire into the speaker now, instead of trying to get around the back once it's up. Then you place the speaker up on the bracket, being careful not to fold in the stickers, and screw the sides in as tight as you can without stripping them or cracking the speaker case.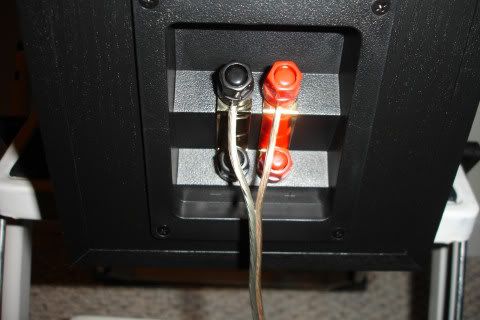
This is a long speaker, so it will need to be set forward on the bracket, I only had about 3/4 of an inch from the back of the bracket to the very back of the speaker.
This will make it fall forward a bit, and is why I needed to use the securing screws because the back of the speaker was coming off the bracket, and didn't seem secure enough to just leave as is. Drill small lead holes in the speaker (I know), do not drill all the way through the bottom, about 1/2 inch is enough, hold the speaker down to the bracket while doing this. Then screw all the bottom screws in until the stop and the bracket is tight to the speaker.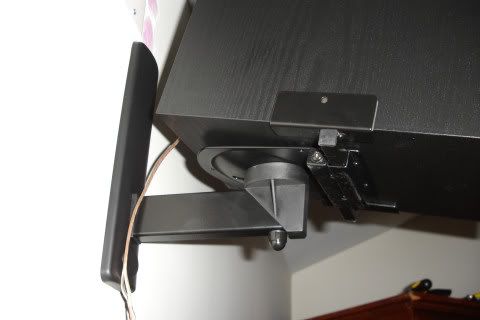
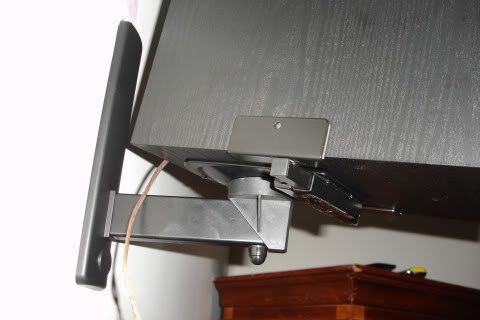
In the 'manual' they say to use 5 securing screws, but only give you 3 each. I side ones anyway, as they aren't needed and 2 big holes on the sides would make any resale harder a bit harder.
Now you just put the other end of the speaker wire in, point it at the listening position, and enjoy...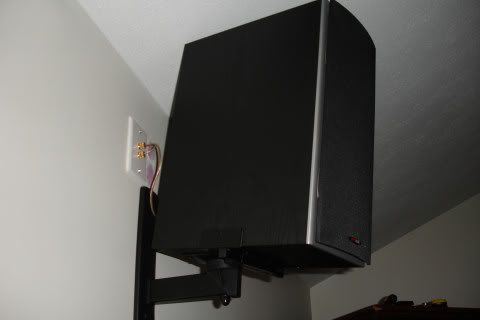
It would have been good if they included padding stickers for the bottom as the did for the sides, and I may get some thin acoustic dampening material for this at a later date, but haven't noticed much pass through to the wall yet. -
Thank you sooo much for posting with all the detailed steps!!
-
Yeah, thanks a lot. Damn firewalls at work are blocking the pics. but I will def. check them out when I get home. Can't wait to see what they look like.
-JeffHT Rig
Receiver- Onkyo TX-SR806
Mains- Polk Audio Monitor 70
Center- Polk Audio CS2
Surrounds- Polk Audio TSi 500's
Sub- Polk Audio PSW125
Retired- Polk Audio Monitor 40's
T.V.- 60" Sony SXRD KDS-60A2000 LCoS
Blu-Ray- 80 GB PS3
2 CH rig (in progress)
Polk Audio Monitor 10A's :cool:
It's not that I'm insensitive, I just don't care..
-
Great job on the step by step!
Thank you very much.Home Theater
Polk RTi8
Polk Monitor 40
Polk CSi5
Polk MicroPro 2000
Visio 42 LCD
Denon AVR 790
Samsung BD 1600
Two Channel
Polk SDA 2B -
No problem. Sorry for all the grammatical issues. I was planning to go back and correct those after I posted, but got pulled away and I guess they don't let you edit after a certain amount of time. Oh well, you live you learn.
-
LOL, edit option goes away after 5 minutes.
-JeffHT Rig
Receiver- Onkyo TX-SR806
Mains- Polk Audio Monitor 70
Center- Polk Audio CS2
Surrounds- Polk Audio TSi 500's
Sub- Polk Audio PSW125
Retired- Polk Audio Monitor 40's
T.V.- 60" Sony SXRD KDS-60A2000 LCoS
Blu-Ray- 80 GB PS3
2 CH rig (in progress)
Polk Audio Monitor 10A's :cool:
It's not that I'm insensitive, I just don't care..
-
Here's a bonus pic that I was going to post on the edit.
Tools needed.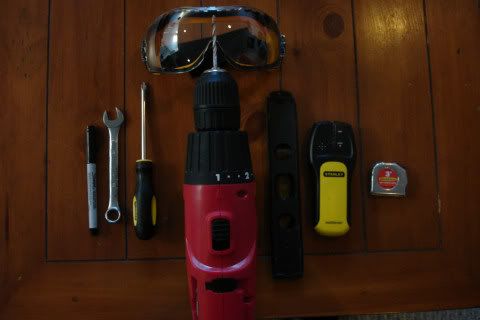
OK, unless there are any questions, that will do it for this step-by-step. -
Eric Preston wrote: »Here's a bonus pic that I was going to post on the edit.
OK, unless there are any questions, that will do it for this step-by-step.
Firstly thank you for that step by step. I have been searching high and low for some way to wallmount the Monitor 40's. My only question is this. Instead of drilling holes (albeit small ones) in the speaker to keep it from falling down could you have instead used velcro on the bottom of the stand and again on the speaker to secure it? I am deathly afraid of **** up and destroying the speaker.
Other than that it seemed to make completely logical sense to me."....not everything that can be counted counts, and not everything that counts can be counted." William Bruce Cameron, Informal Sociology: A Casual Introduction to Sociological Thinking (1963) -
What about unscrewing one of the four screws that hold the terminal cup in, making some type of "L" bracket and using a longer screw on the terminal cup. That way you are using an existing hole, no new holes, and can attach the speaker to the wall mount.
-
What about unscrewing one of the four screws that hold the terminal cup in, making some type of "L" bracket and using a longer screw on the terminal cup. That way you are using an existing hole, no new holes, and can attach the speaker to the wall mount.
I would think that would create some problem with grounding out the signal and you couldnt do it if you happened to be bi-amping/bi-wiring the speakers.
Plus thats just a whole lot more work than some velcro lol....."....not everything that can be counted counts, and not everything that counts can be counted." William Bruce Cameron, Informal Sociology: A Casual Introduction to Sociological Thinking (1963) -
Thank You.
Now I just need the WAF to put mine on the wall.
Paul -
EndersShadow wrote: »I would think that would create some problem with grounding out the signal and you couldnt do it if you happened to be bi-amping/bi-wiring the speakers.
Plus thats just a whole lot more work than some velcro lol.....
I don't mean the 5 way binding posts.
I'm talking about one of these black screws in the corners of the terminal cup:
They do not conduct anything. They are wood screws that keep the terminal cup attached to the back of the mdf of the speaker.


