Monitor XO build.
Esreuter
Posts: 176
Evening forum,
Well I spoke about it, wished it and now did it. I am almost done with my monitor XO mods.
I would like to take the readers through the process, so that if any of you people sitting on the side lines, nervous to take your speakers apart, I say unto you, do it the rewards are worth it.
I would also like to thank all of you on the forum, though your posts, photos, and experiences I have researched and gathered a small working knowledge of internal speaker workings.
I dont understand the read outs and all the gadgets used to make the sine waves you guys always talk about but i do have my own two ears and i have learned to trust them.
Lets begin, why up grade monitors? why not invest in amps or RTI?
My logic is based on a goal, I know that I will be taking the leap to the LSI series in about 4-5 years, hey they might even be cheaper then, so I wanted to practice mods first on a pair of less expensive speakers. I will be adding and amp but i already know how to hook up wires to that.
Also many folks say dont upgrade unless you are going to keep the speakers for a while, in my book 5 years is a while.
The move to RTI would be a waste, as I am planning on the LSI series, not the new M, the now older ones.
Finally I wanted to hear what really happens when parts are changed out, you guys talk about it all the time and all i could do is wonder what really happens, now I know.
I still lack detailed comparison in after market parts, but now i can hear the difference between stock electrolytic caps verus poly, metal resistors versus wire wound, and larger air core inductors versus a metal core inductor.
Decisions decisions.
the way I approached my decision on what parts to buy was governed by budget and experience, more so experience.
the parts chosen to replace stock parts are: Clarity caps PX, Solen perfect lay inductors, mundorf 10 watt metal ox resistors and 16awg wire and silver and tin solder.
Like above, i chose the PX line and the 10 resistors because this is my first ever go at a XO build, I wanted to be able to replace the parts I might break in the process. Plus there is no need for a first time build to get MR grade or ESA grade caps. I have developed a clarity cap bias huh?
the process and the learning curve.
Every XO I build gets better and tighter along the way. I started with one of my surrounds an M40, and man was it a mess. I did not take photos of this as I was a bit worried I could complete the process. I had measured the peg board and laid the parts out in a logical manner but it was the soldering on the inductors that was getting to me.
Well learning opportunity #1 I never knew there was a coating on the inductor wire that must be removed before contact can be made, I still dont know what this coating is but i scraped it off and then was able to get a reading on my meter and get my joints to take a solid solder.
Now this may be common knowledge to seasoned tinkerers, but I mention my faux pas to save others time and problem solving frustration. Here is a macro of the copper and the red cover scratched away, copper good, red has its purpose which is not connectivity.:cheesygrin::cheesygrin::cheesygrin:

second learning opportunity, going with the biggest AWG wire is not always needed or the best. This actually cost me 20 bucks from parts express. i always had a old mindset i am recently coming to terms with, biggest is the best and buy in bulk.
I didnt buy bulk speaker wire, just an example of my old mindset is, why buy a pound of meat for 5$ when i can buy 5 pounds for 7.50? i used to do that, then use a pound and end up throwing the rest out. i have since learned to buy what you need and thats it. Same concept in the AWG department get the size you need and maybe one more size up. Stock inside is 18 guage, light and easy to work with, plus the longest run i made was inside the monitor 70 at 40" long at that distance and with the power i am running the resistance is not an issue.
But I tried to nuke it, again no photos of this, sorry i was fretting and stressed about breaking leads ruining my speakers, I use 12 awg and man it was heavy, hard to tin the end with out melting the shield and when i put it on the poor connection on the XO i could see the stress.
Well long story short, I now have a spool of 12 awg for spare. After some research about the resistance of X awg wire at X foot lengths i figured 18 was fine for the short amounts i was using and could save a buck by just reusing the internal wire with the cabinet, however this story ends with the tweaker getting the best of me, with better knowledge from the above mentioned mistake, i ended up ordering a spool of 16 awg and going with that. what a relief, smaller, easier to work with and a lil larger to make me feel i did something for the good of mankind.
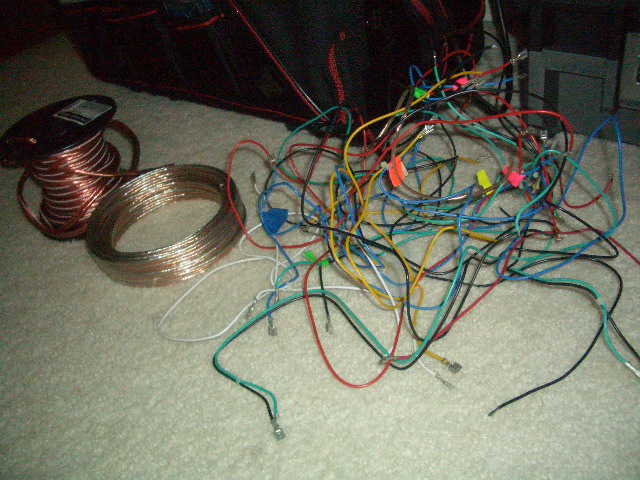
there you have the old internal, the solution 16awg and the mistake 12 awg.:rolleyes::rolleyes::rolleyes: live and learn.
You all should know that with these little mistakes i was sweating bullets, thought i ruined my speakers and wasn't sure to continue on or should I call polk and order a new XO. This isnt a cancer battle i know, i am reffering to that feeling of regret when things are not going well. Just have to push on though and make sure to learn from your mistakes.
With the wire size solving many issues, I felt i was on my feet, and got to rockin. Measured and cut out the peg board, did a mock up of the parts and the best logical order to place and make connections.
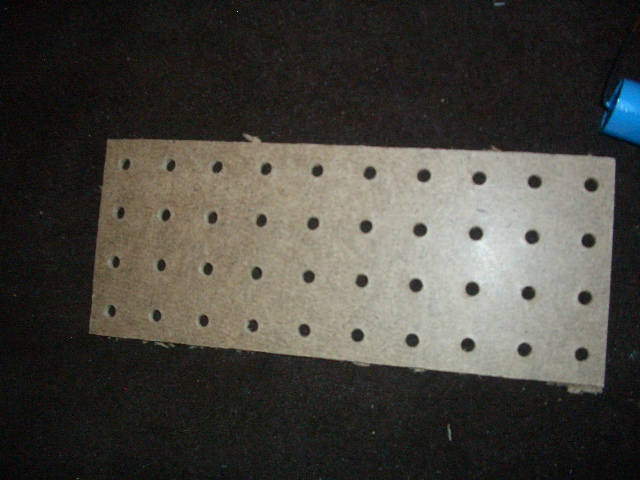
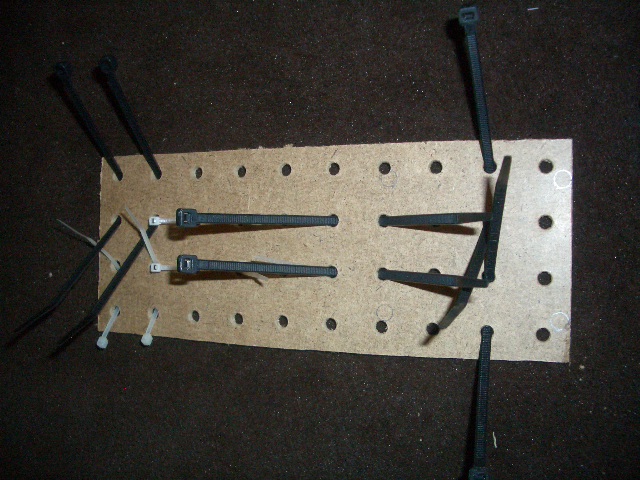

i just now realized i didnt take photos of the placement mock up and the working mock up when the XO was connected, forgive me.
during this phase of working mock up on my center channel I hit another stumbling block. I though i fried my speaker, and those old sinking feelings of sweat and dread crept back into my brain. A simple error on my part when tracing the circuit on the board.

Anybody see the problem?
Yuppers, I somehow when i drew up the circuit put the lead for the woofers after the cap, thus i had made my center channel into a large 3 driver tweeter! oi. Now, luckily i hadnt soldered yet, this mess up boggled me for a hour or so until i went back to the original circuit board and finally caught my mistake. Easily remedied and also never made the same mistake again. The best thing from this experience is I have now built 7 XOs and by the 3rd one i was really in a groove and could know that low end must come off an inductor and high end must come off a cap, in my speakers case.
Once i got my groove back it was on, and let me say the M70 XO was a joy to build and heavy. I researched proper inductor placement and distance and made the best compromise that space would allow. I have not heard cross talk or have measured any spilling inductance between my coils.
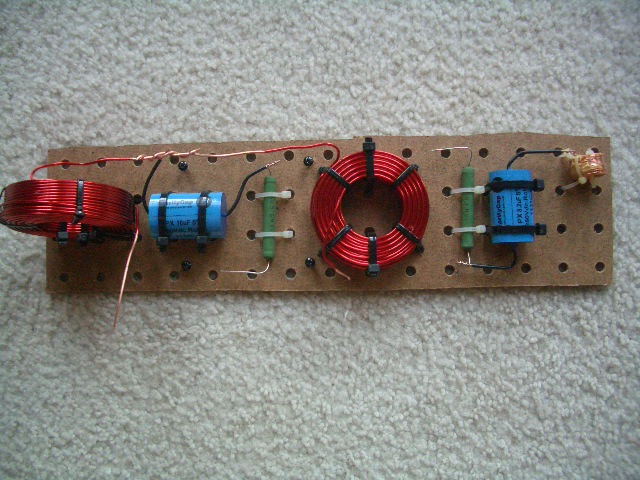
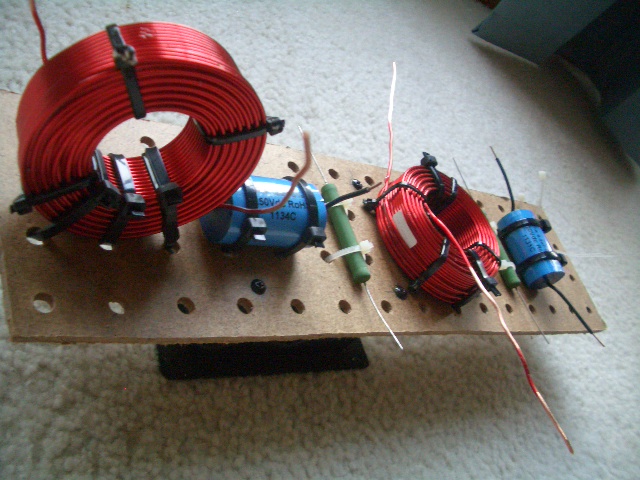
now if you see any thing that needs work, I am here to learn and take notes so please tell me. Bad connections, bad layout or any issues you might see. I will not take offense.
I chose to use zip ties simply because i have million of them around the house and from work so a big money saver when having to buy a hot glue gun and glue. Maybe later i can get a gun, if some one trusts me enough to do some stuff for them.:cool::cool::cool:
anywho, moving on here are some solder joints, from my experience these should not be cold joints, nice and sturdy and the solder flows.

A thought here, do any of you guys tin your wire ends before you make the connection to the XO parts? i found it makes life easier when connecting parts.

here is the completed XO fresh from Dr. Frankenstein's lab ready to go back in the M70. Again I am looking for notes here so please share.
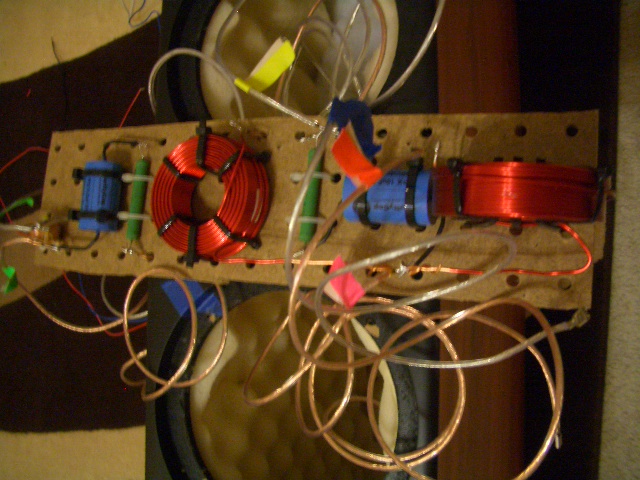
putting the XO back in was a nerve racking experience, watching wires connections trying not to break anything OI oi oi. but slow and sure it all fits into place. surprisingly, hitting the screws into the plastic cup was incredibly easy, i thought this would be the hardest part but no, they matched with ease.
Well after all those rebuilds and learning opportunities you would think i am mistake free right? haa I am human. one silly mistake again.
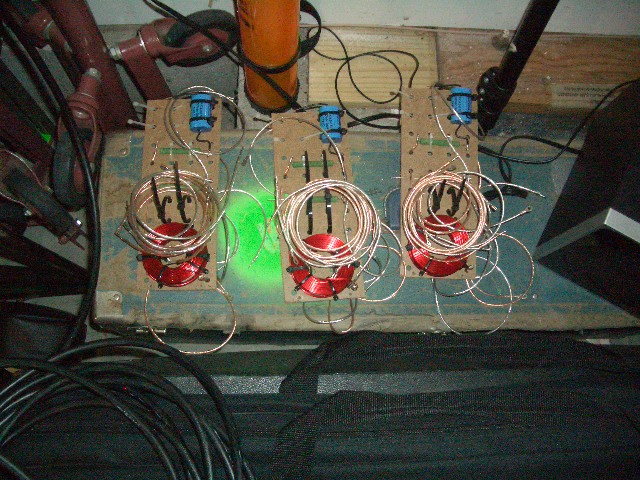
look at them, pretty little maids all in a row, do they work? hell no! see something missing?
yeah, so when you decide to embark on your XO mod, even after checking your order several times, make sure you order parts for all speakers.
I got confused! I read my order for M40s parts as my center channel parts and only ordered 1 cap, not all 4! so there they sit.
so tonight I give to you my XO build experience and tomorrow the caps will arrive and all will be right in the kingdom of heaven.
Well folks thats my experience. I will talk specifics about parts in another post and then we can all discuss sound quality and differences between stock and modded parts.
Bottom line is, if your on the sidelines thinking should I break my speakers open or not? will i break them? oh jeeze. well, let me say this is one of the more rewarding experiences for a project. time and money invested pays off dividends!! Do it!!:cool::cool::cool:
good night and good luck
ESR:twisted::twisted::twisted:
Well I spoke about it, wished it and now did it. I am almost done with my monitor XO mods.
I would like to take the readers through the process, so that if any of you people sitting on the side lines, nervous to take your speakers apart, I say unto you, do it the rewards are worth it.
I would also like to thank all of you on the forum, though your posts, photos, and experiences I have researched and gathered a small working knowledge of internal speaker workings.
I dont understand the read outs and all the gadgets used to make the sine waves you guys always talk about but i do have my own two ears and i have learned to trust them.
Lets begin, why up grade monitors? why not invest in amps or RTI?
My logic is based on a goal, I know that I will be taking the leap to the LSI series in about 4-5 years, hey they might even be cheaper then, so I wanted to practice mods first on a pair of less expensive speakers. I will be adding and amp but i already know how to hook up wires to that.
Also many folks say dont upgrade unless you are going to keep the speakers for a while, in my book 5 years is a while.
The move to RTI would be a waste, as I am planning on the LSI series, not the new M, the now older ones.
Finally I wanted to hear what really happens when parts are changed out, you guys talk about it all the time and all i could do is wonder what really happens, now I know.
I still lack detailed comparison in after market parts, but now i can hear the difference between stock electrolytic caps verus poly, metal resistors versus wire wound, and larger air core inductors versus a metal core inductor.
Decisions decisions.
the way I approached my decision on what parts to buy was governed by budget and experience, more so experience.
the parts chosen to replace stock parts are: Clarity caps PX, Solen perfect lay inductors, mundorf 10 watt metal ox resistors and 16awg wire and silver and tin solder.
Like above, i chose the PX line and the 10 resistors because this is my first ever go at a XO build, I wanted to be able to replace the parts I might break in the process. Plus there is no need for a first time build to get MR grade or ESA grade caps. I have developed a clarity cap bias huh?
the process and the learning curve.
Every XO I build gets better and tighter along the way. I started with one of my surrounds an M40, and man was it a mess. I did not take photos of this as I was a bit worried I could complete the process. I had measured the peg board and laid the parts out in a logical manner but it was the soldering on the inductors that was getting to me.
Well learning opportunity #1 I never knew there was a coating on the inductor wire that must be removed before contact can be made, I still dont know what this coating is but i scraped it off and then was able to get a reading on my meter and get my joints to take a solid solder.
Now this may be common knowledge to seasoned tinkerers, but I mention my faux pas to save others time and problem solving frustration. Here is a macro of the copper and the red cover scratched away, copper good, red has its purpose which is not connectivity.:cheesygrin::cheesygrin::cheesygrin:

second learning opportunity, going with the biggest AWG wire is not always needed or the best. This actually cost me 20 bucks from parts express. i always had a old mindset i am recently coming to terms with, biggest is the best and buy in bulk.
I didnt buy bulk speaker wire, just an example of my old mindset is, why buy a pound of meat for 5$ when i can buy 5 pounds for 7.50? i used to do that, then use a pound and end up throwing the rest out. i have since learned to buy what you need and thats it. Same concept in the AWG department get the size you need and maybe one more size up. Stock inside is 18 guage, light and easy to work with, plus the longest run i made was inside the monitor 70 at 40" long at that distance and with the power i am running the resistance is not an issue.
But I tried to nuke it, again no photos of this, sorry i was fretting and stressed about breaking leads ruining my speakers, I use 12 awg and man it was heavy, hard to tin the end with out melting the shield and when i put it on the poor connection on the XO i could see the stress.
Well long story short, I now have a spool of 12 awg for spare. After some research about the resistance of X awg wire at X foot lengths i figured 18 was fine for the short amounts i was using and could save a buck by just reusing the internal wire with the cabinet, however this story ends with the tweaker getting the best of me, with better knowledge from the above mentioned mistake, i ended up ordering a spool of 16 awg and going with that. what a relief, smaller, easier to work with and a lil larger to make me feel i did something for the good of mankind.

there you have the old internal, the solution 16awg and the mistake 12 awg.:rolleyes::rolleyes::rolleyes: live and learn.
You all should know that with these little mistakes i was sweating bullets, thought i ruined my speakers and wasn't sure to continue on or should I call polk and order a new XO. This isnt a cancer battle i know, i am reffering to that feeling of regret when things are not going well. Just have to push on though and make sure to learn from your mistakes.
With the wire size solving many issues, I felt i was on my feet, and got to rockin. Measured and cut out the peg board, did a mock up of the parts and the best logical order to place and make connections.


i just now realized i didnt take photos of the placement mock up and the working mock up when the XO was connected, forgive me.
during this phase of working mock up on my center channel I hit another stumbling block. I though i fried my speaker, and those old sinking feelings of sweat and dread crept back into my brain. A simple error on my part when tracing the circuit on the board.

Anybody see the problem?
Yuppers, I somehow when i drew up the circuit put the lead for the woofers after the cap, thus i had made my center channel into a large 3 driver tweeter! oi.
Once i got my groove back it was on, and let me say the M70 XO was a joy to build and heavy. I researched proper inductor placement and distance and made the best compromise that space would allow. I have not heard cross talk or have measured any spilling inductance between my coils.


now if you see any thing that needs work, I am here to learn and take notes so please tell me. Bad connections, bad layout or any issues you might see. I will not take offense.
I chose to use zip ties simply because i have million of them around the house and from work so a big money saver when having to buy a hot glue gun and glue. Maybe later i can get a gun, if some one trusts me enough to do some stuff for them.:cool::cool::cool:
anywho, moving on here are some solder joints, from my experience these should not be cold joints, nice and sturdy and the solder flows.

A thought here, do any of you guys tin your wire ends before you make the connection to the XO parts? i found it makes life easier when connecting parts.

here is the completed XO fresh from Dr. Frankenstein's lab ready to go back in the M70. Again I am looking for notes here so please share.

putting the XO back in was a nerve racking experience, watching wires connections trying not to break anything OI oi oi. but slow and sure it all fits into place. surprisingly, hitting the screws into the plastic cup was incredibly easy, i thought this would be the hardest part but no, they matched with ease.
Well after all those rebuilds and learning opportunities you would think i am mistake free right? haa I am human. one silly mistake again.

look at them, pretty little maids all in a row, do they work? hell no! see something missing?
yeah, so when you decide to embark on your XO mod, even after checking your order several times, make sure you order parts for all speakers.
I got confused! I read my order for M40s parts as my center channel parts and only ordered 1 cap, not all 4! so there they sit.
so tonight I give to you my XO build experience and tomorrow the caps will arrive and all will be right in the kingdom of heaven.
Well folks thats my experience. I will talk specifics about parts in another post and then we can all discuss sound quality and differences between stock and modded parts.
Bottom line is, if your on the sidelines thinking should I break my speakers open or not? will i break them? oh jeeze. well, let me say this is one of the more rewarding experiences for a project. time and money invested pays off dividends!! Do it!!:cool::cool::cool:
good night and good luck
ESR:twisted::twisted::twisted:
AVR: Sony 5600ES
Center: CS2II (Clarity Caps PX, Perfect Lay coil, Mundorf resistors)
Front: Monitor 70 II (Clarity Caps PX, Perfect Lay coils, Mundorf resistors)
Surrounds: Monitor 40 II (Clarity Caps PX, Perfect Lay coil, Mundorf resistors)
Rear Surrounds: Monitor 40 II (Clarity Caps PX, Perfect Lay coil, Mundorf resistors)
More to come :biggrin:
Post edited by Esreuter on
Comments
-
Finish what you started.
Well, this morning i bid good by to the M40 XOs, while waiting for UPS to deliver my caps.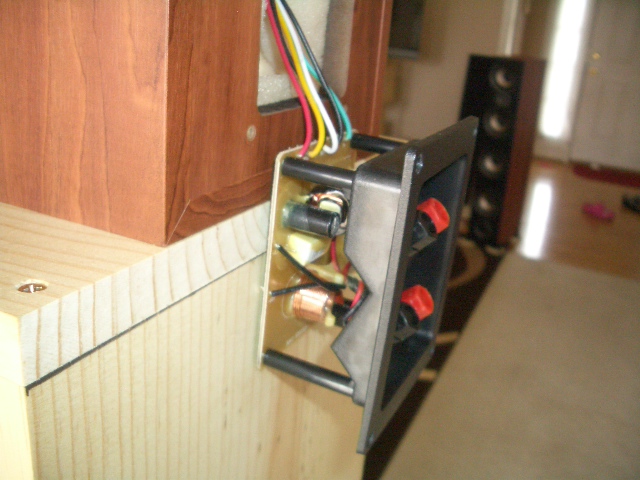
Things worked out perfectly, the UPS guy dropped off the caps before the solder iron was even cold, mounting up and finishing was a breeze from then on.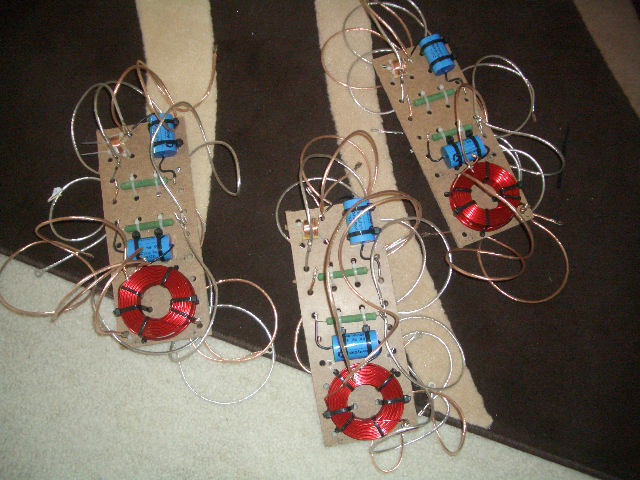
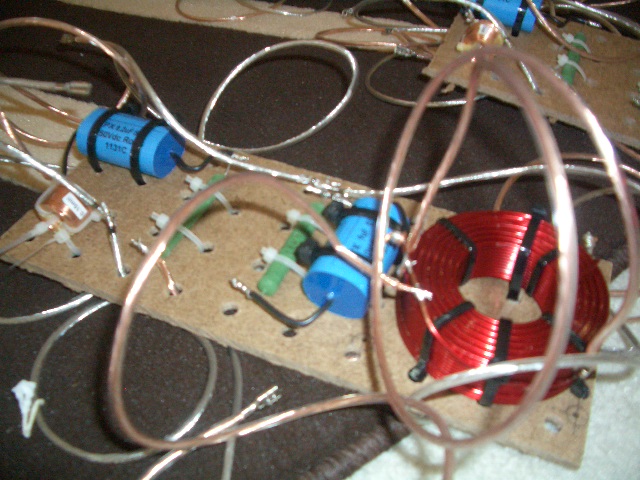
One of the 3, new XOs locked in place inside its new home.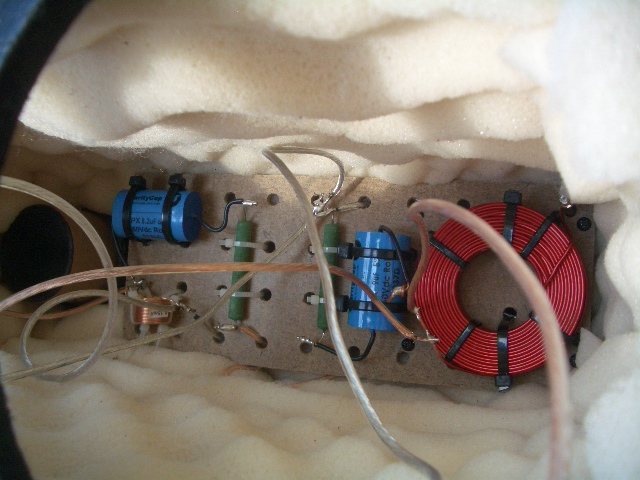
finally I put the M40s on top of the 70s and let em wail for about an hour. there were no problems to report. I must comment on the dynamic little speaker the M40s are, the filled the room with great sound, I was shocked when i got to hear them cranked up.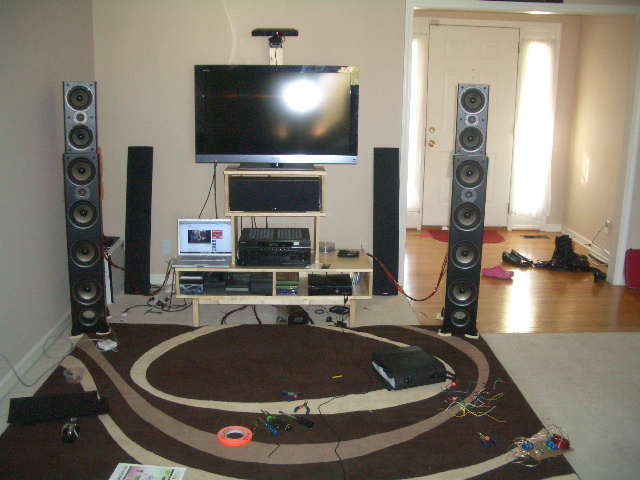
well, all XOs are built, installed and working. Let me say this, what a rewarding experience. It all began saturday when i tore apart my CS2 and started to sweat bullets as i pried the tweeter inductor off the circuit board, I was not able to work on it everyday but finally I closed the project today. I have been listening to everything under the sun at volumes all over the scale, give me a few days to really soak in the sound and i will write about the improvments. I did do one speaker at a time and then played them live to hear the difference and it was remarkable, a great speaker just got better.
ESR:cheesygrin:AVR: Sony 5600ES
Center: CS2II (Clarity Caps PX, Perfect Lay coil, Mundorf resistors)
Front: Monitor 70 II (Clarity Caps PX, Perfect Lay coils, Mundorf resistors)
Surrounds: Monitor 40 II (Clarity Caps PX, Perfect Lay coil, Mundorf resistors)
Rear Surrounds: Monitor 40 II (Clarity Caps PX, Perfect Lay coil, Mundorf resistors)
More to come :biggrin: -
For those of you with the same rig as mine and wanting to do a upgrade here is a list of parts you will need:
CS2II
.8MH inductor .20R
.2mh inductor, i dont know DCR the stock is air core so i just used it.
8.2uf cap
10uf cap
5.7 resistor
M70II
1.3mh inductor .25R
.8mh inductor .20R
.2mh inductor, again stock is air core so i used it.
1ohm resistor
5.7 resistor
8.2uf cap
10uf cap
M40II
.15mh inductor, see above about stock inductors.
1.2mh inductor .25r
8.2 uf cap
9.1uf cap
1ohm resistor
1.2 resistor
if you only order speaker wire once and get all your caps and parts at once the total bill will be around 350$ that is including solder and the peg board from lowes.
i cant make any comparisons on after market caps, but i seem to have devloped a bias toward clarity caps from the buzz around this forum and also the humble homemade hifhi capacitor shoot out, for entry level caps the clarity caps PX was given 7.5 on the scale, which outranked other caps such as: erse, solen and dayton caps. So i give them my whole support.
I wasnt able to find much in the way of reviews on the Mundorf resistors specficaly but i have learned along the way the the metal oxide film type resistors are better than the stock ones that come with the speakers. I cant comment on MOX versus wire wounds like the mills but give me sometime to hear the different types. This was a price thing too, I figured i could cut costs of 4.15 to 2.50 per resistor and being this is my first go, why not? The mundorf has improved the sound in my speakers though so i give em a thumbs up for 2.50.
Inductors were a price point thing, that and finding a match to the specs i needed. so i could have gotten away with a copper foil inductor but again i based the decision on this is my first experience and if i could save a few bucks here and there it would be beneficial. I do support the solens, again i have nothing but the stock for comparison but they are wound and bonded very well.
Well thats how i chose my parts, I hope i didnt violate anything by posting the specs, if i did i apologize in advance. Again if your wishing to upgrade your monitor II's go for it! you will like the results.
ESR:cheesygrin::cheesygrin::cheesygrin:AVR: Sony 5600ES
Center: CS2II (Clarity Caps PX, Perfect Lay coil, Mundorf resistors)
Front: Monitor 70 II (Clarity Caps PX, Perfect Lay coils, Mundorf resistors)
Surrounds: Monitor 40 II (Clarity Caps PX, Perfect Lay coil, Mundorf resistors)
Rear Surrounds: Monitor 40 II (Clarity Caps PX, Perfect Lay coil, Mundorf resistors)
More to come :biggrin: -
Looookin good!
 - Not Tom ::::::: Any system can play Diana Krall. Only the best can play Limp Bizkit.
 -
Thank you much Vr3m, coming from you that means alot to me.
only problem is, i dont have other speakers to keep practice on.
maybe raid the neighbors and convince them for some resistor and cap changes.:evil:
ESR:cheesygrin:AVR: Sony 5600ES
Center: CS2II (Clarity Caps PX, Perfect Lay coil, Mundorf resistors)
Front: Monitor 70 II (Clarity Caps PX, Perfect Lay coils, Mundorf resistors)
Surrounds: Monitor 40 II (Clarity Caps PX, Perfect Lay coil, Mundorf resistors)
Rear Surrounds: Monitor 40 II (Clarity Caps PX, Perfect Lay coil, Mundorf resistors)
More to come :biggrin: -
Good job! Posts like this help to ease others anxiety about attempting these kinds of mods."Science is suppose to explain observations not dismiss them as impossible" - Norm on AA; 2.3TL's w/sonicaps/mills/jantzen inductors, Gimpod's boards, Lg Solen SDA inductors, RD-0198's, MW's dynamatted, Armaflex speaker gaskets, H-nuts, brass spikes, Cardas CCGR BP's, upgraded IC Cable, Black Hole Damping Sheet strips, interior of cabinets sealed with Loctite Power Grab, AI-1 interface with 1000VA A-L transformer
-
The sound.
Well, that was the reason for embarking on this journey, to maximize my speakers potential.
During the mod process I completed on speaker at a time so I have something to compare to and now have been enjoying the results over the past few days. Here are my thoughts and experiences.
First off, the most notable change when comparing modded to the stock speakers is a balance act. I mean all the sounds cleaned up and play together well. there is not to much bass or to much mid range and the highs are mellowed out and balance with the rest.
I noticed this immediately when i reassembled my first m40, it was in surround back duty but i simply switched the wires up at the AVR and ran the two as mains, I was watching king of the hill and the difference in peggy hills voice from one speaker to the next was very noticeable. the Stock sounded good but with a bit of brightness in the highs and the modded 40 was just in balance with its self and stood out pleasantly. this is true for each speaker as i went around the system. the m70s especially, just snapped them into balance with its self.
second, as i mentioned above is the harshness of the tweets, every now and then i could get some high highs, not ear wrenching but just the sound that makes your ears go meh. As i went around the system I noticed in each modded speaker the highs were very present but lest biting to the eardrum now they are very pleasant. Even at loud volumes the highs are just a great experience.
3rd, details.
I am hearing tiny details i never heard before. For example watching net videos AVGN to be exact, he is consistent in his production methods and posting at the same sample rate on his videos so now when i listen to him i can hear the quality of his microphone, the echo of the room and many other tiny things never apparent before. Same goes for movies and music, gun shots, background noises people in the background suddenly have a voice. Music I can just enjoy hearing it closer to how the mixer wanted me to, i believe. there are many tiny details brought out in many songs i never heard before. as far as details this was worth it.
4th apparent size,
Yes, my speakers seem bigger than what they really are. no not just because i am cranking them in these last few days i can actually hear it when i placed the modded speaker back into its position, the modded seem to spill sound and over power its stock brother.
now that all speakers are done, it really is impressive to hear them work. I measured with my sound meter but didnt need to recalibrate as there was no a change in SPL, however everything is just bigger!
the best sensation of this is I played medal of honor airborne, i think the sound really drives those game home, hearing the war around you really immerses you into it. Anyways, everything was just great, guys yelling, gun shots, shrapnel oooooofff! All speakers just sound like bigger versions of themselves.
5th, clarity
these speakers were good to begin with but now they are on a better plane. by clarity i am talking about how each sounds comes out of the speaker. when listening to music the beat the kick drum is that exactly a kick drum, dun, dun, dun, dun with no rumble between each kick.
At first i thought i have zapped my bass away but it turns out before there were sounds that would mud together. After the mod there is clarity between sounds.
I tested the bass with good ole 2 live crew, its all there just cleaner.
highs, the same, less harsh on the ear but very strong and wonderful sound, rock music, cymbals each hit is separate. the blaster fire in starwars is crisp and clear. R2D2 noises are very clear and not ear piercing.
the mid range woke up, its not over powering but it now commands attention saying I am here now! before it was more subdued. Techno music with all its crazy sweeps really brings out the mid range and of course the human voice is very clear and punctual. Han solo, very clear and pleasing. Henry hill in good fellas and and Leo dicaprio and Daniel Daylewis in Gangs of new york, both films heavy on the dialog, really let the mid range shine, and the voices are just crisp and clear.
So, after all the sweat, mistakes and good times was it worth 375$? Yes. in sound gains and personal gains this was money well spent and I hear the caps and resistors have a break in time so things will only get better.
So there you have it, Monitor series II upgrades, thanks for coming on my journey.
ESR:loneranger::loneranger::loneranger:AVR: Sony 5600ES
Center: CS2II (Clarity Caps PX, Perfect Lay coil, Mundorf resistors)
Front: Monitor 70 II (Clarity Caps PX, Perfect Lay coils, Mundorf resistors)
Surrounds: Monitor 40 II (Clarity Caps PX, Perfect Lay coil, Mundorf resistors)
Rear Surrounds: Monitor 40 II (Clarity Caps PX, Perfect Lay coil, Mundorf resistors)
More to come :biggrin: -
Holy Cow!! What an experiment....
Not sure if I would want to tackle something like that just coming into the POLK realm...
Great little Frankenstein you got there....
Maybe after I have had mine for a little bit I would venture into something like this....
Bama -
Don't you worry Mark.
I am not trying to sell you anything.
I went all out because I wanted to have the experience of the improvements and the building of the xo.
A typical xo upgrade is just the capacitors and resistors, there is no ruby idling on peg board or wire replacement it's all done on the stock circuit board.
Plus the cost can be a few bucks to the thousands, your in control.
In my mod the most expensive cap was the 10uf at 8.10$ plus shipping but there are good brands of caps out there for 2 to 3$ each, that can be used as well.
The resistors were 2.50$ each, so my point is, the day yAVR: Sony 5600ES
Center: CS2II (Clarity Caps PX, Perfect Lay coil, Mundorf resistors)
Front: Monitor 70 II (Clarity Caps PX, Perfect Lay coils, Mundorf resistors)
Surrounds: Monitor 40 II (Clarity Caps PX, Perfect Lay coil, Mundorf resistors)
Rear Surrounds: Monitor 40 II (Clarity Caps PX, Perfect Lay coil, Mundorf resistors)
More to come :biggrin: -
Don't you worry Mark.
I am not trying to sell you anything.
I went all out because I wanted to have the experience of the improvements and the building of the xo.
A typical xo upgrade is just the capacitors and resistors, there is no cutting peg board or wire replacement it's all done on the stock circuit board.
Plus the cost can be a few bucks to the thousands, your in control.
In my mod the most expensive cap was the 10uf at 8.10$ plus shipping but there are good brands of caps out there for 2 to 3$ each, that can be used as well.
The resistors were 2.50$ each, so my point is, the day you are ready to mod, your incontrol of the price and the benifits are well worth it.
Check around the forums you will see plenty of xo mod threads, most of which inspired me to do mine, you will see its a simple process.
I just hope I get the opportunity to do it for you.
Thanks for reading
EsrAVR: Sony 5600ES
Center: CS2II (Clarity Caps PX, Perfect Lay coil, Mundorf resistors)
Front: Monitor 70 II (Clarity Caps PX, Perfect Lay coils, Mundorf resistors)
Surrounds: Monitor 40 II (Clarity Caps PX, Perfect Lay coil, Mundorf resistors)
Rear Surrounds: Monitor 40 II (Clarity Caps PX, Perfect Lay coil, Mundorf resistors)
More to come :biggrin:
