JB Welding RTA 12b drivers - question.
Escher
Posts: 41
Been reading up on things prior to my upcoming recap job...
Since I will have the drivers out anyways - should I just go ahead and jb weld these while I'm at it?
I assume its just the joint between the magnet and the basket, correct? I haven't seen a good close up of the mod yet. Just give it a dab every 90 degrees around the perimeter?
Since I will have the drivers out anyways - should I just go ahead and jb weld these while I'm at it?
I assume its just the joint between the magnet and the basket, correct? I haven't seen a good close up of the mod yet. Just give it a dab every 90 degrees around the perimeter?
Post edited by Escher on
Comments
-
As long as they are out why not? One day when you move them, and just the right "jarring" will freeze up a driver. Then you will have to do more then just apply JB weld

All of the failures that "I" have experienced, were from the magnet to the front plate and the back plate to the magnet. I have not encountered the basket coming away from the front plate. I have read where some people have.
I apply JB weld at four positions at 90 deg intervals, on both the front and back of the magnet. This will secure the magnet to the front plate, and the rear plate to the magnet. Since reading about the failures of the front plate and basket, I think that I will start applying adhesive at that location as well. What could it hurt, another 15-20 minutes of time applying the mixture?
Good luck with your project! -
This thread has some of the best posted closeups, and a discussion of where to put the JB Weld. http://www.polkaudio.com/forums/showthread.php?t=98202
Usually the mounting plate is riveted to the basket (you can shine a flashlight sideways on to the spider and look for the rivets). So, you only need the JB Weld where the magnet meets the mounting plates on either side.
And here's another couple of closeups showing the JB Weld run all the way around the magnet rather than 90 degree intervals. http://www.polkaudio.com/forums/showthread.php?t=110276
Either way should be fine. Geoff727 has said that to get that smooth clean layer all the way around you can smooth a small bead with your finger and use Goof-Off to clean up anything that got away from you. -
Cool! - I had seen that thread - but for some reason didn't notice where the jb weld was - I was assuming it would be in a different place - not on the edges of the magnet... DOH!!
-
On3s&Z3r0s wrote: »This thread has some of the best posted closeups, and a discussion of where to put the JB Weld. http://www.polkaudio.com/forums/showthread.php?t=98202
Usually the mounting plate is riveted to the basket (you can shine a flashlight sideways on to the spider and look for the rivets). So, you only need the JB Weld where the magnet meets the mounting plates on either side.
And here's another couple of closeups showing the JB Weld run all the way around the magnet rather than 90 degree intervals. http://www.polkaudio.com/forums/showthread.php?t=110276
Either way should be fine. Geoff727 has said that to get that smooth clean layer all the way around you can smooth a small bead with your finger and use Goof-Off to clean up anything that got away from you.
Thanks for the links 1's&0's! I was going off in a adventure looking and you have already been there and posted some.
I can not get the light to shine correctly thru the spider mesh to view if the basket is is riveted to the front plate or not, I am stupid:biggrin: -
when i did my MW6600's I also did the area where the basket meets the first plate. I figure they are one of the earliest drivers from what i know(SDA1 signature) so while they were out doing the XO's I went ahead and did them that way. I didn't do as much as Geoff727, but more than every 90degrees.
-
audiobilly wrote: »I can not get the light to shine correctly thru the spider mesh to view if the basket is is riveted to the front plate or not, I am stupid:biggrin:
Ha, I finally got it! Brilliant! -
Buy yourself a sandwich !:biggrin:
-
audiobilly wrote: »Ha, I finally got it! Brilliant!
Congrats! It took me a minute too the first time I looked. TFLF's pictures of the basket with the spider removed helps you know what you're looking for. Finally I saw the flashlight reflect off what looked kinda like the head of a flat-head screw and knew I had 'em. -
Drivers are currently drying - jb welded to death.

Crossovers in process!!!!! If my 7 MO daughter would go to sleep, I'd get to solderin'!!! Sleep little girl!!!!! -
You will be happy you did it, did you Dynamat the baskets as well???
-
Not using Dynamat, I have some open cell foam that we use at work (Called Permacel) that I will be using, its free after all... It should do a good job deadening sound.
So - The work is done, except the drivers which are still drying... Tomorrow night I will apply the permacel to the baskets and reinstall.
So - Pics are in order I believe!!! Sorry - no pics of the lower crossovers - I did those on the fly without disconnecting them...
All in all - about 3 hours or work, 4 hours total with the jb weld treatment.
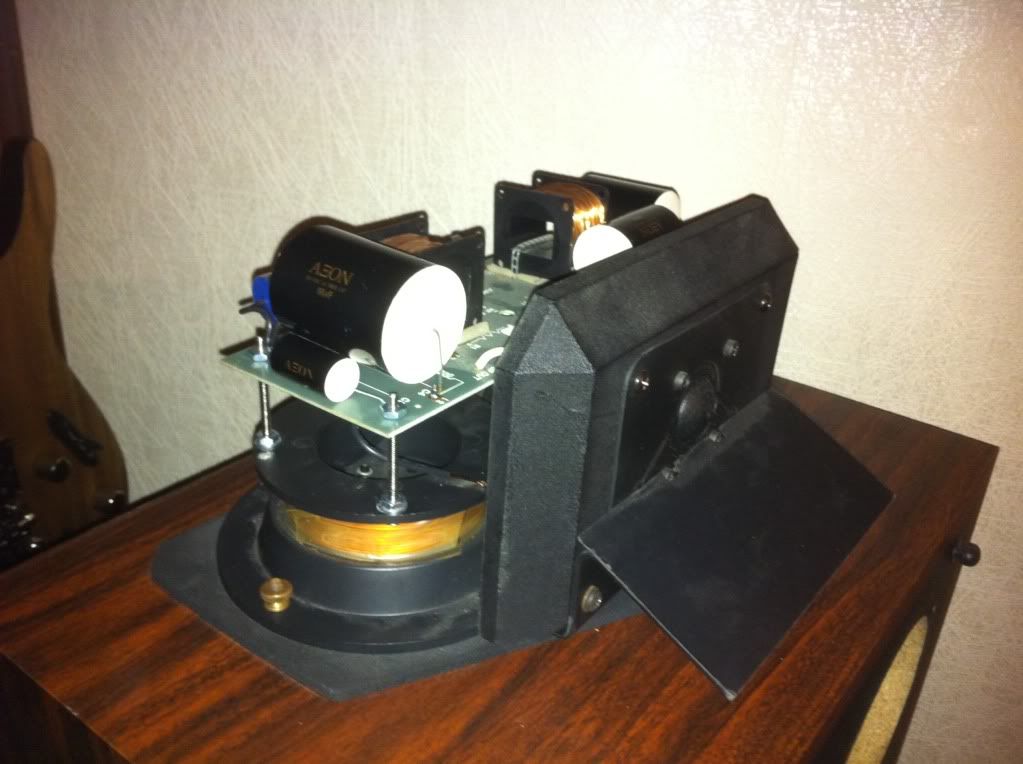
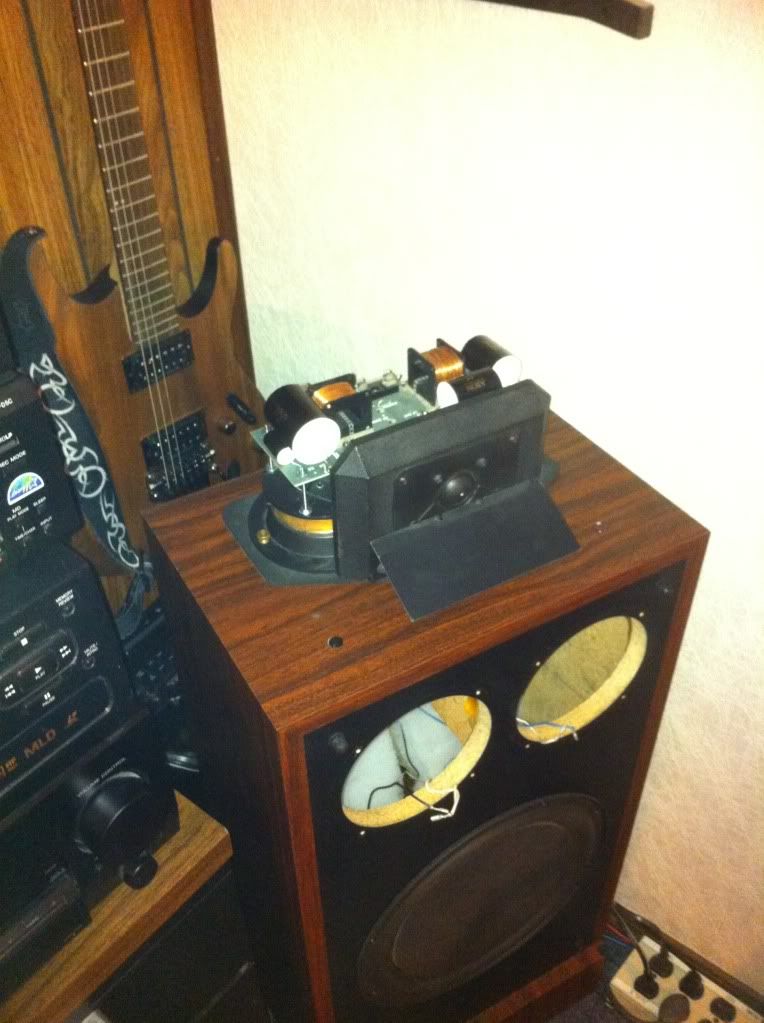
Here are the bits that were removed:
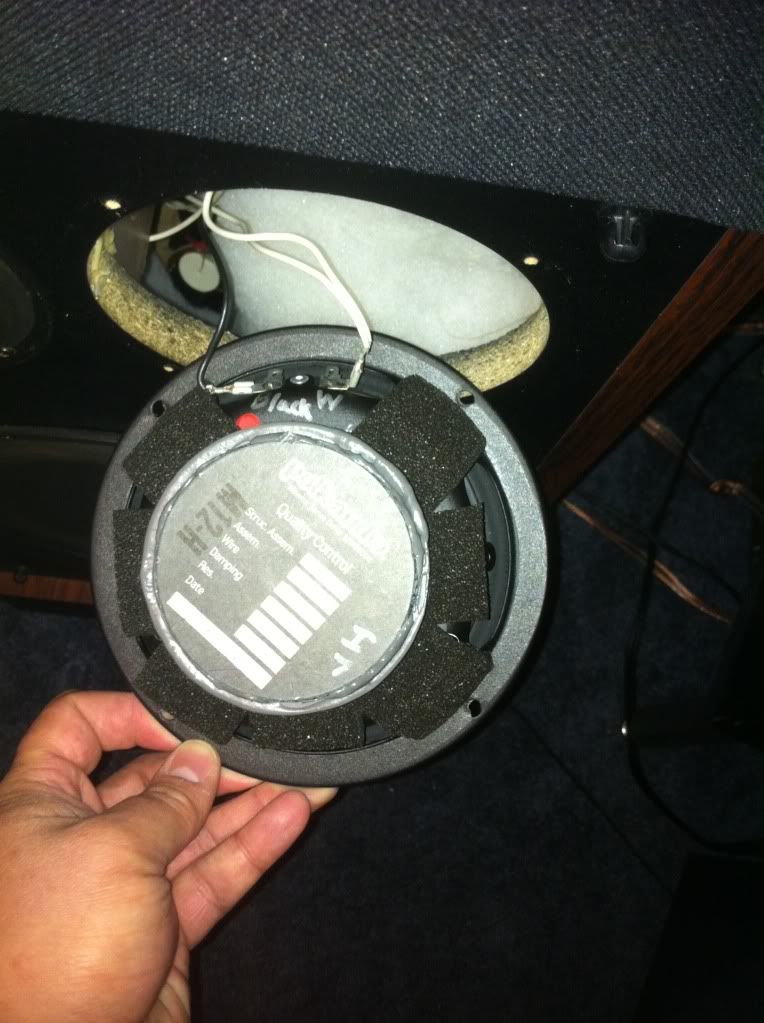
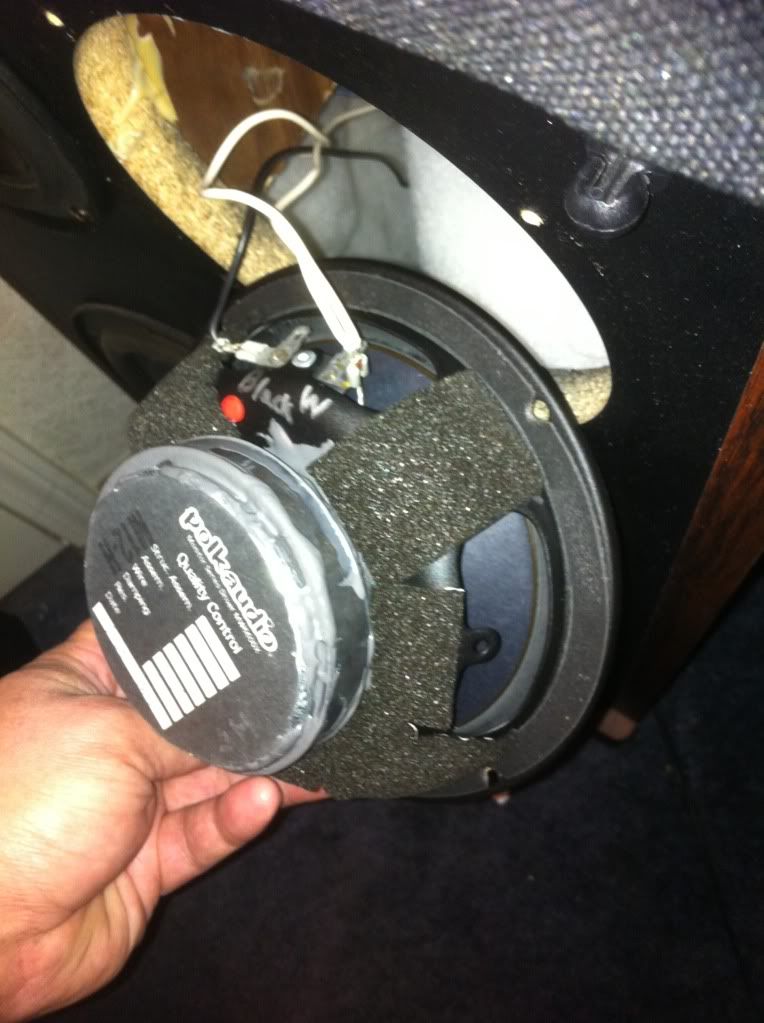
And the drivers drying:
Some pics of the completed Tweeter crossovers:


-
Nice work !!!

-
I couldn't take it!!!!
JB weld was set up but still a bit tacky so I went ahead and put the permacel on and reinstalled the drivers.
I can't play it a at a decent volume since its like 1:am....
But...
I can say that I can hear a difference... its not night and day, but it does seem smoother and the imaging is improved - that was obvious. Soundstage appears much wider..
I'll report back tomorrow evening after I get a chance to play a decent volume.. -
I recall some discussion a while back concerning the steel particulate that is in most JB-Weld products and the magnet attracting the particles. Is this a non-issue?
I recall that someone suggested using the JB-Weld Steelstick which is a steel reinforced epoxy putty. There are other similar products which do not contain steel also.
StanStan
Main 2ch:
Polk LSi15 (DB840 upgrade), Parasound: P/LD-1100, HCA-1000A; Denon: DVD-2910, DRM-800A; Benchmark DAC1, Monster HTS3600-MKII, Grado SR-225i; Technics SL-J2, Parasound PPH-100.
HT:
Marantz SR7010, Polk: RTA11TL (RDO198-1, XO and Damping Upgrades), S4, CS250, PSW110 , Marantz UD5005, Pioneer PL-530, Panasonic TC-P42S60
Other stuff:
Denon: DRA-835R, AVR-888, DCD-660, DRM-700A, DRR-780; Polk: S8, Monitor 5A, 5B, TSi100, RM7, PSW10 (DXi104 upgrade); Pioneer: CT-6R; Onkyo CP-1046F; Ortofon OM5E, Marantz: PM5004, CD5004, CDR-615; Parasound C/PT-600, HCA-800ii, Sony CDP-650ESD, Technics SA 5070, B&W DM601 -
Its not an issue other than the fact that you have to scrape some of the jb-weld off the magnets and reapply it to the joints... as it sets up it will migrate toward the magnet and accumulate - so I just went back every 5 minutes or so until it set up and scraped the accumulation off and reapplied it.
It sure aint pretty - but these baby's aren't going anywhere any time soon... by the time I was done I nearly had jb weld all the way around each joint.
As a side note: I noticed that I forgot to apply permacel to my passives - so I'll be doing that this evening. -
PICS of the permacel install please!!!!
-
I recall that someone suggested using the JB-Weld Steelstick which is a steel reinforced epoxy putty. There are other similar products which do not contain steel also.
Stan
FWIW, I tried the JB Weld epoxy putty. For me, it did not adhere to the metal good enough to create a good bond. I mixed up a small batch, applied it, let it set for 30 minutes, tried to see if I could move it, it came right off. Would not stick to the metals. Maybe they were to dirty. I did the same experiment with the original JB Weld, and after 30 mins it adhered to the metal nicely and difficult to remove. After 24 hours brilliant bond.
Again, FWIW!
Lets see that Permacel!:biggrin: -
Permacel pics:


-
Finally got a chance to play the system at a decent volume today while the wife and kids were away.
Big difference in imaging - definately a wider sense of soundstage. Treble is MUCH smoother as well. It was harsh before, and I was concerned actually... now its a very nice smooth blend, no audible spikes to my ear.
I;'m nto going to sit here and pretend I know all the ins and outs of high end audio - I'm still learning... but the results are pleasing to my ear - and form what I have read, it does what is claimed.
Also - maybe its just wishful hearing, but I do think that some of the perceived nasal quality (I think another personal called it singing into cupped hands) is removed, which is supposedly a benefit of deadening the baskets... So, it looks like the permacel did its job.
Definitely worth the time and effort.... If you have decent soldering skills and about $120, this is a fun evening project. -
Hay Escher,
Where did you get your caps for the Xovers'? -
I purchased everything from partsconnexion... I've got an online google doc spreadsheet with all the part numbers, etc if you want it...
-
I was looking at the capacitors, was just wondering where you got them. Thanks for the info!
-
So when it comes to the brand of the weld is JB the choice? I was at Wal-Mart today and they did not have JB, but Loctite. Does it matter?
-
I supposed you could use whatever you wanted, but JB weld was something I have worked with before and others have used it....
-
What's your Clarity Cap value? Isn't that one and the one to the right both 4.4uf? Although the different versions have different layouts.....just wondering.CTC BBQ Amplifier, Sonic Frontiers Line3 Pre-Amplifier and Wadia 581 SACD player. Speakers? Always changing but for now, Mission Argonauts I picked up for $50 bucks, mint.


