Time to work on my $200 SDA SRS2's

avguytx
Posts: 1,628
It looks like it's going to be a partially rainy weekend here in North Texas so I think I'll start on my SRS2's now. First off is to find out the exact crossover parts I need and get those ordered. Most likely I will use the Solen caps and Mills resistors again since they worked out so well in the 1C's. I thought about doing the tweeters first instead of the crossovers but I'm still deliberating.
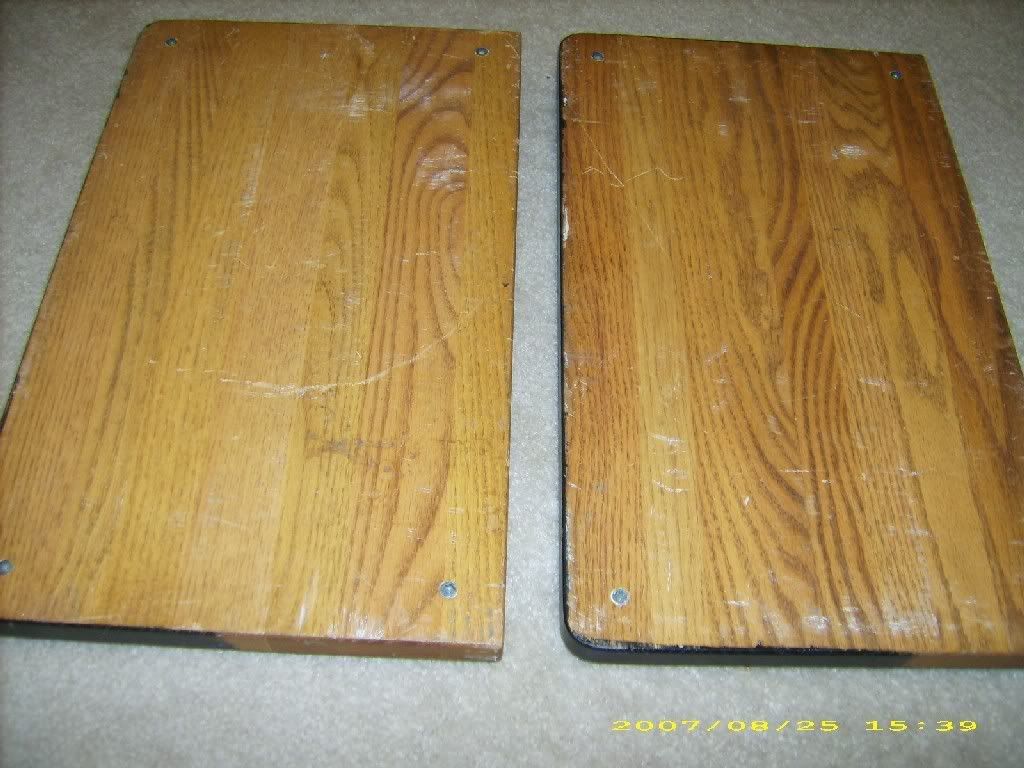
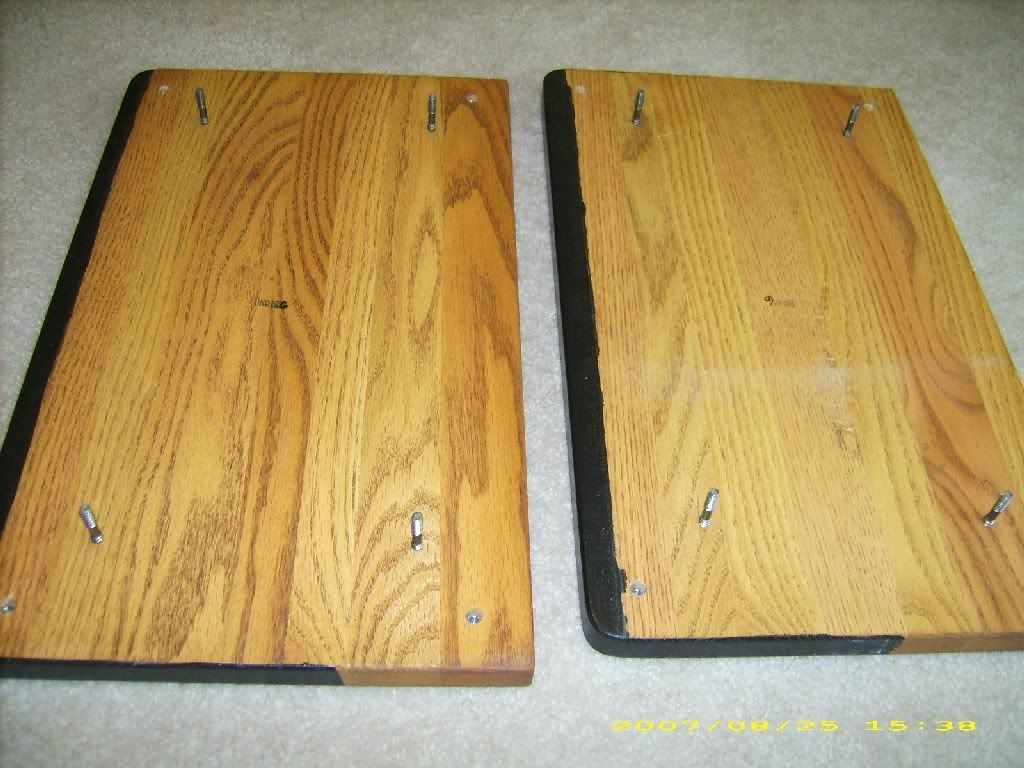
Also, you can see in the pictures the black paint (or whatever it is) that someone used on these many years ago as they were built into a huge wall shelving system in an equally large living room. They painted the front edges of the cabinet and a small part of the top along with the lip of the base plate. I'm going to remove the base plate first and experiment with some "Strip-Eaze" to see if it will lift the paint. Kind of odd that they did this but maybe it won't be a complete pain in the ****. Fortunately, the rest of the cabinets are perfect and everything is intact. I'll need to remove and replace that heavy/thick grill cloth soon and use something more acoustically transparent. I typically listen to them with the grills off so it's not a major concern right now. Like the 1C's, there is what seems like 10 extra feet of speaker wire inside that I'll shorten up when I do the crossovers. I was listening to some music one night that had a some low bass drum tones that went from left to right and I could hear noises out of the right speaker. Took the passive out and some of the mid/woofer wires were up against the PR. Each mid will come out of the cabinet about 2 feet with the wires attached. Just like the 1C's were.
Any recommendations about removing the paint would be greatly appreciated.
But hey, how can you gripe about these for only $200 a pair!
Richard? Who's your favorite Little Rascal? Alfalfa? Or is it........................Spanky?.................................Sinner.
Post edited by avguytx on
Comments
-
Original semi-paste Strypeeze.Political Correctness'.........defined
"A doctrine fostered by a delusional, illogical minority and rabidly promoted by an unscrupulous mainstream media, which holds forth the proposition that it is entirely possible to pick up a t-u-r-d by the clean end."
President of Club Polk -
Nah, I think it was from the camera flash in my office. They are about the same look as the 1C's...both are very clean!Richard? Who's your favorite Little Rascal? Alfalfa? Or is it........................Spanky?.................................Sinner.
-
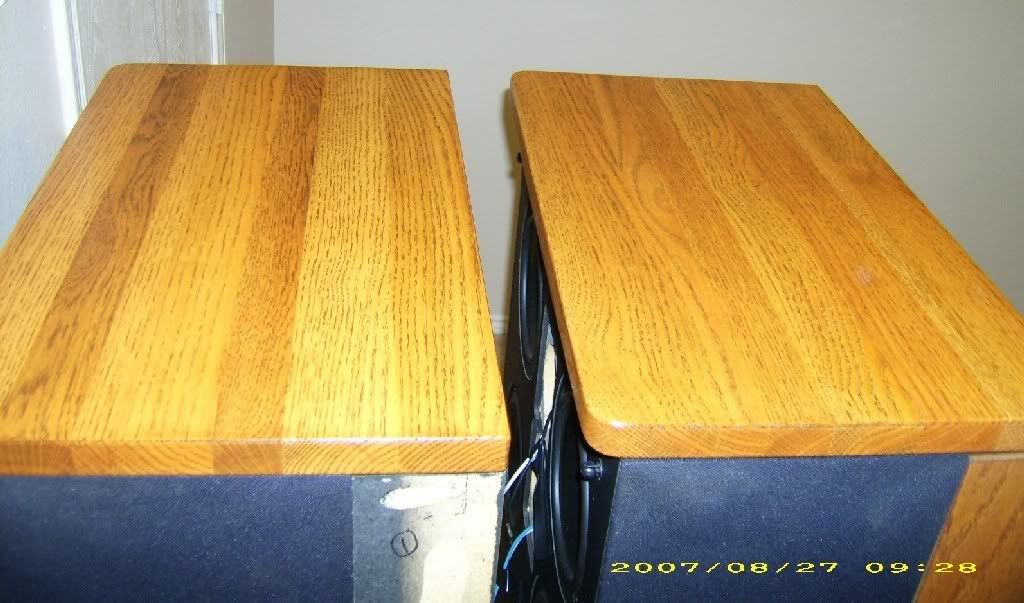
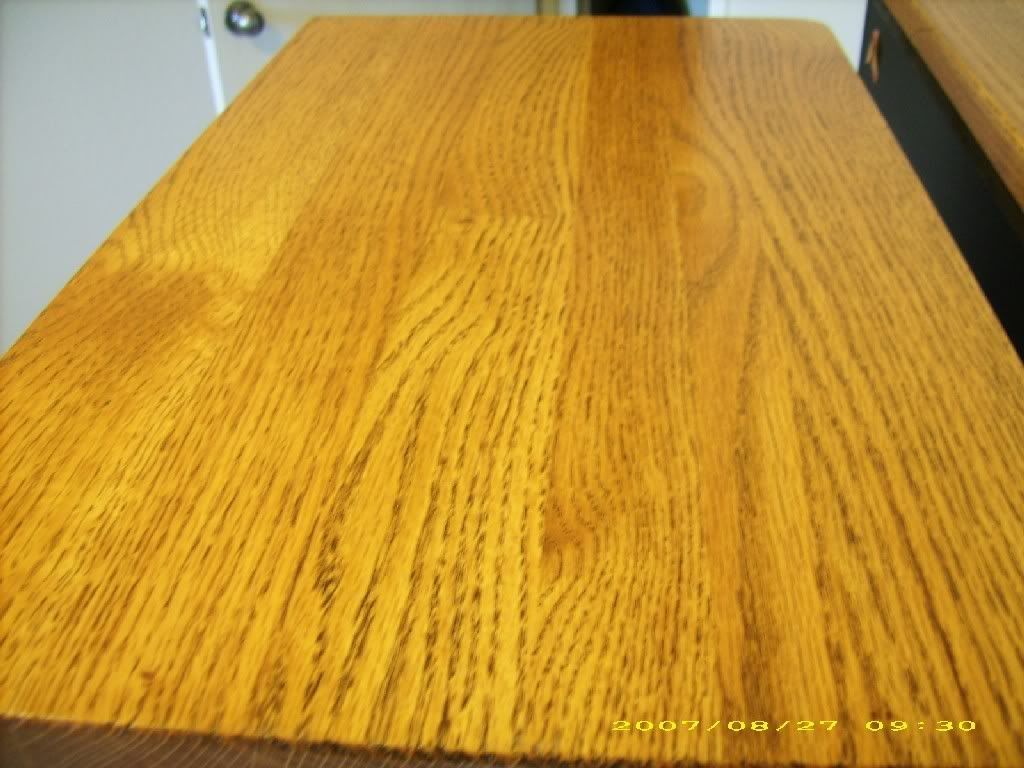
Here's an update of the progress. That Strypeeze did a great job on the first round and now it's on to round two. Being that it's oak, it gets down into the "pores" a little and takes a little more to get out of there. After a little mild scraping on this round, I will use some old rags to get into the pores better. After that, clean them up, let them dry and prep them for a refinish. So far, so good.

Ok, F1 or anyone else...what was it recommended to do the tops and bottoms in once they are cleaned up to bring the life back in them? Tung oil or is there something else recommended? I know I've read it but for the life of me I can't remember.Richard? Who's your favorite Little Rascal? Alfalfa? Or is it........................Spanky?.................................Sinner. -
can you sand those down and get more of that black paint off? I know you're still working on them. but i was just thinking.. some light sanding might get into those pores better.
it is solid oak, so taking off a thin layer wouldn't hurt anything.. and it would give the entire surface a nice clean look. and it may also take out any other dings or nicks.") PolkFest 2012, who's going>?
PolkFest 2012, who's going>?
Vancouver, Canada Sept 30th, 2012 - Madonna concert :cheesygrin: -
Here are what they look like after the second coat removal and then cleaned off with mineral spirits per the directions. It did a damn fine job of getting the paint off of them I must say. Yep danger boy, they definitely need sanding as they feel a little rough all over. After they are dry (most likely tomorrow), I will do some light sanding then use some steel wool on them before I figure out what I'm going to put on them. There's a water ring on the top of one as I figure someone used it for a potted plant holder. Geez. Whatever I do to the tops, I'll most likely end up doing to the sides and bottom so they match up. I'll have to take the base plates off and do them eventually...just not today.Richard? Who's your favorite Little Rascal? Alfalfa? Or is it........................Spanky?.................................Sinner.
-
atta boy.. those are looking really good now. i don't have much wood restoring experience.
I did strip the paint off an old antique oval mirror a few years ago.. it had prob 3 coats of old paint on it.. i stripped it all over. and went over it with some steel wool.. then used tung oil on it.. it brought back the luster of the dark oak and it looked amazing.
I think there are other oils you can use on wood too.. but someone else might know better than me about that.PolkFest 2012, who's going>?
Vancouver, Canada Sept 30th, 2012 - Madonna concert :cheesygrin: -
Do not steel wool them before finishing.
You did apply stripper to the entire area, right?
Make sure you wash them with mineral spirts a few times and let dry for a few days before doing anything else.
To remove the water ring, you'll have to treat the entire top with Oxalic acid. Follow the directions and let dry for a few days, at least.
Lightly sand everything then wipe with a tack cloth.
Apply a stain, color of your choice.
An easy, yet durable finish (much better than tung oil) is Minwax's wiping poly. Tack cloth right before applying the finish. After the finish has cured, rub out the finish with 0000 steel wool, buff with soft cotton cloth and you're done.Political Correctness'.........defined
"A doctrine fostered by a delusional, illogical minority and rabidly promoted by an unscrupulous mainstream media, which holds forth the proposition that it is entirely possible to pick up a t-u-r-d by the clean end."
President of Club Polk -
I do have some Formby's high gloss tung oil that I got for restoring some older Dynaco A-10's, A-25's and Small Advent speakers at some point. I might test the underneath side of the panel and see how it does. If I go the stain route, I will want to redo the side panels and bottoms on the SRS2's as well so they all match.Richard? Who's your favorite Little Rascal? Alfalfa? Or is it........................Spanky?.................................Sinner.
-
Do not steel wool them before finishing.
You did apply stripper to the entire area, right?
Make sure you wash them with mineral spirts a few times and let dry for a few days before doing anything else.
To remove the water ring, you'll have to treat the entire top with Oxalic acid. Follow the directions and let dry for a few days, at least.
Lightly sand everything then wipe with a tack cloth.
Apply a stain, color of your choice.
An easy, yet durable finish (much better than tung oil) is Minwax's wiping poly. Tack cloth right before applying the finish. After the finish has cured, rub out the finish with 0000 steel wool, buff with soft cotton cloth and you're done.
Yep, did the stripper on the entire topside and part of the underneath visible part. I'm a couple of times into it now on the mineral spirits on them and am allowing some dry time in between. After the third, I'm going to let them sit and air out a few days before anything else is done.
I've used the Minwax poly coats before with good results on coffee tables, end tables and dining tables I've built. As a matter of fact, it's time to strip down my dining table that I built 8 years ago and re-coat it. Good stuff. I might go with a darker walnut on the table this time since the kitchen cabinets are walnut and the table is a light oak color. Oh well, that's another story and project!Richard? Who's your favorite Little Rascal? Alfalfa? Or is it........................Spanky?.................................Sinner. -
After stripping/sanding, the original color will be washed out. I'd recommend staining them.Political Correctness'.........defined
"A doctrine fostered by a delusional, illogical minority and rabidly promoted by an unscrupulous mainstream media, which holds forth the proposition that it is entirely possible to pick up a t-u-r-d by the clean end."
President of Club Polk -
I agree. Are the side pieces solid wood or laminated? Are they glued on? I've read on some of the other threads that they are a **** to get off.
Edit: They look like laminated 1/4" mdf from looking at them from the top.Richard? Who's your favorite Little Rascal? Alfalfa? Or is it........................Spanky?.................................Sinner. -
Correct, they are veneered.Political Correctness'.........defined
"A doctrine fostered by a delusional, illogical minority and rabidly promoted by an unscrupulous mainstream media, which holds forth the proposition that it is entirely possible to pick up a t-u-r-d by the clean end."
President of Club Polk -
And I assume a complete **** to remove, right?Richard? Who's your favorite Little Rascal? Alfalfa? Or is it........................Spanky?.................................Sinner.
-
Yeah, I believe they are glued on.Political Correctness'.........defined
"A doctrine fostered by a delusional, illogical minority and rabidly promoted by an unscrupulous mainstream media, which holds forth the proposition that it is entirely possible to pick up a t-u-r-d by the clean end."
President of Club Polk -
Any recommendation of a stain that could be used to replicate the color of the side panels to avoid having to redo them as well? They are already in perfect shape and if I could avoid having to remove them, that would be a bonus! If not, I can do that as well.Richard? Who's your favorite Little Rascal? Alfalfa? Or is it........................Spanky?.................................Sinner.
-
I see your in North Texas - I'm in Grapevine... Once you get those all back together, I would love to get a chance to listen.. I have RTA 12B - Bought them new in the early 80's... I wonder how much different they sound...
Enjoy -
If I had them in front of me, I'm sure I could match the color. However, there's no way to tell you what product/color would work straight out of a can/bottle. Color matching is an art and usually requires more than one product or just one step. Most likely they used a pigmented wiping stain and not a dye, other than that I can't help you.Political Correctness'.........defined
"A doctrine fostered by a delusional, illogical minority and rabidly promoted by an unscrupulous mainstream media, which holds forth the proposition that it is entirely possible to pick up a t-u-r-d by the clean end."
President of Club Polk -
I appreciate the offer, Sal. I'll just work on getting the side panels off later along with the bottoms and see what it's going to take. Hell, if they get reasonably close, I'm good with that. I know a solid piece of wood is going to react differently than a veneered piece with just simple coats. I guess I'll have to "retire" the SRS2's to closet duty while the top and bottom pieces are off since there will be 4 little extra ports in the top! I've been listening to them with them off and can't tell too much difference but it's been at just a basic volume and nothing crazy.Richard? Who's your favorite Little Rascal? Alfalfa? Or is it........................Spanky?.................................Sinner.
-
More updates. Today, I removed the bottom panels of the SRS2's to strip that small section of black paint like the tops had. The paint came off as well as the top and they have been cleaned with mineral spirits and are drying for a couple of days.
I also removed the side panels. You know, those glued on "bastages". It really wasn't too bad on removing them. The first, third and fourth were easy but the second one I did was a biotch to remove. I decided to try a flat dull scraper and wedge in between the speaker and the panel it self and tap it out with a hammer and that worked wonderfully well. On the second piece, there must have been either a bit more glue or I didn't get the scraper under the glue part as well as the other 3. So, I took the little pieces that came off and re-glued them back onto the panel and clamped them to dry overnight. I'm going to strip the finish off the other 3 for now and do the other in the morning unless I get a wild hair later.
In the next little bit, I am going to get some of the Minwax one step poly finish and get them rolling so maybe by the end of the week, I can have them back together. The 1C's sound good but, damn, I miss the extra bass! The Solen crossovers are ordered and Monday the RD0-194's are going to be ordered. By next weekend, I'll be able to hopefully get them all back together. That will give me a day or two to listen to them before I leave for CEDIA on Tuesday (ugh) and won't be back till the following Sunday.
Here are a few pics so far. I will update as the project rolls along.
The dull paint scraper worked very well.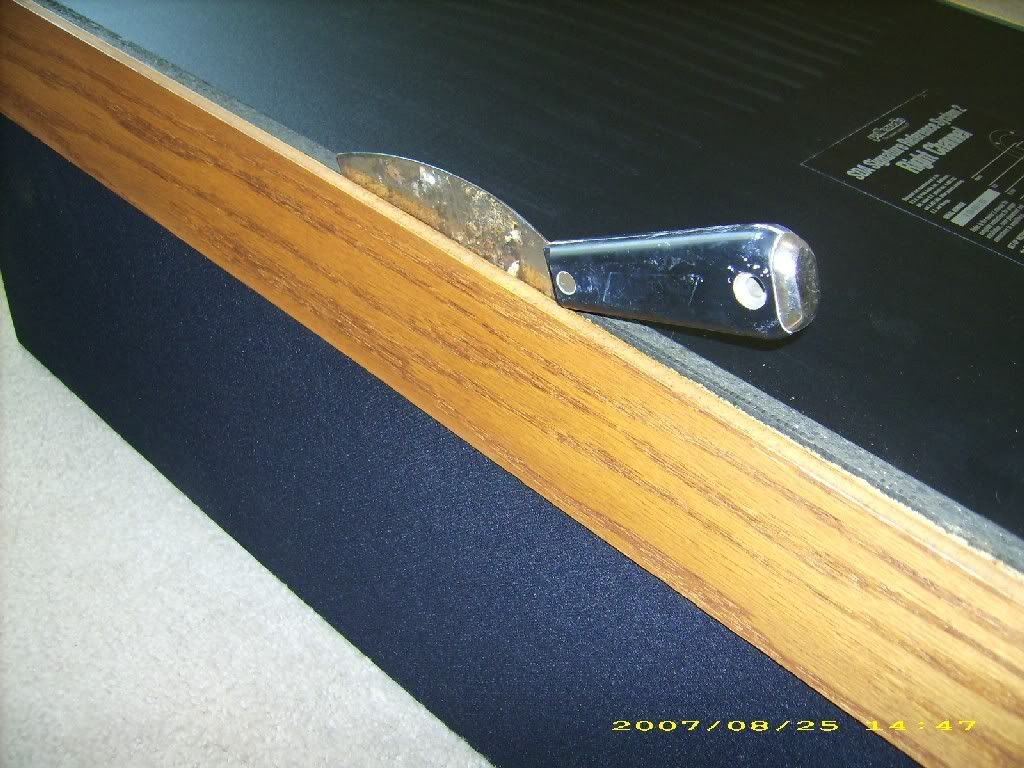
Side panels off...top view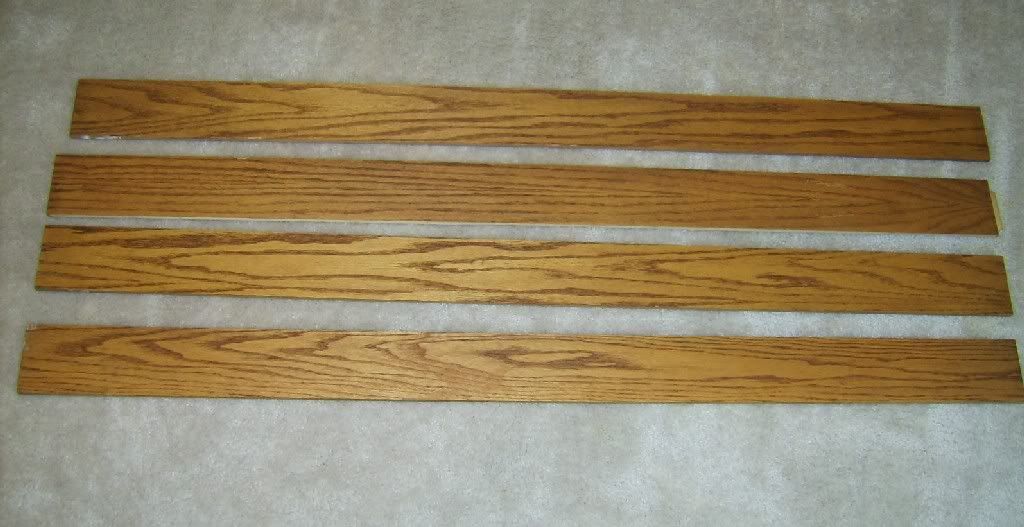
Side panels off....bottom view. You can tell which one sucked to get off.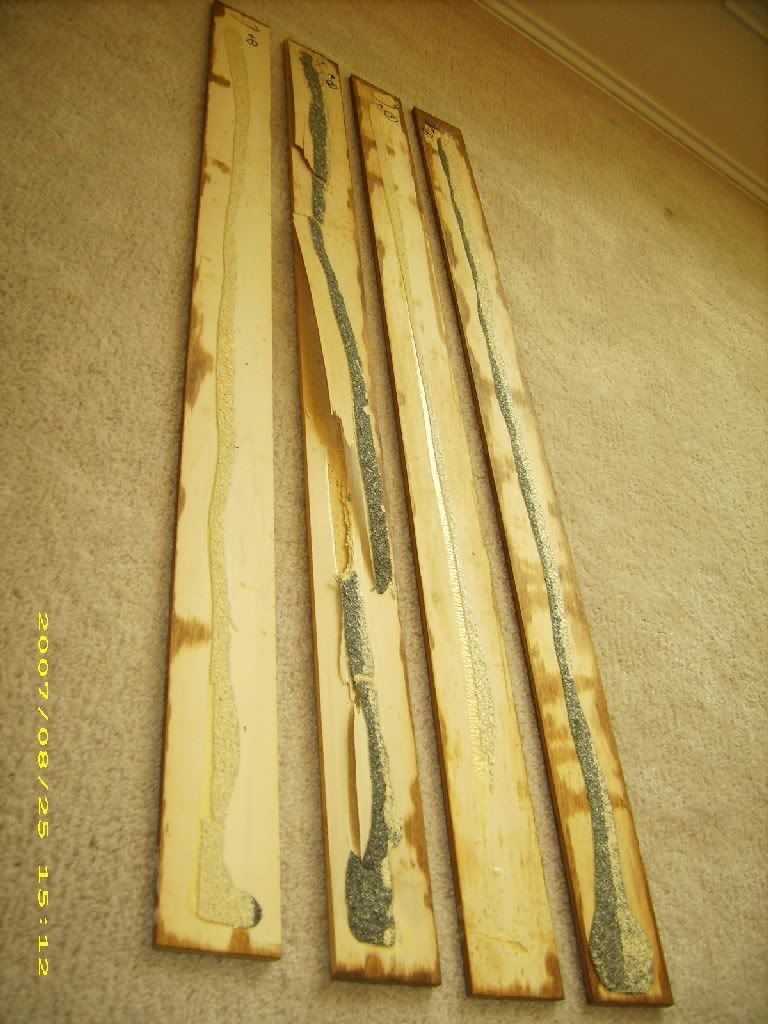
Side view of cabinets with panels off
Bottom panels of speakers. Very bottom side is pretty rough of course. I'm going to either try some spikes on them or nail those pieces in like what's used on furniture.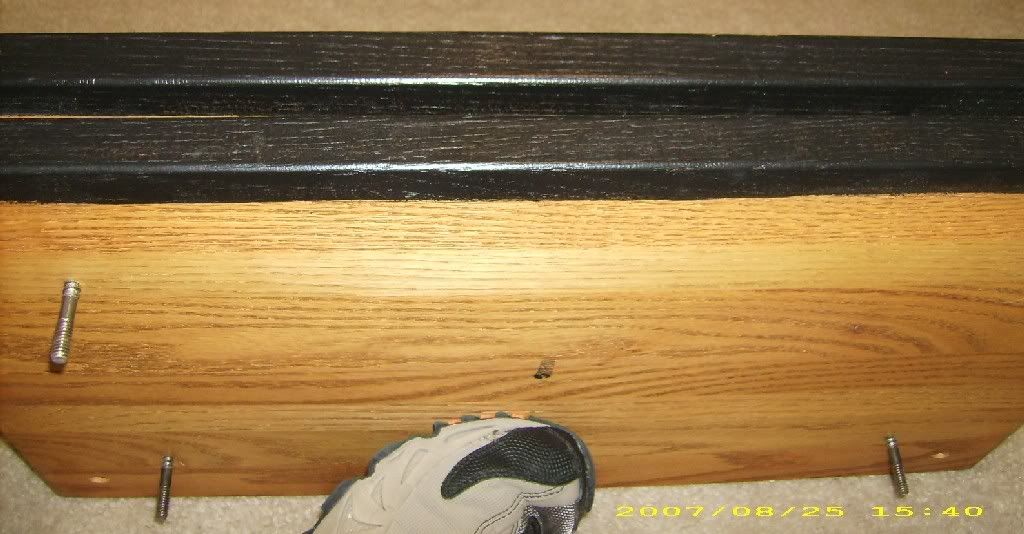
 Richard? Who's your favorite Little Rascal? Alfalfa? Or is it........................Spanky?.................................Sinner.
 -
Thanks Las. Here are some pictures of the tops after refinishing. I think they turned out great! Now, I have to lightly sand down the side panels and give them a coat or 2 to get them to match!
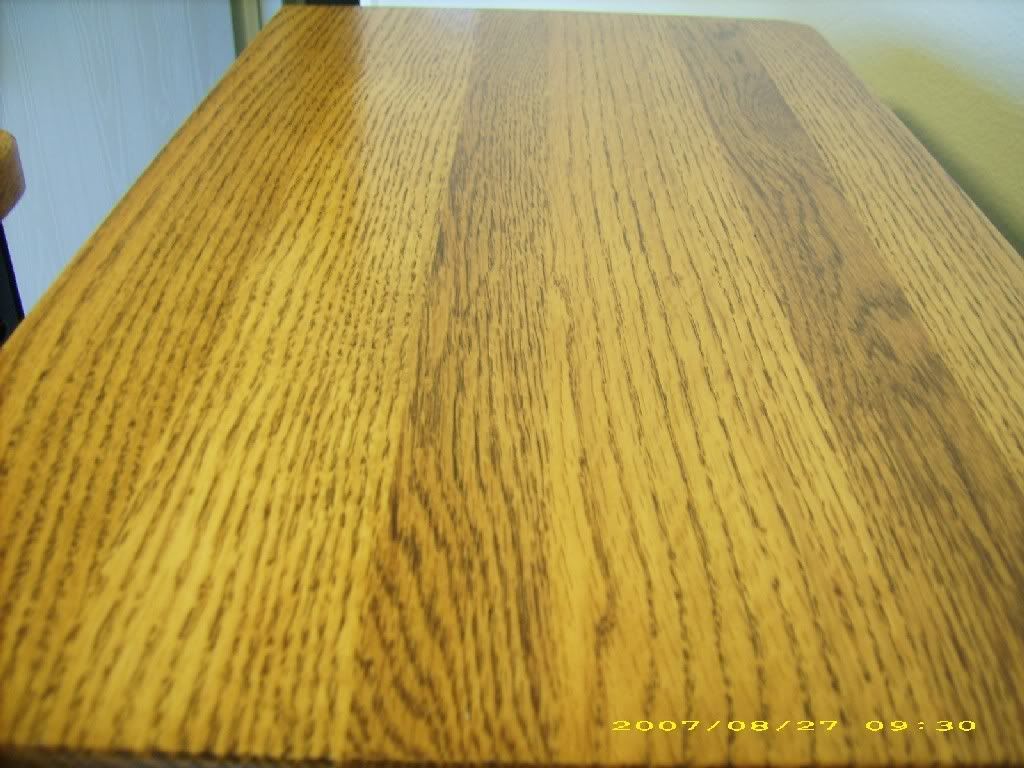 Richard? Who's your favorite Little Rascal? Alfalfa? Or is it........................Spanky?.................................Sinner.
 -
-
Really Nice work, enjot them tjey sound great.
CRj -
Woo hoo!!! The new RD0-194's are on the way! Now, if those new caps and resistors make it in by the end of the week, I can get them done before I leave for CEDIA. My plan was to have them done and then wire them up face to face (maybe out of phase) and playing while I'm in Denver for 6 days. That would help to break in the caps AND the tweeters while I'm gone. That would be about 144 hours into the break in period.
Should have some pics of the side panels later today or tonight. The first coat of stain/poly is on them and are looking great. If anyone redoes theirs, the Minwax Poly Classic Oak is the color I used and looks great. Thanks F1 for the recommendation.Richard? Who's your favorite Little Rascal? Alfalfa? Or is it........................Spanky?.................................Sinner.