Built-in (IB) Sub or Subs
Options

scubalab
Posts: 3,101
Well, after several years of looking at an unfinished front wall in our HT, We finally started demo/construction. I've not finalized any design just yet... This is what I have so far.

Due to limited space IN the room, I'm looking to build-in as much as I can; the AV rack for sure (highlighted in green above), and may even wall mount or slightly recess the front 3 speakers too). Since I'll have plenty of room behind the wall to do this, I was thinking of also building in a sub or two (highlighted in pink above) at Dan's (@EndersShadow) recommendation. A little research led me to the infinite baffle subs. I currently have the SVS PCi25-31 sub, and although the footprint is smaller than a cube sub, it's quite conspicuous! I'd want to equal or better the sound of that sub, and it appears that a properly constructed built-in IB sub is more than capable of the task at hand.
So, anyone have any advice or direction? I'm fully capable with my carpentry skills (still have 9.95 fingers left) , but need 100% direction on what parts/supplies to get and how to construct.
The room is approximately 10' wide by 20' long by 7'-4" high (highlighted in blue above). The back of the room opens to a sunroom, but we plan on installing doors there. There is also a 9'x9' bar (highlighted in yellow above) at the rear off to the right. Note that this photo is a temporary configuration! Where the screen is in this picture will actually be the BACK of the room in final configuration. Doors will be installed in that opening under the blue Penn State sign). The bar can be partially seen to the left in that photo. The speakers in the top corners are actually the permanent rear speakers (being used temporarily as front speakers...) So, the finished room will be rotated 180 degrees and essentially be L shaped including the bar.

Here is a picture of the front of the HT. The new front wall will extend from the exposed studs to the left wall. So, the 3.5' of space behind it (to the door and under the stairs) is all useable space for equipment, subs, cabling, and storage. Behind the door in the pic is a guest bedroom. That door and wall will be removed and moved closer to the unused backside of the new front wall (basically making the guest BR a little bigger and not wasting space behind the screen).

Fun fact. See the rope/pulleys on the right wall in that pic? That's an actual prop used during filming of Disney's Pirates of the Caribbean movies (2nd and 3rd ones). We acquired it while on vacation on Grand Bahama Island 10 years ago. It was in a trash pile on the beach of the set at the Bahamas Film Studio's Collyer Tank on Gold Rock Beach.
I can do one or possibly two subs. Manifolds will need to fit in between studs. I'd like to keep them as small as possible, but can go up to 20" deep by say 20" high. I'm looking for as much help as I can get in designing, and spec'ing the sub(s). What drivers should I get, what amp, hurricane screws?, mdf vs plywood, wires, damping material, grill cloth, etc. Anyone have a comprehensive parts list or design plans? I know this is asking a lot, but I trust the experience here and surely someone has done (or knows someone who's done) something similar.
Thanks in advance!
-Al
Due to limited space IN the room, I'm looking to build-in as much as I can; the AV rack for sure (highlighted in green above), and may even wall mount or slightly recess the front 3 speakers too). Since I'll have plenty of room behind the wall to do this, I was thinking of also building in a sub or two (highlighted in pink above) at Dan's (@EndersShadow) recommendation. A little research led me to the infinite baffle subs. I currently have the SVS PCi25-31 sub, and although the footprint is smaller than a cube sub, it's quite conspicuous! I'd want to equal or better the sound of that sub, and it appears that a properly constructed built-in IB sub is more than capable of the task at hand.
So, anyone have any advice or direction? I'm fully capable with my carpentry skills (still have 9.95 fingers left)
The room is approximately 10' wide by 20' long by 7'-4" high (highlighted in blue above). The back of the room opens to a sunroom, but we plan on installing doors there. There is also a 9'x9' bar (highlighted in yellow above) at the rear off to the right. Note that this photo is a temporary configuration! Where the screen is in this picture will actually be the BACK of the room in final configuration. Doors will be installed in that opening under the blue Penn State sign). The bar can be partially seen to the left in that photo. The speakers in the top corners are actually the permanent rear speakers (being used temporarily as front speakers...) So, the finished room will be rotated 180 degrees and essentially be L shaped including the bar.
Here is a picture of the front of the HT. The new front wall will extend from the exposed studs to the left wall. So, the 3.5' of space behind it (to the door and under the stairs) is all useable space for equipment, subs, cabling, and storage. Behind the door in the pic is a guest bedroom. That door and wall will be removed and moved closer to the unused backside of the new front wall (basically making the guest BR a little bigger and not wasting space behind the screen).
Fun fact. See the rope/pulleys on the right wall in that pic? That's an actual prop used during filming of Disney's Pirates of the Caribbean movies (2nd and 3rd ones). We acquired it while on vacation on Grand Bahama Island 10 years ago. It was in a trash pile on the beach of the set at the Bahamas Film Studio's Collyer Tank on Gold Rock Beach.
I can do one or possibly two subs. Manifolds will need to fit in between studs. I'd like to keep them as small as possible, but can go up to 20" deep by say 20" high. I'm looking for as much help as I can get in designing, and spec'ing the sub(s). What drivers should I get, what amp, hurricane screws?, mdf vs plywood, wires, damping material, grill cloth, etc. Anyone have a comprehensive parts list or design plans? I know this is asking a lot, but I trust the experience here and surely someone has done (or knows someone who's done) something similar.
Thanks in advance!
-Al
Comments
-
Al:
Writing down some thoughts so we can both remember what we talked about. If they dont make sense we can chat again about them later.
Some quick points first. Try to run some dedicated lines down there. I would suggest one for the B&K amp your picking up, another for the sub amp and then a third and final for the other gear. For your speaker wire if your going to run it in wall make sure you use CL2 or CL3 speaker wire. Audioquest sells some decent in wall wire called the FLX series. You could run the wire inwall to a jack and then from their use speaker cables to connect however you want. That would likely be the cleanest way to run things.
If your looking to do a projector, run a PVC pipe up the wall and through the joists so you can fish any wire you want in the future through it. I know that would be a pain but then its all hidden. Alternately they make cable runways that you could paint and do the same thing, the only diff is you'd see it on the ceiling.
Paint the TV wall black. If you can get away with it the ceiling too. This will help kill any reflection glare and make the picture better..
I'd do a sealed system of 2 subs. I'd shoot for 15 or 18" drivers. The Ultimax is pretty much king unless you can find a TC Sounds LMS-R and those are pricey and it would be used.
I'd build the box as big as you can get. You can brace it with dowel rods so thats cheap. But you want to brace it GOOD. Overbracing is FINE. I'd build a false front/frame to your wall so you can get away with a ugly box that is NOT build in. Similar to what @nooshinjohn did for his rack.
I'd go with MDF if you can, understanding its a pain to work with but REALLY good for boxes, plywood if you cant. If you can get away with 1" all the way around and a 1.5" front baffle I would try for that.
We talked about a 30 tall x 30 wide x 16 deep which equates to about 6.66 cubic square feet. Now your going to have some bracing in there so really its gonna be closer to 6 cubic square feet which is fairly decent for a sealed box. Bigger would be better, but those are your constraints and honestly I've seen worse.
Looking at WinISD the better driver for you in that small of a box would be the Ultimax 15. You'd only need about 600 watts for the PAIR before you start to push their excursion (how far in and out they can move before the driver is harmed). The 18" would work in this box, but you'd be leaving some performance on the table unless you really increased the wattage going to them.
The 18" driver wants a MUCH larger SEALED box to sound its best. Doesn't mean it cant work, but its about 100 more (per driver) than the 15".... Plus you could always start with the 15 and upgrade later on if you felt the need.
The difference in SPL between those two drivers is about 6db BUT the 18 requires a BUTT TON of power to get there. And power is pricey compared to just using a bit more wood for a larger box.
For amps I'd honestly stop and look at the Crown XLS series. If you can find one of the newer models (they all in with a 2 rather than 0 so 1502) that would be your best bet. However the older series would work fine two. I'd shoot for the 1500 or 1502 so you have some extra wattage on the table for peaks and whatnot. The XLS series fan doesnt come on as much and is whisper quiet. Additionally it has RCA inputs AND regular binding posts for speaker wire.
I know LOTS of guys use the iNuke subs and they are a decent amp, especially since they have software that allows you to tweak their response... However the stock fan is like 56 db when it gets running so EVERYONE modifies their amp to use a diff fan... which voids the warranty. Also the iNukes only have XLR inputs and require speakon connectors.
Crown XLS (Original series) rear panel:
iNuke rear panel: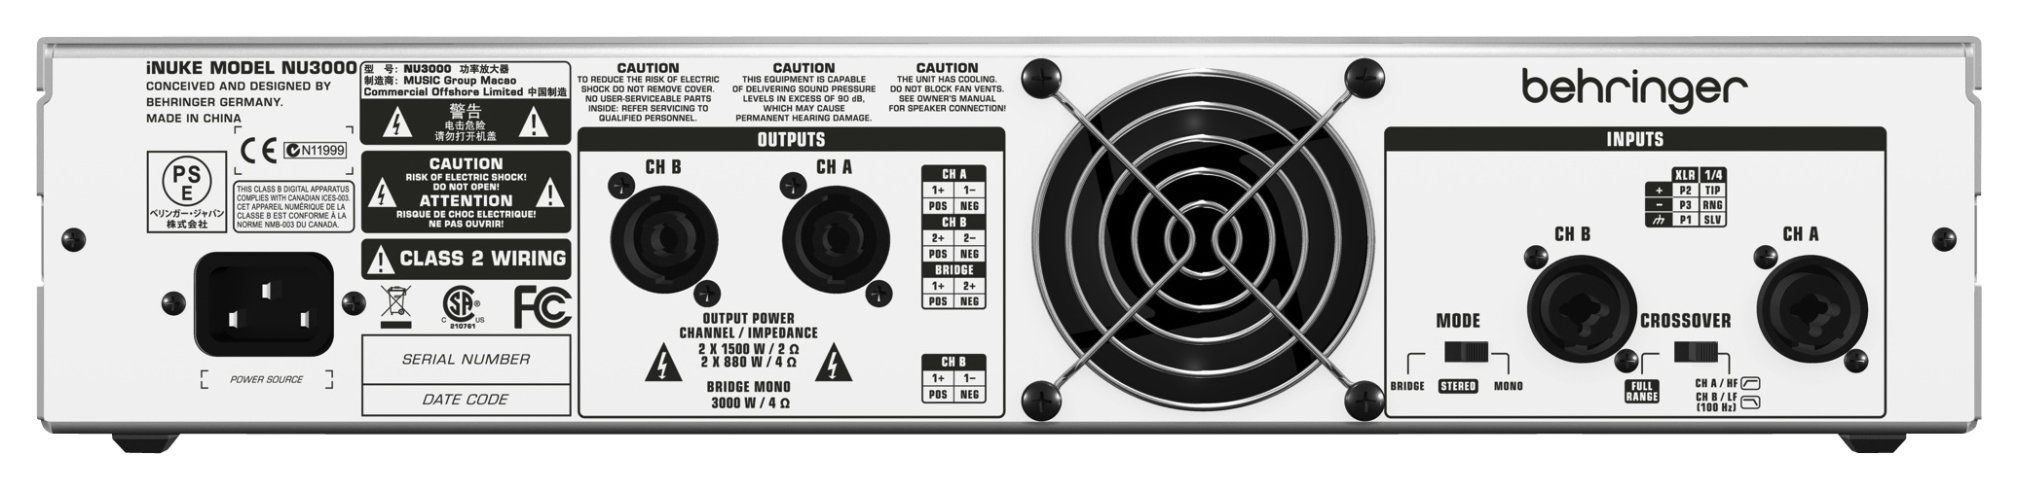
I finally got someone to benchtest a XLS series amp (they used the 2500 but whatever) to see what wattage they can put out in a real world scenario. The 1500 is rated for less wattage but you get the idea. If you found a XLS 2000 or 2500 those would be even better, but again your budget dictates that decision.
lukeamdman, on 26 Feb 2016 - 7:20 PM, said:
Crown XLS 2500 (Bridged/Bypass mode with clip limiting turned off)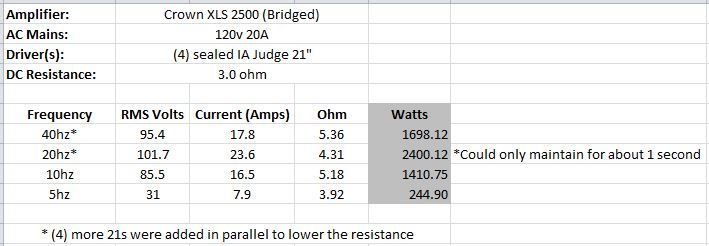
Even though the clip limiters were off, once clipping started the voltage wouldn't increase even when turning up the main volume.
At 10hz and lower, rather than seeing clip lights, the subs would start "pulsing" rapidly. I've seen similar behavior from my Lab Gruppen IPD 2400.Post edited by EndersShadow on"....not everything that can be counted counts, and not everything that counts can be counted." William Bruce Cameron, Informal Sociology: A Casual Introduction to Sociological Thinking (1963) -
I am adding this so you can kinda get an idea as to the relationship between box size, wattage, cone excursion and SPL and what we talked about with the 15" needing less wattage to get to its max performance (due to the box size). Note the drive examples here is the Stereo Integrity HT 18 which models very much like the the Dayton Ultimax 18" driver. So while not a perfect example, it gives you an idea how all those spec's play together.Put one driver in a sealed cab (4 cubic feet) and hit it with 600 watts of power.
that gives this output (just like others have already shown):
when we check the excursion in the 4 cubic foot cab, we get this:
so only 14mm. this means there is excursion being "wasted". so either, you can hit it with more power or you can increase the size of the cab.
increasing the power by 50% to 900 watts (now you are on your own though as this over warranty power) gives this excursion:
17mm, so still leaving some on the table.
let's try a bigger cab.
moving back down to 600w and increasing the cab by 2x to 8 cubic feet sealed gives this response in RED (black is the 4 cubic foot sealed with 600w):
now you are picking up 3-4 db in the low bass.
let's check excursion:
now, you are using 19mm of the available 22mm. that's not bad, but still leaving a little on the table.
since we are already in an 8 cubic foot cab, let's increase power a little to 900 watts (again, with over warranty power you are on your own though)
now, that's cook'n with gas. we have shot over xmax by a hair which is right where we want to be (t/s model parameters are small signal and so in practice the excursion isn't quite what winisd shows at high power levels and there is much more past 22mm xmax which is usable, so it is all good).
two HT18D4 drivers can be wired up for 8 ohms per driver and then 4 ohms for the pair. run off a channel of the 6000dsp, that will give about 900 watts or so to each driver. again, that's neither wasting amp or excursion. it is all relatively optimized.
final model 1800 watts total, 2 driver, 16 cubic feet total sealed (red) and 8 cubic feet total sealed (black).
the tradeoff for the low price of the HTD4 drivers is the extra cab space required to make use of their excursion. ideally, they would be run just like mktheater is in an infinite baffle/super large sealed enclosure. BUT, they can work just fine in smaller enclosures. if you want to keep to about 900 watts or so and take full advantage of the excursion on the low end, then 7-8 cubic feet per driver is what is required.
if you want to run them in 4c.f. per driver, then that will be fine, there will just be some of the excursion that won't be used and low end output will be 3-4 db lower, assuming that you don't want to go too far over the warranty power.
one driver per cab is fine. two drivers in one cab that is twice as large is also fine.
hope that helps not just with this project but with how to balance cab size/power/driver excursion in general."....not everything that can be counted counts, and not everything that counts can be counted." William Bruce Cameron, Informal Sociology: A Casual Introduction to Sociological Thinking (1963) -
And another option as the spec's are SOOO close to what you have size wise... Yes its ported, but the drivers are cheaper than the Ultimax and you have a full on cutsheet, for everything. You could probably tweak the width to make up for the fact you may need to not have it as deep.... You'd need to do a tweak to the port length as well, and I'd shoot for the 15hz tune myself.... We can talk later if you want to take this route, but its a bit out of my element as a FYI.
http://www.avsforum.com/forum/155-diy-speakers-subs/2226642-v-b-s-s-diy-subwoofer-design-thread.htmlOfficial Value Buster Subwoofer System design info thread.
As the title implies this design allows you to get lots of bass from an inexpensive driver an easy to build enclosure with flexible tuning and allow for multiples to be powered from a single iNuke amp.
The driver for this design is the Dayton PA460-8, an odd choice for a subwoofer design you might say. True, but with the right balance of enclosure, power and proper EQ it does amazingly well. Similar to the Magnum-12 woofer in the Flex-12 the PA460 is very efficient in the mid bass leading to very little thermal compression and great dynamics in that range. While it is a bit limited in terms of coil overhang it does have a very soft suspension and decent mechanical clearances so there is no trouble pushing it a bit at lower frequencies. I have done thorough testing with the iNuke 3000 and the driver stays safe even when driven hard below tuning with the DSP settings limiting any bad noises from either the driver or the amp when being pushed hard into the limiter as was demonstrated at ENG-399's where a pair was run at reference with the sub trim about 16dB hot.
The enclosure is a fairly straightforward ported box, approximately 6.25 cubic feet net internal. Measures 23.5" wide, 31.5" tall x 20-20.5" deep (depending on double baffle or not). If going with a single baffle layer and surface mounting the enclosure can be cut from a single 4x8' 3/4" sheet of MDF or plywood. Add a 2x4' sheet of 1/2" if you want to flush mount the drivers and ports which is how I built mine.
Here is the cultist for the enclosure without the additional 1/2" front baffle to flush mount the driver and ports. To flush mount the driver all you need to do is cut the outer diameter out of the 1/2" baffle and that will put it flush. Theoretically you could add the second baffle layer at any time without making a new box or adjusting the cuts on the inner baffle.
Note 30" x 2" piece should be cut into smaller pieces to fit between the side to side and top to bottom bracing, I just forgot the exact dimensions which making the cultist. It should be measured during assembly anyway to determine exact length of parts needed.
Here is a look at the bracing I used, feel free to add more or beef it up if you wish, but I found that to be adequate:
Here is a look at the damping I used in the cabinets. It's R-13 recycled denim/cotton insulation with a piece placed on top the port tubes below the driver that is held in by the brace and a couple pieces placed on the walls above and behind the driver leaving space above the ports for airflow.
The design uses two of the 4" precision ports at full length which makes things very easy. Using both at full length gives you a 20 Hz tuning, if one is plugged you get 15 Hz and if you remove the center extension tubes you get a 31 Hz tune. You can use masking or electrical tape to hold the ports together if you want to leave open the option of removing the port extension tube. The proximity of the internal port flare to the rear wall makes the effective port length longer then it would be otherwise which allows for the tuning to come in lower then what it looks like it should calculate out to.
The VBSS is meant to be used in conjunction with the iNuke 1000DSP or 3000DSP amps. A 1000 can power up to two of these in bridged mode while a 3000 can drive up to 8, 4 per channel. This allows you can get a lot of bass without spending big bucks or have a rack filled with multiple subwoofer amps.
Here is a look at the outdoor 2pi frequency response for the 15hz, 20hz and 31hz modes (with DSP):
Rough idea of the 2pi max output from a single enclosure powered by an iNuke 3000:
A zip file with the DSP settings for the iNuke amps is also attached."....not everything that can be counted counts, and not everything that counts can be counted." William Bruce Cameron, Informal Sociology: A Casual Introduction to Sociological Thinking (1963) -
Dan,
Great talking with you Saturday evening. Thanks so much for all the tips and advice. I spent the entire day today (Sunday) framing the front wall. It is done (the framing, anyway...). Final rough openings are 61"x31"x20"deep for the gear rack, and 19"Wx33"Hx23"D for the subs. That gives me a roughly 8 CF box (exterior) and approximately 6 CF interior (subtracting a little for bracing and 2" in each dimension for the walls.
Also, all wiring was done several years ago. I used all Monoprice cable (I know...), but it works and didn't break the bank. I ran CL-2 14AWG for surrounds and rears, two HEAVY gauge HDMI cables, heavy gauge component, VGA, and RCA video. I even ran two RCA sub cables to the back of the room (just in case...) and a heavy gauge headphone cable to the treadmill as well. I also have two Ethernet cables and the Coax for the cable. I ran a dedicated power supply already. I will try to run at least one more, but don't know if I have any open breakers left...
I'll try to get some pics uploaded tomorrow. I have my homework cut out for me. Again, I can't thank you enough for all the help you've given me on this project.
-Al -
Front wall framing is complete. Large opening in the center will be a built in equipment rack (3 level) for AVR, amps, Oppo, CATV DVR, Xbox, Wii, HTPC, and Center Speaker. Two medium openings to the L/R of the equipment opening will be built-in subs. Smaller openings above the subs will be partial recesses for the Front L/R speakers.
It's coming along. Only swore a couple times and only smashed one finger in the process!


-
Looking good Al! Sorry I have nothing to offer except encouragement. Keep us posted on the progress!Living Room 2.2: Usher BE-718 "tiny dancers"; Dual DIY Dayton audio RSS210HF-4 Subs with Dayton SPA-250 amps; Arcam SA30; Musical Fidelity A308; Sony UBP-x1000es; Squeezebox Touch with Bolder Power Supply
Game Room 5.1.4: Denon AVR-X4200w; Sony UBP-x700; Definitive Technology Power Monitor 900 mains, CLR-3000 center, StudioMonitor 350 surrounds, ProMonitor 800 atmos x4; Sub - Monoprice Monolith 15in THX Ultra
Bedroom 2.1Cambridge Azur 551r; Polk RT25i; ACI Titan Subwoofer -
Thanks Paul. Encouragement is well received! I'll keep updating as I make progress, but if history proves correct, I usually stall at the 90% complete point!


